
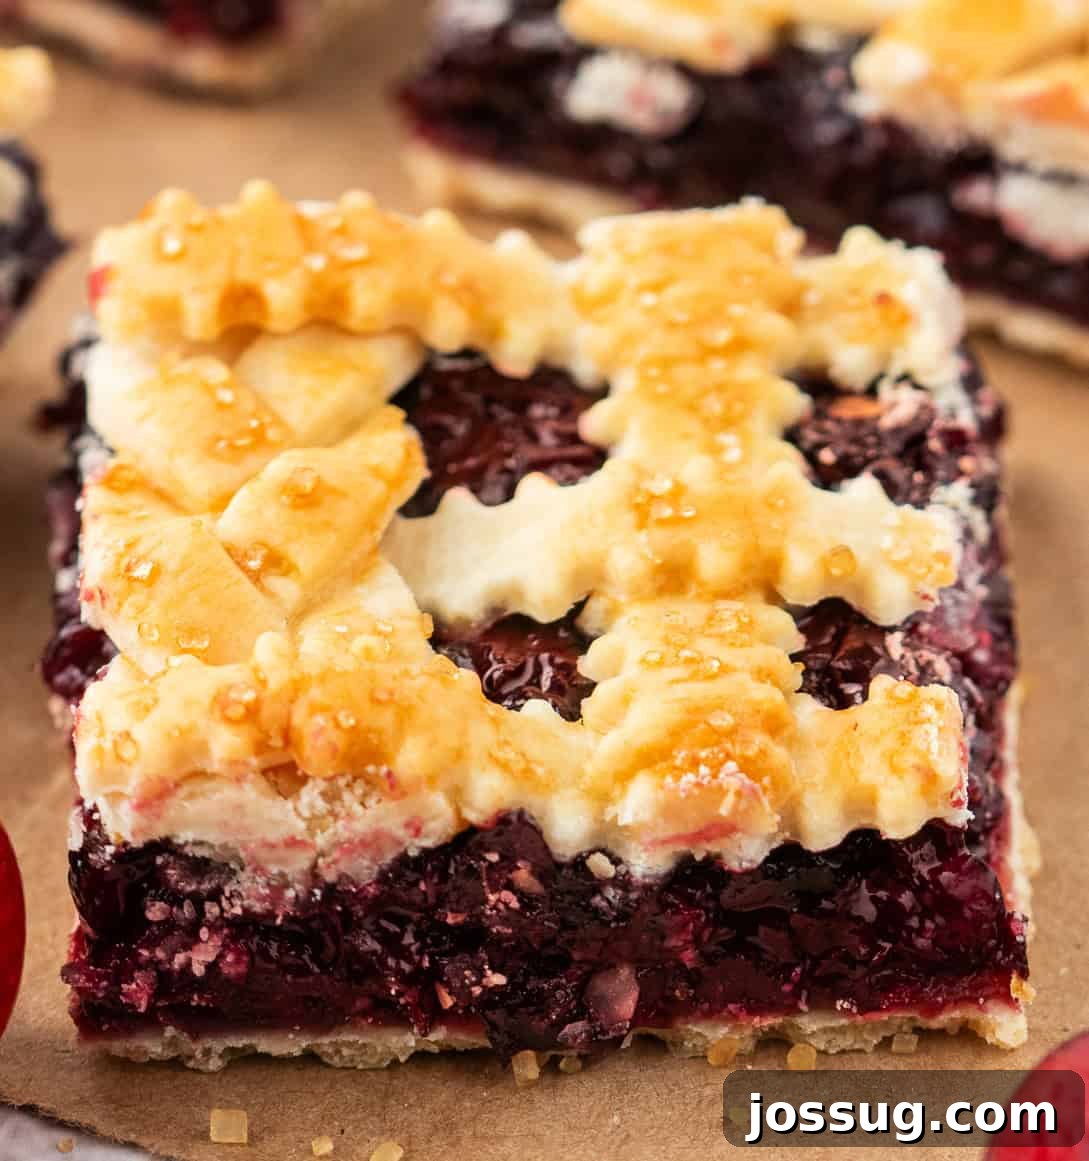
🍒 These Cherry Pie Bars offer a delightful and convenient way to savor all the classic flavors of cherry pie without the traditional fuss! Whether you’re preparing for a lively party, a community potluck, or simply craving a sweet snack, these bars are perfectly suited for any occasion.
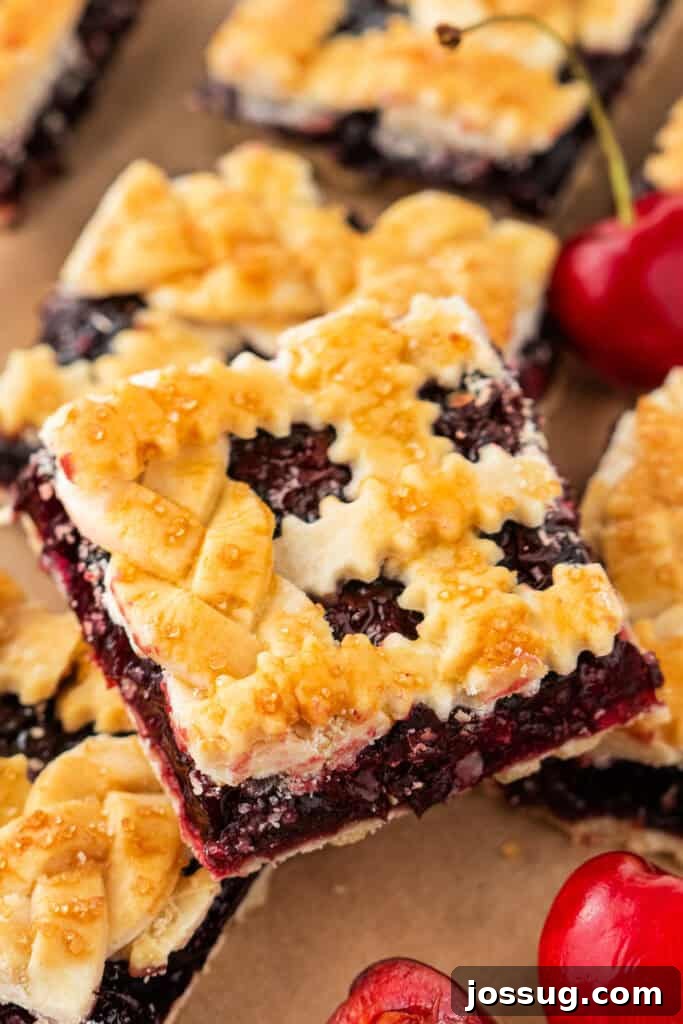
Effortless Cherry Pie Bars: The Perfect Sweet Treat
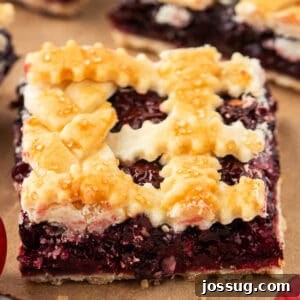
If you find yourself yearning for the comforting taste of cherry pie but want to skip the lengthy preparation, these delightful Cherry Pie Bars are your ultimate solution. This recipe transforms the beloved cherry pie into an incredibly simple, sweet, and utterly satisfying bar format. Imagine a buttery, golden crust cradling a rich, gooey cherry filling, all crowned with a crisp, artfully woven lattice topping. It’s everything you adore about classic cherry pie desserts, reimagined into an easy-to-handle, sliceable treat.
These cherry bars are incredibly versatile, making them ideal for a variety of gatherings. Picture them as the star of your summer picnic, a cherished addition to a potluck spread, or simply a quick and easy dessert to enjoy at home. Crafted with readily available store-bought pie crusts and convenient frozen cherries, this recipe is designed to be fuss-free yet bursting with vibrant flavor. Once you discover how effortlessly delicious these cherry pie bars are, you’ll want to keep this recipe close at hand to enjoy year-round!
⭐ Why You’ll Love This Cherry Pie Bar Recipe
Baking delicious desserts doesn’t have to be complicated. These Cherry Pie Bars are designed for maximum flavor with minimal effort, making them a fantastic choice for both novice and experienced bakers. Here’s why this recipe will become a fast favorite:
- No Homemade Crust Required: Save significant time and effort by utilizing refrigerated, store-bought pie crusts. This eliminates the need for mixing, chilling, and rolling dough from scratch, making the baking process incredibly convenient without compromising on taste.
- A Fun Twist on Classic Cherry Pie: While traditional cherry pie is always a winner, these bars offer a fresh, modern take. They’re easier to serve, perfect for handheld snacking, and bring a delightful casual elegance to any dessert table.
- Simple Ingredients and Minimal Prep: The ingredient list is straightforward, focusing on pantry staples and easily accessible items. With quick cooking of the filling and simple assembly, you’ll spend less time prepping and more time enjoying.
- Perfect for Sharing or Freezing: Whether you’re feeding a crowd or want to have a sweet treat on hand, these bars are fantastic. They travel well to parties and potlucks, and leftovers can be easily frozen for future cravings.
- Your Go-To Cherry Bars Recipe for Any Occasion: From impromptu gatherings to holiday celebrations, these cherry pie bars fit right in. Their appealing look and irresistible taste make them a reliable choice for impressing guests or simply satisfying your sweet tooth.
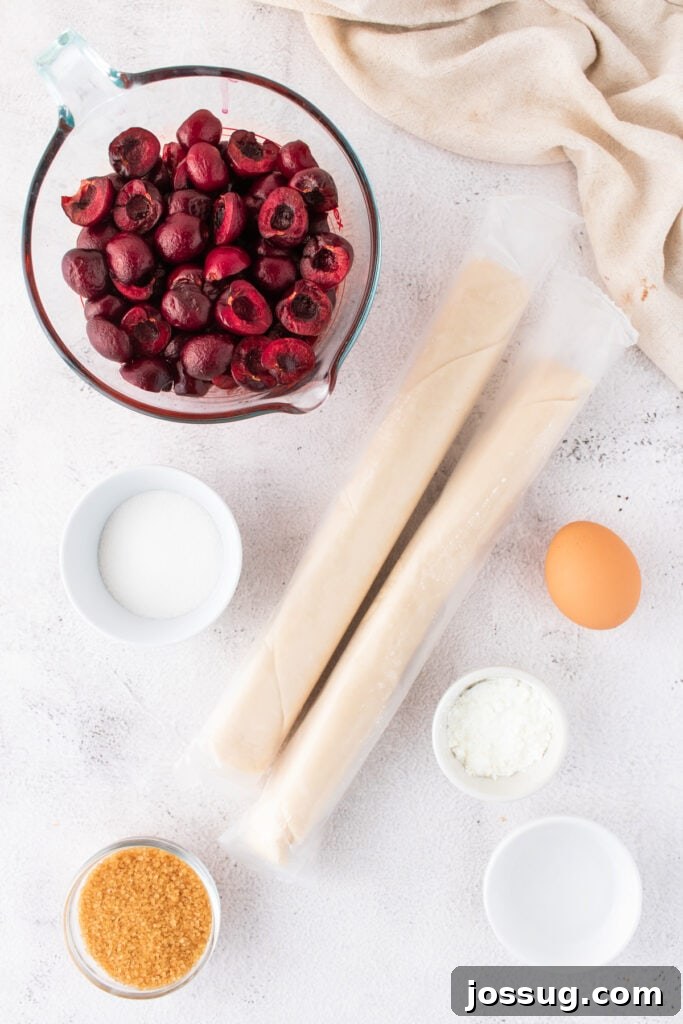
🛒 Ingredients & Thoughtful Substitutions
This recipe calls for a handful of basic ingredients, many of which you might already have in your kitchen. We’ll also explore some smart substitutions to ensure you can make these delicious bars no matter what’s in your pantry.
-
Cherries: We recommend frozen sweet red cherries for their convenience and consistent flavor. Frozen cherries are pre-pitted, saving you valuable prep time.
- Substitution Tip: You can absolutely use fresh pitted cherries when they are in season. If using fresh, ensure they are ripe and sweet, adjusting sugar to taste. Canned cherry pie filling can also be used for an even quicker shortcut; just be mindful to reduce the added granulated sugar in the recipe, as most canned fillings are already sweetened.
-
Granulated Sugar: This provides the essential sweetness for the cherry filling, balancing the fruit’s natural tartness.
- Substitution Tip: For a slightly richer flavor, brown sugar can be used, though it will alter the color of the filling. Adjust the amount based on the sweetness of your cherries and personal preference.
-
Cornstarch: A crucial thickening agent for the cherry filling, preventing it from being too watery and ensuring that delightful gooey texture.
- Substitution Tip: Arrowroot powder or tapioca starch are excellent gluten-free alternatives that will perform similarly to cornstarch, creating a thick, glossy filling.
- Water: Used to create a slurry with cornstarch, ensuring it mixes smoothly into the cherry filling without clumping.
-
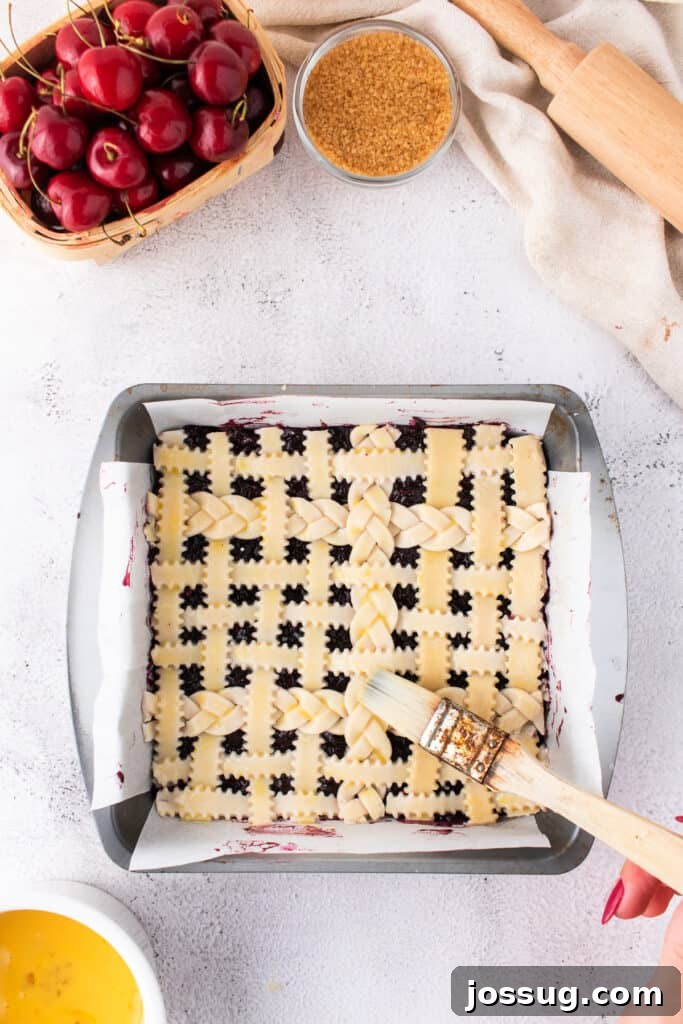
Egg: A single large egg is used to create an egg wash, giving the lattice topping a beautiful golden sheen and helping the turbinado sugar adhere.
- Substitution Tip: If you prefer not to use an egg, a brush of milk or cream will also provide a nice color, though it might be slightly less glossy. A plant-based milk alternative would also work for a dairy-free option.
-
Turbinado Sugar: This coarse sugar is sprinkled over the lattice topping before baking, adding a wonderful sparkle and a satisfying crunch.
- Substitution Tip: Regular granulated sugar or sanding sugar can be used as alternatives for the topping. If you don’t have turbinado sugar, simply omit it – the bars will still be delicious!
-
Refrigerated Pie Crust: The ultimate time-saver! One box typically contains two sheets, perfect for the bottom crust and the lattice top.
- Substitution Tip: If you enjoy baking from scratch, a homemade pie crust recipe works wonderfully. For a flakier, more delicate texture, puff pastry can also be used for the top or even both crusts. Adjust baking times accordingly if using puff pastry.
✨ Creative Variations to Explore
While these Cherry Pie Bars are fantastic as is, don’t hesitate to get creative with these delightful variations to suit your taste or experiment with new flavor profiles:
- Almond Extract Boost: For a bakery-style depth of flavor, add a splash (about ½ teaspoon) of almond extract to the cherry filling. Cherry and almond are a classic pairing that enhances the fruit’s natural sweetness beautifully.
- Flaky Puff Pastry Top: Instead of a traditional pie crust lattice, use puff pastry for the top layer. Its light, airy, and flaky texture will provide a sophisticated contrast to the rich cherry filling. Simply roll out the puff pastry, cut into strips, and arrange as a lattice, or even use a cookie cutter for decorative shapes.
- Drizzle with Glaze: Once the bars have cooled completely, prepare a simple vanilla or almond glaze. Whisk together powdered sugar with a small amount of milk (or almond extract for extra flavor) until smooth, then drizzle decoratively over the top for an extra touch of sweetness and visual appeal.
- Berry Medley Twist: Incorporate other berries into your filling for a more complex fruit flavor. Mix in blueberries or raspberries with your cherries to create a vibrant berry medley that offers a delightful tart-sweet balance.
- Crumb Topping Alternative: If you prefer a rustic look and extra texture, skip the lattice and opt for a crumb topping instead. Combine flour, sugar, and cold butter until crumbly, then sprinkle generously over the cherry filling before baking.
🔥 Expert Tips for Perfect Cherry Pie Bars
Achieving bakery-quality cherry pie bars is easier than you think with these expert tips:
- Cool the Cherry Filling Completely: This is a crucial step to prevent a soggy bottom crust. Warm filling can steam the crust and make it soft. Allowing it to cool down (you can even chill it in the fridge) ensures it sets properly and contributes to a perfectly crisp crust.
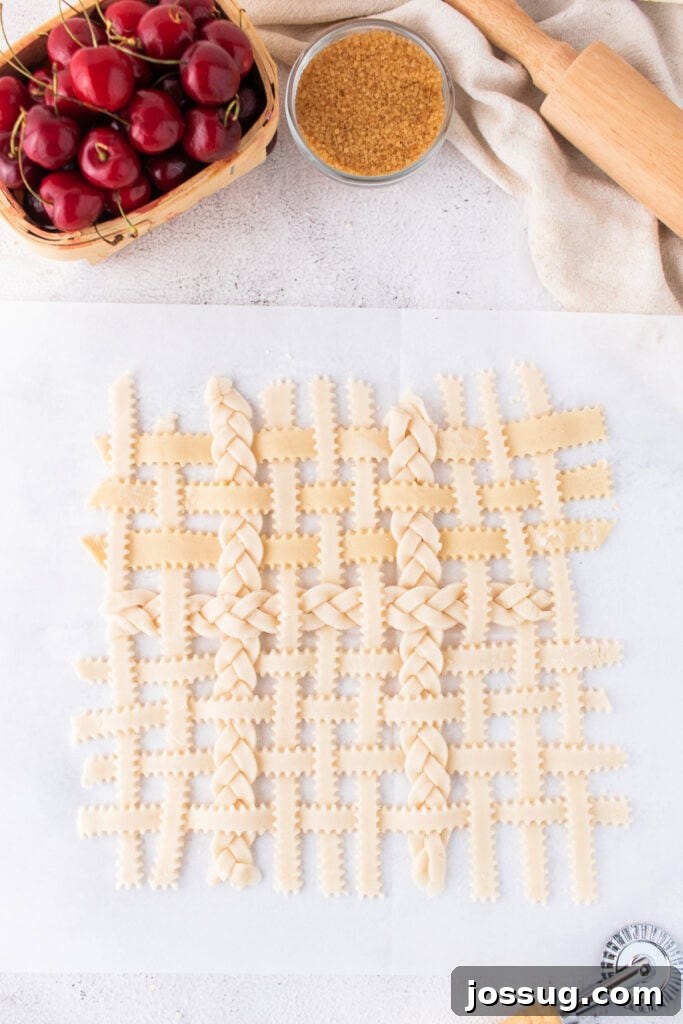
- Freeze the Lattice Before Transferring: Creating a lattice top can be delicate work. By assembling the lattice on a sheet of parchment paper and then freezing it until firm, it becomes much easier to handle and transfer precisely onto the cherry filling without losing its shape. This tip is especially helpful for intricate designs or braided strips.
- Let Bars Cool Completely for Clean Cuts: Patience is key! Resist the urge to slice into warm bars. Cooling them thoroughly allows the cherry filling to fully set and the crust to firm up, resulting in neat, clean cuts and a less messy experience. Warm bars will crumble and ooze.
- Use Parchment Paper for Easy Removal: Lining your baking pan with parchment paper, leaving an overhang on the sides, is a game-changer. Once baked and cooled, you can simply lift the entire slab of bars out of the pan, making slicing and serving incredibly easy and cleanup a breeze.
- Blind Bake the Bottom Crust: The recipe includes a step for pre-baking the bottom crust. This “blind baking” technique is vital for ensuring a crisp bottom, preventing it from becoming soggy under the juicy cherry filling. Bake until it’s lightly golden and feels firm.
- Don’t Overwork the Crust: When handling refrigerated pie crusts, work quickly and avoid overworking the dough. This helps maintain its flakiness.
❓ Frequently Asked Questions (FAQs)
Absolutely! Fresh cherries work wonderfully. Just be sure to pit them thoroughly before cooking. Depending on the sweetness of your fresh cherries, you might want to adjust the amount of granulated sugar in the filling slightly. Taste your cherries first to guide your adjustment.
Yes, you can. If using canned cherry pie filling, reduce or completely omit the added granulated sugar in the recipe, as most canned fillings are already quite sweet. You might also need less cornstarch, as canned fillings are typically pre-thickened. Start by adding less and assess consistency as you cook.
Not at all! Braiding the lattice strips adds a beautiful decorative touch if you’re feeling a bit fancy, but it’s purely optional. Simple straight strips woven in an over-under pattern will create a classic lattice top that works just as well and looks fantastic.
Yes, this recipe doubles beautifully! For a larger batch, bake in a 9×13-inch baking pan. You will likely need to adjust the bake time, adding an additional 10-20 minutes, or until the top is golden brown and the filling is bubbly. Keep an eye on it!
No need to thaw! You can add frozen cherries directly to the saucepan. They will break down and release their juices as they cook, contributing to the delicious filling. Just allow a few extra minutes for them to soften and for the filling to thicken fully.
Absolutely! Cherry Pie Bars are an excellent make-ahead dessert. In fact, many people find they taste even better the next day once the flavors have had more time to meld and deepen. Store them covered tightly at room temperature for up to 2 days, or in the refrigerator for up to 5 days.
The sizing is entirely up to you and the occasion! You can cut the 8×8-inch pan into nine generous large bars for a satisfying individual dessert, or slice them into 12-16 smaller squares for parties, dessert trays, or snack-sized portions. Use a sharp knife for clean cuts.
Turbinado sugar is a coarse, raw sugar with larger crystals and a slightly molasses-like flavor. When sprinkled on top, it provides a beautiful sparkle and a delightful crunch. It’s not strictly required; you can substitute it with regular granulated sugar or fine sanding sugar, or simply omit it if you prefer.
The key to preventing a soggy bottom crust lies in two main steps: first, make sure to blind bake the bottom crust until it’s lightly golden and firm. Second, ensure your cherry filling is fully thickened and, most importantly, completely cooled before you spread it over the baked bottom crust. This prevents excess moisture and heat from steaming the crust.
Yes, you can use tart cherries! If you opt for tart cherries (fresh or frozen), you will likely need to increase the amount of granulated sugar in the filling to balance their natural acidity. Start by adding an extra 1/4 to 1/2 cup of sugar and taste the filling as it cooks, adjusting to your preferred sweetness level.
🍽️ More Delicious Cherry & Dessert Recipes You May Enjoy
If you’ve loved these Cherry Pie Bars, you’re in for a treat! Explore other delightful recipes that celebrate the sweet and tangy goodness of cherries or offer equally satisfying dessert experiences.
Breakfast
Buttermilk Doughnuts with Cherry Glaze
Dessert
Cherry Upside Down Cake with Almond Whipped Cream
Dessert
Cherry Coconut Magic Bars
Dessert
Cherry Lasagna Lush
9
servings
Cherry Pie Bars
Jamie Sherman
20 minutes
50 minutes
2 hours
3 hours
10 minutes
Equipment
-
8×8 inch baking dish
-
Parchment paper
-
Medium saucepan
-
Rubber spatula or wooden spoon
-
Rolling pin
-
Pastry wheel or sharp knife
-
Small bowl (for egg wash)
-
Pastry brush
Ingredients
-
2-½
cups
sweet red cherries,
frozen -
2
tablespoons
granulated sugar -
1
tablespoon
cornstarch -
1
tablespoon
water -
1
large
egg -
turbinado sugar,
for topping (optional) -
1
box
refrigerated pie crusts,
(14.1 ounces, 2 sheets)
Instructions
-
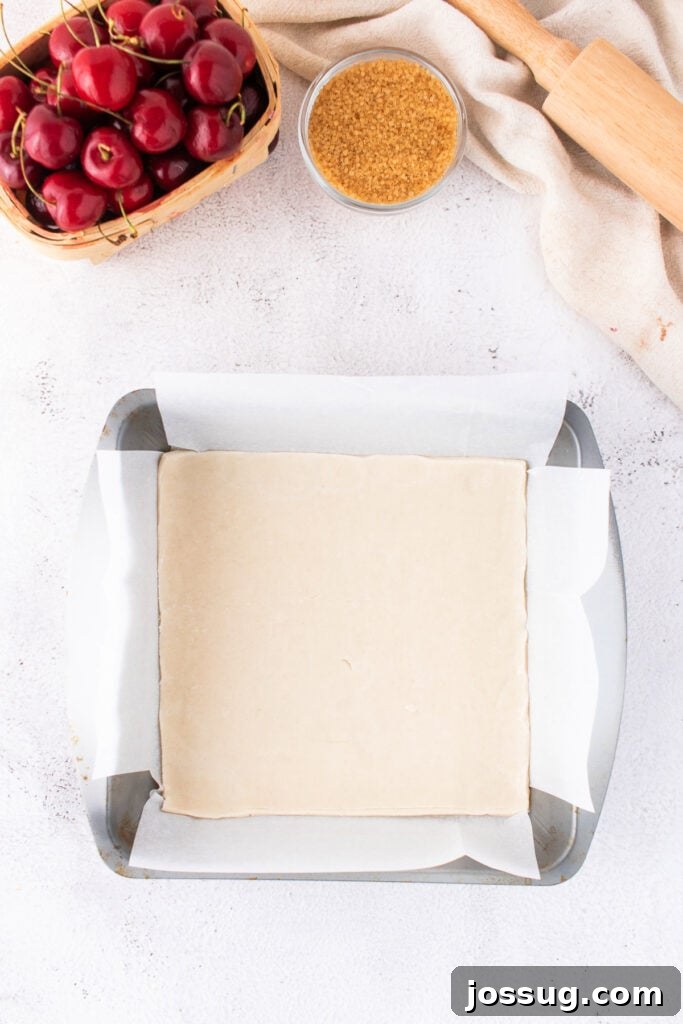
Preheat your oven to 375°F (190°C). Line an 8×8 inch baking dish with parchment paper, leaving an overhang on two sides for easy removal later.
-
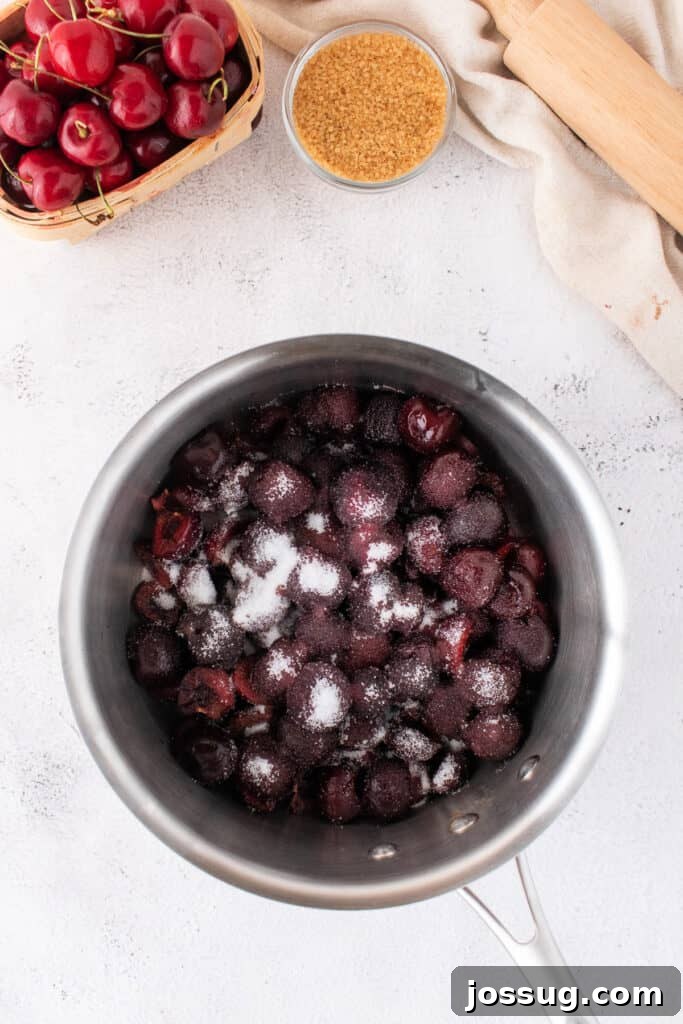
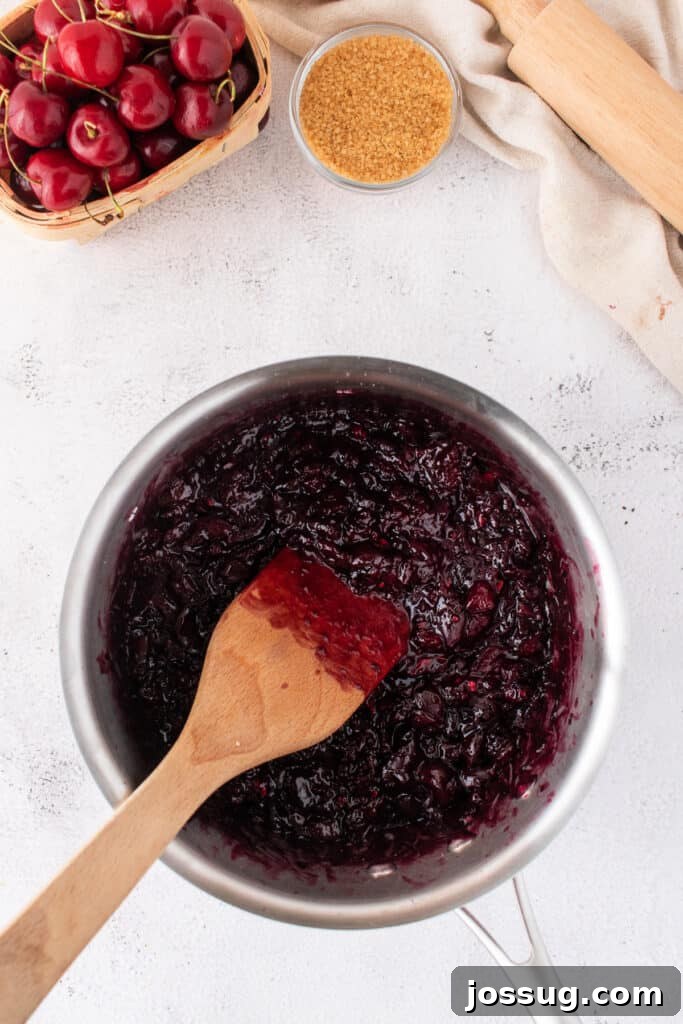
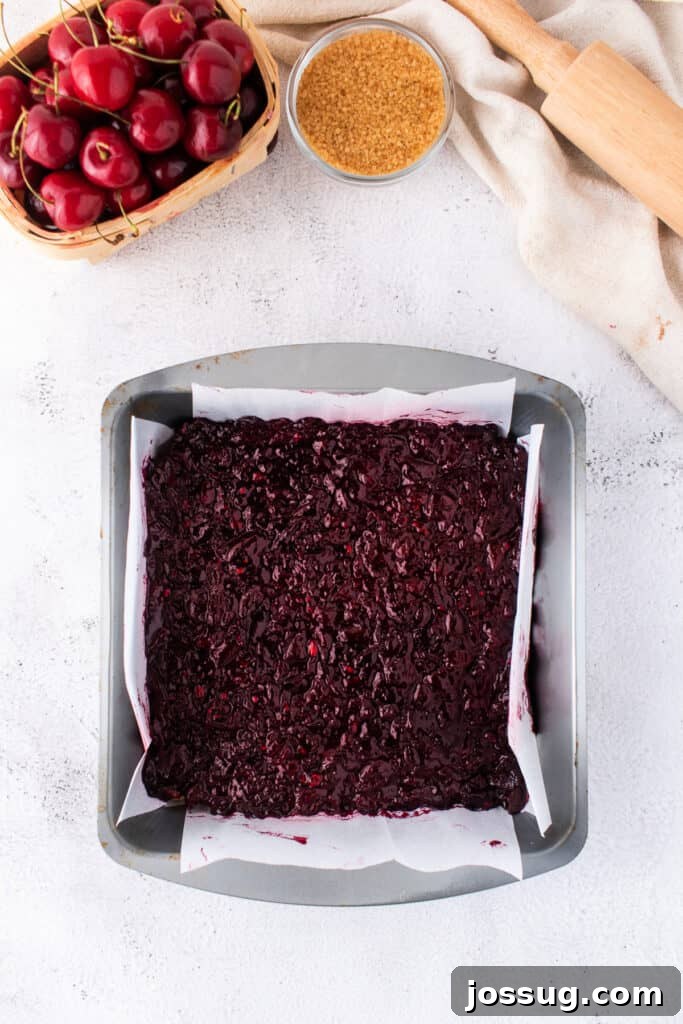
In a medium saucepan, combine the frozen cherries and granulated sugar over medium heat. Cook for 15-20 minutes, stirring occasionally and gently mashing some of the cherries with your spatula. Continue until the mixture is bubbly and slightly thickened.
-
In a small bowl, whisk together the cornstarch and 1 tablespoon of water to create a slurry. Stir this slurry into the cherry mixture in the saucepan. Continue cooking for another 1-2 minutes, stirring constantly, until the filling thickens significantly. Remove from heat and allow the cherry filling to cool completely.
-
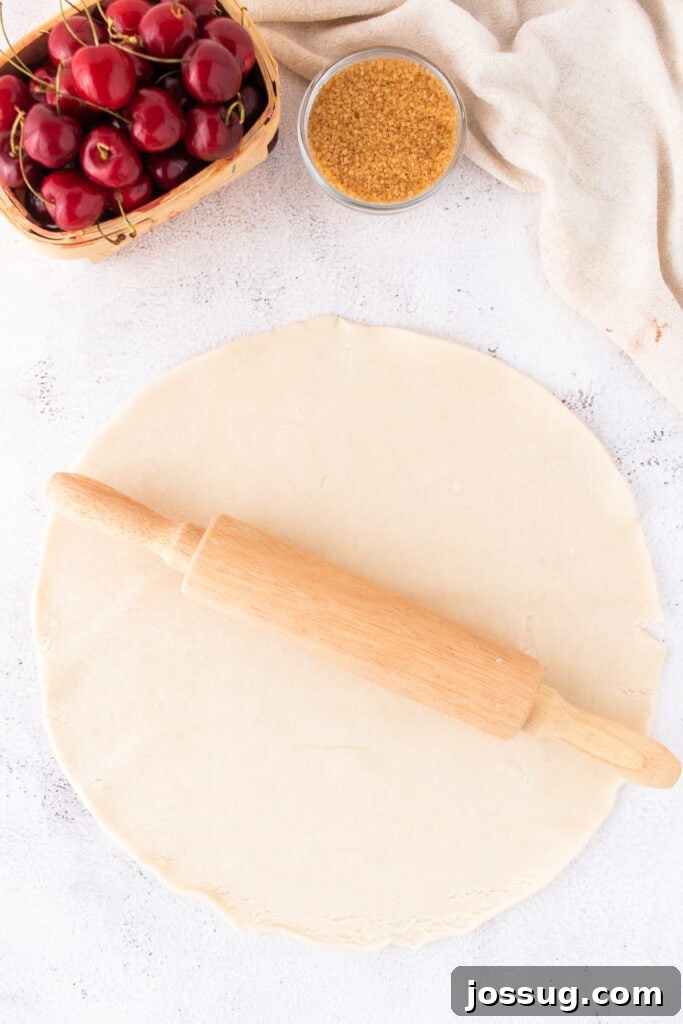
Carefully roll out one of the refrigerated pie crusts and press it evenly into the bottom of your prepared 8×8 inch baking dish. Bake this bottom crust in the preheated oven for 15-20 minutes, or until the edges are lightly golden brown. Remove from oven and let cool slightly.
-
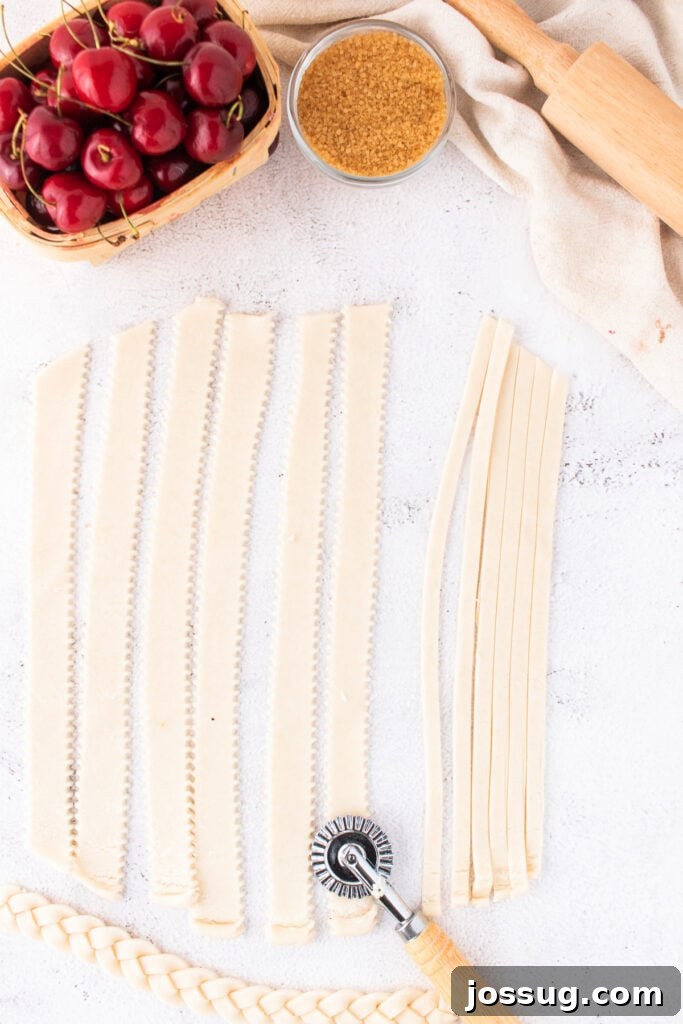
While the bottom crust bakes, unroll the second pie crust onto a clean, lightly floured surface or a piece of parchment paper. Roll it out slightly to form a 9×9 inch square. Using a pastry wheel or a sharp knife, cut the dough into ½-inch wide strips. If desired, braid some of the strips for a decorative touch. Arrange your chosen strips on the parchment paper to form a lattice design. Transfer the parchment with the lattice to a baking sheet and freeze until firm (about 10-15 minutes).
-
Once the bottom crust has cooled and the cherry filling is completely chilled, spread the cooled cherry filling evenly over the pre-baked crust in the dish.
-
Carefully retrieve the frozen lattice from the freezer and gently slide or place it on top of the cherry filling. In a small bowl, beat the large egg with 1 tablespoon of water to create an egg wash. Brush this egg wash evenly over the lattice topping. Sprinkle generously with turbinado sugar for extra crunch and sparkle, if using.
-
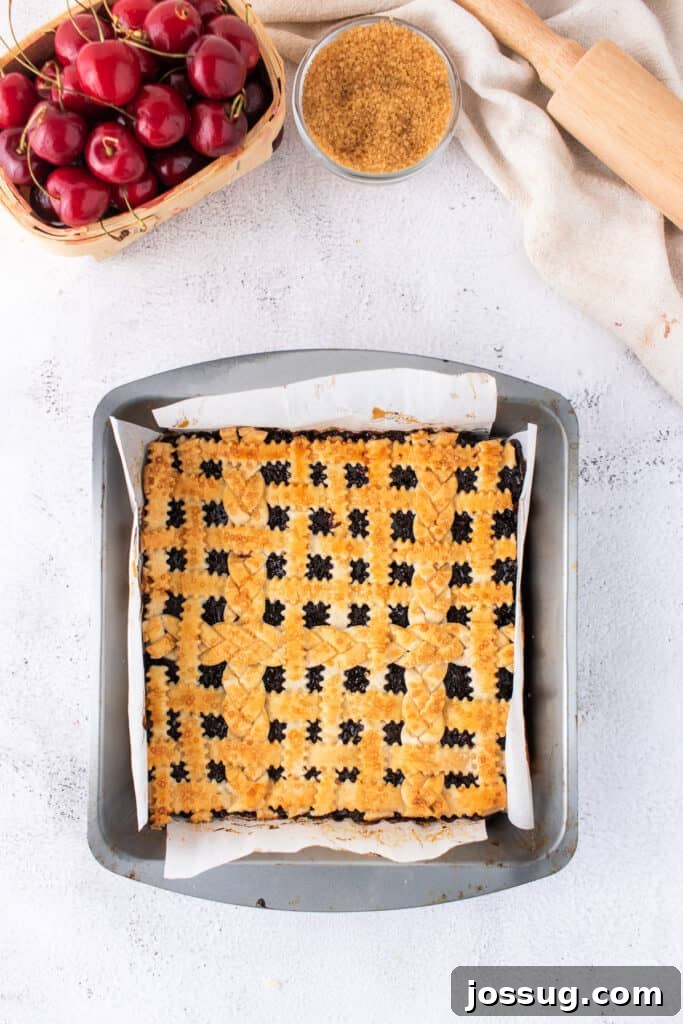
Return the baking dish to the oven and bake for an additional 25-30 minutes, or until the lattice top is beautifully golden brown and the cherry filling is bubbly.
-
Allow the cherry pie bars to cool completely in the pan on a wire rack before slicing into individual bars. This step is essential for clean cuts and for the filling to fully set.
Notes for Success
🥡 STORAGE
- Store any leftover Cherry Pie Bars in an airtight container at room temperature for up to 2 days to maintain optimal freshness.
- For extended storage, transfer the covered bars to the refrigerator, where they will keep well for up to 5 days.
♨️ REHEATING
- Microwave: For individual bars, microwave for 10-15 seconds until just warmed through.
- Oven: To reheat a few bars, warm them in a preheated oven at 300°F (150°C) for 5-8 minutes until heated through and the crust is crisp again.
❄️ FREEZING
- To freeze for longer enjoyment, ensure the bars are fully cooled. Arrange them in a single layer on a baking sheet and freeze until solid. Once frozen, transfer the bars to a zip-top freezer bag or an airtight freezer-safe container. They can be frozen for up to 2 months.
- When ready to serve, thaw the frozen bars overnight in the refrigerator. You can gently warm them in the oven before serving for a “freshly baked” feel.
💡 TIPS FOR BEST RESULTS
- Use a pastry cutter or a very sharp knife for clean and even lattice strips. This makes weaving much easier and gives a professional finish.
- Do not skip the step of freezing the lattice! This critical step makes the delicate pastry firm and easy to transfer without stretching or breaking, preserving your beautiful design.
- Allow the cherry filling to cool completely before assembling the bars. This prevents the bottom crust from becoming soggy due to the heat and moisture of the filling.
- Cool the entire pan of baked bars completely before attempting to slice them. The filling needs ample time to set, ensuring neat, firm slices.
🍳 ALTERNATE COOKING METHODS (FOR REHEATING/CRISPING)
- Air Fryer: Individual squares can be reheated or given a crisp top by baking at 325°F (160°C) for 6-8 minutes.
- Toaster Oven: A toaster oven is perfect for quickly reheating one or two bars, achieving a warm, crisp crust without heating up a full oven.
♻️ LEFTOVERS: GET CREATIVE!
- Leftover bars are wonderful served warmed with a scoop of vanilla ice cream, creating a miniature à la mode experience.
- Crumble pieces of leftover cherry pie bars into a yogurt parfait for a delightful breakfast or snack.
- Blend cooled bars into a vanilla milkshake for a unique and indulgent cherry pie-flavored twist.
Nutrition
Serving: 1 slice,
Calories: 249kcal,
Carbohydrates: 31g,
Protein: 4g,
Fat: 12g,
Saturated Fat: 4g,
Polyunsaturated Fat: 2g,
Monounsaturated Fat: 6g,
Trans Fat: 0.002g,
Cholesterol: 21mg,
Sodium: 190mg,
Potassium: 136mg,
Fiber: 2g,
Sugar: 8g,
Vitamin A: 55IU,
Vitamin C: 3mg,
Calcium: 17mg,
Iron: 1mg
Nutrition information is automatically calculated and should only be used as an approximation.
Loved this recipe? Share your thoughts below!
Your comments and ratings help other bakers discover delicious new treats.