
Cookies in a Jar: Your Go-To for Thoughtful Homemade Gifts
There’s something truly special about a homemade gift, and few presents capture that sentiment as perfectly as “Cookies in a Jar.” These charming layered ingredient mixes are my absolute favorite solution when I’m short on time for baking or when I want to give a gift that offers both immediate gratification and a delightful future activity. Imagine the joy of receiving a beautifully layered jar, knowing that a batch of warm, freshly baked cookies is just moments away!
Whether it’s for a holiday, a birthday, a thank-you, or just because, a cookie mix in a jar is a heartfelt gesture that speaks volumes. It’s more than just a recipe; it’s an experience, an invitation to create, and a promise of deliciousness. This comprehensive guide will walk you through everything you need to know about crafting these delightful edible gifts, from selecting the right ingredients to creative presentation ideas.
Why Cookies in a Jar Make the Ultimate Gift
In a world full of mass-produced items, a handmade gift stands out. Cookies in a Jar offer a unique blend of practicality, personal touch, and pure deliciousness. Here’s why they’ve become a beloved choice for gift-givers everywhere:
- Convenience for the Giver: No last-minute baking stress! Simply layer your ingredients, seal the jar, and add a tag. It’s quick, easy, and can be prepared well in advance.
- Joy for the Recipient: Recipients get the fun of baking fresh cookies without the hassle of measuring out multiple ingredients. It’s an instant baking kit ready for action.
- Personal Touch: You can customize the cookie recipe to suit the recipient’s taste, whether they love chocolate, nuts, cranberries, or a combination.
- Visually Appealing: The layers of ingredients create a beautiful, rustic, and inviting presentation that makes the gift feel extra special even before it’s baked.
- Economical: Often, buying bulk ingredients for several jars can be more cost-effective than purchasing individual gifts or baking multiple batches of cookies from scratch.
- Long Shelf Life: Dry ingredients stored in an airtight jar will last much longer than baked cookies, allowing the recipient to enjoy them at their leisure.
Getting Started: Essential Ingredients and Tools
Creating your perfect cookie mix in a jar begins with selecting high-quality ingredients and having the right tools on hand. The beauty of these gifts lies in the clear visibility of the layers, so fresh, vibrant ingredients are key.
What You’ll Need:
- Wide-Mouth Quart Jars (approx. 32 oz / 1 liter): These are ideal as they provide enough space for all ingredients and make layering easier. Make sure they are clean and dry.
- Dry Ingredients: Flour, sugar (granulated, brown), baking soda, baking powder, salt. Ensure they are fresh to guarantee the best baking results.
- Flavorful Add-ins: Chocolate chips (milk, dark, white, semi-sweet), M&M’s, chopped nuts (walnuts, pecans, almonds), dried cranberries, raisins, shredded coconut, sprinkles, or even a dash of ground cinnamon or nutmeg for spiced cookies.
- Measuring Cups and Spoons: For accurate layering.
- Funnel (Optional but Recommended): Helps to keep the sides of the jar clean while adding layers.
While classic chocolate chip cookies are always a hit, don’t hesitate to get creative! You can easily swap out traditional chocolate chips for festive M&M’s to match a holiday theme, or introduce white chocolate chips and dried cranberries for a more sophisticated flavor profile. The possibilities are truly endless, allowing you to tailor each jar to the individual you’re gifting it to.
Crafting Your Cookie Mix: Layering Instructions
The art of the cookie in a jar lies in its beautiful, distinct layers. Proper layering not only makes the gift visually stunning but also ensures the ingredients are ready for baking. Here’s a general guide for a classic chocolate chip cookie mix, which can be adapted for other variations:
Step-by-Step Assembly:
- Start with Flour: Begin by pouring 1 ¾ cups all-purpose flour into the bottom of the jar. Lightly tap the jar on your counter to settle the flour and create a flat base. This foundational layer prevents finer ingredients from sifting to the bottom.
- Add Leavening Agents: Layer ½ teaspoon baking soda and ½ teaspoon salt on top of the flour. You might gently flatten this layer with the back of a spoon.
- Granulated Sugar: Carefully add ¾ cup granulated sugar. Using a funnel here can help maintain clean sides and a distinct layer.
- Brown Sugar: Next, firmly pack ½ cup light brown sugar. Packing it tightly helps create a beautiful, dense layer and prevents it from mixing with other ingredients.
- Chocolate Chips: Add 1 cup of your preferred chocolate chips. This is a popular layer that adds visual appeal.
- Optional Add-ins: If you’re including nuts, M&M’s, or other extras, add them now. For instance, ½ cup chopped walnuts or M&M’s would make an excellent final layer.
- Seal and Label: Once all layers are in, secure the lid tightly.
Remember, the order of ingredients can sometimes be adjusted, but generally, heavier, denser ingredients like brown sugar should be packed well, and flour often forms the base. The key is to create clear, visually appealing distinctions between each component.
Customizing Your Cookie in a Jar Creations
The real fun begins when you start experimenting with different flavors and themes. Beyond the classic chocolate chip, here are a few ideas to spark your creativity:
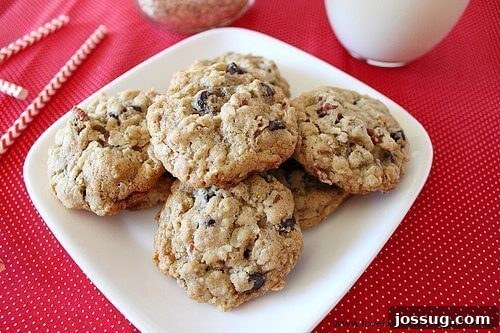
- Oatmeal Raisin Cookies: Layer flour, oats, brown sugar, white sugar, cinnamon, baking soda, and raisins.
- White Chocolate Cranberry Cookies: Use flour, sugars, white chocolate chips, and dried cranberries.
- Peanut Butter Chocolate Chip: Incorporate some crushed peanuts and both granulated and brown sugars, along with chocolate chips.
- Spice Cookies: Add ground cinnamon, nutmeg, ginger, and cloves to the flour mixture for a festive twist.
- M&M Cookies: Replace chocolate chips with colorful M&M’s for a fun, vibrant look, especially good for birthdays or specific holidays.
Don’t forget to consider seasonal themes! Red and green M&M’s for Christmas, pastel colors for Easter, or orange and black for Halloween can make your gifts extra festive. A simple change of add-ins can transform a basic cookie mix into a personalized masterpiece.
Presentation Matters: Tags and Decor
A beautifully assembled jar deserves an equally charming presentation. This is where your personal touch truly shines through. Don’t underestimate the power of a well-designed tag and some simple decorations.
Ideas for Enhancing Your Gift:
- Recipe Tags: This is crucial! Include clear, concise baking instructions for the recipient. List the wet ingredients they’ll need to add (e.g., butter, egg, vanilla extract) and the oven temperature and baking time. Don’t forget storage tips. Many websites (like Living Well, Spending Less, where I’ve shared my easy Cookies in a Jar recipe and cute FREE printables for your jars!) offer free printable tags.
- Fabric or Ribbon: Tie a piece of festive ribbon, twine, or fabric around the neck of the jar or under the lid for an extra pop of color and texture.
- Gift Tags: Attach a personalized gift tag with a handwritten message.
- Labels: If you’re making many jars, consider printing custom labels for the front of the jar.
- Small Utensils: For an added touch, you could tie a small cookie cutter or a cute wooden spoon to the jar.
The effort you put into the presentation transforms a simple jar of ingredients into a truly memorable and delightful gift package.
Baking Instructions for the Recipient (Example Tag Content)
For your cookie mix in a jar to be a success, clear instructions are paramount. Here’s an example of what you might include on your recipe tag:
[Cookie Name] Cookie Mix in a Jar
Instructions:
- Preheat oven to 350°F (175°C). Line a baking sheet with parchment paper.
- Empty the contents of this jar into a large mixing bowl.
- Add:
- ½ cup (1 stick) unsalted butter, softened
- 1 large egg
- 1 teaspoon vanilla extract
- Mix until just combined. Do not overmix.
- Drop rounded tablespoons of dough onto the prepared baking sheet, about 2 inches apart.
- Bake for 9-12 minutes, or until edges are golden brown and centers are set.
- Let cool on the baking sheet for 5 minutes before transferring to a wire rack to cool completely.
- Enjoy!
Makes approximately 2 dozen cookies.
More Recipes to Inspire Your Homemade Gift Journey
While Cookies in a Jar are fantastic, the world of edible gifts is vast and wonderful. If you enjoy the concept of homemade treats, you might also like to explore these other delightful recipes:
- White Chocolate Peppermint Oreo Cheesecake Jars – Another fantastic jar gift idea, perfect for individual servings!
- No-Bake Lemon Cheesecake – A refreshing treat that’s surprisingly simple to make.
- Refrigerator Pickles – A savory alternative for those who prefer tang over sweetness.
- Golden Grahams S’mores Bars – A fun, family-friendly dessert that evokes campfire memories.
- Lemon Pudding Cookies – Bright, zesty, and soft cookies for a different flavor profile.
These ideas show the versatility of homemade gifts, ensuring there’s something delicious for everyone on your list, no matter their preference.
Conclusion: The Gift That Keeps on Giving
Cookies in a Jar are more than just a convenient present; they embody the spirit of thoughtful giving. They offer a personalized touch, a fun activity, and the irresistible reward of warm, homemade cookies. Whether you’re a seasoned baker or just starting your journey into homemade gifts, this simple yet impactful idea is sure to bring smiles and delicious memories.
Featured at Chocolate, Chocolate and More and I Should Be Mopping the Floor, these cookie mixes have captivated many with their charm and simplicity. So, gather your ingredients, unleash your creativity, and start layering your way to the perfect homemade gift!
Originally published on December 16, 2013. Updated on April 25, 2021. This article has been refreshed and expanded to provide a comprehensive guide to crafting delightful Cookies in a Jar.