
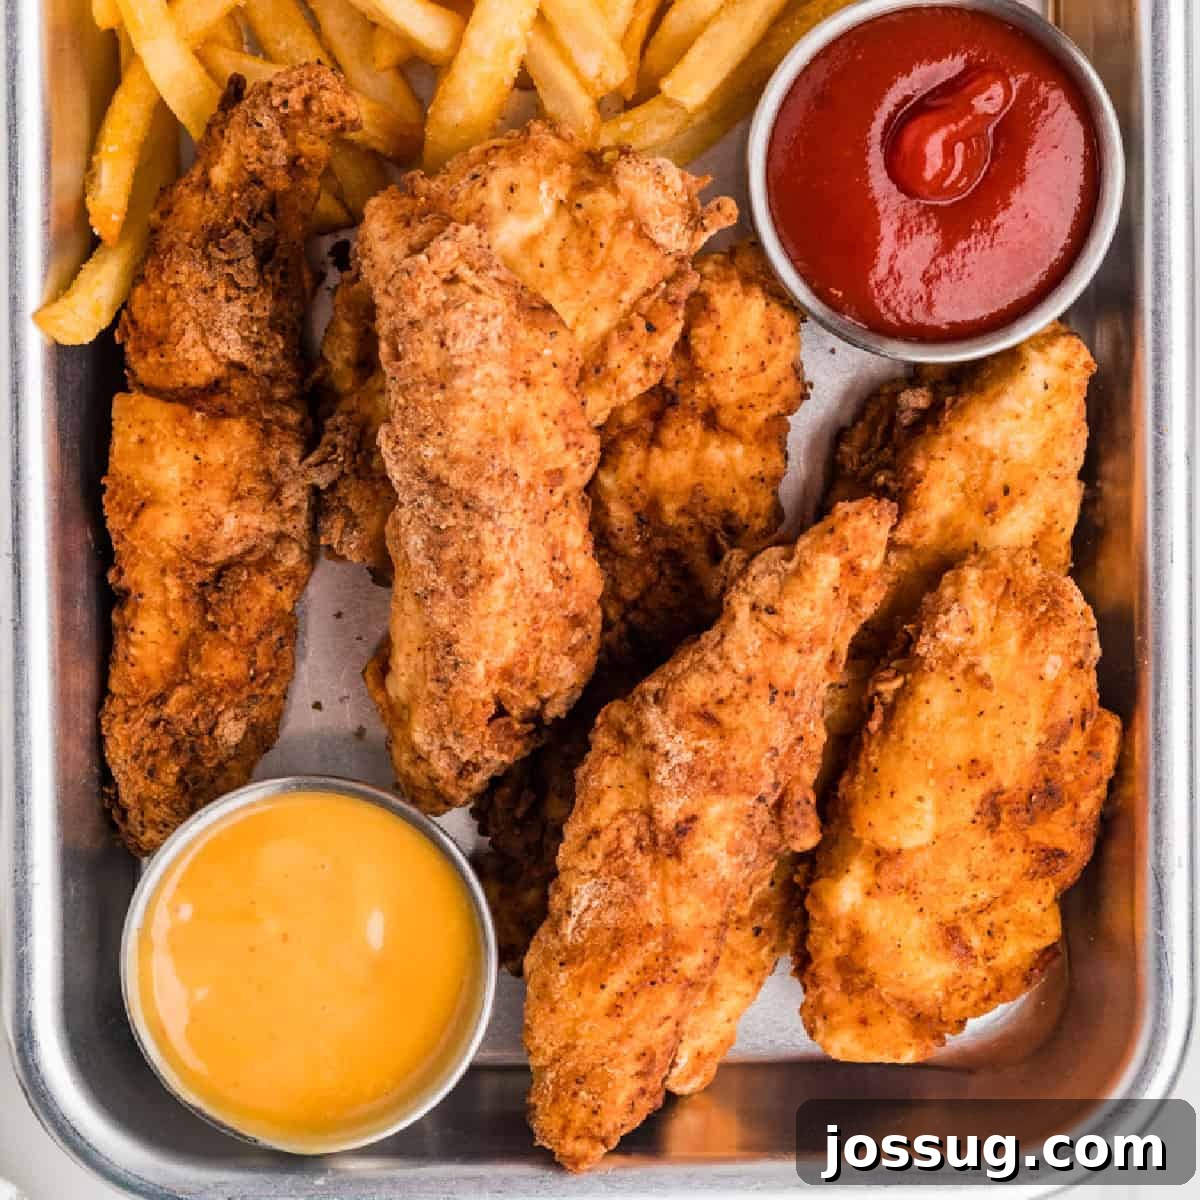
Crispy, Juicy Homemade Fried Chicken Strips: The Ultimate Comfort Food Recipe
There’s nothing quite like the irresistible allure of perfectly made **Fried Chicken Strips** – golden, crispy on the outside, and incredibly juicy and tender on the inside. This classic comfort food staple brings warmth and satisfaction to any table, making it a beloved choice for all ages. Forget bland, dry chicken; our easy-to-follow recipe ensures every strip is packed with mouthwatering flavor and an enviable crunch. Whether you call them chicken strips, chicken tenders, or chicken fingers, this homemade version will quickly become a favorite.
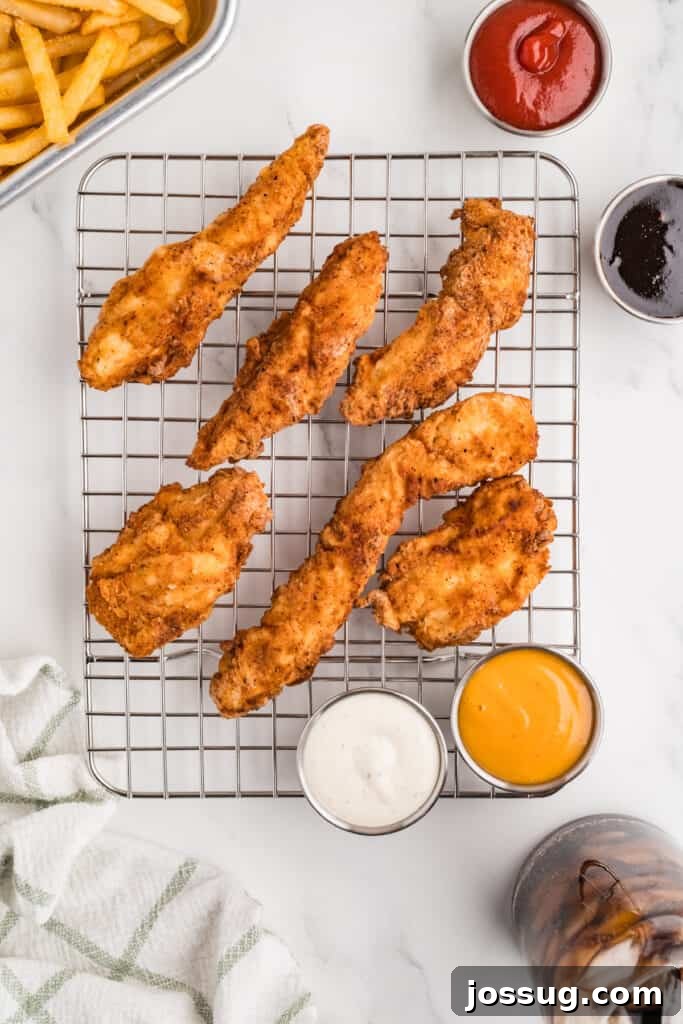
Crafted with simple pantry staples, this recipe for **Homemade Chicken Strips** comes together remarkably fast, in about **25 minutes from start to finish**. This makes it an ideal solution for busy **weeknight dinners** when time is short but the craving for something truly delicious is high. Beyond quick family meals, these versatile chicken strips are also a fantastic addition to **game-day platters**, casual gatherings, or any occasion where crowd-pleasing finger food is desired. Serve them alongside your favorite creamy **dipping sauces**, classic **crispy fries**, or a fresh, simple side dish for a complete meal that everyone will eagerly ask for again and again. Get ready to elevate your home cooking with this foolproof guide to the **best crispy fried chicken strips** you’ve ever tasted, bringing restaurant-quality flavor right to your kitchen!

Table of Contents
- ❤️ Why You’ll Love This Easy Fried Chicken Strips Recipe
- Key Ingredients for Perfect Fried Chicken Strips
- Ingredients & Smart Substitutions
- Delicious Variations to Try
- Expert Tips for Crispiest Results
- Frequently Asked Questions About Fried Chicken Strips
- Storage, Reheating, and Freezing Fried Chicken Strips
- Step-by-Step: How to Make Fried Chicken Strips at Home
- 📌 Save This Recipe for Later
- Fried Chicken Strips Recipe Card
- 🍽️ Other Delicious Chicken Recipes You May Enjoy
❤️ Why You’ll Love This Easy Fried Chicken Strips Recipe
This recipe isn’t just about making fried chicken; it’s about creating a memorable meal that’s both simple to prepare and incredibly satisfying to eat. Here’s why these **crispy chicken strips** will become a new family favorite, consistently delivering on flavor, texture, and convenience:
- Unbeatable Speed for Busy Nights: In today’s fast-paced world, finding a delicious homemade meal that’s ready in under 30 minutes is a huge win. These **Fried Chicken Strips** are quick enough for even your busiest evenings, making homemade comfort food a reality without the long wait or complicated steps. You can enjoy a fresh, hot meal with minimal fuss.
- Perfectly Crispy Outside, Amazingly Juicy Inside: The magic of these chicken strips lies in their superior texture. Our special double-dredging method ensures the coating fries up to a perfectly golden, shatteringly crisp crust, providing that satisfying crunch you crave. Meanwhile, the chicken inside remains wonderfully tender, moist, and juicy, never dry or tough, making every bite a delight.
- Uses Everyday Pantry Ingredients: You won’t need a special trip to a gourmet store for this recipe. It relies on simple, staple ingredients that you likely already have in your pantry, such as flour, eggs, milk, and common seasonings. This makes the recipe incredibly convenient, budget-friendly, and accessible for any home cook.
- Versatile for Any Occasion: Whether you’re planning a casual **weeknight dinner** for the family, prepping for an exciting **game day platter** with friends, or hosting a fun party, these chicken strips fit right in. They’re universally loved and always a hit, easily adaptable to various serving styles and dietary needs.
- Pairs Beautifully with Other Favorites: These **homemade chicken strips** are fantastic on their own, but they also complement a wide array of other dishes, allowing you to create a diverse and appealing spread. Imagine serving them alongside creamy Bacon Cheddar Deviled Eggs for an impressive appetizer spread, or with a refreshing Mock Champagne Punch for a celebratory feel. The possibilities for pairing and creating a complete meal are truly endless!
Key Ingredients for Perfect Fried Chicken Strips
Crafting the ultimate **crispy fried chicken strips** starts with understanding the role of each ingredient. Below, we highlight the essential components that contribute to the classic flavor, tender texture, and satisfying crunch of this beloved dish. You’ll find the complete list of ingredients and precise measurements in the printable recipe card located further down the page.
Chicken: The Heart of Your Delicious Strips
For this recipe, **boneless, skinless chicken breasts** are the top recommendation. They are incredibly easy to prepare, allowing you to cut them into uniform 1-inch thick strips, which ensures even cooking and consistently juicy, tender pieces every time. If you’re looking to save a little prep time and simplify the process, pre-cut **chicken tenders** (also known as chicken tenderloins) are an excellent and convenient alternative, as they come perfectly portioned and ready for dredging.
All-Purpose Flour: The Foundation of Unforgettable Crunch
**All-purpose flour** forms the crucial base for that signature crisp and golden coating that defines great fried chicken. The secret to achieving maximum crunch and a substantial crust is a **double dredging technique**: first, the chicken is coated in seasoned flour, then dipped in an egg mixture, and finally returned for a second coating in the flour. This layering process creates a robust and textured crust that fries up beautifully, effectively locking in the chicken’s natural moisture and delivering that satisfyingly crispy texture with every single bite.
Eggs: The Essential Binding Agent
**Eggs** play a vital role as the binding agent, creating the necessary adhesive layer that helps the seasoned flour coating adhere securely to the chicken. When beaten and mixed with milk, they form a tacky surface that allows the flour to cling without falling off during frying, ensuring every piece of chicken fries up with a complete and perfectly crisp crust. Without the eggs, your delicious coating simply wouldn’t stick, resulting in a less desirable texture.
Whole Milk: For a Smooth and Effective Dredge
A touch of **whole milk** added to the beaten egg mixture helps to thin it slightly, creating a smoother, more liquid consistency. This improved fluidity ensures the egg mixture coats the chicken strips uniformly and effortlessly, which in turn allows the flour to stick better and create an even crust. For those with dietary restrictions or preferences, specifically needing a **dairy-free option**, plain water works perfectly well as a substitute, yielding similar excellent results in the dredging process.
Classic Seasonings: Flavor You’ll Absolutely Love
The beauty of these **homemade chicken strips** lies in their timeless, straightforward, and universally appealing flavor profile. A simple yet incredibly effective blend of fundamental seasonings provides a savory depth that appeals to everyone. We use **Kosher salt**, **coarse-ground black pepper**, **onion powder**, and **garlic powder**. This classic combination enhances the natural taste of the chicken and the flour coating, creating that comforting, familiar fried chicken taste without being overly complicated or requiring exotic spices.
Frying Oil: The Key to Golden Perfection
Choosing the right type of oil is paramount for achieving perfectly fried, golden, and crispy chicken strips. Oils like **canola oil, vegetable oil, or peanut oil** are all excellent choices and highly recommended for deep frying. They are preferred because they possess a high smoke point, meaning they can be heated to the necessary high temperatures (ideally between 365-375°F or 185-190°C) without breaking down, smoking excessively, or imparting undesirable burnt or off-flavors to your food. This ensures a beautifully golden-brown, evenly cooked, and truly crispy result every time.
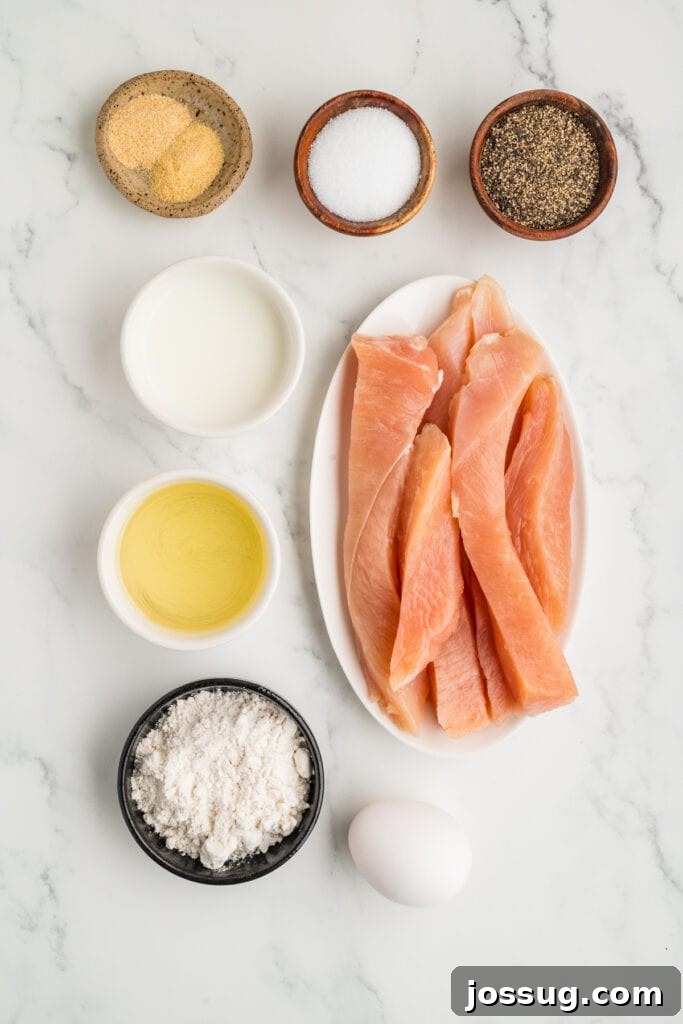
Ingredients & Smart Substitutions for Fried Chicken Strips
We’ve selected the best ingredients to ensure this **easy fried chicken strips recipe** delivers maximum flavor and crispiness. However, we understand that sometimes you need a little flexibility in the kitchen! Here are some common and effective substitutions you can make. Remember, the full printable recipe with exact measurements is available in the recipe card further below.
- Chicken Breasts: While boneless, skinless chicken breasts are highly recommended for their uniform size and tender results, you can easily substitute them with pre-cut **chicken tenders** for even less prep work. If you prefer a slightly richer flavor and moister texture, boneless, skinless chicken thighs, cut into similar strips, will also work wonderfully, though they might require a minute or two longer to cook through.
- Kosher Salt (for pre-salting): For the initial salting of the chicken, we strongly recommend using **kosher salt**. Its larger crystals dissolve more slowly, allowing for better flavor penetration into the meat itself. For optimal results and flavor balance, no substitution is recommended here.
- All-Purpose Flour: If you’re looking for a **gluten-free fried chicken strips** option, a high-quality **1:1 gluten-free all-purpose flour blend** can be used as a direct substitute. Be aware that the final texture of the coating might vary slightly, but it will still provide a good, adherent crust.
- Coarse Ground Black Pepper: If you don’t have coarse-ground pepper on hand, regular fine-ground **black pepper** can be used in its place. The coarse grind provides a slightly more pronounced peppery bite and visual appeal, but the overall flavor will still be excellent with fine-ground pepper.
- Onion Powder & Garlic Powder: These two seasonings are foundational to the classic savory flavor profile of these chicken strips. They provide essential aromatic notes that make the coating truly delicious. For the best flavor, no substitution is recommended for these key spices.
- Large Eggs: Eggs are absolutely essential for binding the flour coating to the chicken, creating that desired crispy crust. As such, no substitution is recommended to ensure the coating adheres properly and delivers the optimal texture.
- Whole Milk: For a delicious **dairy-free fried chicken strips** option, simply substitute the whole milk with an equal amount of plain **water** in the egg mixture. The dredging mixture will still achieve the correct consistency to ensure the flour sticks effectively.
- Canola Oil (for frying): Any neutral-flavored oil with a high smoke point is suitable for deep frying these chicken strips. **Vegetable oil or peanut oil** are excellent and widely available substitutes for canola oil, ensuring your chicken fries to a perfect golden crisp without burning or imparting strong flavors.
Delicious Variations to Elevate Your Fried Chicken Strips
While the classic **Fried Chicken Strips** are an undeniable hit on their own, don’t hesitate to get creative and experiment with flavors! Here are some exciting and easy variations to customize your homemade chicken strips and make them uniquely yours, adding new dimensions to this beloved comfort food:
- Add a Touch of Heat: For those who enjoy a little kick in their comfort food, incorporating a half teaspoon or even a full teaspoon of **smoked paprika or cayenne pepper** into the flour mixture will introduce a delightful warmth and subtle spice. Adjust the amount to match your preferred spice level, creating a fiery twist on a classic.
- Boost the Flavor Profile: To deepen the savory taste or add an aromatic layer, consider incorporating a little **seasoned salt** in place of some of the kosher salt in the flour dredge. Alternatively, adding a teaspoon of **Italian seasoning** will infuse the coating with fragrant herbs like oregano, basil, and thyme, providing a wonderfully aromatic and savory twist.
- Toss in a Saucy Finish: Once your chicken strips are perfectly fried and crispy, take them to the next level by tossing them immediately in your favorite sauce for an extra layer of bold flavor. Try classic, tangy **buffalo sauce** for a zesty, spicy kick, a rich and smoky barbecue sauce for a sweet and savory glaze, or a creamy, sweet, and tangy honey mustard sauce. This simple step transforms them into gourmet finger foods perfect for any party or gathering.
- Create a Full Comfort-Food Feast: Elevate your meal by pairing these crispy strips with other beloved comfort dishes for an indulgent spread. Serve them with golden and fluffy sweet potato fries or traditional French fries, a warm and creamy bowl of homemade stovetop mac and cheese, or even a side of tender Baked Garlic Parmesan Flounder for a unique “fried and baked” dinner spread that offers delightful variety and satisfying indulgence.

Expert Tips for the Crispiest, Juiciest Fried Chicken Strips
Achieving restaurant-quality **crispy fried chicken strips** at home is far easier than you might think, especially when you follow these expert tips. These guidelines are designed to ensure your chicken is perfectly cooked, wonderfully golden, and incredibly delicious with that irresistible crunch every single time you make them:
- Maintain Optimal Oil Temperature: The most critical factor for achieving consistent crispiness and avoiding greasy chicken is to maintain a stable oil temperature. Aim to keep your frying oil between **365°F and 375°F (185-190°C)** throughout the cooking process. Using a reliable digital instant-read thermometer is absolutely essential for monitoring this closely. If the oil is too cool, the chicken will absorb too much grease and become soggy; if it’s too hot, the coating will burn long before the chicken inside is cooked through.
- Avoid Overcrowding the Pan: When frying, it’s crucial to resist the urge to cook too many chicken strips at once, even if you’re in a hurry. Overcrowding the pan significantly drops the oil temperature, making it difficult for the chicken to crisp up properly and often leading to less crispy, more oily results. Always fry in small batches, typically 4-5 pieces at a time, to ensure the oil maintains its ideal temperature and that each piece cooks evenly to golden perfection.
- Use a Wire Rack for Draining: After frying each batch, immediately transfer your cooked **crispy chicken strips** to a **wire rack** that is set over a rimmed baking sheet. This setup allows air to circulate freely around all sides of the chicken, preventing steam from accumulating underneath and turning the freshly fried crust soggy. Avoid placing them directly on paper towels, as this can trap moisture and compromise crispness.
- Season the Chicken Before Dredging: For flavor that penetrates deeply into the meat itself, rather than just seasoning the surface coating, it’s vital to lightly salt the chicken strips directly before beginning the dredging process. This crucial step allows the seasoning to infuse into the chicken as it cooks, resulting in a more balanced, flavorful, and delicious taste throughout the entire strip.
- Cook to the Correct Internal Temperature: To guarantee your chicken is fully cooked, safe to eat, and wonderfully juicy, always use an **instant-read food thermometer**. Insert the thermometer into the thickest part of a chicken strip; it should register an internal temperature of **165°F (74°C)**. This precise measurement ensures perfectly cooked, safe, and tender chicken every single time, without guesswork.
Frequently Asked Questions About Homemade Fried Chicken Strips
While **fried chicken strips** are undoubtedly best served fresh for peak crispiness and flavor, you can certainly prepare them in advance. To restore some of their delightful crisp texture, we highly recommend reheating them in a preheated oven or an air fryer, rather than using a microwave. Detailed instructions for optimal reheating are provided in the recipe notes section below.
The best oils for frying **chicken strips** are those with a high smoke point, meaning they can withstand the necessary high cooking temperatures without burning, smoking excessively, or imparting undesirable flavors to your food. Excellent choices that fit this criterion include **canola oil, vegetable oil, and peanut oil**.
Yes, you absolutely can! While **baked chicken strips** won’t achieve quite the same intense level of deep crispiness and rich flavor that frying provides, they still turn out incredibly tasty and offer a healthier alternative. You can find alternate cooking methods, including detailed instructions for both baking and air frying, in the comprehensive recipe notes section.
The key to maintaining maximum crispiness after frying is proper draining and cooling techniques. After frying, immediately transfer the cooked chicken strips to a **wire rack** (never directly on paper towels) that’s set over a baking sheet. Ensure they are arranged in a single layer and avoid stacking them while they cool, as stacking traps steam and will quickly soften that desirable crispy crust.
**Fried Chicken Strips** are wonderfully versatile and pair well with a wide variety of sides, making them perfect for any meal occasion. For lighter options, consider serving them with fresh simple side salads, creamy deviled eggs, or some colorful steamed vegetables. If you’re aiming for a fun, party-style spread, they’re fantastic with nostalgic stuffed celery and an impressive Shirley Temple punch. For a classic, hearty comfort meal, don’t forget the golden fries, creamy mac and cheese, or a comforting potato salad!
Storage, Reheating, and Freezing Fried Chicken Strips
Ensuring your delicious **homemade fried chicken strips** remain enjoyable even as leftovers is easy with proper storage and reheating techniques. While they are undoubtedly at their absolute best when served fresh, they can still be wonderfully tasty later with a little care!
- Storage: To maintain freshness and quality, store any leftover **Fried Chicken Strips** in an airtight container in the refrigerator. They will remain good for up to 3 days. Always ensure the chicken has completely cooled down to room temperature before sealing it in the container to prevent condensation.
- Reheating: For the absolute best texture, especially to restore their delightful crispiness, we highly recommend reheating your chicken strips in an **air fryer** or a conventional **oven**. Avoid using the microwave if crispiness is a priority, as it tends to make the coating soggy and diminishes the texture. Specific reheating temperatures and times are conveniently provided in the detailed recipe notes section below.
- Freezing: If you’ve prepared a large batch or wish to cook ahead for future meals, cooked and cooled chicken strips can be successfully frozen. To do this, first arrange the completely cooled chicken strips in a single layer on a baking sheet and flash freeze them for an hour or two until they are solid. This prevents them from sticking together. Once frozen solid, transfer them to a freezer-safe container or a heavy-duty freezer bag. They can be safely stored for up to 2 months. For reheating, simply cook them directly from frozen in the oven or air fryer, following the reheating instructions above but adding a few extra minutes to the cooking time until they are piping hot and crisp again.
Step-by-Step: How to Make Crispy Fried Chicken Strips at Home
Making your own perfectly **crispy fried chicken strips** at home is a surprisingly simple and rewarding process that yields incredibly satisfying results – a golden, crunchy coating embracing perfectly juicy and tender chicken inside. Once you have your organized dredging station set up, the actual preparation and cooking move very quickly, making it a perfect quick dinner. Here’s a detailed, step-by-step guide to walk you through each phase of creating these irresistible homemade chicken strips:
Detailed Steps to Crispy Perfection:
- **Prepare Your Frying Station:** Begin by pouring your chosen frying oil (canola, vegetable, or peanut oil) into a large cast-iron skillet or a heavy deep skillet, ensuring the oil is approximately 2 inches deep. Place the skillet over medium-high heat. It is crucial to use a digital instant-read thermometer to accurately monitor the oil temperature, aiming for precisely **365-375°F (185-190°C)**. Do not let the temperature exceed 375°F to prevent the coating from burning. While the oil heats, set up a wire rack over a rimmed baking sheet nearby; this will be your dedicated spot for draining your freshly fried chicken to maintain its ultimate crispness.
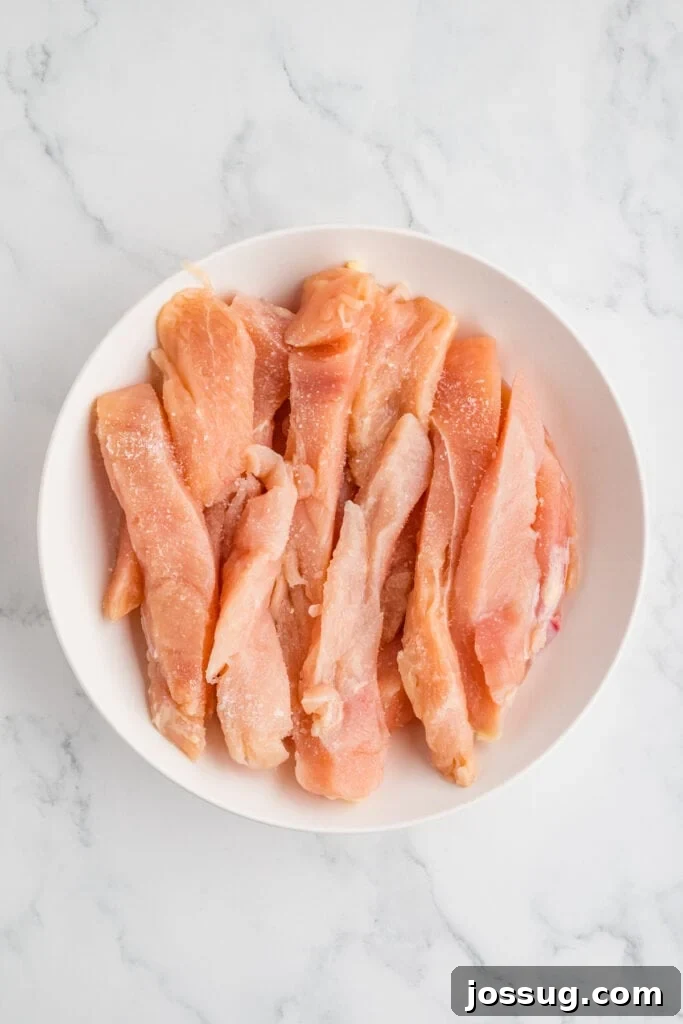
- **Season the Chicken:** Take your prepared chicken strips (boneless, skinless chicken breast cut into 1-inch thick strips, or chicken tenders) and generously sprinkle them evenly with 1 teaspoon of kosher salt. Toss the strips gently to ensure every piece is thoroughly coated. This initial salting is a vital step for seasoning the meat itself, ensuring depth of flavor that goes beyond just the outer crust.
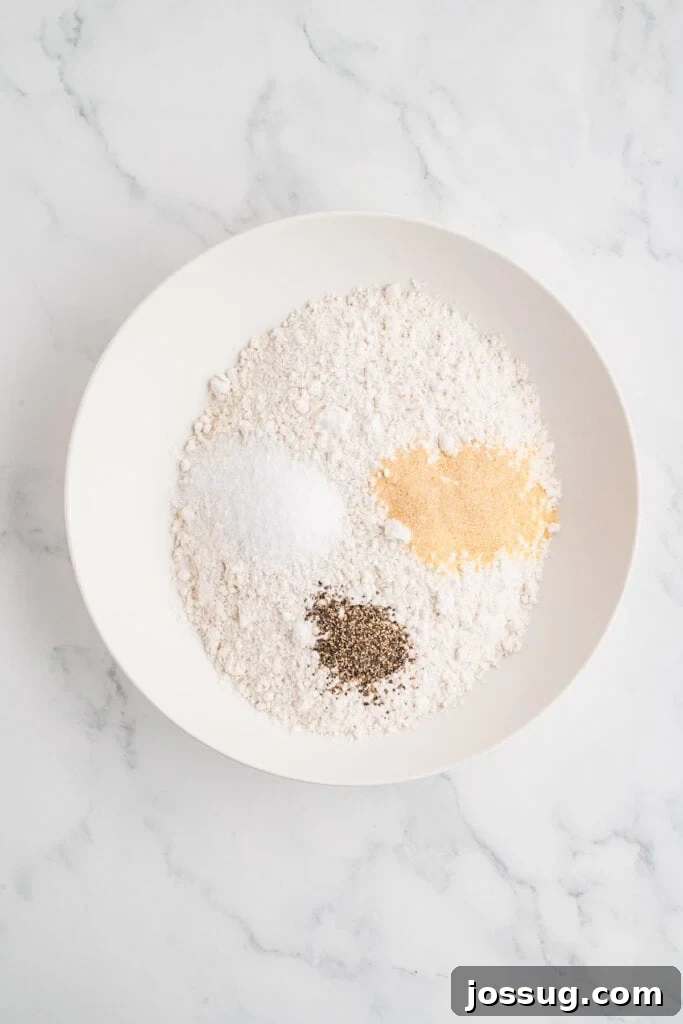
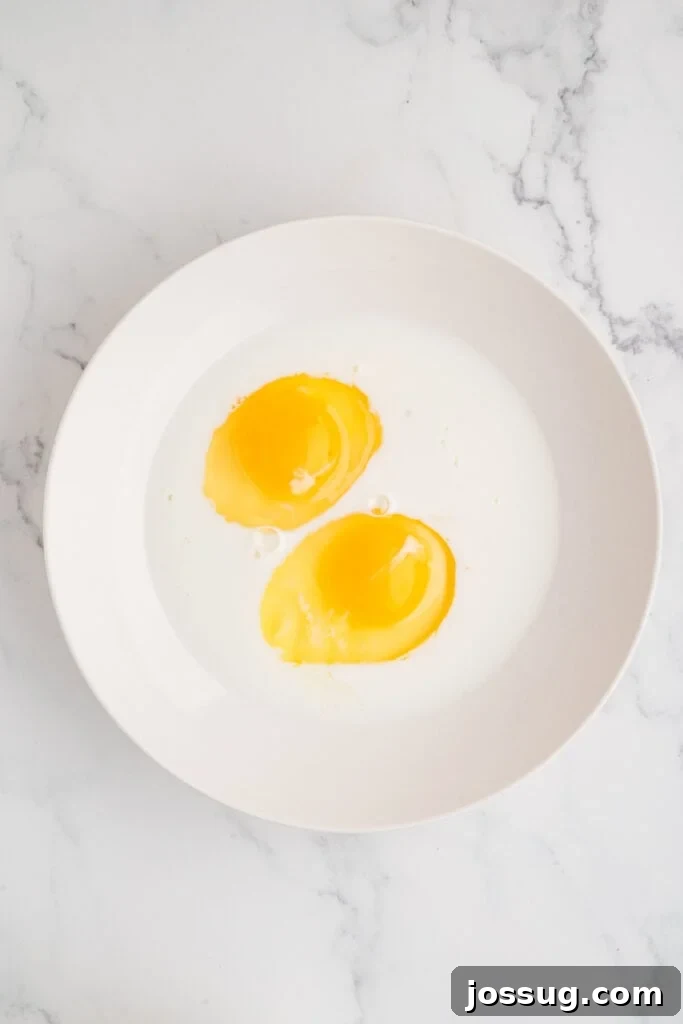
- **Set Up Dredging Bowls:** Prepare two separate shallow bowls for your dredging station. In the first bowl, whisk together the 1¾ cups all-purpose flour, 2 teaspoons kosher salt, ½ teaspoon coarse ground black pepper, ½ teaspoon onion powder, and ½ teaspoon garlic powder until all the dry ingredients are thoroughly combined and evenly distributed. In the second shallow bowl, whisk together the 2 large eggs and ¼ cup of whole milk (or water if you prefer a dairy-free option) until the mixture is smooth and uniform. These two bowls form your dry and wet stations for coating.
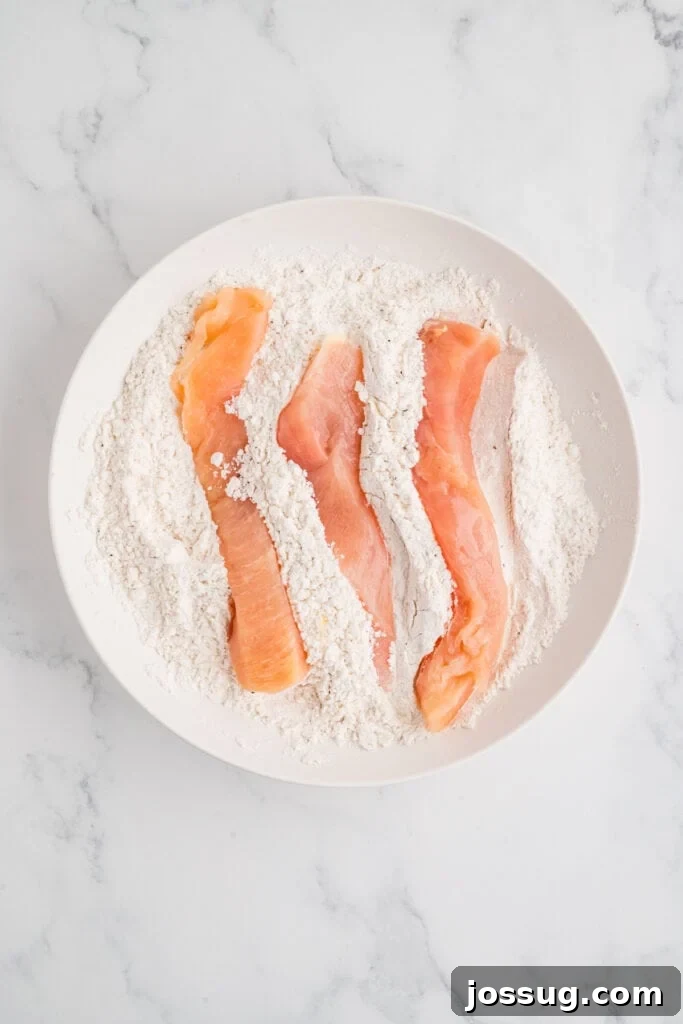
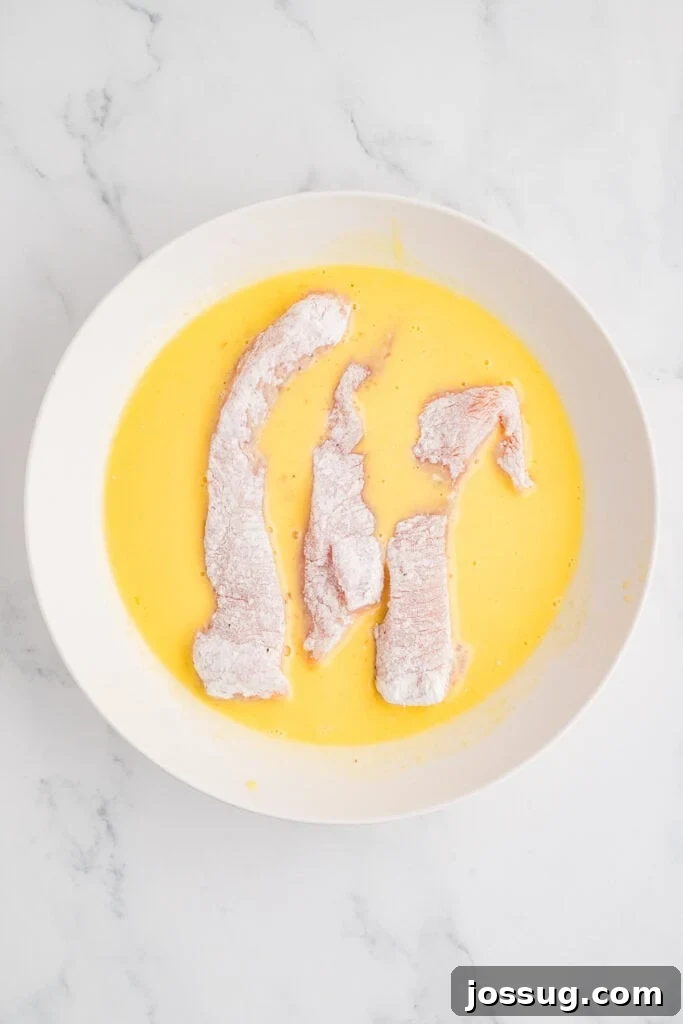
- **Double-Dredge for Maximum Crispness:** Working in small batches (typically 4-5 chicken strips at a time to avoid overcrowding, which drops the oil temperature), begin the double-dredging process. First, dredge each chicken strip thoroughly in the seasoned flour mixture, ensuring it’s completely coated on all sides. Gently shake off any excess flour. Next, dip the flour-coated strip into the egg mixture, allowing any excess liquid to drip off. Finally, return the strip to the flour mixture for a second coating, pressing lightly with your fingers to ensure a thick, even, and robust crust forms. This double-dredging technique is the secret to achieving that coveted thick and extra-crispy exterior.
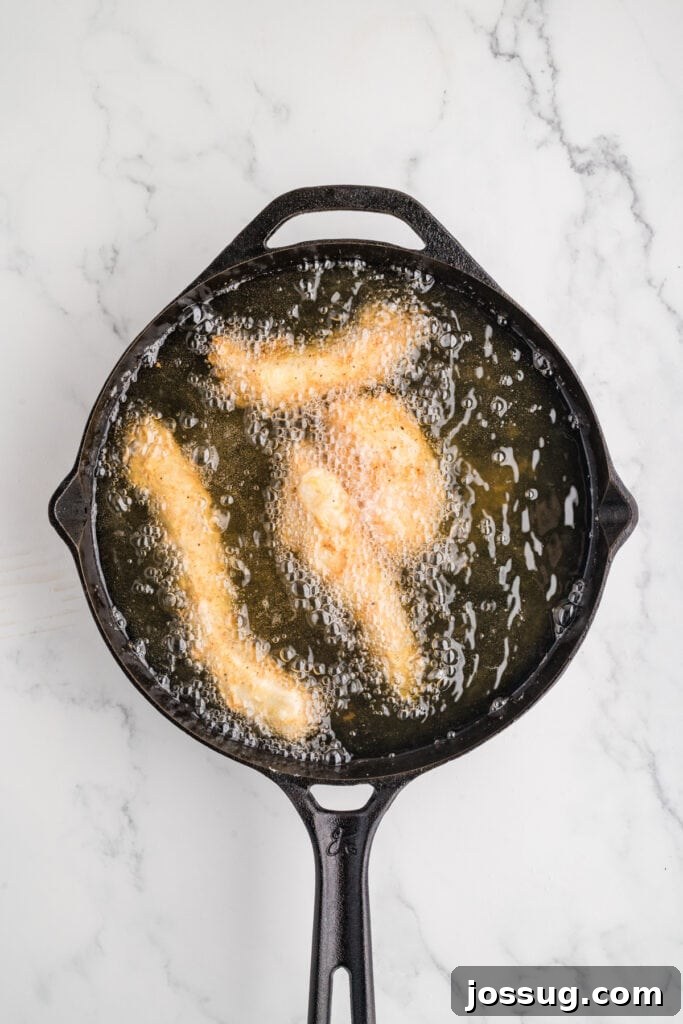
- **Fry to Golden Perfection:** Carefully place the coated chicken strips into the preheated hot oil. Remember not to overcrowd the pan, as this will significantly drop the oil temperature and result in less crispy, potentially soggy chicken. Fry 4-5 pieces at a time for approximately **5-6 minutes per side**, or until they achieve a beautiful, appealing golden brown color and the internal temperature of the chicken, measured with your instant-read thermometer inserted into the thickest part, reaches **165°F (74°C)**. If you notice the coating browning too quickly before the inside is cooked, slightly reduce your heat to allow the chicken to cook through evenly.
- **Drain and Serve:** As each batch of chicken strips finishes frying and reaches the correct internal temperature, use tongs to carefully transfer them from the hot oil directly to the prepared wire rack over the baking sheet. This crucial step allows any excess oil to drip away and, most importantly, allows air to circulate around the strips, preventing steam from making the bottoms soggy and helping to maintain their crispness. Allow the oil to return to the target temperature before frying the next batch. Repeat this entire process until all chicken strips are beautifully cooked. Serve your piping hot, crispy **homemade chicken strips** immediately while warm. They are absolutely perfect when accompanied by your favorite dipping sauces, such as honey mustard, BBQ, ranch, or even a spicy sriracha mayo, and a generous side of golden, fluffy fries. Enjoy this ultimate comfort food experience!


📌 Save This Crispy Fried Chicken Strips Recipe!
Don’t let this incredible **Fried Chicken Strips recipe** get lost in your search history! Make sure to save it for easy access whenever that comfort food craving strikes. Pin it to your favorite chicken recipes board on Pinterest, or add it to your collection of easy dinner ideas, beloved comfort food recipes, or winning **game-day food** inspiration. You’ll definitely want to easily find this perfect recipe for the crispiest homemade chicken strips again and again for delicious meals and gatherings!
Pin this now to find it later
Pin It


5
servings
Crispy Fried Chicken Strips
Jamie Sherman
15 minutes
10 minutes
25 minutes
Print Recipe
Equipment Needed
-
Large cast iron skillet or heavy deep skillet
-
Wire cooling rack
-
Baking sheets
-
Mixing bowls
-
Whisk
-
Tongs
-
Digital instant-read food thermometer
Ingredients
- 1½-2 pounds chicken breasts, cut into 1-inch-thick strips, or chicken tenders
- 1 teaspoon kosher salt (for pre-salting chicken)
For the Flour Dredge
- 1¾ cups all-purpose flour
- 2 teaspoons kosher salt
- ½ teaspoon coarse ground black pepper
- ½ teaspoon onion powder
- ½ teaspoon garlic powder
For the Egg Dredge
- 2 large eggs
- ¼ cup whole milk (or water for dairy-free)
For Frying
- Canola oil, vegetable oil, or peanut oil (for deep frying)
Instructions
-
**Prepare for Frying:** Pour canola, vegetable, or peanut oil into a large cast-iron skillet or a heavy deep skillet until it is about 2 inches deep. Place the skillet over medium-high heat. Using a digital instant-read thermometer, heat the oil until it reaches precisely **365-375°F (185-190°C)**. It is critical to monitor the temperature and not let it exceed 375°F to prevent burning the coating. While the oil heats, place a wire rack over a rimmed baking sheet and set it aside; this will be used for draining the fried chicken to keep it crispy.canola oil, vegetable oil, or peanut oil
-
**Season the Chicken:** Take your chicken strips and sprinkle them evenly with 1 teaspoon of kosher salt. Toss the strips gently to ensure they are thoroughly coated. This step ensures the chicken meat itself is seasoned, adding depth of flavor beyond just the crust.1½-2 pounds chicken breasts (or tenders),
1 teaspoon kosher salt -
**Prepare the Flour Dredge:** In a shallow bowl, combine the 1¾ cups all-purpose flour, 2 teaspoons kosher salt, ½ teaspoon coarse ground black pepper, ½ teaspoon onion powder, and ½ teaspoon garlic powder. Whisk all the dry ingredients together thoroughly to ensure the seasonings are evenly distributed.1¾ cups all-purpose flour,
2 teaspoons kosher salt,
½ teaspoon coarse ground black pepper,
½ teaspoon onion powder,
½ teaspoon garlic powder -
**Prepare the Egg Dredge:** In a second separate shallow bowl, whisk together the 2 large eggs and ¼ cup of whole milk (or water for a dairy-free option). Whisk until the mixture is smooth and well combined.2 large eggs,
¼ cup whole milk -
**Double-Dredge the Chicken:** Working in small batches of 4-5 chicken strips at a time, first dredge each piece thoroughly in the seasoned flour mixture, ensuring it’s completely coated on all sides. Gently shake off any excess flour. Next, dip the flour-coated strip into the egg mixture, allowing any drips to fall back into the bowl. Finally, return the strip to the flour mixture for a second coating, pressing lightly to ensure a thick, even crust forms. This double-dredging is key to ultimate crispiness.
-
**Fry in Batches:** Carefully place the coated chicken strips into the hot oil. Do not overcrowd the pan, as this will drop the oil temperature and result in soggy chicken. Fry 4-5 pieces at a time for approximately **5-6 minutes per side**, or until they are beautifully golden brown and the internal temperature, measured with your instant-read thermometer, reaches **165°F (74°C)**. If the coating is browning too quickly, slightly reduce the heat.
-
**Drain and Repeat:** As each batch of chicken strips finishes frying, use tongs to carefully transfer them to the prepared wire rack over the baking sheet. This allows excess oil to drain away and prevents the bottoms from becoming soggy. Allow the oil to return to the target temperature before frying the next batch. Repeat this process until all chicken strips are cooked.
-
**Serve Warm:** Serve your freshly fried, crispy chicken strips immediately while warm. They are perfect accompanied by your favorite dipping sauces, such as honey mustard, BBQ, or ranch, and a generous side of golden fries. Enjoy this ultimate comfort food!
Notes for Perfect Fried Chicken Strips
🥡 Storage
- Leftover **Fried Chicken Strips** are best stored in an airtight container in the refrigerator for up to 3 days. Ensure they are completely cooled before storing to prevent condensation.
♨️ Reheating
- Air Fryer: For optimum crispiness, reheat in the air fryer at 360°F (182°C) for about 6-8 minutes, or until thoroughly heated through and crisp again.
- Oven: Alternatively, reheat in a preheated 400°F (200°C) oven for 10-12 minutes, or until hot and crispy.
- Microwave: Only use the microwave if absolutely necessary, but be aware that the coating will likely not retain its crisp texture.
❄️ Freezing
- To freeze cooked **chicken strips**, first ensure they are completely cooled. Then, arrange them in a single layer on a baking sheet and flash freeze for an hour or two until solid. Transfer to a freezer-safe container or heavy-duty freezer bag. They can be stored for up to 2 months.
- Reheat frozen chicken strips directly in the oven or air fryer following the reheating instructions above, adding a few extra minutes to the cooking time until hot and crisp.
💡 Additional Tips for Best Results
- Oil Temperature is Key: Always use a reliable digital thermometer to maintain the oil temperature precisely between 365-375°F (185-190°C). This range is vital for a truly crispy, non-greasy coating and fully cooked chicken.
- Seasoning Penetration: Do not skip the initial salting of the chicken before dredging. This ensures the flavor deeply penetrates the meat, not just staying on the surface coating.
- Fry in Batches: Frying too many pieces at once drastically lowers the oil temperature, leading to soggy results. Always fry in small batches to keep the oil at its optimal heat.
- Wire Rack for Crispness: After frying, transfer the cooked strips to a wire rack set over a baking sheet. This allows air to circulate, preventing steam from making the bottom crust soft. Avoid stacking them.
- Serve Fresh: Like most fried foods, these **crispy chicken strips** are at their absolute best when served immediately after cooking.
🍳 Alternate Cooking Methods (Healthier Options)
- Air Fryer Chicken Strips: For a healthier alternative, lightly spray both sides of the double-dredged chicken strips with oil. Cook in a preheated air fryer at 400°F (200°C) for 10-14 minutes, flipping them halfway through, until the chicken reaches an internal temperature of 165°F (74°C).
- Oven Baked Chicken Strips: Place the double-dredged chicken strips on a greased wire rack set over a baking sheet. Lightly spray with oil. Bake in a preheated 425°F (220°C) oven for 18-22 minutes, flipping halfway through, until golden brown and cooked through (165°F internal temperature).
♻️ Creative Uses for Leftovers
- Versatile Meals: Repurpose sliced leftover chicken strips in delicious wraps, fresh salads, hearty sandwiches, or flavorful rice bowls for quick and easy lunches or dinners.
- Comfort Food Upgrades: Chop the crispy strips and serve them over fluffy waffles for a homemade chicken and waffles dish, stir them into creamy mac and cheese, or sprinkle them over loaded fries for an indulgent treat.
📝 Important Notes
- Oil Temperature is Key: If your frying oil is too cool, the coating will not crisp properly and will absorb too much oil, resulting in a greasy texture.
- Browning Too Fast: Should the chicken exterior brown too quickly before the internal temperature reaches 165°F (74°C), gently lower the heat to allow the chicken to cook through without burning the crust.
- Dairy-Free Option: For those with dairy sensitivities or preferences, simply use water instead of milk in the egg dredge mixture. The results will still be delicious and crispy.
Nutrition Information (Approximate)
Carbohydrates: 35g,
Protein: 27g,
Fat: 5g,
Saturated Fat: 1g,
Polyunsaturated Fat: 1g,
Monounsaturated Fat: 2g,
Trans Fat: 0.02g,
Cholesterol: 134mg,
Sodium: 1535mg,
Potassium: 437mg,
Fiber: 1g,
Sugar: 1g,
Vitamin A: 157IU,
Vitamin C: 1mg,
Calcium: 40mg,
Iron: 3mg
Nutrition information is automatically calculated and should be used as an approximation only. Factors such as specific ingredient brands and cooking variations can affect actual nutritional values.
Enjoyed this recipe? Share your thoughts below!
🍽️ Other Delicious Chicken Recipes You May Enjoy
If you’ve loved making these **crispy homemade fried chicken strips** and are looking for more fantastic poultry dishes, you’re in for a treat! Here are a few more reader-favorite chicken recipes from Love Bakes Good Cakes that offer unique flavors and cooking methods. Whether you’re looking for lighter alternatives, quick weeknight meals, or more comforting classics, you’ll find plenty of delicious inspiration for your next meal right here.
Chicken and Turkey
Air Fryer Lemon Chicken Bites
Chicken and Turkey
Air Fryer Cracker Barrel Chicken Tenderloins
Main Dish
Southwest Chicken Tenders
Southern Recipes
Southern Fried Chicken