
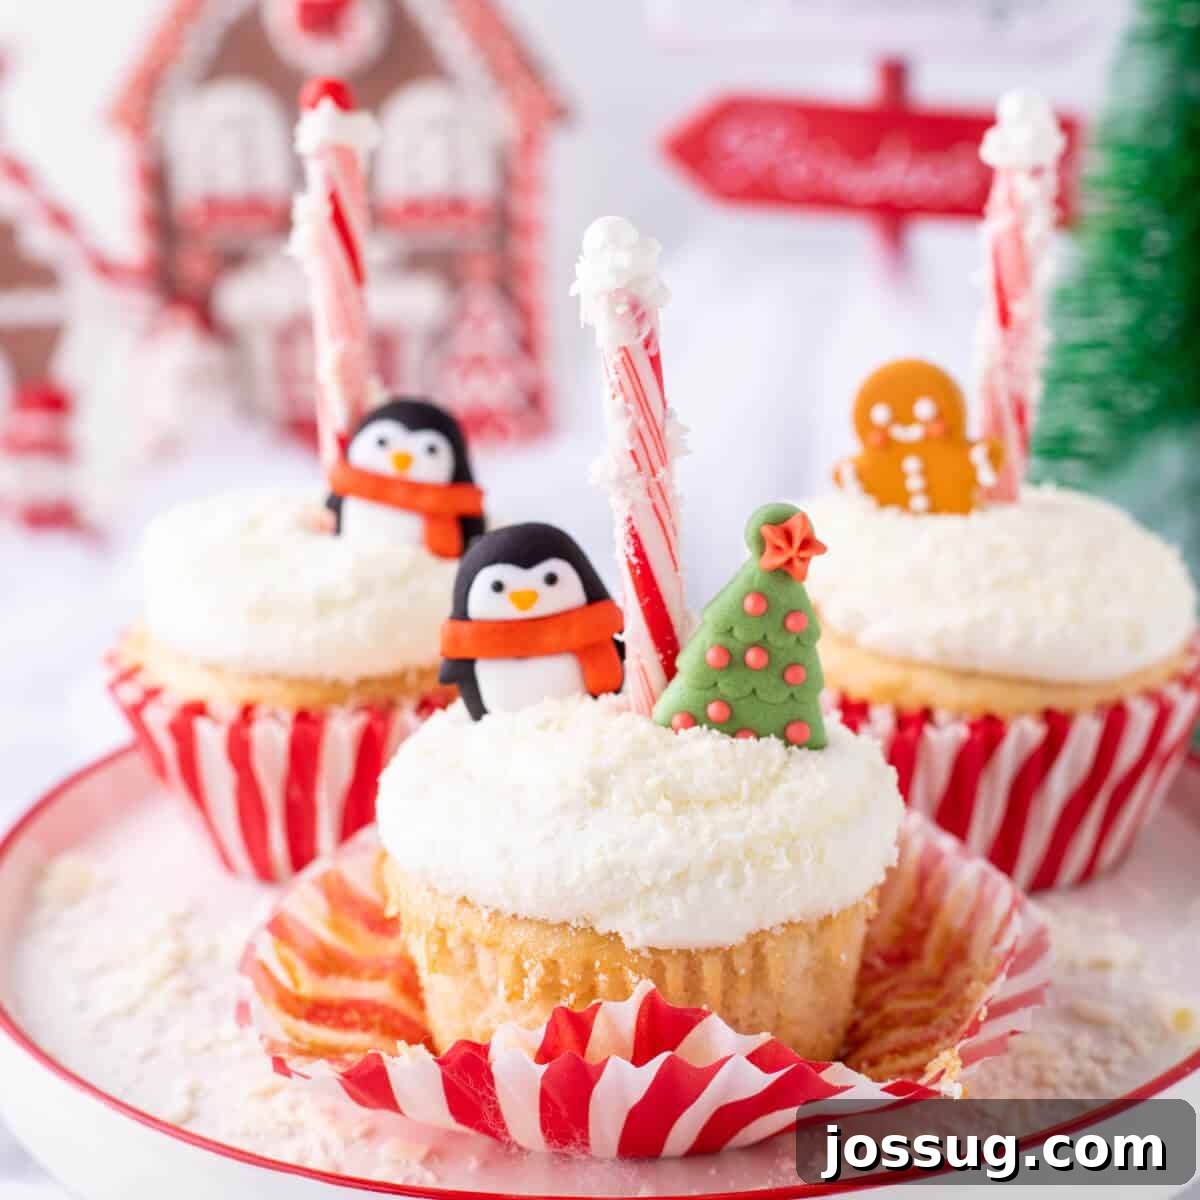
Embrace the spirit of the season with these delightful North Pole Cupcakes! This recipe offers a simple yet impressive way to create festive holiday treats. Starting with a convenient box cake mix and crowned with a dreamy snowy white chocolate buttercream, these cupcakes are then adorned with vibrant candy canes and whimsical gingerbread characters, making them a true holiday showstopper.
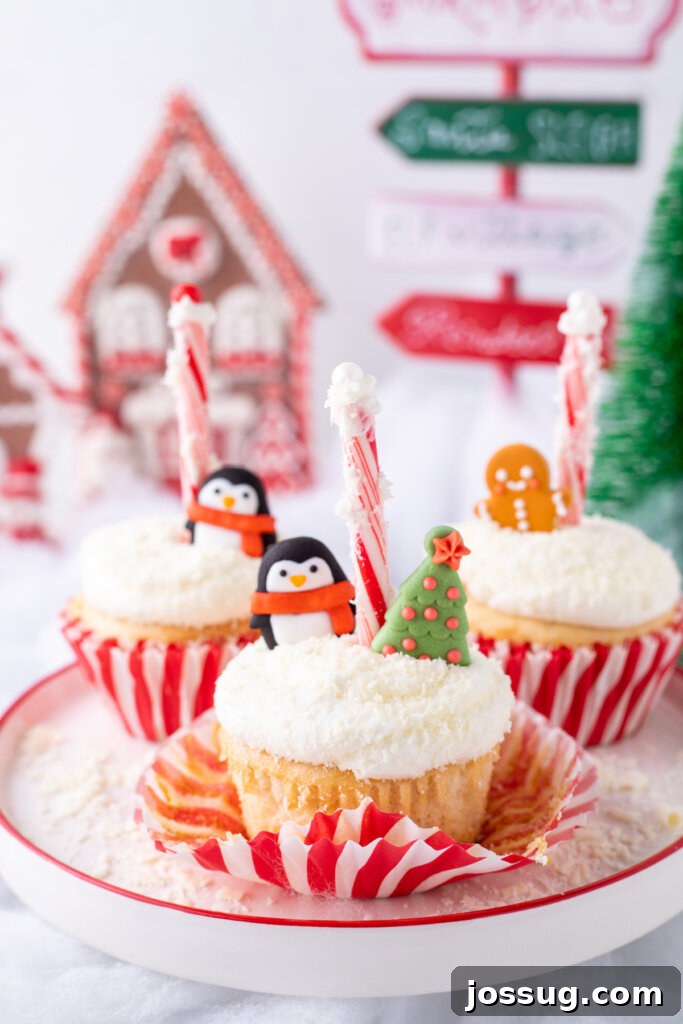
Unleash the Holiday Magic with Festive Christmas Cupcakes
The holiday season ushers in a time for warmth, joy, and, of course, delicious treats. As families gather and spirits brighten, there’s no better way to spread Christmas cheer than with homemade festive desserts. Our North Pole Cupcakes are specifically designed to capture the enchantment of the season, offering a delightful blend of flavors and textures that will transport you straight to a winter wonderland.
These aren’t just any ordinary Christmas cupcakes; they are miniature works of art, promising both visual appeal and an exquisite taste experience. Whether you’re an experienced baker looking for a new holiday favorite or a novice eager to try your hand at festive baking, our North Pole Cupcakes recipe is the perfect addition to your Christmas repertoire. We’ve meticulously crafted this recipe to be simple and straightforward, removing any guesswork so that anyone can achieve bakery-quality results right in their own kitchen.
Imagine biting into a moist, fluffy cupcake, subtly infused with the essence of the holidays. The rich, creamy white chocolate buttercream adds a touch of luxurious sweetness, perfectly complemented by the refreshing zing of crushed candy canes. Adorning each cupcake with charming gingerbread candy characters adds a playful touch that delights both young and old. This delightful combination of flavors – the sweet chocolate, the cool peppermint, and the spiced gingerbread – makes these winter desserts an irresistible indulgence that truly sings with the joy of the season.
Beyond their incredible taste, North Pole Cupcakes offer a fantastic canvas for your creativity. From piping on the snowy white chocolate frosting to arranging the festive gingerbread figures and sprinkles, you have endless opportunities to personalize each cupcake, making every one a unique masterpiece. They are absolutely perfect for a myriad of holiday occasions: elaborate family dinners, lively school parties, cozy evenings by the fireplace, or simply as a heartwarming gift for loved ones.
In the midst of the chilly winter air, these North Pole Cupcakes are like a warm, comforting hug for your taste buds. Don’t let another holiday season pass without adding these enchanting treats to your menu. They are more than just a dessert; they are an invitation to create lasting memories and share the sweet spirit of Christmas with everyone around you. Indulge in the magic, bake with love, and let these festive cupcakes be a beacon of holiday happiness in your home.
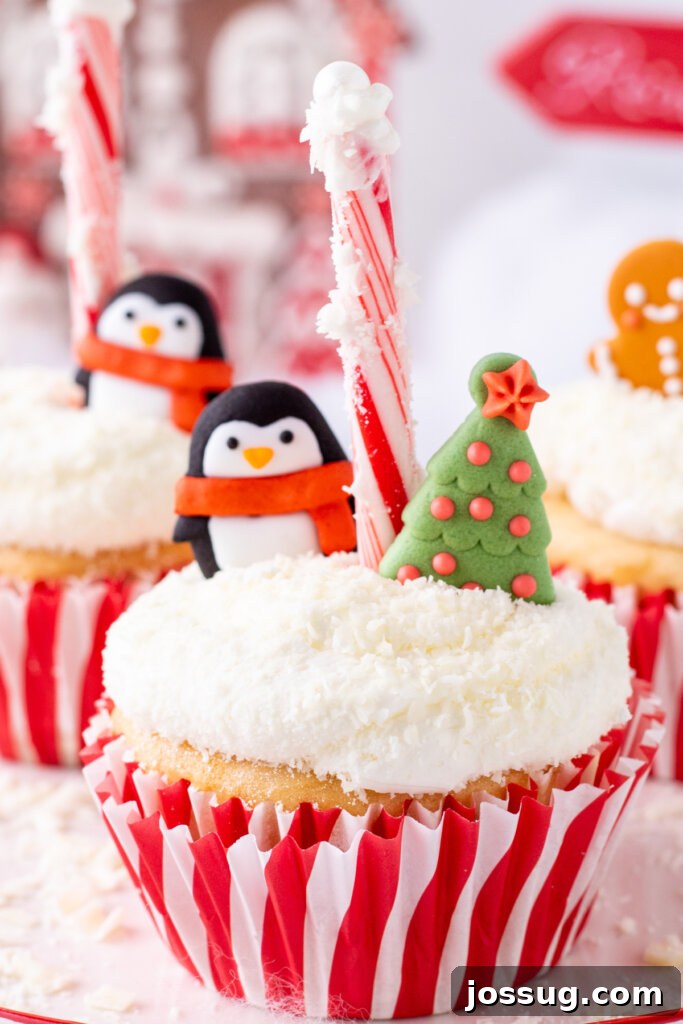
North Pole Cupcakes: Essential Ingredients & Smart Substitutions
Crafting these delectable Christmas desserts begins with a selection of high-quality ingredients, many of which are kitchen staples. Here’s a detailed look at what you’ll need and potential substitutions to ensure your North Pole Cupcakes turn out perfectly every time.
Ingredients
Gathering your ingredients before you begin ensures a smooth and enjoyable baking process. Precision in measuring is key to achieving the desired texture and flavor.
For the Cupcakes: Building a Fluffy Foundation
- White Cake Mix (15.25 oz.): The foundation of our easy recipe. A good quality box mix saves time without sacrificing flavor.
- Substitution: For a completely homemade approach, you can use your favorite white cake recipe. Ensure it yields approximately 24 cupcakes.
- All-Purpose Flour (1 cup): Added to the cake mix to give the cupcakes more structure and a slightly denser, more bakery-style crumb.
- Tip: Measure flour by spooning it into a measuring cup and leveling off with a knife to avoid a dense cake.
- Granulated Sugar (1 cup): Sweetens the batter and contributes to its tender texture.
- Substitution: While granulated sugar is standard, a portion could be replaced with brown sugar for a subtle caramel note, though it might affect the “white” appearance slightly.
- Salt (½ teaspoon): A crucial ingredient that balances the sweetness and enhances all the other flavors.
- Water (1 cup): Helps bind the dry ingredients and create the right batter consistency.
- Substitution: Milk (whole or 2%) can be used for a richer flavor.
- Sour Cream (1 cup): This is the secret to incredibly moist and tender cupcakes. Its acidity also helps activate the leavening agents.
- Substitution: Plain Greek yogurt or buttermilk can be used as alternatives for similar moisture and tang.
- Egg Whites (4, room temperature): Contribute to the light, fluffy texture and white color of the cupcakes. Room temperature egg whites incorporate better into the batter.
- Tip: Separate eggs when cold, then let the whites come to room temperature for about 30 minutes.
- Heavy Whipping Cream (⅓ cup): Adds richness and a delicate crumb to the cupcakes.
- Substitution: Whole milk can be used, but the texture might be slightly less rich.
- Vanilla Extract (1 teaspoon): A classic flavor enhancer that complements the white chocolate beautifully.
- Substitution: Almond extract or a clear vanilla extract could be used for a slightly different flavor profile or to maintain a pure white color.
- White Chocolate (⅓ cup, chopped into small pieces): Folded into the batter for pockets of creamy white chocolate goodness in every bite.
- Tip: Use high-quality white chocolate baking bars or chips for the best flavor.
For the Frosting: Creamy White Chocolate Buttercream
- Unsalted Butter (1 cup, room temperature): The base of a rich, flavorful buttercream. Room temperature butter creams smoothly.
- Shortening (1 cup): Essential for a stable, pipeable frosting that holds its shape and can withstand slightly warmer temperatures. It also contributes to the snowy white color.
- Substitution: All butter can be used, but the frosting will be less stable and may soften quicker.
- Powdered Sugar (5 cups): Provides the bulk and sweetness of the frosting. Sifting is recommended for a super smooth consistency.
- Heavy Whipping Cream (5 tablespoons): Adjusts the consistency of the frosting, making it smooth and spreadable or pipeable.
- Tip: Add cream gradually, one tablespoon at a time, until your desired consistency is reached.
- Peppermint Extract (1-2 teaspoons): Infuses the buttercream with a refreshing, festive peppermint flavor.
- Substitution: Vanilla extract can be used for a classic flavor, or omit for a pure white chocolate taste.
Toppings: The Festive Finish
- White Chocolate (shaved): Creates a beautiful “snowy” effect on top of the frosted cupcakes, adding elegance and texture.
- Soft Candy Cane Sticks (broken in half): Provides a pop of red and white color, a delightful crunch, and a burst of peppermint flavor.
- Substitution: Crushed peppermint candies or small candy cane pieces work just as well.
- Gingerbread Candy Characters: Adds a whimsical and thematic touch, bringing the North Pole characters to life on your cupcakes.
- Substitution: Small gingerbread cookies, royal icing decorations, or even edible sugar characters like polar bears or elves can be used.
- Pearl Sprinkles: Tiny edible pearls add a magical shimmer, enhancing the “snowy” and festive appearance.
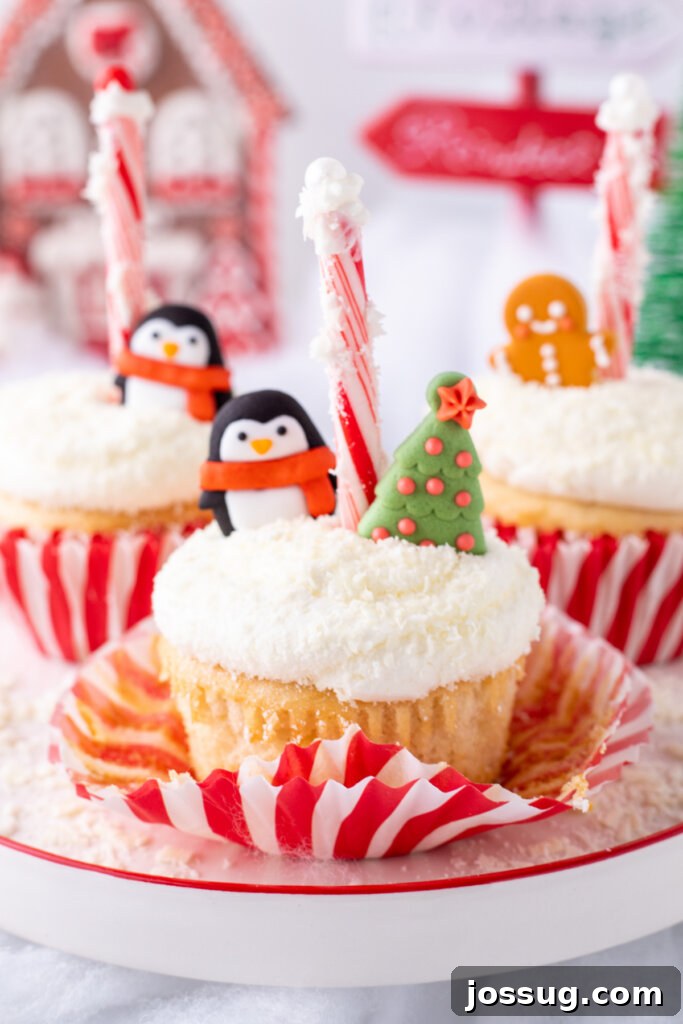
Mastering the Art: A Step-by-Step Guide to North Pole Cupcakes
Creating these enchanting North Pole Cupcakes is a fun and rewarding process. Follow these detailed steps to ensure perfectly baked and beautifully decorated treats.
- Prepare Your Workspace: Begin by preheating your oven to 325°F (160°C). Line two standard 12-cup muffin pans with festive cupcake liners. Having everything ready before you start mixing will make the process much smoother.
- Combine Dry Ingredients: In a large mixing bowl, thoroughly whisk together the white cake mix, all-purpose flour, granulated sugar, and salt. Whisking ensures that all dry ingredients are evenly distributed, preventing lumps and promoting uniform baking.
- Incorporate Wet Ingredients: Gradually add the water, sour cream, egg whites (at room temperature), vegetable oil (if using, not listed in original ingredient list, but implied by typical box mix instructions, if not, omit), heavy cream, and vanilla extract to the dry mixture. Mix on low speed with an electric mixer until just combined. Be careful not to overmix the batter, as this can lead to tough cupcakes. A few small lumps are acceptable.
- Fold in White Chocolate: Gently fold the chopped white chocolate pieces into the cupcake batter using a spatula. This ensures pockets of deliciousness in every bite without overworking the batter.
- Fill Cupcake Liners: Divide the batter evenly among the prepared cupcake liners, filling each about two-thirds full. This allows room for the cupcakes to rise without overflowing.
- Bake to Perfection: Bake in the preheated oven for approximately 22 minutes, or until a wooden skewer or toothpick inserted into the center of a cupcake comes out clean. Baking times can vary, so keep an eye on them.
- Cool Completely: Once baked, remove the muffin pans from the oven and let the cupcakes cool in the pans for a few minutes before transferring them to a wire cooling rack. It is crucial for the cupcakes to cool completely before frosting; otherwise, your beautiful buttercream will melt.
- Prepare the White Chocolate Buttercream Frosting: While the cupcakes are cooling, begin preparing your frosting. In a large bowl, using an electric hand mixer, cream together the softened unsalted butter and shortening until the mixture is smooth and light, about 2 minutes. This incorporates air and creates a fluffy base.
- Add Liquids and Flavor: Beat in the milk (or heavy cream as per ingredient list, which gives richer result) and peppermint extract until well combined.
- Gradually Add Powdered Sugar: Slowly add the powdered sugar, one cup at a time, mixing on low speed until each addition is incorporated. Once all sugar is added, increase the speed and beat until the frosting is light and fluffy, about 2-3 minutes. If the frosting is too thick, add more heavy cream, one teaspoon at a time, until you achieve a smooth, pipeable consistency. If it’s too thin, add a little more powdered sugar.
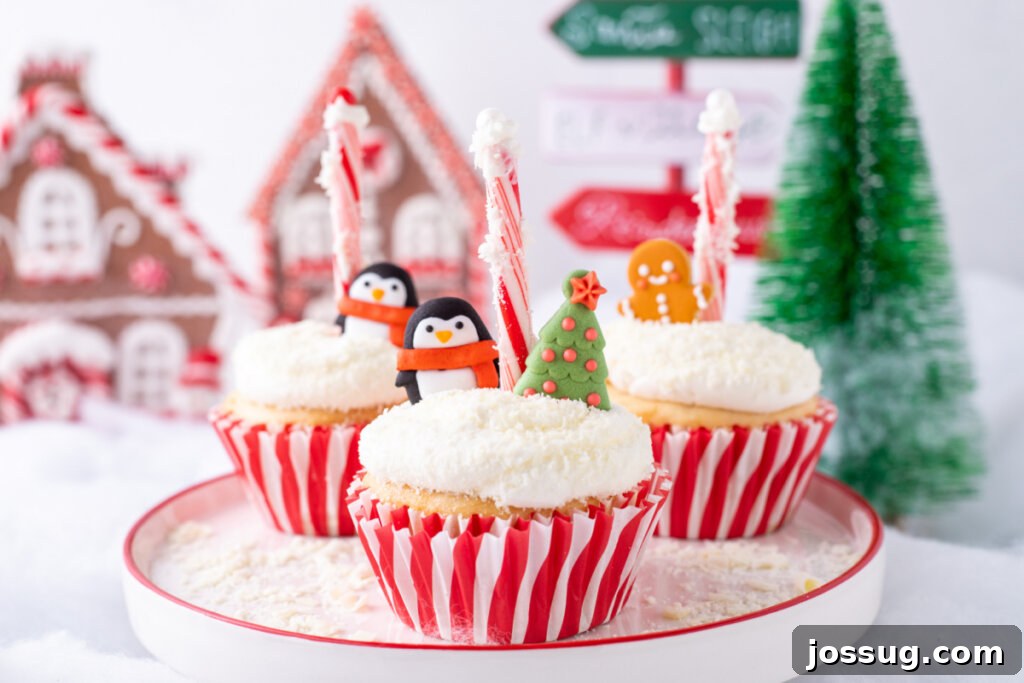
- Frost Your Cupcakes: Transfer the prepared frosting to a piping bag fitted with your favorite decorative tip (a large round or star tip works wonderfully for a snowy effect). Pipe a generous swirl of frosting onto each cooled cupcake, creating a lovely mound of “snow.”
- Decorate with Shaved White Chocolate: To achieve a truly magical snowy look, gently dip the frosted top of each cupcake into a shallow bowl of shaved white chocolate, or sprinkle the shavings generously over the frosting.
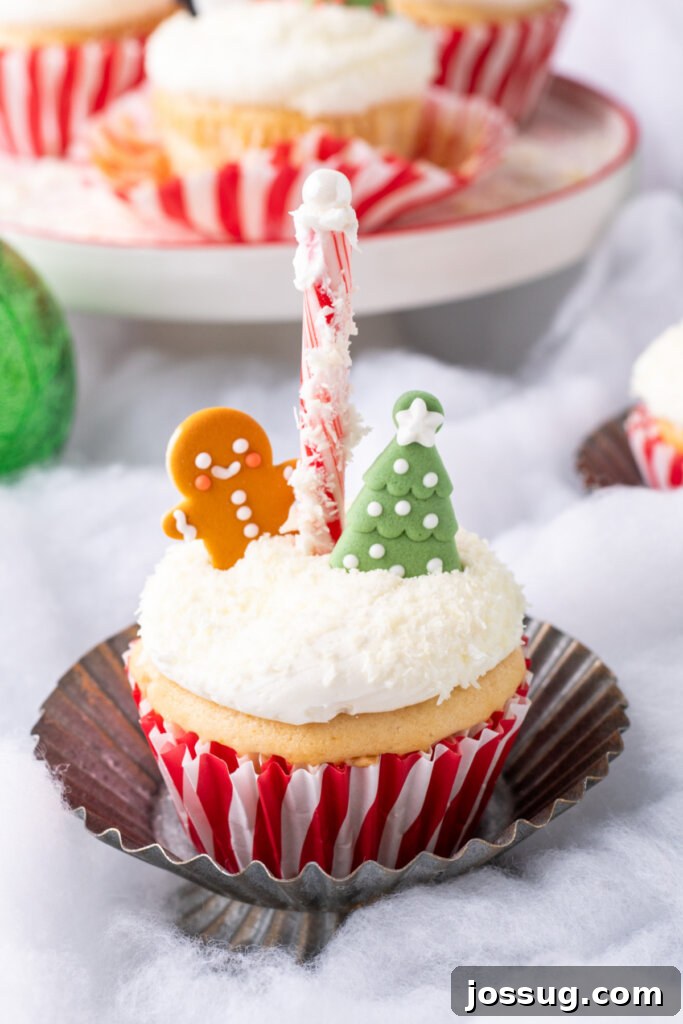
- Add Festive Candy Canes: Take a broken candy cane stick and gently press it into the center of the frosted cupcake, as if it’s a North Pole marker. You can also place a few small pieces around the base.
- Place Gingerbread Characters: Nest a gingerbread candy character (or other festive candy) into the “snow” on top of each cupcake, positioning it next to the candy cane.
- Finish with Pearl Sprinkles: For a final touch of enchantment, scatter a few pearl sprinkles over the cupcake and around the base of your candy cane and character. This adds a beautiful shimmer, completing your winter wonderland creation.
North Pole Cupcakes: Your Questions Answered
Can I customize North Pole Cupcakes?
Absolutely! These cupcakes are a wonderful canvas for your creative expression. Feel free to experiment with different edible decorations like edible glitter, different colored sprinkles, or even small sugar snowflakes. You could also try other extract flavors in the frosting, like almond or coconut, or add food coloring to create vibrant holiday hues if you wish to diverge from the snowy white theme.
How long do North Pole Cupcakes stay fresh?
To maintain optimal freshness, North Pole Cupcakes can typically be stored in an airtight container at room temperature for up to 2-3 days. If you need them to last longer, refrigerate them in an airtight container for up to a week. For extended storage, you can freeze undecorated cupcakes for a few months. Wrap them individually in plastic wrap and then place them in a freezer-safe bag or container. Thaw frozen cupcakes in the refrigerator overnight before decorating and serving.
Can I make North Pole Cupcakes in advance?
Yes, making these cupcakes in advance is a fantastic way to reduce holiday stress. You can bake the cupcakes up to 2-3 days ahead of time and store them in an airtight container. The white chocolate buttercream can also be made 2-3 days in advance and stored in the refrigerator; just let it come to room temperature and re-whip it with an electric mixer until fluffy before frosting. Decorate them closer to your event for the freshest look.
What occasions are North Pole Cupcakes suitable for besides Christmas?
While inherently festive for Christmas, these cupcakes are surprisingly versatile for various winter-themed celebrations. They are an excellent choice for New Year’s Eve parties, winter birthdays, cozy winter gatherings, or even as a delightful treat on a chilly afternoon. Their charming aesthetics and delicious flavor profile make them suitable for any event where you want to add a touch of winter magic and sweetness.
Are there any tips for decorating North Pole Cupcakes for a professional look?
For a professional finish, invest in quality piping bags and a few different pastry tips (like a large star tip or a round tip). Practice your piping technique on a piece of parchment paper beforehand to get comfortable. Ensure your frosting has a consistent, smooth texture, free of lumps. Using a small offset spatula to smooth the frosting before adding shavings can also give a polished base. Edible glitter or luster dust can add a subtle, elegant sparkle.
Are there any creative presentation ideas for North Pole Cupcakes?
To truly elevate your display, arrange your North Pole Cupcakes on a tiered cupcake stand or a large festive platter. Consider adding some faux snow, small pinecones, or battery-operated fairy lights around the base of the stand for an extra enchanting effect. Individual cupcake boxes tied with festive ribbons make charming party favors or gifts. A backdrop featuring winter scenery or twinkling lights can also enhance the overall presentation, creating a beautiful dessert tablescape.
Can I use a different cake flavor?
Certainly! While a white cake mix forms the classic “snowy” base for our North Pole theme, you can definitely experiment with other flavors. A chocolate cake mix would be a decadent choice, offering a “dark winter night” contrast to the white frosting. Red velvet or even a spiced cake mix could also be delicious and festive alternatives. Just ensure the mix yields a similar number of cupcakes.
What if my frosting is too thin or too thick?
The consistency of your buttercream is crucial for perfect piping. If your frosting is too thin, gradually add more powdered sugar, one tablespoon at a time, mixing well after each addition until it reaches your desired stiffness. If it’s too thick, add heavy cream (or milk), one teaspoon at a time, until it becomes smooth and pipeable. Temperature also plays a role; if it’s too warm, chill it briefly in the refrigerator before re-whipping.
Other Festive Recipes You May Enjoy
If you loved these North Pole Cupcakes, here are more delightful recipes to explore for every season and occasion:
- Carrot Cupcakes with Cream Cheese Frosting
- Oreo Cheesecake Cupcakes
- Lemon Cupcakes with Raspberry Buttercream Frosting
- Pumpkin Cupcakes with Pumpkin Spice Cream Cheese Frosting
- Red Velvet Cupcakes with OREO Cream Cheese Frosting
North Pole Cupcakes
By Jamie Sherman
Create festive North Pole Cupcakes with our easy recipe! White chocolate, candy canes, and gingerbread characters make them a holiday delight.
Servings: 24 cupcakes
Prep Time: 30 mins
Cook Time: 22 mins
Additional Time: 1 hr (for cooling/frosting prep)
Total Time: 1 hr 52 mins
Rate
Equipment
- Sprinkles – Confect Sprinkles for Cakes & Cupcakes Decoration Assorted pack of 5 White Princess Disco Ball Sprinkles Mix White Pearl Dragees – 3.5 Oz
- Wilton 12 Count Christmas Gingerbread Icing Decorations
- Wilton Christmas Penguin Royal Icing Decorations, 12 Count
- Bob’s Sweet Stripes Soft Peppermint Candy (Pack of 2)
- Box Grater, Stainless Steel with 4 Sides
- Piping bags
- Measuring cups and spoons
- Hand mixer
- Mixing bowl
- Wire cooling rack
- Cupcake liners
- 12-cup muffin pan
Ingredients
Cupcake Ingredients
- 1 box white cake mix, 15.25 oz.
- 1 cup all-purpose flour
- 1 cup granulated sugar
- ½ teaspoon salt
- 1 cup water
- 1 cup sour cream
- 4 egg whites, room temperature
- ⅓ cup heavy whipping cream
- 1 teaspoon vanilla extract
- ⅓ cup white chocolate, chopped into small pieces
White Chocolate Buttercream Frosting
- 1 cup unsalted butter, room temperature
- 1 cup shortening
- 5 cups powdered sugar
- 5 tablespoons heavy whipping cream
- 1 – 2 teaspoons peppermint extract
Topping
- White chocolate, shaved
- Soft candy cane sticks, broken in half
- Gingerbread candy characters
- Pearl sprinkles
Instructions
- Preheat the oven to 325°F. Line muffin pans with cupcake liners and set them aside.
- In a large mixing bowl, whisk together the cake mix, all-purpose flour, granulated sugar, and salt.
- Slowly add in water, sour cream, egg whites, vegetable oil (if applicable), heavy cream, and vanilla extract. Mix until everything has been combined.
- Fold chopped white chocolate into the batter.
- Add batter into the lined cupcake pan, filling 2/3 full.
- Bake in preheated oven for 22 minutes or until the center is baked.
- Remove from the oven and allow to cool completely on a cooling rack.
- While the cupcakes are cooling, prepare the frosting. Mix butter and shortening until smooth, about 2 minutes, with an electric hand mixer.
- Add in milk (or heavy cream) and vanilla extract.
- Slowly add in the powdered sugar, a little at a time. If the frosting is too thick, add one teaspoon of heavy cream until you have reached the texture you are looking for. Mix frosting for another 2 minutes.
- Add frosting to a piping bag and pipe cupcakes.
- Dip or sprinkle cupcakes with the shaved white chocolate. This will give you a snowy look.
- Place icing on the candy cane and a few on the side. Sprinkle shaved white chocolate on the candy cane and place it in the center of the cupcake.
- Add a pearl sprinkle to the top and a candy character in the “snow.”
Notes
- North Pole Cupcakes are a canvas for your creativity. You can customize them by adding different decorations, experimenting with frosting colors, or even trying out alternative flavors to suit your preferences.
- To keep your leftover North Pole Cupcakes fresh, store them in an airtight container at room temperature for a day or two. For longer storage, refrigerate them in an airtight container or freeze them individually wrapped. Be sure to thaw frozen cupcakes before serving.
Nutrition
Serving: 1 cupcake
Calories: 426 kcal
Carbohydrates: 57 g
Protein: 3 g
Fat: 22 g
Saturated Fat: 10 g
Polyunsaturated Fat: 3 g
Monounsaturated Fat: 7 g
Trans Fat: 2 g
Cholesterol: 34 mg
Sodium: 215 mg
Potassium: 54 mg
Fiber: 0.4 g
Sugar: 44 g
Vitamin A: 391 IU
Vitamin C: 0.1 mg
Calcium: 69 mg
Iron: 1 mg
Nutrition information is automatically calculated, so should only be used as an approximation.
Like this recipe? We’d love to hear from you! Leave a comment or rate this recipe below to share your experience with other bakers!