
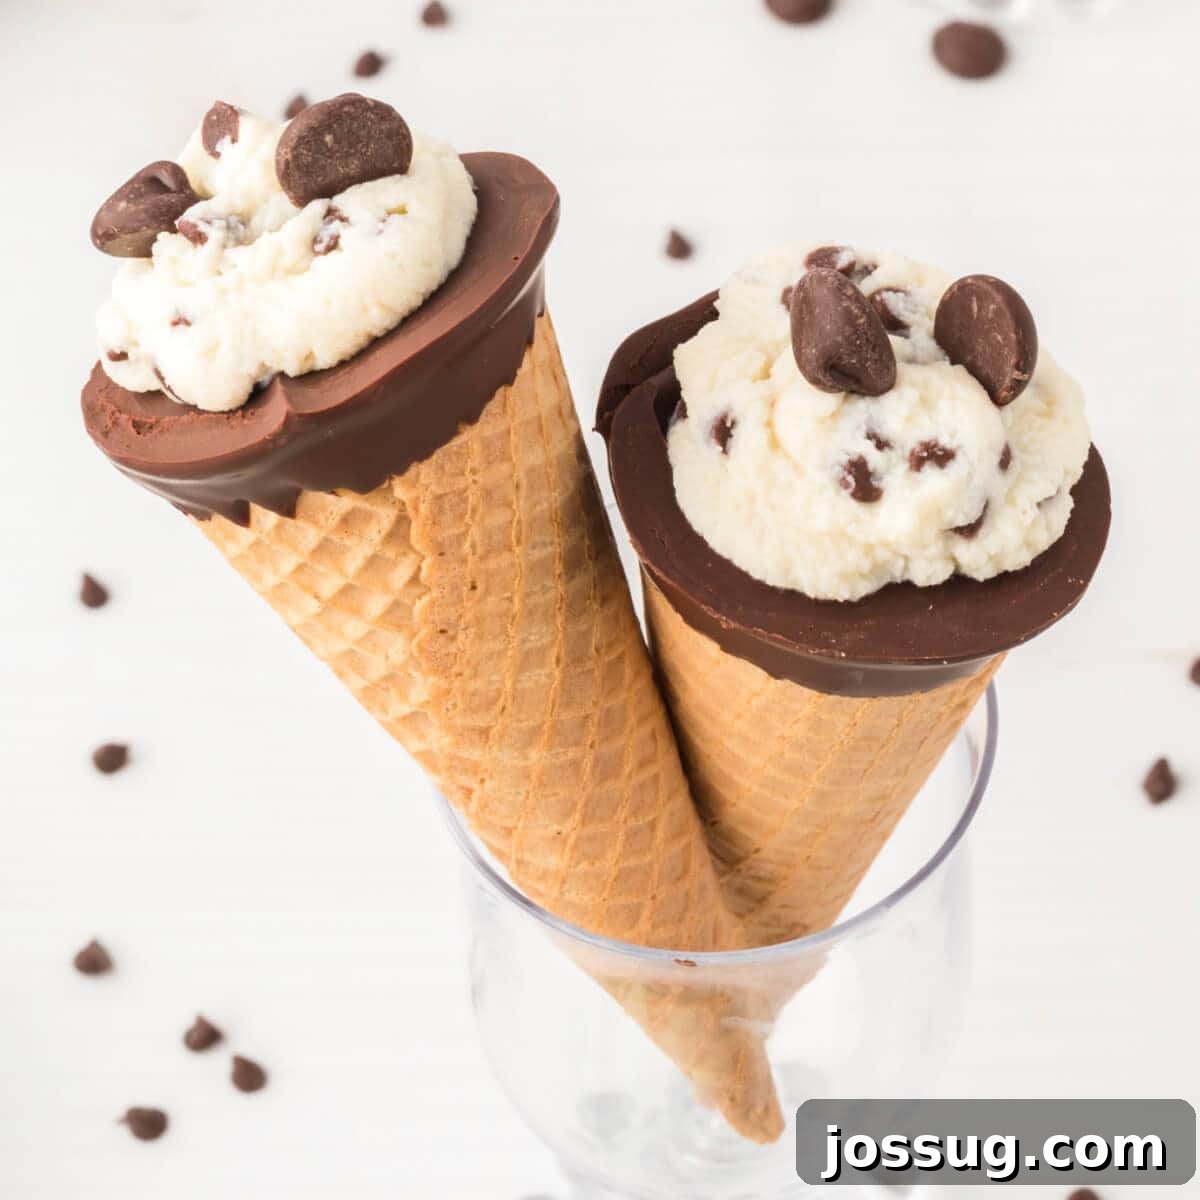
Craving the sweet, creamy delight of traditional cannoli but want to skip the laborious process of frying delicate shells? Look no further! These incredibly easy-to-make **Cannoli Cones** offer all the flavor and charm of authentic Italian cannoli with a fraction of the effort. Imagine crisp sugar cones, generously filled with a velvety, sweetened ricotta cheese mixture, often studded with mini chocolate chips and dipped in rich melted chocolate. It’s a dessert revelation that brings joy without the fuss, perfect for home cooks seeking a delicious shortcut to a beloved classic.

Effortless Cannoli Cones: Your New Favorite Dessert Shortcut
Cannoli holds a special place in my heart; it’s a dessert I find myself craving often, a true taste of Italian culinary tradition. My time living in Phoenix, surrounded by an incredible array of diverse cuisines, led me to discover some truly memorable culinary gems. Among them was an exceptional Italian eatery in the East Valley that became a fast favorite. A quick recommendation for fellow dessert enthusiasts: if you ever find yourself in the Phoenix area, DeFalco’s Italian Deli & Grocery is a must-visit. And when you go, you absolutely have to try their cannoli – they are, without a doubt, my absolute favorite! Their perfectly crisp shells and rich, sweet filling are simply divine.
While the dream of crafting homemade, authentic cannoli shells from scratch remains on my culinary bucket list, for now, I’m perfectly happy embracing clever shortcuts that don’t compromise on flavor. This is precisely where the brilliance of **Cannoli Cones** shines through. This recipe ingeniously replaces the traditional fried pastry shell, which requires specific equipment and a bit of culinary bravery, with a readily available sugar cone. The result? A delightful dessert that captures the very essence of cannoli. The sugar cone provides that familiar sweet crunch that perfectly complements the creamy filling, making it taste remarkably similar to the real deal without any of the deep-frying hassle. The inherent sweetness and crisp texture of the sugar cone create an instant, ready-made, and utterly delicious vessel for our luscious ricotta cream. It’s a game-changer for anyone who loves cannoli but wants a quicker, simpler option.
Beyond its speed, affordability, and incredibly simple preparation, this recipe’s versatility is truly one of its greatest assets. Thinking about serving a unique and impressive treat at a birthday party for any age group? Planning a special, memorable dessert for an anniversary dinner? Need a festive and easy-to-manage sweet for large holiday gatherings like Thanksgiving or Christmas? Or perhaps just a simple, delightful ending to a casual summer picnic or a spontaneous “just because” moment? **Cannoli Cones** fit seamlessly into any occasion. Their charming presentation and irresistible flavor make them remarkably adaptable, a fantastic choice for virtually any holiday celebration or everyday indulgence. (It even crossed my mind how fun and unexpected it would be to hand these out for Halloween – imagine the happy faces of trick-or-treaters receiving such a unique delight!)
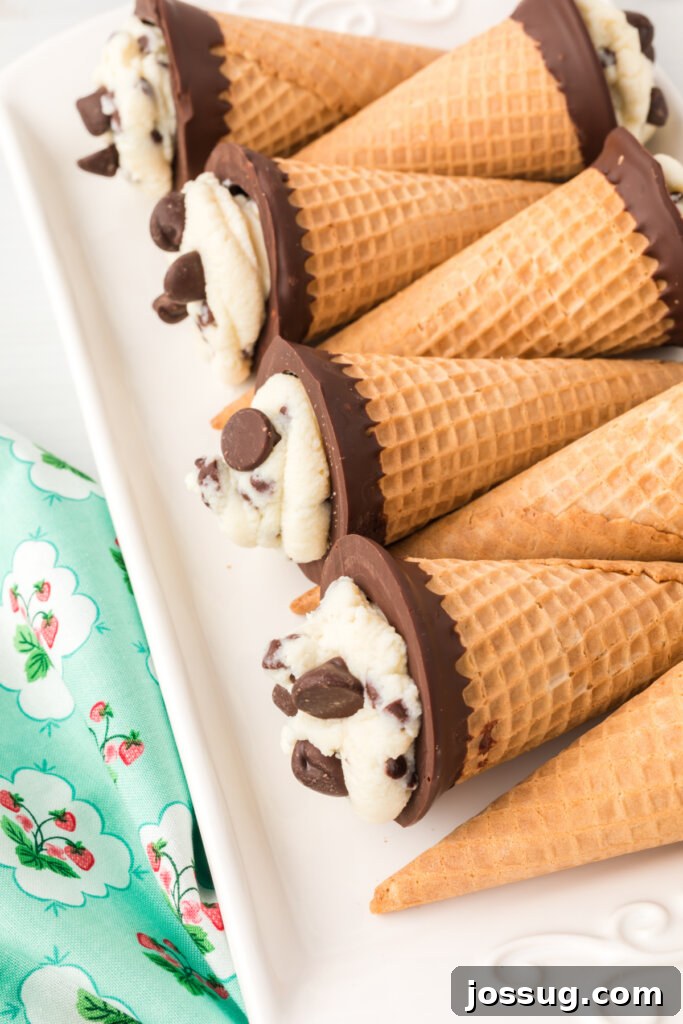
Customizing Your Cannoli Cones: Delicious Variations and Flavor Boosts
One of the greatest joys of making **Cannoli Cones** is the incredible ease with which you can customize them to suit your personal taste preferences, seasonal availability, or the theme of any special occasion. While the classic ricotta and mini chocolate chip filling is undeniably delicious and a beloved favorite, don’t hesitate to experiment with different additions to elevate the flavor profile and add textural excitement.
For instance, I sometimes love to add a bright, zesty note that cuts through the richness of the ricotta. This can be achieved by grating fresh orange or lemon peel directly into the creamy mixture. The vibrant citrus oils awaken the palate and introduce a sophisticated, aromatic twist that perfectly complements the sweetness. It’s a subtle yet impactful way to enhance the classic flavor.
For those who prefer a delightful nutty crunch, swapping out the mini chocolate chips for finely chopped pistachios is an absolutely fantastic option. The vivid green color of the pistachios adds visual appeal, while their distinct, slightly salty flavor and satisfying crunch create an elegant and incredibly satisfying contrast with the sweet, smooth ricotta. Better yet, why limit yourself? Combine both! A generous mix of mini chocolate chips and pistachios offers the best of both worlds – chocolatey sweetness mingling with a delightful nutty texture. Seriously, once you try these simple variations, you’ll be amazed at how much you can do with this adaptable dessert base. Don’t be afraid to get creative and make these **Cannoli Cones** uniquely yours; you’ll be so glad you ventured beyond the traditional!
Beyond these personal favorites, the possibilities for customization are virtually endless, allowing you to tailor your **Cannoli Cones** to any craving or celebration. Consider incorporating other finely chopped nuts like pecans, almonds, or walnuts for different textural dimensions and earthy notes. Each type of nut brings its own unique character to the filling. You could also experiment with various types of chocolate chips – milk chocolate, white chocolate, or even butterscotch chips could make for unique and exciting toppings or be mixed directly into the ricotta filling. For a touch of fruity elegance and a pop of color, top your finished **Cannoli Cones** with fresh berries such as plump raspberries, thinly sliced strawberries, or a sprinkle of finely diced candied orange peel. And if you’re feeling adventurous and want to introduce a cozy warmth, a hint of aromatic spice, like a pinch of ground cinnamon, nutmeg, or even a tiny amount of cardamom, can add wonderful depth and complexity to the ricotta mixture. For themed parties, children’s birthdays, or festive holidays, a generous scattering of colorful sprinkles can instantly transform these simple treats into eye-catching, celebratory delights. While these might not be “authentic” cannoli in the strictest sense, they are undeniably delicious, wonderfully convenient, and truly hit the spot every single time. I genuinely hope you enjoy the process of creating and the pleasure of savoring these delightful **Cannoli Cones** as much as I do!
Cannoli Cones: Essential Ingredients & Smart Substitutions
Crafting these delightful **Cannoli Cones** requires just a handful of simple, readily available ingredients, most of which you might already have in your pantry. The key to their success lies not only in the quality of the ingredients but also in some specific preparation steps, especially for the ricotta cheese. Here’s a detailed look at what you’ll need to create this amazing dessert:
Core Ingredients for Perfect Cannoli Cones
- Ricotta Cheese (Full-Fat): This is the heart of your cannoli filling, providing its signature creamy texture and mild, milky flavor. It is absolutely crucial to opt for full-fat (whole milk) ricotta, as it yields the richest, most luxurious filling. Low-fat or part-skim ricotta often contains more water and will result in a less satisfying, potentially grainy filling. Even more vital is the step of thoroughly draining the ricotta with a cheesecloth. This meticulous process removes excess moisture, preventing your cones from becoming soggy and ensuring a thick, decadent, and pipeable filling that holds its shape beautifully. Don’t skip this step for the best results!
- Vanilla Extract: A dessert staple, high-quality vanilla extract provides a warm, sweet, and aromatic foundation for the ricotta filling. It enhances all the other flavors in the mixture, adding a layer of depth and traditional cannoli essence.
- Powdered Sugar (Confectioners’ Sugar): This finely milled sugar is essential for achieving a smooth, lump-free filling. Unlike granulated sugar, powdered sugar dissolves instantly into the ricotta, creating a silky texture and perfectly balanced sweetness without any grittiness.
- Sugar Ice Cream Cones: These sturdy and delightfully sweet cones are the brilliant shortcut that transforms this recipe into **Cannoli Cones**. They replace the laborious traditional fried cannoli shell, offering an instant, convenient, and delicious edible vessel for your creamy filling. Their crispness provides a fantastic textural contrast to the soft ricotta.
- Dark Chocolate Chips (for dipping): Melting dark chocolate chips to dip the rim of your cones serves multiple purposes: it adds an extra layer of sweetness, provides a delightful crunchy texture with every bite, and creates a visually appealing, professional-looking finish. While dark chocolate is recommended for its rich flavor, you can certainly experiment with semi-sweet or even milk chocolate if you prefer a milder, sweeter chocolate note.
- Mini Semisweet Chocolate Chips (for filling): These are a non-negotiable addition to the cannoli filling itself. Their small size ensures even distribution throughout the creamy ricotta, providing those iconic, satisfying bursts of chocolatey goodness that are a hallmark of classic cannoli. They add a perfect counterpoint to the sweetness of the ricotta.
- Additional Decorations: A few extra dark chocolate chips, finely chopped pistachios, or even some colorful sprinkles can be used to garnish the top of your filled cones, adding extra flair and visual appeal.
Cannoli Cones: Frequently Asked Questions
One of the greatest advantages of this recipe is its efficiency! Following these straightforward instructions, you can expect to whip up a batch of delicious **Cannoli Cones** in approximately 30 minutes. This includes all the essential steps: melting the chocolate for dipping, preparing the rich ricotta filling, and the final assembly of piping the cream into the cones. It’s truly a quick and gratifying dessert that’s perfect for when you need a sweet treat in a flash.
This recipe is designed to yield a generous batch of 10 individual **Cannoli Cones**. This quantity is often perfect for a family dessert, a small gathering of friends, or for ensuring everyone gets to enjoy a couple of these delightful treats without having to make multiple batches. They are quite satisfying, so 10 cones usually go a long way! Yum!
Absolutely, I cannot stress this step enough – it is paramount for the success of your **Cannoli Cones**! Draining the ricotta cheese is a crucial process that removes excess moisture. If you skip this vital step, the ricotta will retain too much water, which will quickly leach into the delicate sugar cones, causing them to become unpleasantly soggy and soft. Draining ensures a firm, creamy, and flavorful filling, maintaining the perfect textural contrast between the crisp cone and the smooth ricotta. Use a cheesecloth-lined sieve over a bowl and let it drain in the refrigerator for at least 30 minutes, or even a few hours, for the best results.
Unfortunately, I strongly advise against freezing the cannoli filling. In my extensive experience, ricotta-based fillings tend not to freeze and thaw well. The delicate texture of the ricotta can suffer significantly, leading to separation of the liquid and solids, and ultimately a grainy or watery consistency that detracts from the desired creaminess and luxurious mouthfeel. For optimal taste and texture, it’s always best to prepare the filling fresh just before assembly.
While I don’t recommend assembling the entire **Cannoli Cones** too far in advance (as the sugar cones can soften quite quickly once filled), you can certainly prepare key components ahead of time. The ricotta filling, for instance, can be made up to 24 hours in advance and stored perfectly in an airtight container in the refrigerator. You can also melt and dip your cones in chocolate hours before. Then, simply fill the chocolate-dipped cones right before serving to maintain their delightful crispness. Aim to serve them within 5-15 minutes of filling for the very best experience, ensuring the cones remain wonderfully crunchy.
Absolutely! One of the best aspects of **Cannoli Cones** is their adaptability. Here are some of my top recommendations and other fantastic ideas to customize your treats:
- Brighten with Citrus: For a more vibrant and aromatic flavor profile, incorporate finely grated orange or lemon peel into the creamy ricotta mixture.
- Nutty Crunch: Elevate the texture and flavor by swapping out the mini chocolate chips for finely chopped pistachios. Their unique taste and color are superb.
- The Best of Both: For the ultimate indulgence, combine both mini chocolate chips AND pistachios in your filling!
- Other Favorite Nuts: Don’t limit yourself to pistachios! Try throwing in any of your favorite chopped nuts into the mix, such as pecans, walnuts, or almonds, for varied textures and earthy notes.
- Chocolate Choices: Experiment with different kinds of chocolate chips (milk chocolate, white chocolate, or even butterscotch chips) as a topping, a dip for the cone, or mixed directly into the filling.
- Fresh Fruit Toppings: Top them with fresh, juicy fruits like raspberries, sliced strawberries, or even a few blueberries for a burst of natural sweetness and visual appeal.
- Warm Spices: For a comforting and nuanced flavor, put a pinch of warm spices, like cinnamon, nutmeg, or a hint of allspice, into the cannoli mix.
- Themed Treats: For holidays or parties, grab your favorite colorful sprinkles to create a fun, festive, and themed treat that will delight guests of all ages!

Other Delightful Dessert Recipes You May Enjoy
- Waffle Cherry Brownie Poke Cake: A Sweet Indulgence for Any Occasion
- Mini Cannoli Cups: Bite-Sized Italian Perfection Without the Fuss
- Ice Cream Cone Cake Pops: Fun and Festive Treats for Parties
- Homemade Waffle Cones: For the Ultimate Ice Cream Experience at Home
- Homemade Snow Cone Syrup: Refreshing Summer Fun Made Easy

Quick & Easy Cannoli Cones Recipe
Skip the traditional cannoli frying and opt for these incredibly easy, no-fuss Cannoli Cones. They feature simple sugar cones filled with a rich, sweet, and creamy ricotta filling, perfect for a quick yet impressive dessert that everyone will love.
Pin Recipe
Rate This Recipe
Print Recipe
Equipment Needed
- Piping Tip (large star tip recommended)
- Piping Bags
- Baking Sheets
- Parchment Paper
- Measuring Cups and Spoons
Ingredients
- ⅔ cup mini semisweet chocolate chips
- 10 sugar ice cream cones
- 1 pound full-fat ricotta cheese, thoroughly drained with a cheesecloth
- ¾ cup dark chocolate chips (for dipping the cones)
- ½ cup powdered sugar
- 1 teaspoon vanilla extract
- Additional dark chocolate chips or chopped pistachios, for optional decoration
Instructions
- Prepare your cones: Gently melt the dark chocolate chips. This can be done in a microwave-safe bowl (heat in 30-second intervals, stirring after each, until smooth) or over a double boiler. Once melted and smooth, dip the wide opening of each sugar cone into the melted chocolate. Allow any excess chocolate to drip off, then place the dipped cones facedown on a parchment paper-lined baking sheet. You can place them in the refrigerator for 5-10 minutes to speed up the hardening process.
- Make the cannoli filling: In a medium-sized mixing bowl, combine the thoroughly drained full-fat ricotta cheese, powdered sugar, and vanilla extract. Using a hand mixer on medium speed, beat the ingredients together until the mixture is light, creamy, and well combined. Ensure there are no visible lumps of ricotta. Once smooth, gently fold in the ¾ cup of mini chocolate chips until they are evenly distributed throughout the luscious filling.
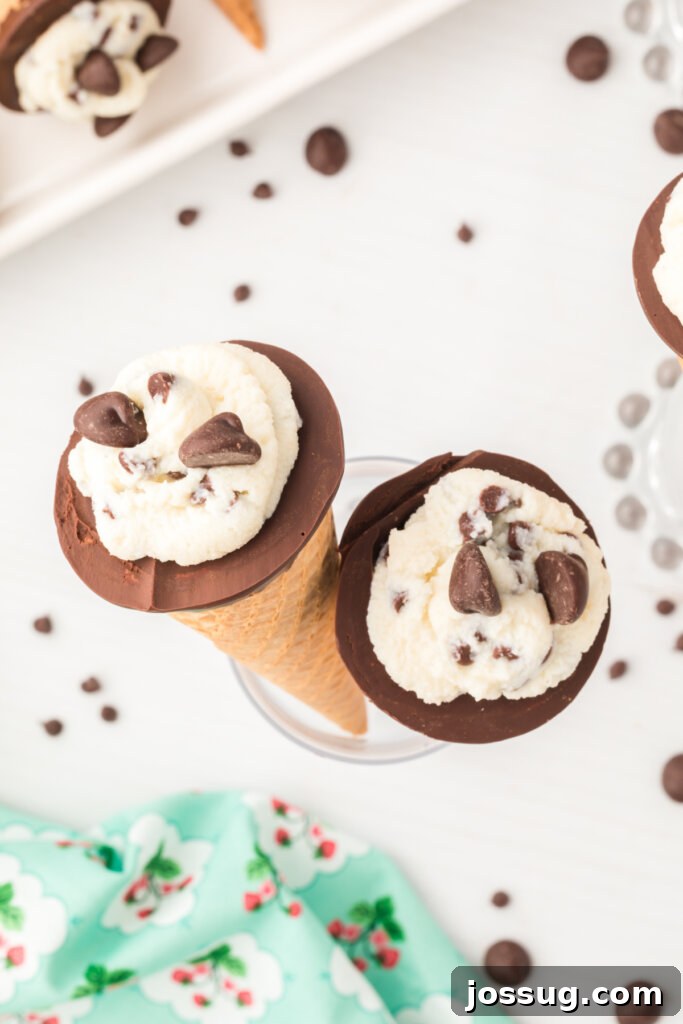
- Fill and decorate: Transfer the creamy cannoli filling to a piping bag that has been fitted with a large star tip or a round tip. Carefully pipe the cannoli mixture into each of the prepared sugar cones, filling them generously. For an extra touch of elegance and flavor, add additional mini chocolate chips, finely chopped pistachios, or a sprinkle of citrus zest on top of the filling for decoration.
- Serve immediately: For the best texture and to ensure the cones remain delightfully crisp, serve your exquisite **Cannoli Cones** within 5-15 minutes of filling them. Enjoy the perfect blend of crunchy cone and smooth, sweet ricotta filling!
Chef’s Notes & Creative Swaps
Here are some of my favorite ways to personalize your **Cannoli Cones** and some additional ideas I know you’ll love:
- Zesty Citrus Flavor: For a bright, aromatic twist that perfectly complements the ricotta, grate fresh orange or lemon peel directly into the mixture.
- Pistachio Perfection: Elevate the texture and flavor by swapping the mini chocolate chips for finely chopped pistachios, or for a delightful combination, use both!
- Other Nutty Additions: Feel free to introduce any of your favorite chopped nuts, such as pecans, walnuts, or almonds, into the filling for varied textures and earthy notes.
- Diverse Chocolate Choices: Experiment with different types of chocolate chips – milk chocolate, white chocolate, or even butterscotch chips – for dipping the cones, mixing into the filling, or sprinkling as a topping.
- Fresh Fruit Toppings: Garnish your Cannoli Cones with fresh berries like raspberries or sliced strawberries for a burst of natural sweetness and vibrant color.
- Warm Spice Infusion: For a comforting and nuanced flavor profile, add a pinch of warm spices such as ground cinnamon, nutmeg, or a hint of cardamom to the ricotta mixture.
- Festive Sprinkles: For birthdays, holidays, or any celebratory occasion, top your cones with colorful sprinkles to create a fun and eye-catching themed treat!
Nutrition Information
Serving: 1 cone, Calories: 284kcal, Carbohydrates: 26g, Protein: 7g, Fat: 16g,
Saturated Fat: 11g, Polyunsaturated Fat: 1g, Monounsaturated Fat: 4g, Trans Fat: 0.01g,
Cholesterol: 24mg, Sodium: 65mg, Potassium: 228mg, Fiber: 2g, Sugar: 17g,
Vitamin A: 211IU, Vitamin C: 0.1mg, Calcium: 146mg, Iron: 1mg
Nutrition information is automatically calculated and should only be used as an approximation. Individual results may vary based on specific ingredients used and preparation methods.
Enjoyed this delightful recipe? We’d love to hear from you! Please leave a comment below and share your thoughts, tips, or variations!
Originally published on September 4, 2018. This content was comprehensively updated on July 19, 2022, with enhanced details, clarity, and additional tips to improve your baking experience.