
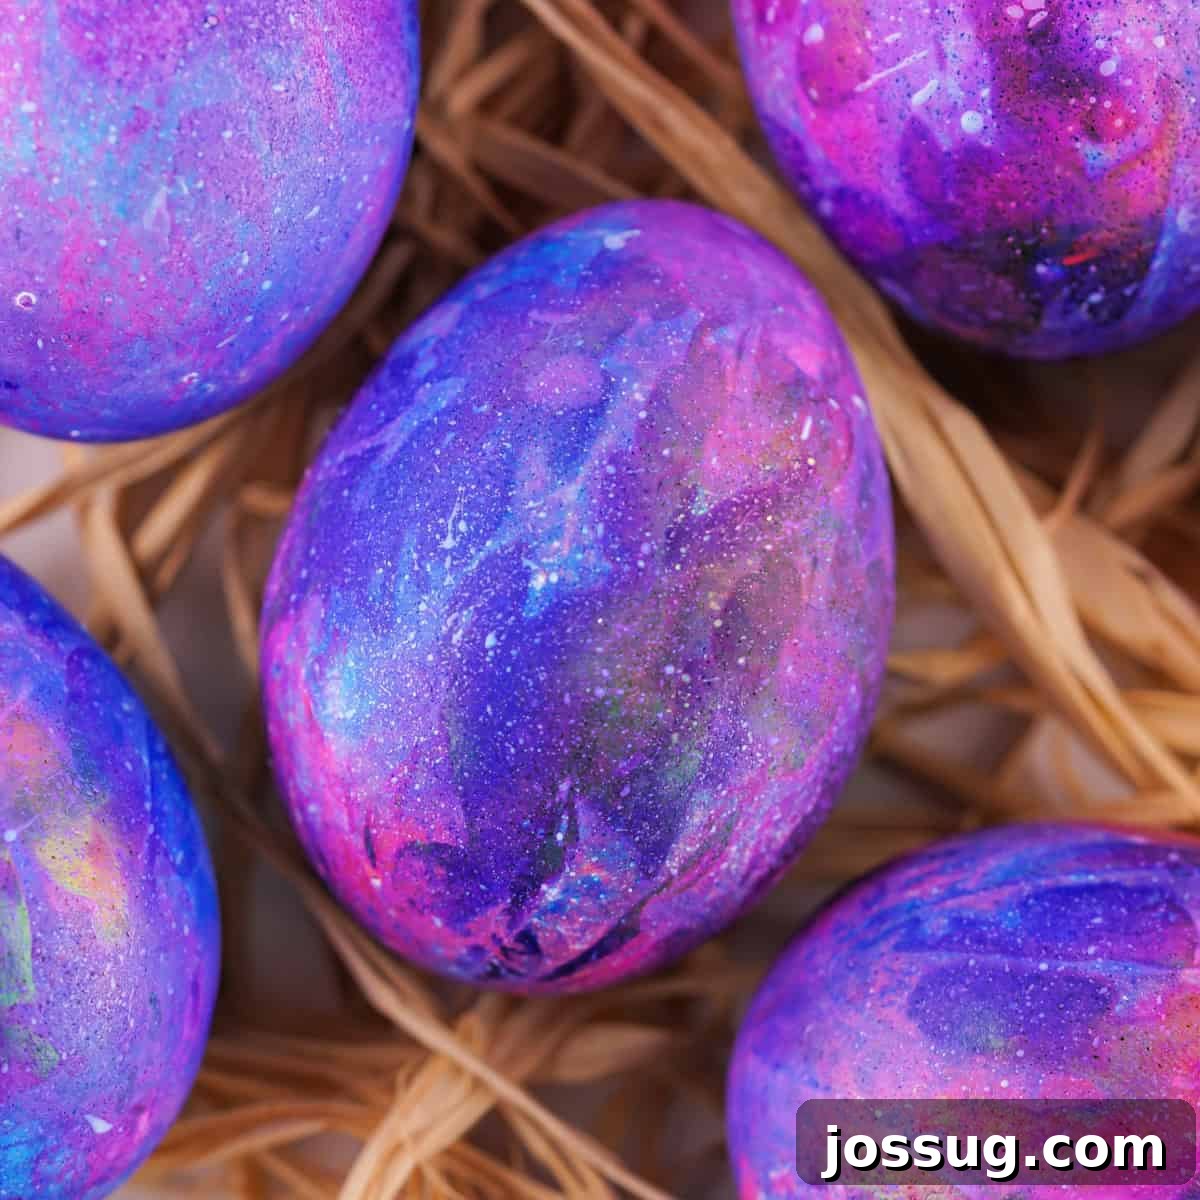
Prepare to embark on a creative journey that transforms humble hard-boiled eggs into captivating miniature galaxies! Our guide to making stunning Galaxy Easter Eggs combines vibrant food dye techniques with enchanting starry paint splatters, resulting in a truly out-of-this-world craft. This incredibly easy DIY Easter project utilizes simple, accessible pantry items, allowing you to achieve a breathtaking cosmic effect in just minutes. It’s the perfect activity for decorating your home, engaging the whole family, and adding a unique, sparkling touch to your Easter celebrations. 🌌✨
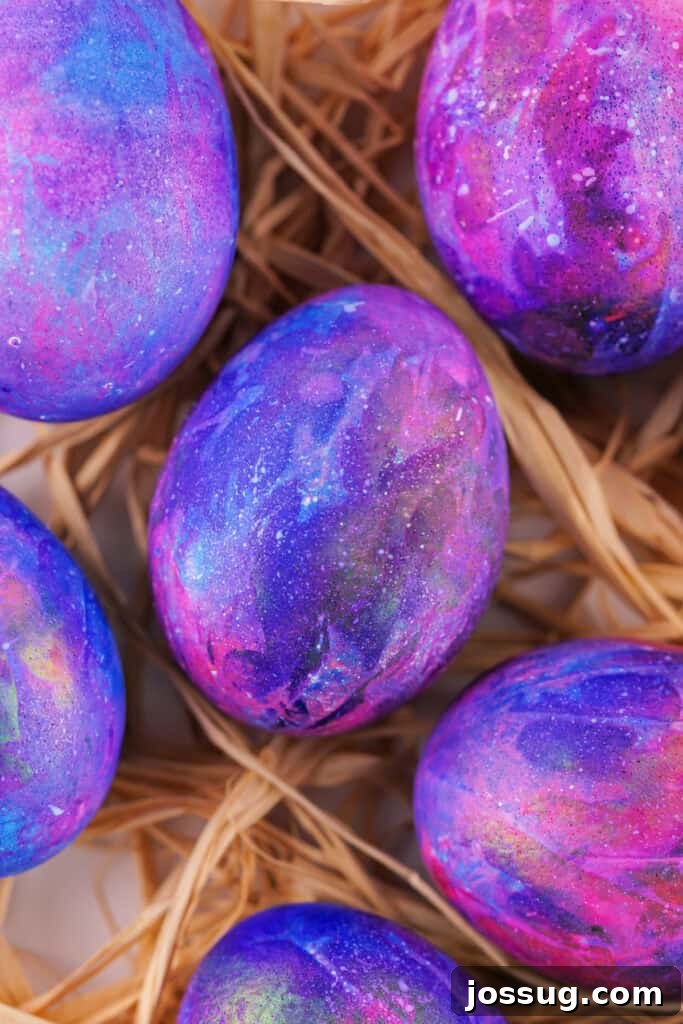
Galaxy Easter Eggs – A Cosmic Easter Craft for the Whole Family!
Are you searching for an Easter egg decorating idea that truly stands out? Look no further than these mesmerizing Galaxy Easter Eggs! Beyond their vibrant and creative appeal, they are surprisingly simple to craft, making them an ideal project for all skill levels. Using just a few readily available pantry ingredients and some common craft supplies, you can transform plain, white hard-boiled eggs into dazzling cosmic masterpieces. This guide will walk you through each step, ensuring you achieve beautiful, starry results every time. Get ready to unleash your inner artist and bring the wonders of the universe to your Easter basket!
⭐ Why You’ll Love This Stellar DIY Project
- Effortless & Engaging Fun – Forget complicated techniques! This craft requires no advanced skills or specialized tools, making it accessible and enjoyable for everyone. It’s a wonderful way to spend quality time with loved ones, creating art together.
- Perfectly Kid-Friendly – This hands-on activity is a delightful way to engage children of all ages. While it might get a little messy (which is half the fun!), the simple steps and magical results will captivate young imaginations and create lasting memories.
- Stunning, Unique Results – Achieve gorgeous galaxy patterns and a sparkling starry finish with surprisingly straightforward methods. Each egg will be a miniature, unique work of art, reflecting the vast beauty of the cosmos.
- Edible & Safe – Using food-safe dyes and proper storage techniques, these decorated eggs are not just beautiful decorations but also safe to eat. Enjoy your hard-boiled creations after the crafting fun is complete!
- Budget-Friendly Creativity – Most of the items needed for this project are likely already in your kitchen or readily available at low cost, making it an economical choice for a show-stopping Easter display.
Gathering Your Celestial Craft Supplies
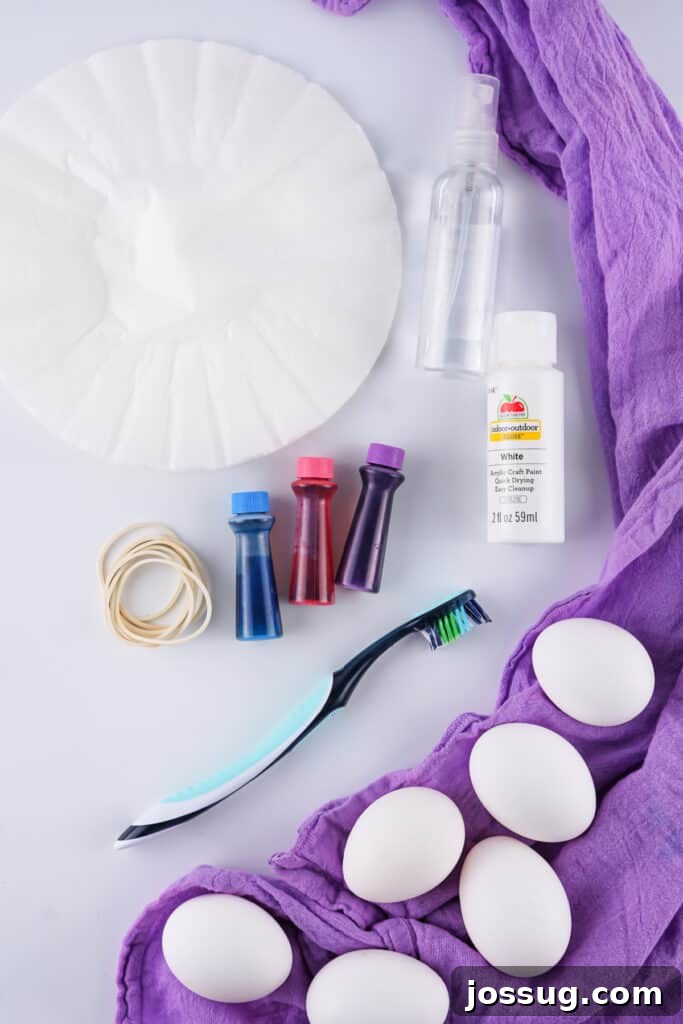
To create these enchanting Galaxy Easter Eggs, you’ll need a few common items that come together to produce a truly spectacular effect. Here’s a detailed look at what you’ll need:
🛒 Essential Ingredients & Smart Substitutions
- Hard-boiled eggs: For the most vibrant and striking galaxy colors, we recommend using white eggs. Their light shell provides a perfect canvas for the dyes to pop. However, if you prefer a deeper, more mysterious galaxy, brown eggs will absorb the dye differently, creating richer, darker tones.
- Liquid food dye: To achieve that classic cosmic look, blue, purple, and pink liquid food dyes are your best friends. These colors blend beautifully to mimic nebulas and distant galaxies. It’s crucial to use *liquid* food dye, not gel or oil-based varieties, as liquid dyes spread most effectively on the coffee filters to create the desired marbled effect.
- Basket-style coffee filters: These are absolutely essential for diffusing the liquid dye onto your eggs in a beautiful, organic pattern. Their porous nature allows the colors to blend and marble, giving each egg a unique celestial design.
- Distilled white vinegar: A splash of vinegar helps the food dye adhere to the eggshells more effectively, resulting in more vibrant and long-lasting colors. It acts as a mordant, setting the dye to prevent fading.
- White craft paint: This is for creating the dazzling star-splatter effect. A quick-dry, non-toxic craft paint is ideal for easy handling and minimal waiting time. Ensure it’s water-based if you plan to eat the eggs.
- Old toothbrush: An often-overlooked tool, a hard-bristled toothbrush is perfect for flicking the white paint onto the eggs to create a realistic and even star splatter. The stiffer bristles yield the best, most dispersed starry effect.
- Rubber bands & gloves: Small rubber bands are useful for securing the coffee filters around the eggs, ensuring full coverage and even dye application. Disposable rubber gloves are highly recommended to protect your hands from staining, especially when working with concentrated food dyes.
✨ Cosmic Variations & Creative Add-Ons
Once you’ve mastered the basic Galaxy Easter Egg technique, don’t hesitate to experiment with these exciting variations to make your cosmic creations even more unique:
- 🌟 Glitter Galaxy: For an extra layer of sparkle reminiscent of shimmering stardust, lightly dust your wet, dyed eggs with fine edible glitter before they fully dry. This adds an incredible depth and shimmer.
- 🌟 Neon Effect: Swap out traditional food coloring for neon food dyes to create an electrifying, bold galaxy. These vibrant hues will give your eggs a truly otherworldly glow.
- 🌟 Metallic Stars: Elevate your star splatters by using metallic gold or silver craft paint instead of white. This sophisticated touch adds a luxurious and dazzling dimension to your cosmic eggs.
- 🌟 Glow-in-the-Dark Surprise: For a fun and unexpected twist, use glow-in-the-dark craft paint for your star splatters. Imagine your Easter display subtly glowing as dusk settles, revealing a hidden galaxy! Ensure the paint is non-toxic if intended for eggs that might be handled by children or eaten.
- 🌟 Deep Space Eggs: Introduce a touch of black or dark grey food dye into your color palette for a truly deep space effect. This adds contrast and intensity, making the brighter colors pop even more.
- 🌟 Ombre Galaxies: Instead of random dye application, try a more controlled ombre effect with your chosen colors. Start with a darker shade at one end of the egg and gradually transition to a lighter one.
Step-by-Step Guide: Crafting Your Own Galaxy Easter Eggs
Creating these cosmic eggs is a fun and visually rewarding process. Follow these simple steps to bring your own miniature galaxies to life:
The Magical Dyeing Process
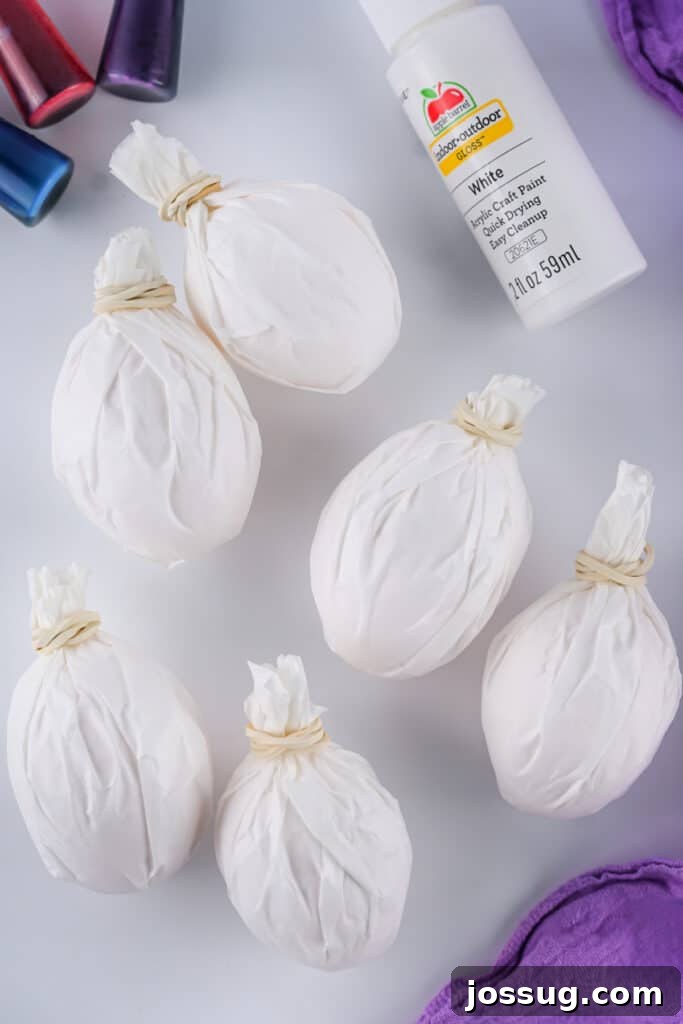

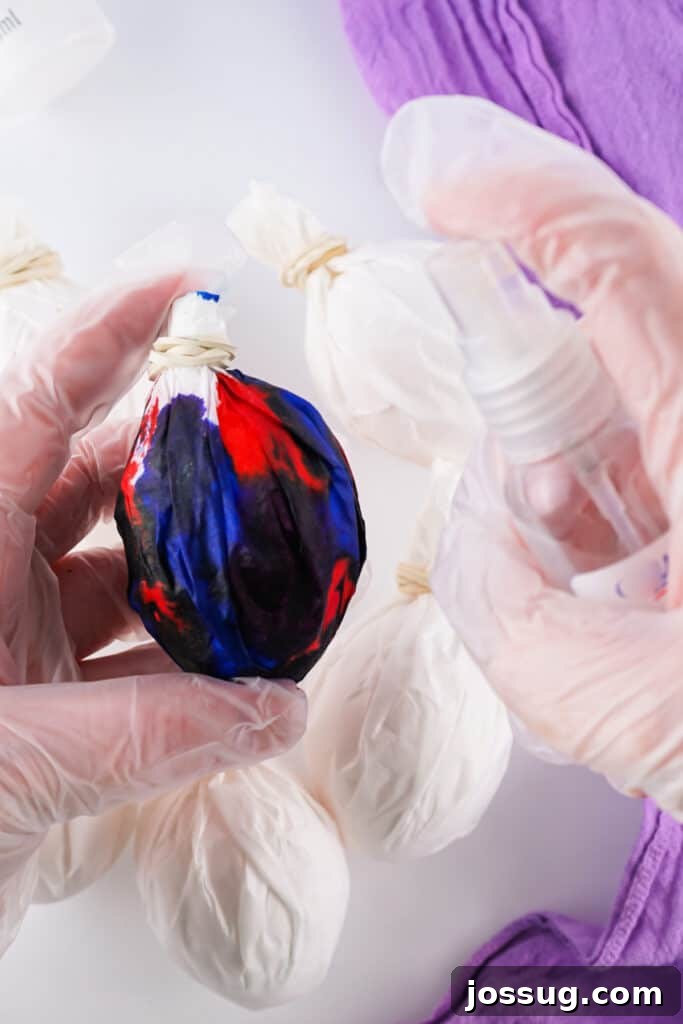
After the dye has set, carefully unwrap each egg. Don’t discard the dye-soaked filters yet! You can gently dab any remaining white spots on the eggs with the filters to enhance the vibrant colors and blend any harsh lines. Allow the eggs to air dry for an additional 5 minutes to ensure the colors are fully absorbed and set before moving to the next stage.
Adding the Starry Splatter
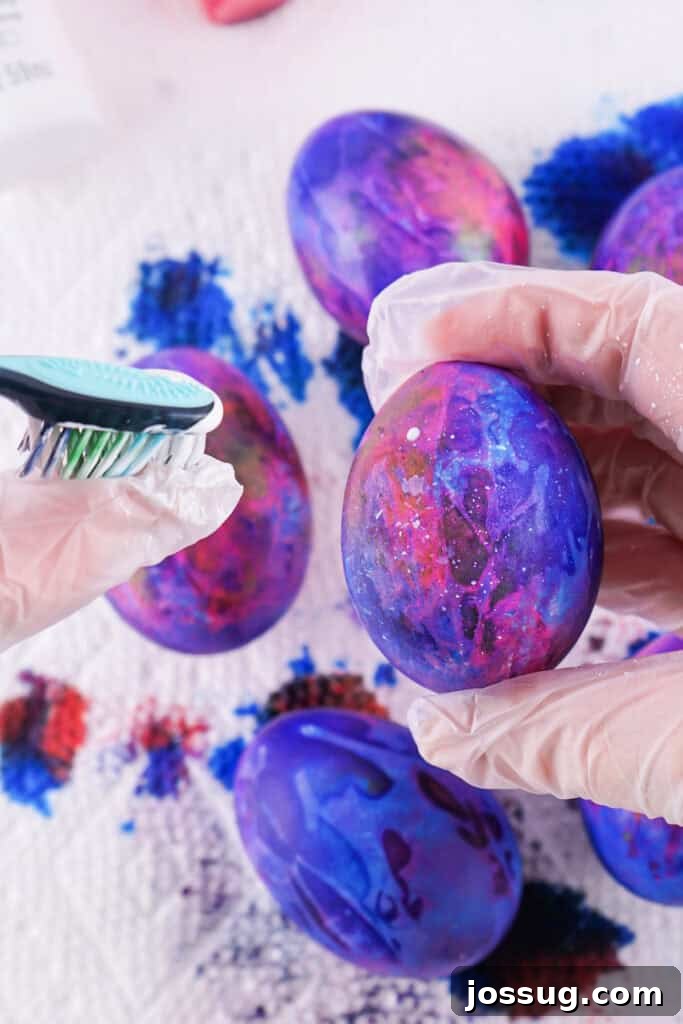
Once you’re satisfied with your starry design, it’s time for the final drying phase. Allow your magnificent Galaxy Easter Eggs to dry completely for at least 15 minutes, or ideally, overnight, before handling them extensively or displaying them. This ensures the paint is fully set and prevents any smudging.
⭐ Pro Tips for a Flawless Galactic Creation
To ensure your Galaxy Easter Eggs turn out as stunning as possible, keep these expert tips in mind:
- Room Temperature Eggs: If your hard-boiled eggs have been refrigerated, let them sit at room temperature for 20-30 minutes before you start decorating. This helps prevent smudging and allows the dye to adhere more evenly.
- Optimal Dye Choice: Always use liquid food dye for this technique. Gel or oil-based dyes will not spread properly on the coffee filters, leading to less consistent and vibrant results.
- Hard-Bristled Toothbrush is Key: For the best star splatter effect, opt for a toothbrush with firm bristles. A stiff brush creates a finer, more dispersed spray of paint, mimicking distant stars perfectly.
- Protect Your Hands: Food dyes can easily stain skin. Wearing rubber gloves throughout the dyeing process will keep your hands clean and make cleanup much easier.
- One Dye Pack Goes Far: You’ll be surprised how many eggs a single pack of liquid food dyes can color. A little goes a long way when applied to the coffee filters.
- Quick-Dry Craft Paint: Using a fast-drying craft paint for the stars significantly reduces the waiting time before you can safely handle and display your finished eggs.
- Experiment with Colors: Don’t limit yourself to just blue, purple, and pink. Try adding a drop of black, a touch of metallic paint, or even neon colors for an even more dramatic and personalized galaxy effect.
- Brown Egg Experiment: While white eggs offer a brighter canvas, trying the process on brown eggs will result in deeper, richer, and more intense colors, giving your galaxy a unique, darker aesthetic.
- Prepare Your Workspace: Lay down newspaper or a disposable tablecloth to protect your work surface from dye and paint splatters. This makes cleanup a breeze!
- Store Eggs Safely: If you plan to eat your beautifully decorated eggs, remember to store them properly in the refrigerator. Hard-boiled eggs should not be left at room temperature for more than two hours.

❓ Your Cosmic Questions Answered: FAQs
Here are some common questions about making Galaxy Easter Eggs:
Absolutely! Brown eggs will absorb the dye differently than white eggs, resulting in deeper, richer, and often more muted cosmic tones. The effect is equally beautiful, just with a darker base.
No, it’s best to stick with liquid food dye. Gel or oil-based dyes are too thick and will not spread evenly or create the desired marbled effect on the coffee filters. Liquid dye is crucial for the cosmic patterns.
Yes, as long as you use food-safe liquid dyes and non-toxic craft paint for the stars. It’s also vital to ensure the eggs are hard-boiled correctly and stored safely in the refrigerator. Do not leave them out at room temperature for extended periods.
If kept refrigerated continuously after decorating, your hard-boiled Galaxy Easter Eggs will last up to one week. Always store them in their carton or an airtight container to maintain freshness and safety.
Ensure you are using liquid food dye and enough vinegar. A generous spritz of vinegar helps the colors spread and merge beautifully. You can also gently squeeze the coffee filter a bit to encourage the dye to move.
Absolutely! While blue, purple, and pink create a classic galaxy look, feel free to experiment with other color combinations like greens and yellows for a nebula effect, or even darker tones for a more intense space theme.
🍽️ Explore More Egg-cellent Recipes and Crafts You May Enjoy!
After you’ve created your celestial masterpieces, perhaps you’re looking for more ways to celebrate Easter with eggs, or simply delicious egg-based recipes. Check out these other fantastic ideas:
- Cool Whip Dyed Easter Eggs
- Shaving Cream Dyed Easter Eggs
- Classic Food Coloring Dyed Easter Eggs
- Irresistible Deviled Eggs
- Spicy Chipotle Deviled Eggs

12
servings
Galaxy Easter Eggs
Jamie Sherman
5 minutes
25 minutes
30 minutes
Pin
Rate
Equipment
-
Basket-style coffee filters
-
Small rubber bands
-
Water-based liquid food dye (blue, purple, and pink recommended)
-
Small spray bottle
-
White craft paint
-
Old toothbrush (hard bristles work best)
-
Rubber gloves (optional, but highly recommended)
Ingredients
- 12 hard-boiled eggs
- ¼ cup white distilled vinegar
- Liquid food dye (blue, purple, pink)
- White craft paint (water-based, non-toxic)
Instructions
-
Prepare Vinegar Spray: Pour the distilled white vinegar into a small spray bottle.
-
Wrap Eggs: Carefully place each hard-boiled egg inside a basket-style coffee filter, ensuring the pointed end is down. Secure the filter tightly around the egg with a small rubber band.
-
Apply Dye: Wearing rubber gloves to prevent staining, add about three drops of each chosen liquid food dye color (blue, purple, and pink are recommended) onto the coffee filter. Allow the dye to naturally spread and marble.
-
Set Color: Lightly spritz each wrapped, dyed egg with the vinegar from your spray bottle. Let the eggs sit undisturbed in their filters for approximately 5 minutes to allow the colors to penetrate and set.
-
Enhance Design: Gently unwrap the eggs. If there are any remaining white spots or areas where you’d like more color, use the dye-soaked coffee filters to gently dab and blend the colors. Let the unwrapped eggs air dry for another 5 minutes.
-
Add Stars: Dip the bristles of an old toothbrush into a small amount of white craft paint. Holding the toothbrush over an egg, gently flick the bristles with your thumb or finger to splatter tiny dots of paint onto the eggs, creating a star-like effect. Rotate the eggs to ensure even coverage.
-
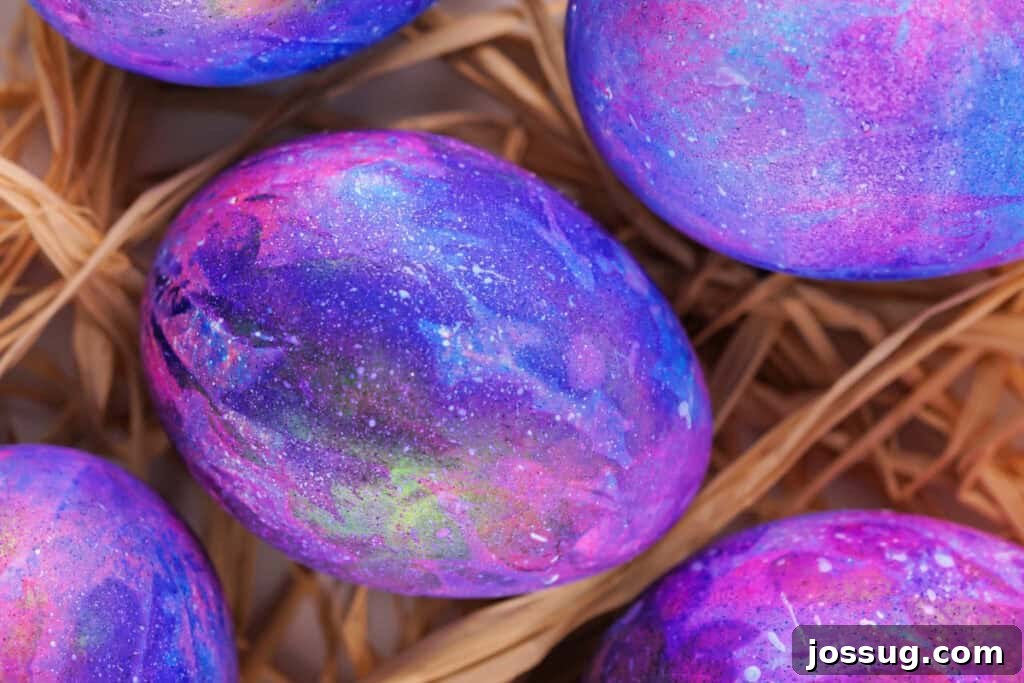
Dry & Enjoy: Allow your completed Galaxy Easter Eggs to dry completely for at least 15 minutes, or ideally overnight, before handling or displaying them.
Notes
- Decorated hard-boiled eggs will last up to one week if kept consistently refrigerated. Always handle with clean hands.
- For optimal color vibrancy, ensure your hard-boiled eggs are completely cool before beginning the dyeing process.
- Consider using a drying rack or an egg carton to dry your decorated eggs, preventing smudges on your beautiful cosmic creations.
- If you desire a deeper, more saturated color, you can re-apply dye and vinegar to the filters and let the eggs sit a bit longer before unwrapping.
Nutrition
Serving:
1
egg
,
Calories:
78
kcal
,
Carbohydrates:
1
g
,
Protein:
6
g
,
Fat:
5
g
,
Saturated Fat:
2
g
,
Polyunsaturated Fat:
1
g
,
Monounsaturated Fat:
2
g
,
Cholesterol:
187
mg
,
Sodium:
62
mg
,
Potassium:
63
mg
,
Sugar:
1
g
,
Vitamin A:
260
IU
,
Calcium:
25
mg
,
Iron:
1
mg
Nutrition information is automatically calculated, so should only be used as an approximation.
Love this cosmic craft? Leave a comment below and share your creations!