
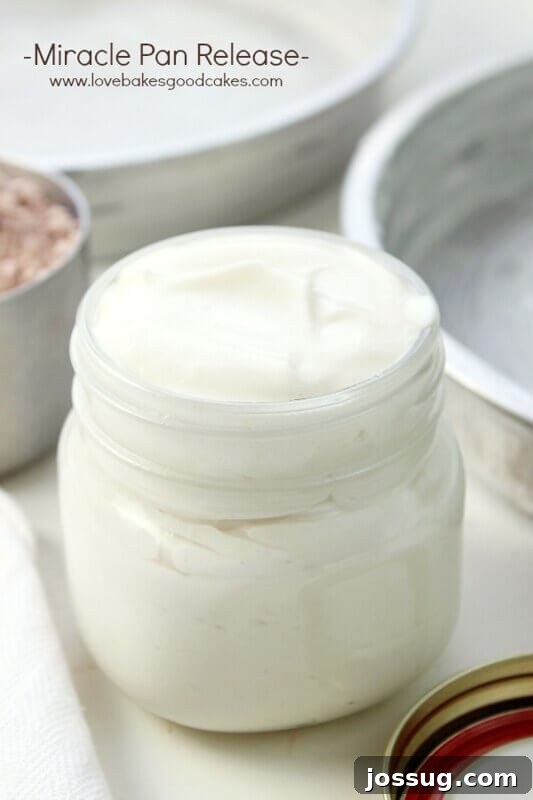
Trust me! You should not be without Miracle Pan Release!
Miracle Pan Release: The Ultimate Baking Secret for Flawless Results
If you’re an avid baker, you know the universal struggle: cakes that stick, muffin tops that cling, and the endless frustration of trying to pry your beautiful creations from the pan. For years, many of us have relied on commercial cooking sprays, but often with disappointing results – and even worse, stubborn, greasy residues that seem impossible to remove. Imagine a world where every baked good slides effortlessly out of its pan, leaving behind a perfectly clean surface. This isn’t a dream; it’s the reality with our incredible Miracle Pan Release recipe!
This simple, homemade concoction is more than just a pan lubricant; it’s a kitchen game-changer. It’s significantly more economical than constantly purchasing cooking spray aerosols, and it performs far better, eliminating those undesirable chemical fumes. Say goodbye to that unsightly, sticky, dark residue that cooking sprays often leave clinging to the edges of your bakeware. With Miracle Pan Release, cleanup becomes an absolute breeze, transforming your baking experience from start to finish.
Why Choose Homemade Pan Release Over Commercial Sprays?
I must confess, I’ve never been a true fan of commercial cooking sprays. While I often list them as an option in my recipes for convenience, my personal preference has always leaned towards more traditional methods. I would meticulously coat my bakeware with shortening or butter, or line it with parchment paper. More often than not, my trusty Silpat baking mats were my go-to. Don’t misunderstand me; I’ve used cooking spray in the past, and I’m certainly not judging anyone who does! However, I’ve consciously moved away from it due to several persistent issues.
The residue left behind by cooking spray on my pots, pans, and bakeware is something I simply can’t stand. It’s often incredibly difficult to scrub off, clinging stubbornly and requiring excessive effort. I’ve tragically had to discard countless baking pans prematurely because of the intractable buildup caused by repeated cooking spray use. As someone who prides herself on being frugal, wasting money on replacing perfectly good bakeware due to stubborn residue is something I deeply regret.
Growing up, I vividly recall my mom meticulously greasing and flouring pans for her baking endeavors, a practice I followed for many years myself. It was a reliable method, but also somewhat messy and time-consuming. Then, a friend introduced me to her homemade “miracle pan release,” and I was immediately captivated. From that moment, I was utterly convinced, and I’ve honestly never looked back! This simple recipe transformed my baking routine.
An Easy, Superior, and Cost-Effective Alternative to Cooking Spray
Seriously, this homemade pan release is absolutely phenomenal. Nothing—and I mean absolutely nothing—sticks to your pans when you use it! The best part is how incredibly easy it is to whip up and keep on hand. You likely already have all three essential ingredients in your pantry: all-purpose flour, vegetable shortening, and vegetable oil. The beauty of this recipe lies in its simplicity and adaptability: you can easily make larger or smaller batches by simply remembering to maintain equal proportions of each ingredient.
In the specific recipe shared below, I’ve opted for a half-cup of each ingredient, which perfectly fills a half-pint sized mason jar. This amount typically lasts me through several baking sessions. If you’re an occasional baker or don’t bake as frequently, you might prefer to start with a quarter of a cup of each ingredient. This ensures you always have a fresh batch without unnecessary waste. The flexibility of this recipe makes it perfect for any home baker, regardless of their frequency.
I exclusively use this homemade pan release for all my cakes, and I absolutely adore how it simplifies every aspect of the baking process. The cakes quite literally just slide right out of the pan, making both the unmolding and the subsequent cleaning incredibly easy. The most satisfying benefit? I no longer face the heartbreaking decision of throwing away my beloved bakeware and having to replace it due to the unsightly and stubborn buildup of gunk from commercial cooking sprays. This mixture not only saves my pans but also saves me money in the long run.
The Simple Science Behind This Baking Marvel
The effectiveness of this Miracle Pan Release lies in the synergistic properties of its three common kitchen ingredients. Vegetable shortening, a solid fat, provides a robust, foundational coating that adheres well to the pan surface. All-purpose flour then mixes with this fat, creating a fine barrier that prevents the batter from directly touching and sticking to the metal. Finally, the vegetable oil, a liquid fat, ensures the mixture is spreadable, smooth, and coats every crevice evenly, creating an impenetrable non-stick layer. This combination forms a powerful barrier that resists heat and moisture, ensuring a clean release every single time, without the harsh chemicals or propellants found in aerosol cans.
Mastering Application for Perfect Results
The key to truly unlocking the magic of Miracle Pan Release is in its application. Unlike cooking sprays which can be haphazard, this mixture allows for precise and thorough coverage. Simply use a pastry brush, a clean paper towel, or even your clean fingers to generously coat the entire inside surface of your baking pans. Ensure you reach into all corners, crevices, and up the sides. For intricate bundt pans or molds, a pastry brush is particularly effective at getting into every detail. A thin, even layer is all that’s needed – don’t overapply. This meticulous application guarantees that your baked goods will release flawlessly, preserving their shape and making them easy to handle.
Other Baking Posts You May Enjoy:
Cherry Upside Down Cake
Red Velvet Cinnamon Rolls
Miracle Pan Release
Rate
Would you like to save this?
We’ll email this post to you, so you can come back to it later!
Equipment
-
Pint (16-oz.) Wide Mouth Jars, Clear, 1-Pack of 4
-
Pastry brush
Ingredients
- ▢ ½ cup all-purpose flour
- ▢ ½ cup vegetable shortening
- ▢ ½ cup vegetable oil
Instructions
-
In a medium mixing bowl, combine the all-purpose flour, vegetable shortening, and vegetable oil. Using a hand mixer, beat the ingredients together until the mixture is light, fluffy, and smooth. It should slightly increase in volume, resembling a creamy frosting. Ensure there are no lumps of flour or shortening remaining.
-
Transfer the prepared Miracle Pan Release into a clean, airtight container, such as a mason jar. Store it at room temperature in your pantry or on your countertop away from direct sunlight.
To use:
-
Before baking, use a pastry brush, a clean paper towel, or even your clean fingers to evenly coat the entire inside surface of your baking pans. A thin, consistent layer is all that’s needed for exceptional non-stick results. For optimal freshness, use the mixture within 3-4 months when stored at room temperature. If you wish to extend its shelf life, you can store it in the refrigerator for longer use, just allow it to come to room temperature or soften slightly before applying.
Notes
- This recipe is incredibly flexible! You can easily adjust the batch size to suit your needs, whether you’re baking for a crowd or just a small treat. Simply use the same measurement for all three ingredients to increase or decrease the overall amount.
- Example for a smaller batch: Use 1 Tablespoon each of all-purpose flour, vegetable shortening, and vegetable oil. This is perfect for single-use or small baking projects.
- Example for a larger batch: Use 1 cup each of all-purpose flour, vegetable shortening, and vegetable oil. This will yield a generous supply for frequent bakers, filling a larger container.
- For those with gluten sensitivities, you can experiment with gluten-free all-purpose flour to make a gluten-free version of this pan release.
Nutrition
Nutrition information is automatically calculated, so should only be used as an approximation.
Like this? Leave a comment below!