

Imagine the delightful aroma of freshly baked bread filling your home, without the need for fancy equipment or complex techniques. With our incredible “Bread in a Bag” recipe, making warm, soft, and utterly delicious homemade bread is not just easy – it’s fun! 🛍️ Forget bulky bread machines or stand mixers; all you need are a few basic ingredients, a sturdy plastic bag, and the warmth of your hands to create a culinary masterpiece. This method transforms baking from a chore into an enjoyable, mess-free experience, perfect for bakers of all skill levels.
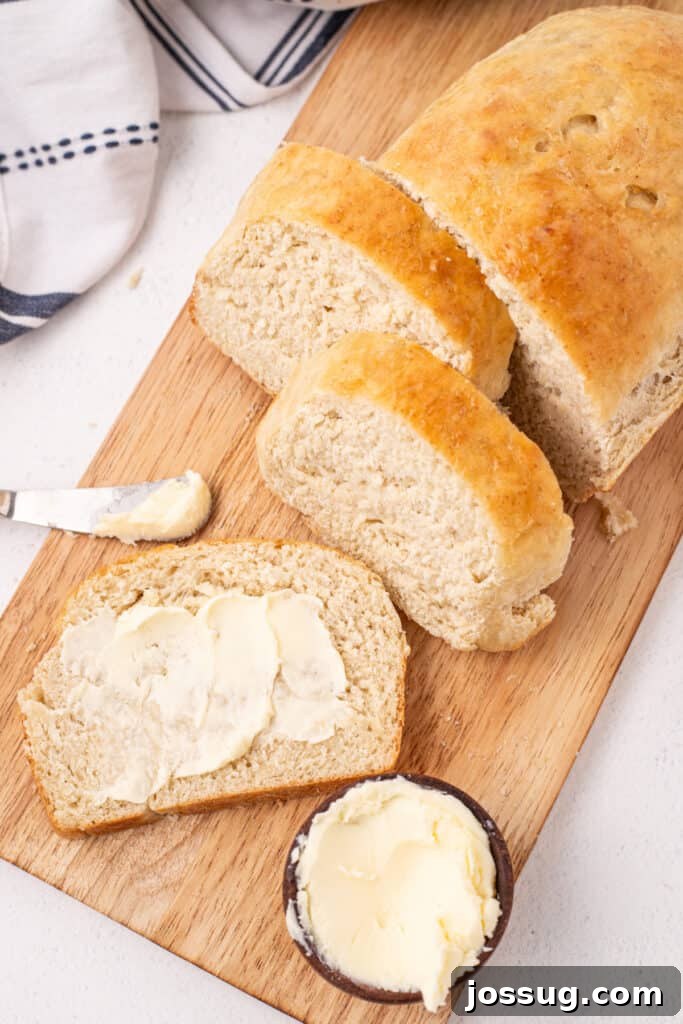
Effortless Homemade Bread: The “Bread in a Bag” Method
Are you searching for a genuinely enjoyable and hassle-free way to bake homemade bread? This innovative bread in a bag recipe is your ultimate starting point. Whether you’re introducing children to the wonders of baking, find yourself short on kitchen tools, or simply crave a no-mess option, mastering how to make bread in a bag is an absolute game-changer. This method eliminates the need for any expensive mixers or dedicated bread machines, relying instead on fundamental ingredients and a simple plastic bag for kneading. It’s an accessible and approachable technique that yields fantastic results every time.
If you’ve ever dreamt of baking a wholesome loaf with your family or needed a quick and reliable recipe on the fly, this bread in a bag recipe is tailor-made for you. The result is consistently soft, wonderfully fluffy, and beautifully golden brown – a true beginner-friendly bake that consistently delivers incredibly tasty, comforting bread. The hands-on process makes it particularly engaging for younger bakers, turning a kitchen task into a playful activity with a delicious reward.
⭐ Why This “Bread in a Bag” Recipe Will Become Your Favorite
- **No Specialized Equipment Needed:** Say goodbye to stand mixers, dough hooks, or bread machines. This recipe proves that exceptional bread can be made with minimal tools, making it perfect for small kitchens, dorms, or even camping trips where resources are limited.
- **Perfect for Baking with Kids:** The kneading process, done entirely within a sealed bag, is incredibly interactive and fun for children. It minimizes mess, allows them to actively participate in making food, and fosters a love for baking from an early age.
- **Quick and Efficient Prep Time:** With active prep taking only about 20 minutes, you can get the dough ready and rising in no time. The total time from start to a ready-to-bake loaf is surprisingly efficient, around 1 hour and 20 minutes for the initial rise.
- **Endlessly Customizable:** This basic recipe serves as an excellent canvas for your creativity. Easily experiment with various mix-ins, herbs, cheeses, or seeds to personalize your loaf and create unique flavor profiles that cater to your taste.
- **Minimal Mess, Maximum Flavor:** Because the initial mixing and kneading happen inside a plastic bag, cleanup is a breeze. You get all the satisfaction of homemade bread with significantly less flour dust and sticky dough on your countertops.
- **Consistently Delicious Results:** Despite its simplicity, this method consistently produces a soft, airy, and flavorful loaf that rivals bread made with more complicated techniques. It’s a rewarding recipe that builds confidence for budding bakers.
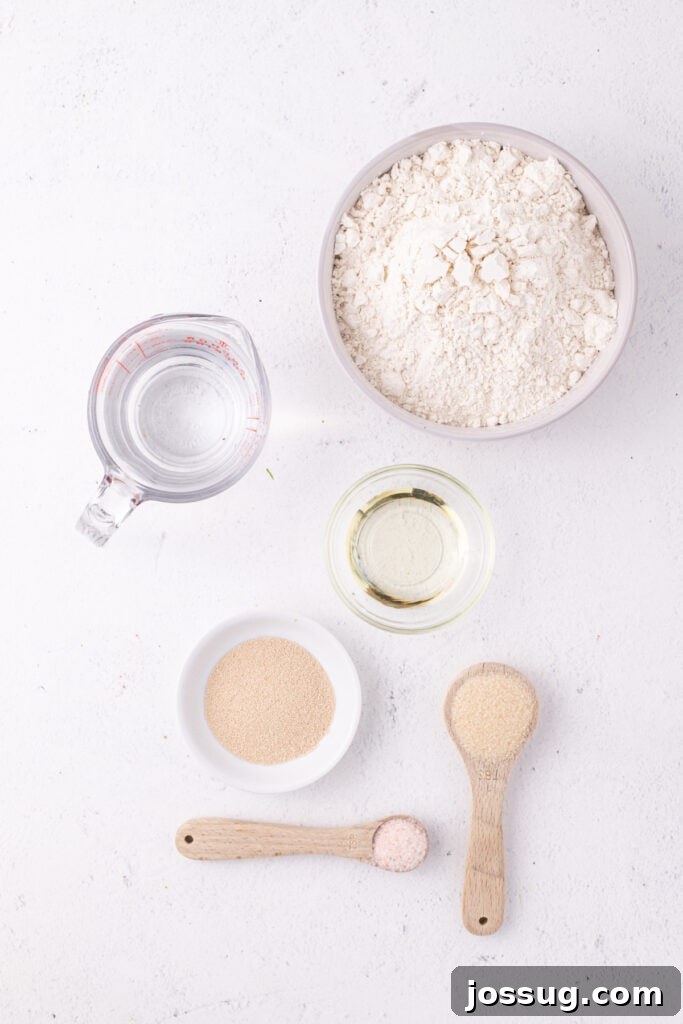
🛒 Essential Ingredients & Smart Substitutions
- **All-purpose flour:** This is the foundation of our bread, providing structure and texture. For a chewier loaf with a slightly higher protein content, you can easily substitute with bread flour. Whole wheat flour can also be incorporated for a heartier bread, though you might need a touch more liquid.
- **Active dry yeast:** This leavening agent is crucial for making your bread light and airy. If you have instant yeast on hand, you can use it interchangeably; simply skip the initial proofing step with warm water and mix it directly with the dry ingredients. Ensure your yeast is fresh for the best rise.
- **Granulated sugar:** Sugar serves multiple purposes: it feeds the yeast, helping it activate and produce carbon dioxide, and it also contributes to the bread’s golden crust and subtle sweetness. You can swap it with honey for a different flavor profile, but remember to reduce the amount of water slightly (by about 1-2 teaspoons) as honey is a liquid.
- **Salt:** Far more than just a seasoning, salt is vital for flavor balance, controlling yeast activity, and strengthening the gluten structure of the dough. Don’t omit it!
- **Warm water:** The temperature of your water is critical for activating the yeast. Aim for a temperature around 110°F (43°C) – it should feel comfortably warm, not hot. Too hot water will kill the yeast, while too cold water won’t activate it effectively. A kitchen thermometer is your best friend here.
- **Vegetable oil:** Oil adds richness, moisture, and helps create a tender crumb in your finished bread. It also contributes to a softer crust. Canola oil or a light olive oil work perfectly. For a different flavor and texture, you can also use melted butter.
✨ Creative Variations to Personalize Your Loaf
The beauty of this simple “Bread in a Bag” recipe lies in its versatility. Once you’ve mastered the basic loaf, feel free to get creative and customize it with your favorite flavors:
- **Cheesy Bread:** Elevate your loaf by adding ½ cup of shredded cheddar, mozzarella, or a blend of your favorite cheeses before the final kneading stage. This creates a savory, melt-in-your-mouth bread perfect with soups or as a grilled cheese sandwich base.
- **Garlic Herb Bread:** Infuse your bread with aromatic flavors by mixing in 1 teaspoon of garlic powder and 1 tablespoon of dried Italian herbs (like oregano, basil, and thyme) with the dry ingredients. A touch of fresh minced garlic can also be added for an extra punch.
- **Sweet Breakfast Twist:** For a delightful breakfast treat, add ½ teaspoon of ground cinnamon and ½ cup of plump raisins to the dough. This sweet variation is fantastic toasted and served with a pat of butter or cream cheese.
- **Hearty Whole Wheat Loaf:** For a more nutritious and robust bread, substitute half of the all-purpose flour with whole wheat flour. This will yield a denser loaf with a nutty flavor and increased fiber content. You might need to add an extra tablespoon or two of water as whole wheat flour absorbs more liquid.
- **Seed and Grain Bread:** Incorporate 2-3 tablespoons of sunflower seeds, pumpkin seeds, flax seeds, or poppy seeds into the dough for added texture and a boost of nutrients.
- **Onion or Everything Bagel Bread:** Mix in 2 tablespoons of dried minced onion or 1 tablespoon of everything bagel seasoning for a savory, flavorful loaf reminiscent of your favorite bagels.
🔥 Expert Tips for Perfect “Bread in a Bag” Every Time
- **Knead Thoroughly for Elasticity:** The 10 minutes of kneading in the bag is crucial. Don’t cut it short! This process develops the gluten in the flour, which gives the bread its structure, elasticity, and chewy texture. A well-kneaded dough will feel smooth and spring back when gently poked.
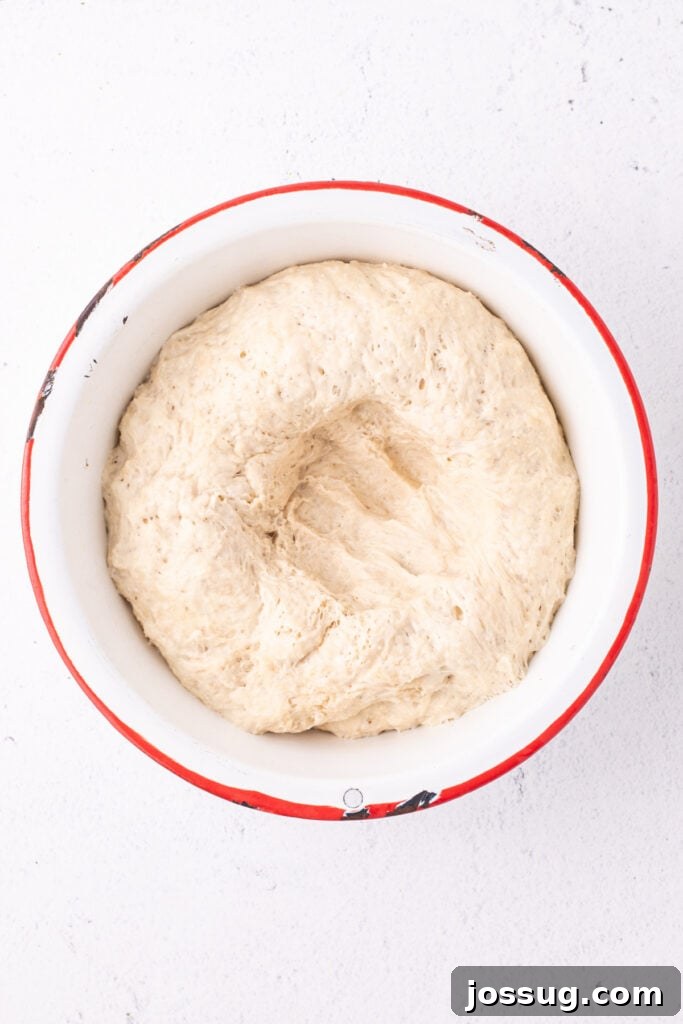
- **Trust the Dough, Not Just the Clock for Rising:** Always let your dough rise until it has *doubled* in size, rather than strictly adhering to the suggested time. Rise times can vary based on ambient temperature and humidity. A warm, draft-free spot is ideal for rising; a slightly warm oven (turned off!) or a sunny windowsill can work wonders.
- **Patience is Key: Cool Before Slicing:** It’s tempting to slice into a warm loaf, but resist the urge! Slicing hot bread can lead to a gummy, dense texture. Allow the bread to cool completely on a wire rack. This allows the internal moisture to redistribute evenly, resulting in a perfect crumb.
- **Store Properly for Maximum Freshness:** Once completely cooled, store your homemade bread in a sealed plastic bag or an airtight container at room temperature. This will help maintain its freshness and prevent it from drying out, keeping it delicious for up to 3 days.
- **Check Yeast Expiration:** Always ensure your active dry yeast is fresh and within its expiration date. Old or inactive yeast is the most common reason for dough not rising.
- **Measure Water Temperature Accurately:** Use a kitchen thermometer to ensure your warm water is consistently around 110°F (43°C). This is the optimal temperature to activate the yeast without killing it.
- **Grease Your Pan Well:** To prevent your beautiful loaf from sticking, generously grease your loaf pan with butter or cooking spray before placing the shaped dough for its second rise.
- **Tap for Doneness:** When the baking time is up and the crust is golden brown, gently tap the bottom of the loaf. If it sounds hollow, your bread is likely done. For absolute certainty, an instant-read thermometer inserted into the center should read around 190-200°F (88-93°C).
❓ Frequently Asked Questions About “Bread in a Bag”
Yes, you absolutely can! However, for easier kneading and to ensure both loaves rise properly, it’s best to divide the ingredients into two separate large plastic bags or use two separate bowls for rising.
This homemade bread typically stays fresh for about 3 days when stored at room temperature in a sealed bag or airtight container. For longer storage, you can easily freeze it.
Absolutely! This method is incredibly kid-friendly and designed for hands-on fun with minimal mess. Kids love the squishing and kneading in the bag, and it’s a fantastic way to involve them in the kitchen.
Yes, you can! You can prepare the dough, let it complete its first rise, and then refrigerate it overnight in a greased, covered bowl. Just be sure to bring it back to room temperature for about 30-60 minutes before shaping and baking.
A good indicator is a golden-brown crust. You can also tap the bottom of the loaf – it should sound hollow. For precise results, an internal thermometer should register around 190°F (88°C) to 200°F (93°C).
Several factors can affect dough rising. Your yeast might be expired, or the water used could have been too hot (killing the yeast) or too cold (not activating it). Also, ensure your rising spot is warm and completely free of drafts, which can inhibit yeast activity.
Definitely! Brushing the top with melted butter just after baking gives the crust a wonderful softness and enhances the flavor. An egg wash (one egg beaten with a tablespoon of water) before baking will give your loaf a beautiful, shiny, golden-brown finish.
This “Bread in a Bag” recipe typically yields a soft, tender, and slightly chewy loaf with a moderately soft crust. For a crustier result, you can bake it uncovered for a bit longer, or try placing a pan of hot water in the bottom of your oven during the first 10-15 minutes of baking to create steam.
Absolutely! Since it requires no mixer and only minimal tools, it’s an excellent option for outdoor or RV baking if you have access to a small oven or a grill with a lid where you can maintain a consistent temperature. Fresh bread while camping is a real treat!
A large, sturdy, gallon-sized (or larger) Ziploc-style freezer bag works best. These bags are strong enough to withstand the kneading process without tearing. Avoid thin sandwich bags.
While all-purpose flour is recommended, you can experiment. For a chewier bread, use bread flour. For a healthier option, substitute up to half of the all-purpose flour with whole wheat flour, but you might need to adjust the water slightly for the right consistency.
🍽️ Other Delicious Recipes You May Enjoy
Bread
Texas Roadhouse Rolls
Breakfast
Cinnamon Rolls
Bread
Cheesy Breadsticks
Holiday
Crescent Rolls
14
slices
Bread in a Bag Recipe
Jamie Sherman
20
mins
30
mins
1
hr
20
mins
2
hrs
10
mins
Print Recipe
Equipment
-
large Ziploc bag
-
mixing bowl (large)
-
measuring cups and spoons
-
9×5-inch loaf pan
-
clean kitchen towel or plastic wrap
-
wire cooling rack
-
Kitchen thermometer (optional, but recommended for water)
Ingredients
- 3 cups all-purpose flour
- 1 packet active dry yeast, (2-¼ teaspoons)
- 2 tablespoons granulated sugar
- 1 teaspoon salt
- 1 cup warm water, (about 110°F / 43°C)
- 2 tablespoons vegetable oil
Instructions
-
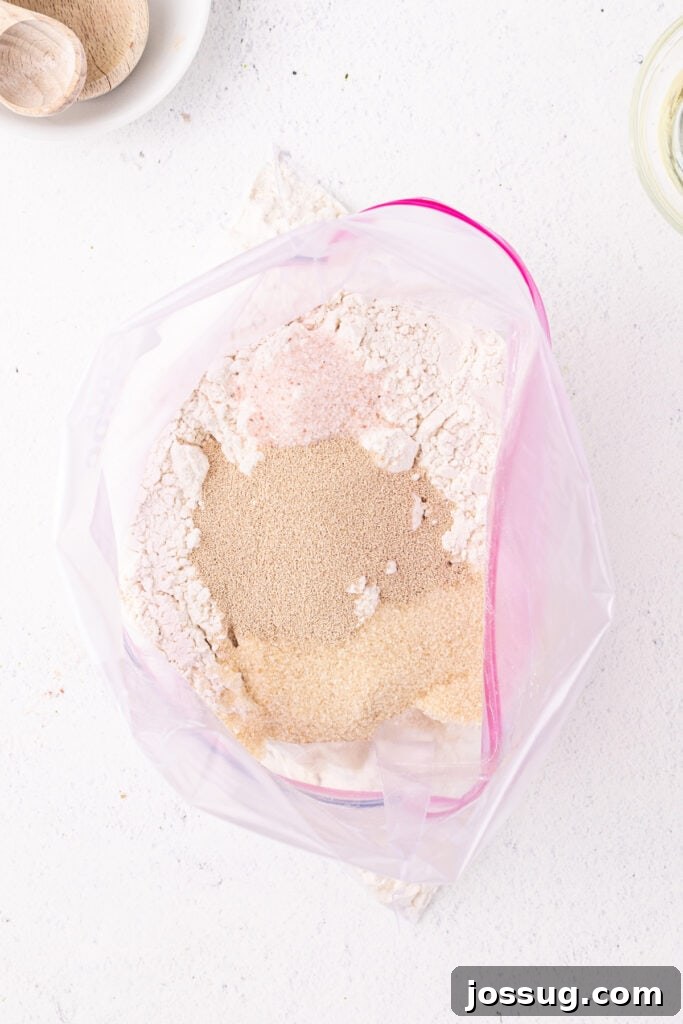
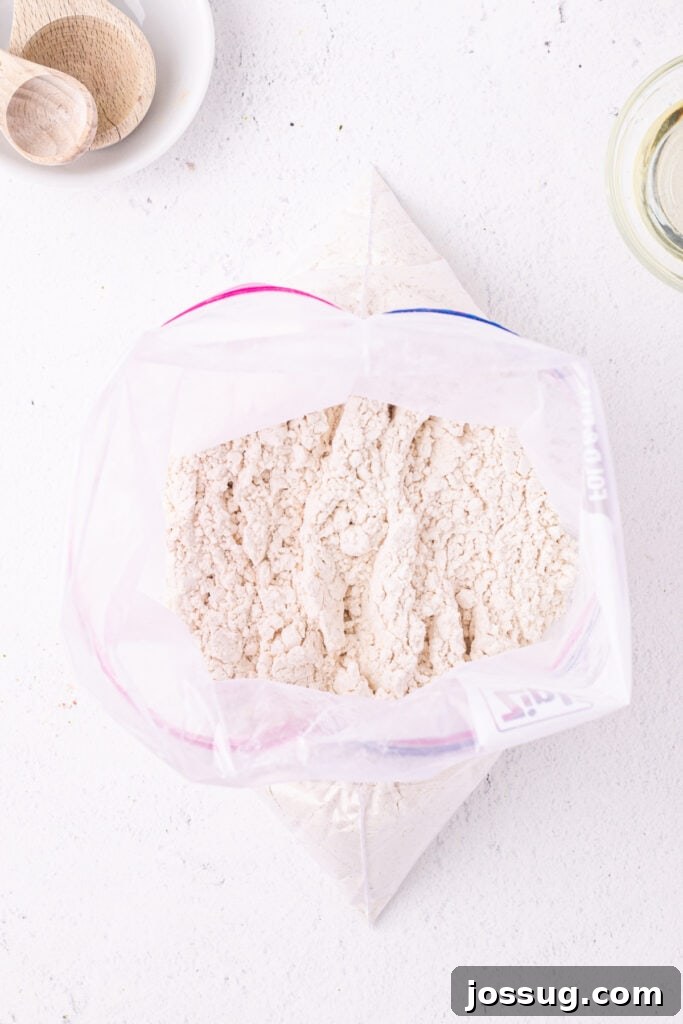
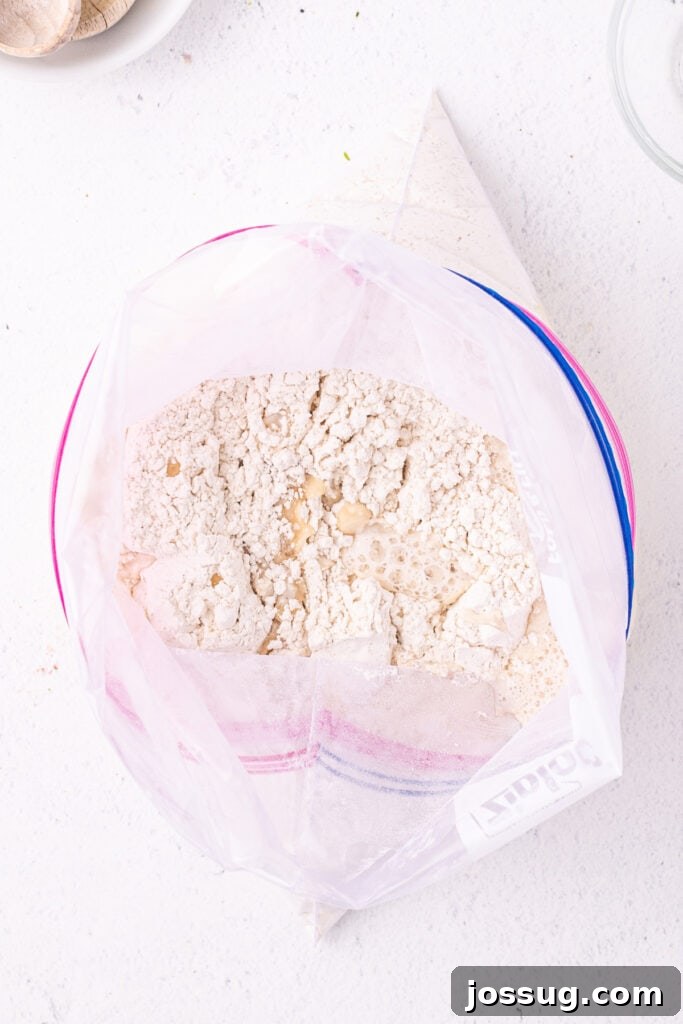
In a large, sturdy Ziploc bag (gallon-sized or larger), combine the all-purpose flour, active dry yeast, granulated sugar, and salt. Seal the bag tightly, ensuring some air remains inside, and shake vigorously for about 30 seconds to thoroughly combine all the dry ingredients.
-
Carefully open the bag and pour in the warm water (around 110°F or 43°C) and the vegetable oil. Reseal the bag, again leaving a little air pocket inside to allow for movement.
-
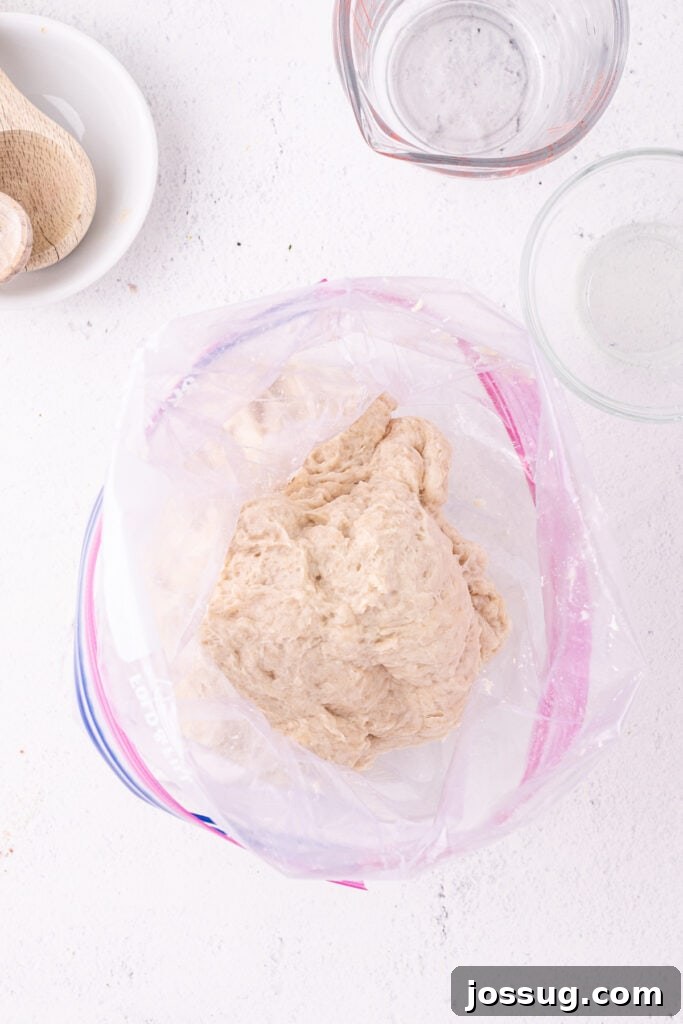
Now, knead the dough by gently squishing and pressing the bag with your hands for about 10 minutes. Continue until the dough becomes smooth and elastic, and all the ingredients are well incorporated. You’ll notice the texture changing from shaggy to cohesive.
-
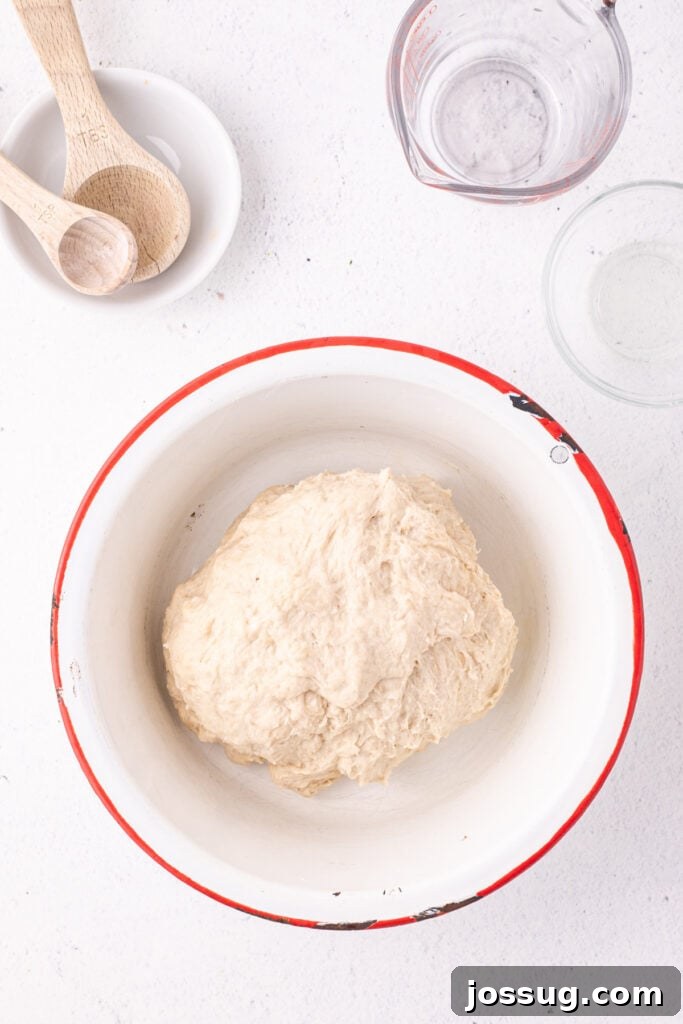
Remove the dough from the bag and place it into a large, lightly greased mixing bowl. Cover the bowl with a clean kitchen towel or plastic wrap. Let the dough rise in a warm, draft-free spot for approximately 1 hour, or until it has visibly doubled in size.
-
While the dough is completing its first rise, preheat your oven to 375°F (190°C). Prepare a 9×5-inch loaf pan by greasing it thoroughly to prevent sticking.
-
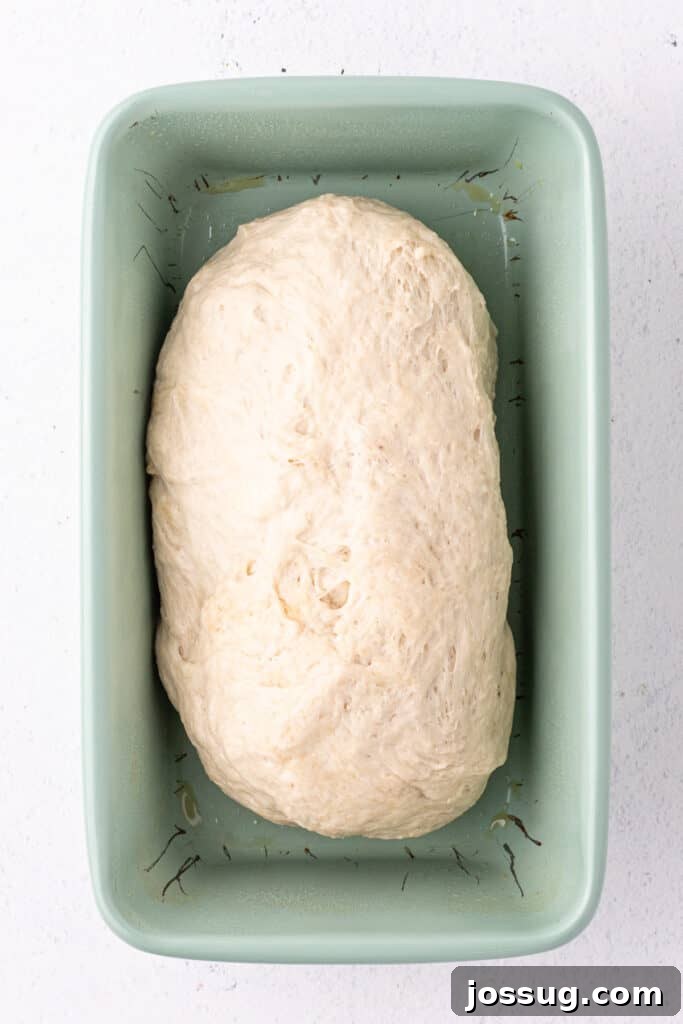
Once the dough has doubled, gently punch it down to release the air. Transfer it to a clean surface and shape it into a neat loaf. Place the shaped dough into your prepared 9×5-inch loaf pan.
-
Cover the loaf pan with the towel or plastic wrap again and let the dough rise for a second time in the pan for another 15-20 minutes, or until it has nearly doubled in size once more and looks puffy.
-
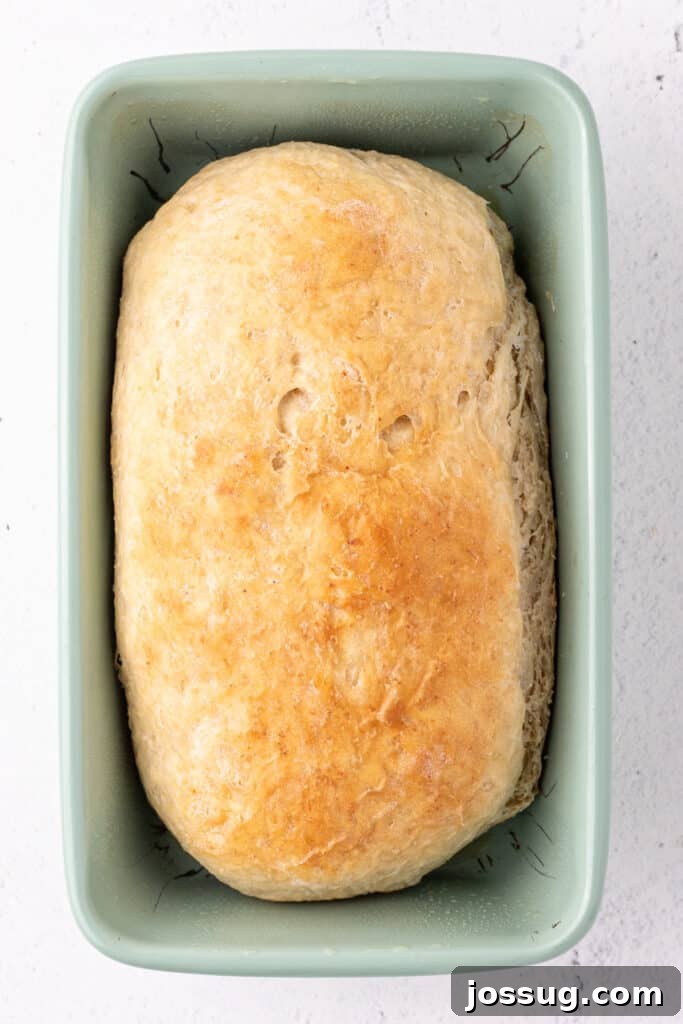
Bake the bread in the preheated oven for 25-30 minutes, or until the crust is a beautiful golden brown and the bottom of the loaf sounds hollow when tapped.
-
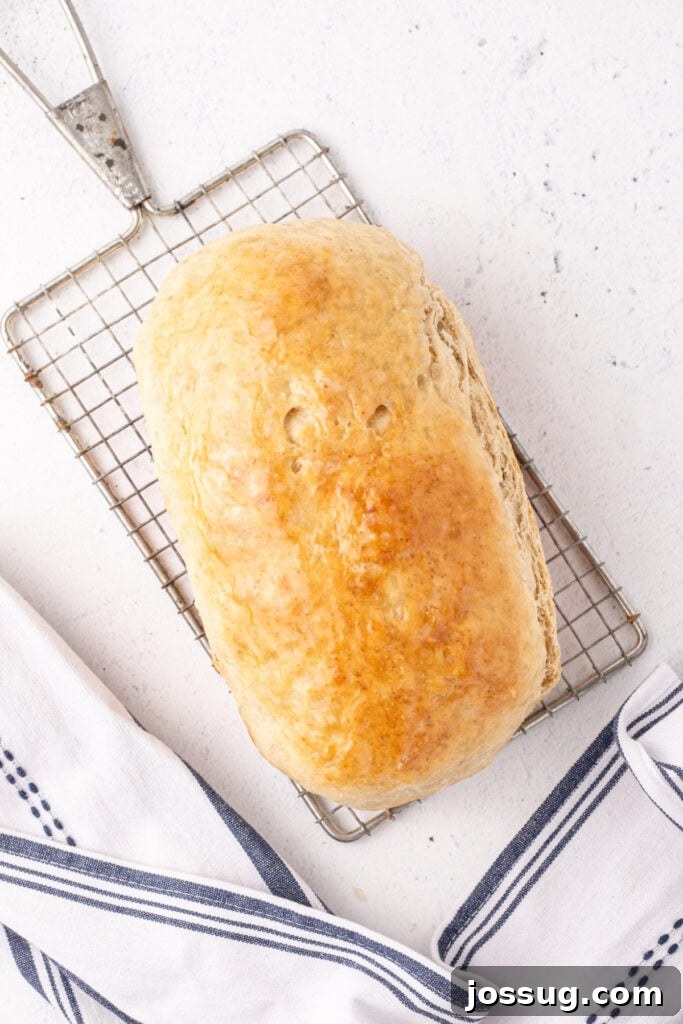
Remove the pan from the oven and let the bread cool in the pan for a few minutes. Then, carefully transfer the loaf to a wire rack to cool completely. This is a crucial step to prevent a gummy texture inside. Slice and enjoy once fully cooled.
Notes
🥡 STORAGE
- Store leftover bread in a plastic bag or an airtight container at room temperature for up to 3 days to maintain its softness.
- For more extended storage, freeze it.
♨️ REHEATING
- **Microwave:** Warm individual slices for 10-15 seconds for a quick refresh.
- **Oven:** For a whole loaf or multiple slices, wrap in foil and warm at 325°F (160°C) for 8-10 minutes.
- **Toaster:** Toast individual slices to restore a slightly crispy edge, perfect for breakfast.
❄️ FREEZING
- To freeze the whole loaf, wrap it tightly in plastic wrap, then an additional layer of aluminum foil. Freeze for up to 2 months.
- For individual slices, place a piece of parchment paper between each slice before freezing them in an airtight container or freezer bag to prevent sticking.
💡 TIPS FOR BEST RESULTS
- Always use a thermometer to accurately check the water temperature for optimal yeast activation (110°F / 43°C).
- Knead the dough until it is genuinely smooth and stretchy. Proper gluten development is key to a light, airy loaf.
- Ensure the dough rises in a warm, completely draft-free area for the most consistent and effective rise.
- Resist the temptation to slice the bread while it’s still hot. Letting it cool completely is essential to prevent a gummy or dense texture inside.
🍳 ALTERNATE COOKING METHODS
- **Bread machine:** If you own one, simply add the ingredients in the order recommended by your machine’s manufacturer and use the basic white loaf setting.
- **Dutch oven:** For a more rustic, crusty loaf, you can bake this dough in a Dutch oven. Preheat your Dutch oven with the lid on at 425°F (220°C). Carefully place the shaped dough inside, bake with the lid on for 20 minutes, then remove the lid and continue baking for another 10-15 minutes until golden brown.
♻️ LEFTOVERS: Creative Ways to Enjoy
- Toast leftover bread for a simple and satisfying breakfast or snack.
- Cube and dry it in the oven to make delicious homemade garlic parmesan croutons.
- Transform stale slices into a comforting bread pudding or a decadent French toast casserole.
- Use it for homemade breadcrumbs to top casseroles or coat chicken.
Nutrition
Calories: 123kcal,
Carbohydrates: 22g,
Protein: 3g,
Fat: 2g,
Saturated Fat: 0.3g,
Polyunsaturated Fat: 1g,
Monounsaturated Fat: 0.5g,
Trans Fat: 0.01g,
Sodium: 168mg,
Potassium: 34mg,
Fiber: 1g,
Sugar: 2g,
Vitamin A: 1IU,
Vitamin C: 0.001mg,
Calcium: 5mg,
Iron: 1mg
Nutrition information is automatically calculated and should only be used as an approximation. It can vary based on specific ingredients and brands used.
Loved this recipe? Share your thoughts below!