
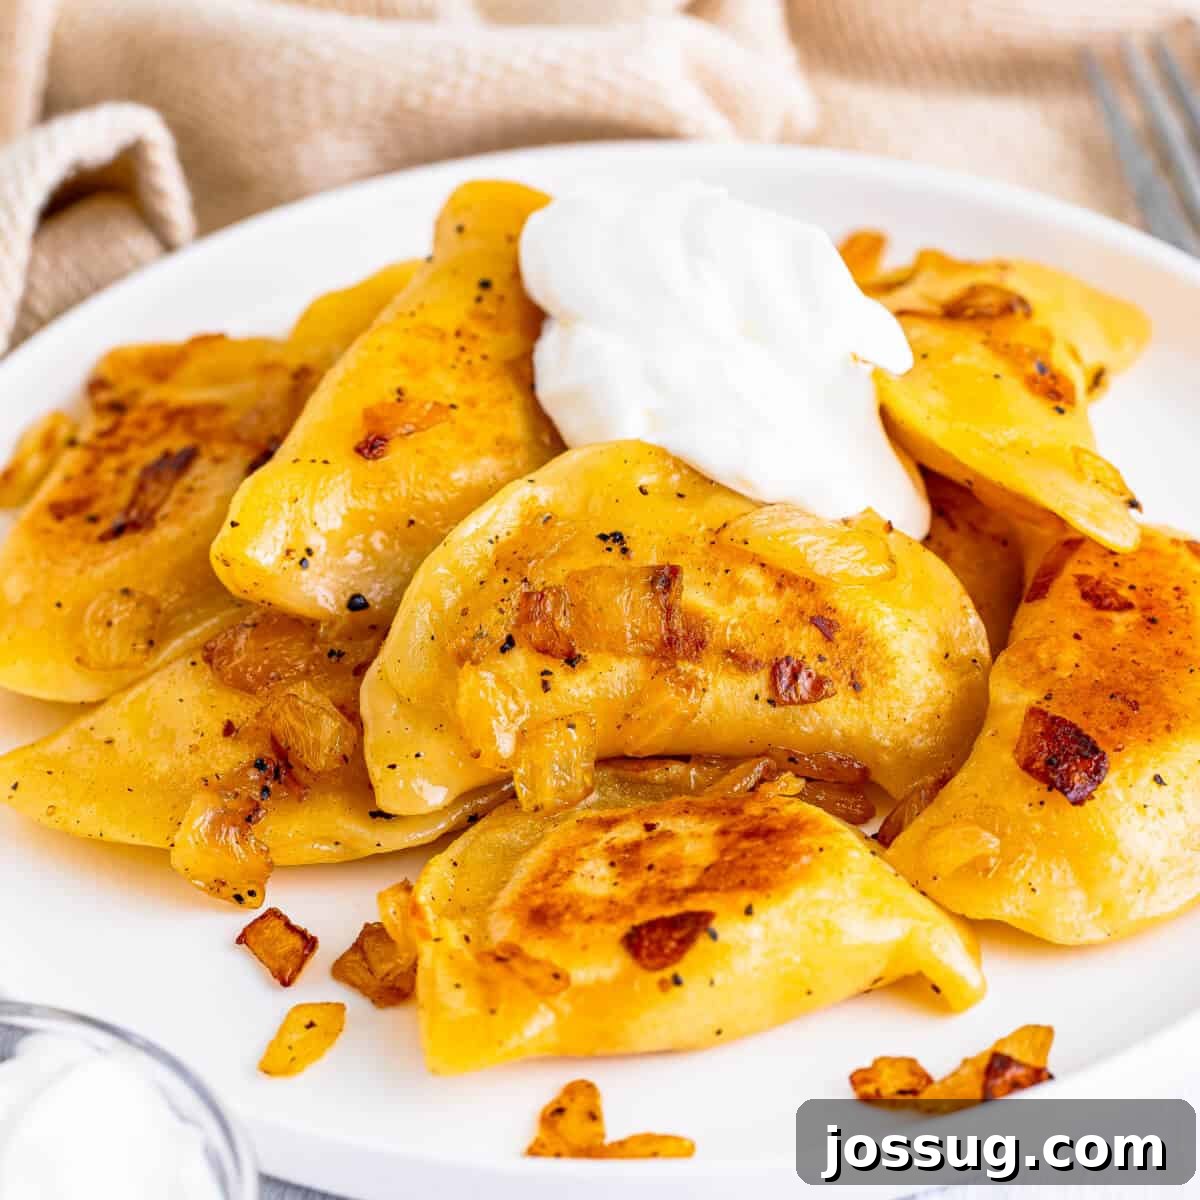
Homemade Pierogi: Crafting Authentic Eastern European Potato & Cheddar Dumplings
Embark on a delightful culinary adventure to the heart of Eastern Europe by mastering the art of homemade Pierogi. These iconic dumplings, celebrated for their rich, comforting flavors, feature a luxurious filling of creamy mashed potatoes and sharp cheddar cheese, all encased in a tender, buttery dough. This comprehensive guide simplifies the process, making it enjoyable for even novice cooks. Whether you’re planning a hearty weeknight dinner, preparing for a festive holiday gathering, or seeking a reliable freezer-friendly meal, homemade Pierogi offer unmatched versatility and deliciousness. Beyond the classic potato and cheese, we’ll explore ways to customize your fillings, ensuring this timeless dish perfectly suits your taste.
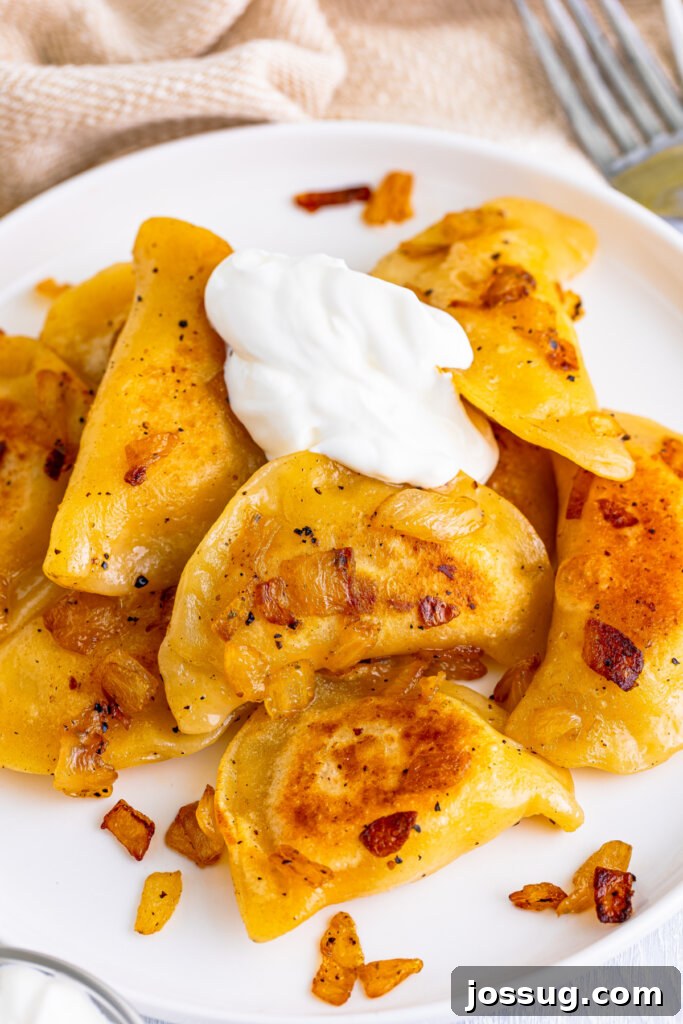
The Unmatched Comfort of Homemade Pierogi
If your quest for the ultimate comfort food has been endless, look no further than the humble yet spectacular Pierogi. Originating from the rich culinary traditions of Eastern Europe, these sumptuous dumplings have deservedly become a global favorite. What makes them so irresistible? It’s the harmonious blend of a delicate, soft dough that cradles a vibrant, savory filling—typically a robust combination of fluffy potato and piquant cheddar cheese. Each bite offers a unique culinary experience, a comforting warmth that stays with you long after the meal is finished.
Why Homemade Pierogi Outshine Store-Bought Varieties
While commercial Pierogi offer convenience, making these delightful dumplings at home unlocks an unparalleled level of freshness, flavor, and texture. The difference is truly remarkable. With just a few simple, wholesome ingredients like all-purpose flour, fresh eggs, rich sour cream, and unsalted butter, you can create a dough that is exquisitely tender and literally melts in your mouth. This homemade approach ensures that every component is at its peak, transforming ordinary ingredients into an extraordinary dish.
And despite their gourmet appeal, the preparation process is surprisingly accessible. You’ll be pleased to discover that with approximately 30 minutes of active preparation time and around an hour for cooking, you can yield a generous batch of about 36 Pierogi. This makes it an ideal project for a weekend, or even a manageable task for a dedicated weeknight when you crave something truly special.
Exploring the Boundless World of Pierogi Fillings
One of the most exciting aspects of Pierogi is their incredible versatility. While the classic pairing of starchy russet potatoes and sharp cheddar cheese remains a beloved standard, this recipe serves as a perfect foundation for culinary creativity. Your imagination is the only limit! For savory enthusiasts, consider fillings like well-seasoned ground meats, tangy sauerkraut mingled with sautéed mushrooms, or a vibrant spinach and feta combination. If you prefer a sweeter treat, Pierogi can be filled with fresh seasonal berries, a sweetened farmer’s cheese, or even stewed apples with cinnamon, transforming them into a delightful dessert or breakfast item. Feel free to experiment with different flavor profiles while maintaining the core principles of the dough and shaping process.
Perfecting the Pierogi Dough: A Foundation of Flavor
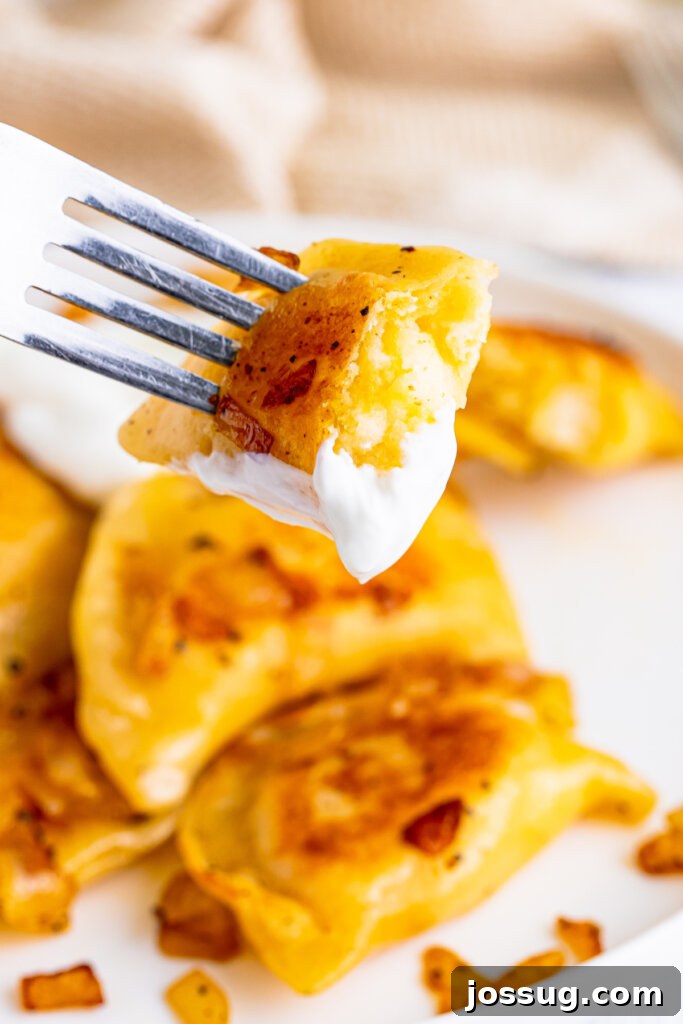
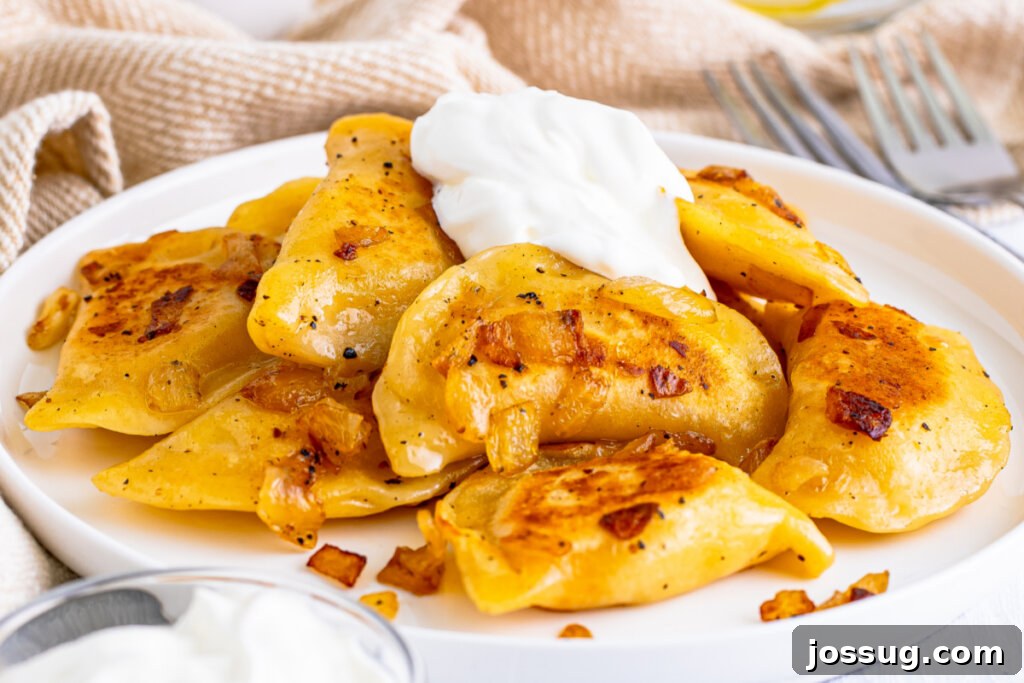
The dough itself, while seemingly simple, is a critical element in the Pierogi experience. Our basic recipe provides a wonderfully pliable and tender dough, but it also offers room for personal touches. Infuse it with finely chopped fresh herbs like chives or dill for an aromatic twist, or experiment with a small amount of whole wheat flour for a nuttier, heartier texture. The secret lies in achieving a dough that is soft and elastic enough to roll thinly without tearing, yet robust enough to perfectly encase your chosen filling. Once prepared, the Pierogi undergo a unique dual cooking process: first boiled until they gracefully float to the surface, and then gently sautéed. This pan-frying step, often done with butter and onions, creates an irresistible golden-brown crust, delivering a delightful crispy exterior that beautifully contrasts with the soft, flavorful interior. Traditionally, these golden-fried dumplings are served piping hot with a generous dollop of cool, tangy sour cream, adding a refreshing counterpoint to their richness. Whether you’re a newcomer to the art of Pierogi making or a seasoned enthusiast, crafting these delectable dumplings at home promises a deeply satisfying and immensely rewarding culinary adventure. Your palate will undoubtedly thank you for it!
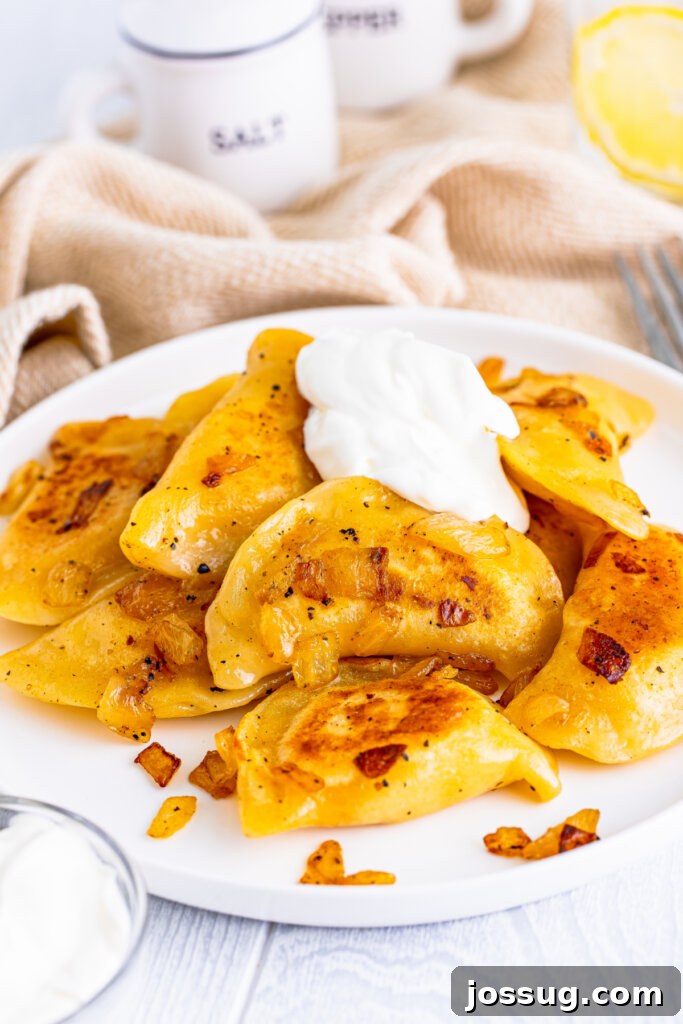
Essential Ingredients for Perfect Pierogi: Dough & Filling
The secret to truly exceptional homemade Pierogi lies in the quality and balance of its ingredients. Here’s a detailed look at what you’ll need, emphasizing the role of each component and offering helpful substitution tips:
For the Tender Dough
- All-purpose flour and kosher salt: These dry ingredients form the fundamental structure of your dough. All-purpose flour provides the ideal gluten content for a dough that is both pliable and tender. Kosher salt not only seasons the dough but also contributes to its overall texture and strength. While this recipe is optimized for all-purpose flour, for a slightly different character, you could consider a minimal blend with a fine pastry flour for extra delicacy.
- Large eggs: Eggs are vital for binding the dough, adding a rich hue, and significantly contributing to its overall richness and tenderness. They provide structure and make the dough more cohesive and manageable to roll.
- Sour cream: A cornerstone ingredient for Pierogi dough, sour cream imparts an incredible tenderness and a subtle tangy flavor. Its acidity helps relax the gluten, ensuring a soft, pillowy texture, while its fat content enriches the dough. Full-fat sour cream is highly recommended for the best results, but a good quality plain Greek yogurt can serve as a substitute if needed, though it might slightly alter the taste and texture.
- Unsalted butter, softened: Butter is crucial for enhancing the dough’s flavor and making it incredibly smooth and pliable. Always opt for unsalted butter to precisely control the sodium levels in your recipe. Ensure it’s properly softened to incorporate smoothly into the dough.
- Warm water: Used to hydrate the dry ingredients and bring the dough together into a cohesive mass. Warm water helps activate the gluten more gently and assists in creating a smooth dough more easily.
For the Savory Potato & Sharp Cheddar Filling
- Russet potatoes, peeled and diced: These are the gold standard for Pierogi filling. Their high starch content guarantees a wonderfully fluffy, smooth, and absorbent mashed potato base, essential for a non-gummy filling. While russets are preferred, Yukon Golds can also be used for a slightly creamier consistency. Avoid waxy potato varieties.
- Unsalted butter: Integrated into the hot mashed potatoes, butter adds essential richness, a creamy texture, and a delightful flavor.
- Kosher salt and black pepper: Basic yet critical seasonings that elevate the natural taste of the potatoes and cheese. Adjust these to your personal preference for seasoning.
- Shredded sharp cheddar cheese: The quintessential partner to potatoes in this classic Pierogi filling. Sharp cheddar delivers a bold, tangy flavor and a creamy texture when melted. Freshly shredded cheese is always recommended over pre-packaged varieties, as it melts more smoothly and offers a superior taste. Don’t hesitate to experiment with other cheeses like white cheddar, smoked gouda, or even a hint of cream cheese for added richness.
For Serving: The Perfect Accompaniments
- Unsalted butter, onion (small-diced), kosher salt, and black pepper: These ingredients are combined to create the traditional caramelized onion topping. Slow-sautéing onions in butter until golden and sweet adds an irreplaceable layer of flavor and texture to the finished Pierogi. Yellow or sweet onions work best for caramelization.
- Sour cream: An indispensable accompaniment, sour cream provides a cool, creamy, and tangy contrast that beautifully balances the richness of the Pierogi. It’s the classic finish that truly completes the dish.
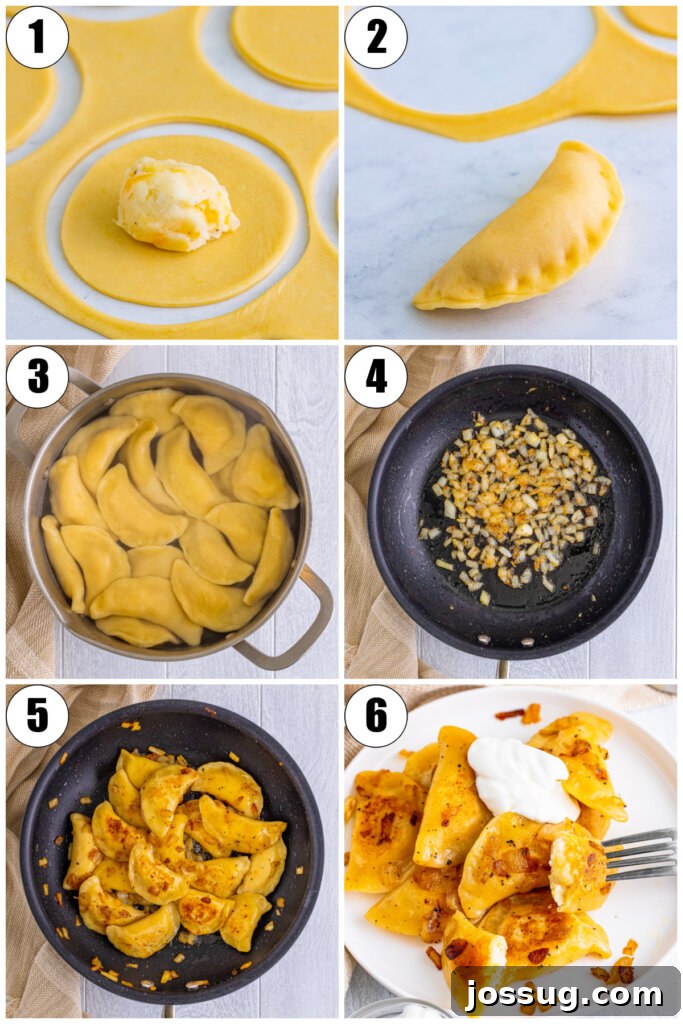
How to Make Pierogi: A Detailed Step-by-Step Guide
Follow these detailed instructions to create perfectly delicious homemade Pierogi that will become a cherished recipe in your culinary collection.
Step 1: Preparing the Silky, Pliable Dough
- Combine Dry Ingredients: In a large mixing bowl (or the bowl of a stand mixer equipped with a dough hook attachment), measure out the all-purpose flour and 1½ teaspoons of kosher salt. Stir them together thoroughly to ensure the salt is evenly distributed throughout the flour.
- Integrate Wet Ingredients: Add the 2 large eggs to the flour mixture. Mix until the flour appears crumbly and the eggs are mostly incorporated. Next, gently stir in the ½ cup of sour cream and ½ cup of softened unsalted butter. Begin to slowly stream in the ¼ cup of warm water from the tap, mixing continuously until a shaggy, cohesive dough begins to form.
- Knead and Rest the Dough: If using a stand mixer, increase the speed to medium-high and knead the dough for precisely 7 minutes. This kneading develops the gluten, resulting in a smooth, soft, and elastic dough. If you’re kneading by hand, this process will take slightly longer, typically 10-12 minutes, until the dough feels supple and smooth. Once kneaded, lightly coat the dough ball with a thin layer of cooking spray or a small amount of neutral oil to prevent it from drying out. Place the coated dough back into the bowl, cover it tightly with plastic wrap, and let it rest at room temperature for at least 30 minutes. This resting period is crucial for allowing the gluten to relax, making the dough much easier to roll and ensuring a more tender final product.
Step 2: Crafting the Creamy Potato & Cheddar Filling
- Cook the Potatoes: While your dough is resting, prepare the delectable filling. Take 1 pound of russet potatoes, peeled and diced into 1-inch cubes. Place these diced potatoes into a medium-sized pot and cover them completely with cold water, ensuring the water level is about 2 inches above the potatoes.
- Boil to Tenderness: Bring the water to a rolling boil over high heat. Once boiling, reduce the heat to a gentle simmer and continue to cook the potatoes until they are absolutely fork-tender, typically requiring 12-15 minutes.
- Mash Until Smooth: Once cooked, meticulously drain the potatoes, ensuring all excess water is removed. Transfer the hot, drained potatoes to a large mixing bowl. Mash them thoroughly until they are perfectly smooth and completely free of any lumps. A potato ricer can achieve an exceptionally fine texture, but a good old-fashioned potato masher works wonderfully too.
- Season and Combine Filling: Into the warm mashed potatoes, stir in the 2 tablespoons of unsalted butter, ½ teaspoon of kosher salt, and ½ teaspoon of black pepper until the butter is fully melted and evenly incorporated. Finally, add the ½ cup of shredded sharp cheddar cheese and stir vigorously until the cheese is completely melted and evenly distributed throughout the potatoes, creating a wonderfully creamy and flavorful filling. Set the filling aside to cool slightly before use.
Step 3: Shaping Your Delicious Half-Moon Dumplings
- Divide and Roll Dough: Divide your rested dough into two equal portions. While working with one portion, keep the other covered tightly with plastic wrap or a clean kitchen towel to prevent it from drying out. On a lightly floured, clean work surface, roll out the first dough portion to an even thickness of approximately 1/8th inch. Aim for consistent thickness across the entire sheet of dough.
- Cut Dough Circles: Using a 3-inch (or similar-sized) circular cookie or biscuit cutter, cut out as many perfect circles from the rolled dough as possible. Try to maximize your cuts to minimize dough scraps, as Pierogi dough can become tougher if re-rolled extensively.
- Fill and Securely Seal: Place about 1½ teaspoons of the potato-cheddar filling directly into the center of each dough circle. Carefully fold the dough circle in half over the filling, creating a distinctive half-moon shape. Firmly pinch the edges of the dough together with your fingers, working your way around the curve, to ensure a tight and secure seal. This prevents the filling from escaping during cooking. For an extra decorative touch and added security, you can crimp the edges with the tines of a fork.
- Store Shaped Pierogi: As you finish shaping each Pierogi, carefully place it on a baking sheet that has been lined with parchment paper. Ensure the Pierogi are not touching each other. Cover the tray of prepared Pierogi with a clean kitchen towel to keep them moist and prevent drying while you continue to shape the remaining dumplings with the second dough portion and any leftover filling.
Step 4: Cooking Pierogi to Golden Perfection
- Prepare Boiling Water: Fill a large stockpot with water and bring it to a vigorous rolling boil over high heat. Liberally season the boiling water with kosher salt – this infuses flavor into the dough as it cooks.
- Sauté Onions: While the water is heating, prepare your caramelized onions for serving. In a large skillet, melt the 4 tablespoons of unsalted butter over medium-low heat. Add the 1 cup of small-diced onion, ½ teaspoon of kosher salt, and ½ teaspoon of black pepper. Stir occasionally and allow the onions to cook slowly until they become beautifully soft, translucent, and begin to caramelize to a rich golden-brown hue, which typically takes 12-15 minutes. This slow process brings out their natural sweetness.
- Boil Pierogi in Batches: Carefully place approximately half of your shaped Pierogi into the boiling salted water. Avoid overcrowding the pot, as this can lower the water temperature and cause the Pierogi to stick together or cook unevenly. Gently stir occasionally to prevent sticking. Boil the Pierogi until they rise and float gracefully to the surface of the water, which indicates they are cooked through. This usually takes 3-4 minutes for fresh Pierogi.
- Transfer and Sauté: Using a slotted spoon or a spider strainer, carefully remove the boiled Pierogi from the water. Immediately transfer them directly into the skillet with the sizzling sautéed onions and butter.
- Toast for Crispness: Gently toss or stir the Pierogi in the skillet to ensure they are thoroughly coated in the fragrant butter and onions. Continue to cook them over medium heat, tossing frequently, until they develop a gorgeous golden-brown and slightly crispy exterior on both sides. This step usually takes about 4 minutes and is essential for achieving that delightful textural contrast.
- Serve Immediately: Once perfectly golden and toasted, remove the Pierogi from the skillet. Serve them piping hot, garnished with any remaining caramelized onions, and accompanied by a generous dollop of cool, tangy sour cream. Enjoy your homemade masterpiece!
Pierogi FAQs: Your Culinary Questions Answered
Absolutely! Pierogi are an excellent make-ahead meal. To freeze uncooked Pierogi, arrange them in a single layer on a parchment paper-lined baking sheet, ensuring they do not touch. Place the baking sheet into the freezer and freeze until the dumplings are completely solid (this usually takes 4-6 hours). Once frozen firm, transfer them to a large freezer-safe bag or an airtight container. They can be stored for up to 3 months, offering a convenient and quick meal option for busy days.
Cooking frozen Pierogi is very simple and doesn’t require thawing. Just drop them directly into a pot of boiling salted water. They might take a few minutes longer to cook than fresh Pierogi, but they are ready when they float to the top of the boiling water. After boiling, you can proceed to pan-fry them with butter and onions for that desired golden, crispy finish.
While the classic russet potato and sharp cheddar cheese filling is a beloved staple, the versatility of Pierogi allows for endless creative possibilities! For savory options, popular choices include a mixture of sauerkraut and mushrooms, seasoned ground pork or beef, or a savory blend of farmers cheese (twaróg) and herbs. For a sweet twist, consider fillings like fresh blueberries, cherries, sweetened cottage cheese (ser), or even apple slices with cinnamon. The key is to maintain a consistent texture and moisture level for your chosen filling to ensure it cooks well and doesn’t burst the dough.
Cooked leftover Pierogi can be stored in an airtight container in the refrigerator for up to 5 days. For the best reheating results, sauté them in a skillet with a small amount of butter over medium heat. To prevent them from drying out and to ensure they heat through evenly, you can cover the skillet and add a splash of water, allowing them to gently steam until warmed and slightly crispy.
Pierogi are most traditionally served hot with a generous helping of buttery, deeply caramelized sautéed onions and a cooling dollop of tangy sour cream. Other popular and delicious toppings include crispy bacon bits, a sprinkle of fresh chopped dill or chives, or even a side of fried mushrooms for an extra earthy flavor.
Absolutely! The base dough recipe is a fantastic starting point for personalization. You can easily incorporate finely chopped fresh herbs like chives, parsley, or dill directly into the dough for an aromatic twist. For a savory depth, a small amount of garlic powder or onion powder can be added. Experimenting with different types of flour, such as a small portion of semolina flour for a slightly firmer chew, or a fine pastry flour for a more delicate dough, can also yield interesting results.
Russet potatoes are overwhelmingly preferred for Pierogi filling due to their high starch content. This characteristic ensures they become wonderfully fluffy and mash into a perfectly smooth consistency, which is crucial for preventing a gummy or dense filling. While Russets are ideal, Yukon Gold potatoes can also be used, offering a slightly creamier texture and buttery flavor profile. It’s generally best to avoid waxy potato varieties if you’re aiming for that light and fluffy filling texture.
Yes, air-frying is an excellent method for achieving an extra crispy texture and a healthier alternative to pan-frying! After boiling your Pierogi (or directly from frozen, with a slightly adjusted cooking time), place them in a single layer in your air fryer basket, ensuring they do not overlap. Cook them at 400°F (200°C) for approximately 10 minutes, making sure to flip them halfway through, until they are beautifully golden brown and perfectly crisp. This method offers a delightful textural contrast to the soft interior.
To ensure your homemade Pierogi turn out perfectly every time, keep these common pitfalls in mind:
- Overfilling the dumplings: Too much filling can make it very difficult to seal the Pierogi properly and can cause them to burst open during the boiling process.
- Insufficiently sealing the edges: If the edges of the dough are not pinched firmly together, the delicious filling will likely escape into the boiling water, resulting in soggy Pierogi.
- Overworking the dough: While kneading is necessary, excessive handling or kneading can lead to a tough, chewy dough rather than a tender one. Knead just until it’s smooth and elastic.
- Re-rolling dough scraps too many times: Pierogi dough, like many pasta doughs, can become tough if it’s repeatedly re-rolled. Try to get as many circles as possible from your initial roll, and combine scraps only once.
- Overcrowding the boiling pot: Adding too many Pierogi to the pot at once will significantly lower the water temperature, causing them to cook unevenly and potentially stick together. Always cook in small batches for optimal results.
Explore More Comfort Food and Family-Favorite Recipes
If you’ve enjoyed the rewarding experience of crafting these homemade Pierogi, you’ll surely love exploring other comforting and savory dishes that are perfect for family meals or entertaining. Expand your culinary repertoire with these delightful recipes:
- Fluffy Butter Dip Biscuits: An Easy Breakfast or Side Dish
- Flavorful Peel and Eat Shrimp: Perfect for Appetizers or Main Course
- Sweet & Sour Hot Dogs: A Fun and Retro Party Food
- Hearty Beefy Sour Cream Noodle Bake: A Comforting Casserole
- Irresistible Loaded Bacon and Cheese Fries: The Ultimate Indulgence
Pierogi Recipe Card
By Jamie Sherman
Summary: Craft delicious homemade Pierogi with ease! This recipe features a buttery, tender dough and a savory potato-cheddar filling, perfect for a comforting meal.
Servings: 6 servings (approximately 36 pierogi)
Prep Time: 30 mins
Cook Time: 30 mins
Additional Time (Dough Rest): 30 mins
Total Time: 1 hr 30 mins
Equipment You’ll Need
- HexClad 7 Quart Hybrid Deep Sauté Pan Fryer With Lid (or a large deep skillet)
- Measuring Cups and Spoons
- Spider Strainer (or slotted spoon)
- Parchment Paper
- Baking Sheets
- 6-Qt. Enameled Cast Iron Dutch Oven (or a large stockpot)
- Mixing Bowl
- Stand Mixer (with dough hook attachment, optional but recommended)
- Cookie or biscuit cutter (3-inch diameter)
Ingredients
For the Dough
- 4 cups all-purpose flour
- 1 ½ teaspoons Kosher salt
- 2 large eggs
- ½ cup sour cream (full-fat recommended)
- ½ cup unsalted butter, softened
- ¼ cup warm water from the tap
For the Potato & Cheddar Filling
- 1 pound russet potatoes, peeled, diced into 1-inch cubes
- 2 tablespoons unsalted butter
- ½ teaspoon kosher salt
- ½ teaspoon black pepper
- ½ cup shredded sharp cheddar cheese (freshly shredded for best results)
To Serve (Sautéed Onions & Toppings)
- 4 tablespoons unsalted butter
- 1 cup small-diced yellow or sweet onion
- ½ teaspoon kosher salt
- ½ teaspoon black pepper
- Sour cream, for serving
- Optional: Crispy bacon bits, fresh dill, or chives for garnish
Instructions
- Prepare the Dough: In a large mixing bowl or stand mixer bowl (with dough hook), combine the 4 cups all-purpose flour and 1½ teaspoons kosher salt. Stir well.
- Add the 2 large eggs and mix until crumbly. Stir in ½ cup sour cream and ½ cup softened unsalted butter. Gradually stream in ¼ cup warm water, mixing until a dough forms.
- Knead on medium-high speed for 7 minutes (or 10-12 minutes by hand) until the dough is smooth and soft. Lightly coat with oil or cooking spray, cover with plastic wrap, and let rest at room temperature for 30 minutes.
- Prepare the Filling: While dough rests, peel and dice 1 pound russet potatoes into 1-inch cubes. Place in a medium pot and cover with cold water (2 inches above potatoes).
- Bring to a boil, then reduce heat to a simmer. Cook until fork-tender (12-15 minutes). Drain thoroughly.
- Transfer drained potatoes to a large bowl and mash until completely smooth.
- Stir in 2 tablespoons unsalted butter, ½ teaspoon kosher salt, and ½ teaspoon black pepper until butter melts. Add ½ cup shredded sharp cheddar cheese and stir until melted and combined. Set aside to cool slightly.
- Form the Pierogi: Divide dough into two portions, keeping one covered. On a lightly floured surface, roll out one portion to about 1/8th inch thick.
- Using a 3-inch circular cutter, cut out dough circles.
- Place about 1½ teaspoons of filling in the center of each circle. Fold dough in half to form a half-moon. Firmly pinch the edges together to seal (crimp with a fork for extra security).
- Place shaped Pierogi on a parchment-lined baking sheet, ensuring they don’t touch. Cover with a clean kitchen towel to prevent drying. Repeat with the remaining dough and filling.
- Cook the Pierogi: Bring a large stockpot of water to a rolling boil and season generously with salt.
- While water heats, melt 4 tablespoons unsalted butter in a large skillet over medium-low heat. Add 1 cup small-diced onion, ½ teaspoon kosher salt, and ½ teaspoon black pepper. Cook, stirring occasionally, until onions are soft and light golden-brown (12-15 minutes).
- Carefully place half of the Pierogi into the boiling water (do not overcrowd). Boil for 3-4 minutes, stirring gently, until they float to the surface.
- Using a slotted spoon, remove boiled Pierogi and immediately transfer them to the skillet with the sautéed onions and butter.
- Gently stir Pierogi to coat them, and cook in the skillet over medium heat, tossing frequently, until lightly toasted and golden-brown on both sides (about 4 minutes).
- Serve: Serve the hot Pierogi immediately with any remaining caramelized onions and a generous dollop of sour cream.
Notes for Perfect Pierogi
- Freezing Pierogi: To freeze uncooked Pierogi, lay them individually on a parchment-lined baking sheet, not touching. Freeze until solid (4-6 hours), then transfer to a freezer-safe bag for up to 3 months.
- Cooking Frozen Pierogi: Frozen Pierogi can be boiled directly from the freezer. They may require slightly longer cooking time but are ready when they float to the top.
- Filling Variations: This recipe serves as a versatile base. Keep the ingredient proportions similar. Explore fillings like sauerkraut and mushrooms, seasoned meat, sweet farmer’s cheese, or various fruits (e.g., cherries, blueberries).
- Dough Handling: Avoid re-rolling Pierogi dough scraps excessively, as it can make the dough tough. Try to maximize your cuts from the initial roll.
- Leftover Storage & Reheating: Store cooked Pierogi in an airtight container in the refrigerator for up to 5 days. Reheat by sautéing in a skillet with butter, adding a splash of water and covering to steam until warmed through and crispy.
- Serving Suggestions: Beyond sautéed onions and sour cream, consider serving with crispy bacon bits, fresh chives, or a side of melted butter.
- Air Frying Pierogi: For a crispier texture, air-fry boiled Pierogi at 400°F (200°C) for about 10 minutes, flipping halfway, until golden brown.
- Adding to Soups: Pierogi can be added to hearty soups (like Polish Pierogi soup). Add them towards the end of the cooking process to prevent them from becoming overly soft or mushy.
Nutrition Information (Approximate Per Serving)
Calories: 711 kcal, Carbohydrates: 81g, Protein: 16g, Fat: 36g, Saturated Fat: 21g, Polyunsaturated Fat: 2g, Monounsaturated Fat: 9g, Trans Fat: 1g, Cholesterol: 153mg, Sodium: 1070mg, Potassium: 510mg, Fiber: 4g, Sugar: 3g, Vitamin A: 1131IU, Vitamin C: 6mg, Calcium: 134mg, Iron: 5mg
Nutrition information is automatically calculated and should only be used as an approximation. Actual values may vary based on ingredients and preparation methods.