
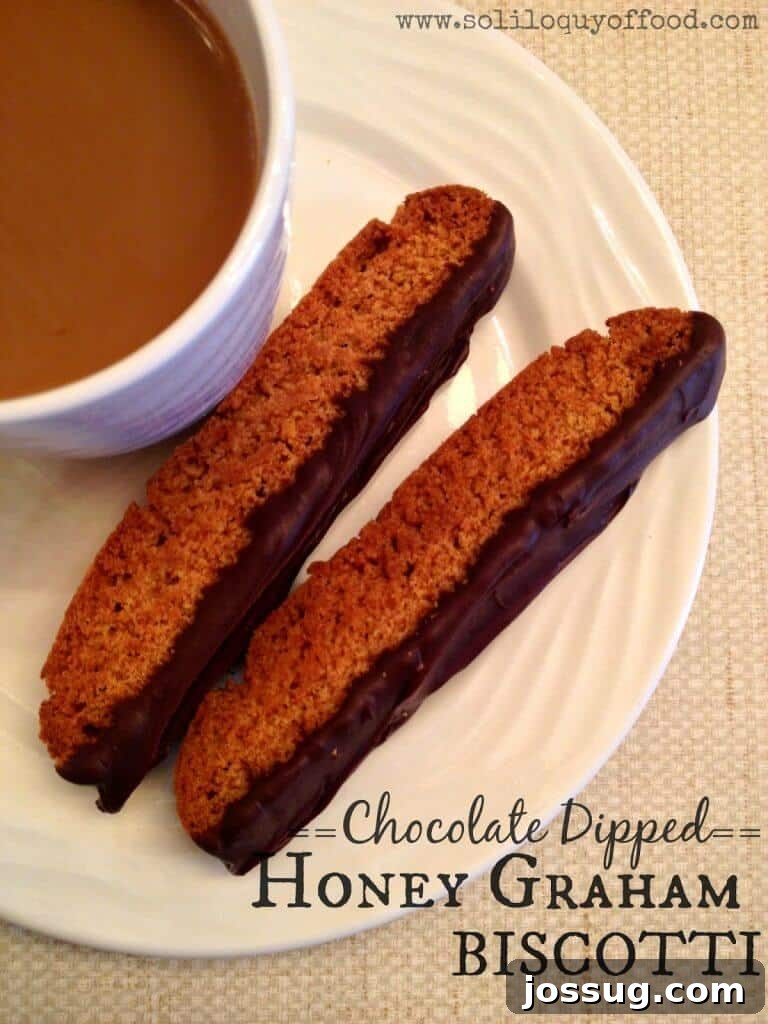
Irresistible Chocolate Dipped Honey Graham Biscotti: Your Perfect Dunkable Treat
Do you ever find yourself noticing how life’s simple moments often inspire the most delightful creations? It’s a bit like a “Cause & Effect” scenario straight out of a textbook, but with a delicious twist! In my world, a specific “cause” frequently leads to an incredibly tasty “effect.”
The Cause: The sheer beauty and sometimes relentless persistence of Mother Nature, especially during a snowy winter season.
The Effect: An abundance of these exquisite Chocolate Dipped Honey Graham Biscotti, ready to bring warmth and joy.
Hey there, baking enthusiasts! It’s Kim, from Soliloquy Of Food & Such, and I’m back, this time with a recipe born from the cozy confines of a snowy day. While some might express a mild lament about the generous amounts of snow we’ve received in the Northeast this year, I confess, I actually find a deep appreciation for it. Snow-covered landscapes often trigger my innate desire to don my comfiest pajamas, settle in with an oversized mug of hot coffee, and, you guessed it, bake! The peaceful solitude of a snowy day is, for me, an open invitation to create something comforting and delicious.
Unveiling the Magic of Biscotti: A Timeless Italian Delight
Biscotti are not just any cookies; they are a revered tradition, a culinary art form perfected over centuries. The name itself, derived from the Latin “bis coctus,” literally means “twice-baked.” This unique double-baking process is the secret to their signature characteristic: an unparalleled crispness that makes them the quintessential dunkable cookie. First, they are baked as long, slender loaves, then cooled slightly, sliced, and returned to the oven for a second toast. This extra step removes excess moisture, giving them their iconic firm texture – strong enough to be dipped into coffee, tea, or milk without fear of crumbling, yet yielding to a tender crunch with every bite.
Our particular recipe elevates the classic biscotti with a heartwarming twist: the inclusion of honey and graham cracker crumbs. This ingenious combination transforms the traditional Italian cookie into a nostalgic, comforting treat that hints at cherished childhood memories of s’mores and cozy evenings. The rich, earthy sweetness of honey beautifully complements the delicate, slightly spiced notes of graham crackers, creating a flavor profile that is both unique and deeply satisfying. It’s a harmonious blend that sets the stage for the indulgent chocolate finish.
The Indulgent Finale: Chocolate Dipped Perfection
While the honey graham biscotti are undeniably delicious on their own, the addition of a rich chocolate dip elevates them to an extraordinary level. This simple step introduces a layer of luxuriousness, creating a delightful contrast between the crunchy, slightly sweet cookie and the smooth, decadent chocolate. It’s this combination that truly defines “melty-chocolate cookie-dunking nirvana”—a moment of pure culinary bliss that can transform even the gloomiest day into a treat-filled escape. So, for those moments when complaints about the weather begin to surface, a plate of these chocolate-dipped wonders, accompanied by a warm beverage, can gently persuade anyone to settle down and simply enjoy the art of dunking.
Creating these delightful biscotti is surprisingly simple and requires no specialized skills. The dough itself, while a bit sticky, is remarkably cooperative. Just turn it out onto a lightly floured surface, divide it into two portions, and gently shape them into neat 10-inch by 4-inch rectangles. Keep in mind that these loaves will expand slightly during the first bake, so ensure they have ample space on your baking sheets for proper air circulation and even cooking. This initial bake sets the foundation for their perfect structure and golden hue.
After their initial bake, the loaves are removed from the oven and allowed to cool slightly. This brief cooling period makes them easier to handle for the next crucial step: slicing. Using a sharp serrated knife, carefully slice the warm loaves crosswise into uniform 1/2-inch sections. The precision of the slice contributes to the final aesthetic and ensures even toasting. Once sliced, arrange the individual biscotti pieces on their sides back onto the baking sheets and return them to the oven for their second toast. This second bake is where they achieve their characteristic dry, crisp texture, becoming perfectly golden and ready for their grand finale.
Yes, the chocolate dipping step does add a little more time to the overall preparation, but trust me, it is unequivocally worth every single minute for that ultimate “melty-chocolate cookie-dunking nirvana.” Melting the chocolate in a wide, shallow bowl simplifies the dipping process. For a truly professional finish, you can even use the back of a spoon to gently smooth the melted chocolate onto the biscotti, ensuring an even and elegant coating. The final wait while the chocolate sets is a small test of patience, but the reward is a batch of perfectly coated, crunchy, and utterly delightful biscotti.
Expert Tips for Baking Perfect Biscotti
- Achieving the Right Dough Consistency: Biscotti dough is meant to be stiff and slightly sticky. Avoid the temptation to add too much flour, as this can result in dry, crumbly biscotti. A lightly floured surface and floured hands are your best tools for shaping.
- Shaping Uniform Loaves: Aim for consistent 10″x4″ rectangles, about 1/2″ thick. Uniformity ensures even baking and easy slicing later on.
- The Importance of Cooling: Allow the loaves to cool for about 20 minutes after the first bake before slicing. This helps them firm up slightly, preventing crumbling and allowing for clean, neat slices with a serrated knife.
- Even Toasting: When performing the second bake, arrange the slices carefully on their sides. Flip them halfway through to ensure both sides achieve a beautiful golden brown color and maximum crispness.
- Melting Chocolate Safely: Use a double boiler or microwave the chocolate in short 30-second bursts, stirring thoroughly after each interval. This prevents the chocolate from burning or seizing, ensuring a smooth, glossy dip.
- Cooling After Dipping: For the best results, allow the chocolate to set completely at room temperature, which typically takes about 90 minutes. If you’re short on time, placing them in the refrigerator for 20-30 minutes can speed up the process.
Creative Serving Suggestions and Flavor Variations
These Chocolate Dipped Honey Graham Biscotti are incredibly versatile and can be enjoyed in numerous ways, beyond their primary role as a dunkable delight. Their robust flavor and satisfying crunch make them perfect for various occasions:
- Coffee & Tea Companion: Naturally, they are ideal alongside your morning coffee, espresso, or a comforting cup of tea.
- Dessert Platter Star: Arrange them beautifully on a dessert platter for gatherings. Their elegant appearance and unique flavor always impress.
- Gourmet Gift: Packaged in a decorative tin or a clear cellophane bag with a ribbon, these homemade biscotti make a thoughtful and delicious gift for friends, family, or hosts.
- Milk’s Best Friend: For a nostalgic and comforting snack, serve them with a cold glass of milk – a sophisticated twist on a classic pairing.
- Add a Nutty Crunch: Integrate half a cup of finely chopped nuts, such as almonds, walnuts, or pecans, into the dough for an added layer of texture and flavor.
- Spice it Up: A hint of cinnamon, nutmeg, or even a touch of cardamom in the dough can further enhance the warm, inviting notes of honey and graham.
- Vary the Chocolate: Experiment with different types of chocolate for dipping. Dark chocolate offers a more intense contrast, while white chocolate provides a creamier, sweeter finish. You could even drizzle with a contrasting chocolate color for visual appeal.
Whether you’re seeking solace from a chilly day, searching for the perfect accompaniment to your favorite hot beverage, or simply craving a homemade treat that balances crunch, sweetness, and chocolatey indulgence, these Chocolate Dipped Honey Graham Biscotti are destined to become a cherished recipe in your collection. Every bite promises a delightful journey of flavor and texture, transforming an ordinary moment into something truly special.
For more delicious baking inspiration and unique recipes, make sure to follow Soliloquy Of Food & Such across all social media platforms!
Explore More Delightful Recipes:
Chocolate Dipped Tangerines
Cinnabunnies with Biscoff Frosting

Chocolate Dipped Honey Graham Biscotti
Biscotti are the perfect cookies to dunk – that’s why they are baked, sliced, then baked again, toasting them to dunkable perfection.
Print Recipe
Ingredients
- ½ cup (1 stick) unsalted butter, melted then cooled
- ½ cup packed light brown sugar
- ½ cup honey
- 2 large eggs
- 1 ¾ cups all-purpose flour
- 1 ½ cups graham cracker crumbs (finely crushed)
- 1 tablespoon baking powder
- 1 cup semi-sweet chocolate chips (for dipping)
Instructions
- Preheat your oven to 375ºF (190ºC). Prepare two large baking sheets by lining them with parchment paper or greasing them lightly.
- In a generously sized mixing bowl, combine the cooled melted butter, brown sugar, honey, and eggs. Whisk or stir vigorously until all these wet ingredients are thoroughly combined and the mixture is smooth.
- In a separate, smaller bowl, whisk together the all-purpose flour and baking powder. Gradually add this dry mixture along with the graham cracker crumbs to the wet ingredients. Using a wooden spoon or spatula, stir and fold until the dough just comes together. The resulting dough will be notably heavy and possess a sticky consistency; this is perfectly normal.
- Transfer the dough onto a lightly floured work surface. Divide the entire batch of dough into two equal halves.
- Carefully shape each half of the dough into a rectangular loaf, aiming for dimensions of approximately 10 inches long by 4 inches wide and about 1/2 inch thick. Place each shaped loaf onto a prepared baking sheet, ensuring several inches of space between them and the edges, as they will spread during their initial bake.
- Bake in the preheated oven for 20-24 minutes, or until the loaves achieve a beautiful golden brown color and feel firm to the touch. Once baked, carefully remove the baking sheets from the oven and transfer the loaves onto a wire rack to cool for approximately 20 minutes.
- After the slight cooling period, use a sharp serrated knife to slice each loaf crosswise into precise 1/2-inch thick sections. Arrange these individual cut pieces on their sides back onto the baking sheets.
- Return the baking sheets to the oven and toast the biscotti slices for 5-6 minutes on one side. Then, carefully flip each piece over and toast for an additional 5-6 minutes, or until they are golden, dry, and wonderfully crispy. Remove from the oven and allow them to cool completely on a wired rack.
- When the biscotti are completely cool, prepare the chocolate for dipping. Place the semi-sweet chocolate chips in a wide, shallow bowl (ensure it’s wide enough for easy dipping). Melt the chocolate in the microwave in 30-second intervals, stirring thoroughly after each interval, until the chocolate is smooth and fully melted.
- Dip the bottom portion of each cooled biscotti into the melted chocolate. For a more uniform and elegant application, you can gently smooth the chocolate with the back of a spoon. Lay the chocolate-dipped biscotti on their side on a tray lined with parchment paper or wax paper.
- Allow the chocolate-dipped biscotti to set. This will take approximately 90 minutes at room temperature, or you can expedite the process by placing them in the refrigerator for about 30 minutes until the chocolate is firm. Once set, they are ready to be savored!
Notes
- If you prefer a simpler, classic biscotti experience or intend to primarily dunk these in your coffee, you can certainly skip the chocolate dipping step. They are wonderfully delicious in their un-dipped form as well!
Nutrition Information
Nutrition information is automatically calculated and should only be used as an approximation. Actual values may vary based on specific ingredients and preparation methods.
Enjoyed crafting these delicious biscotti? We’d love to hear your thoughts! Leave a comment below!