
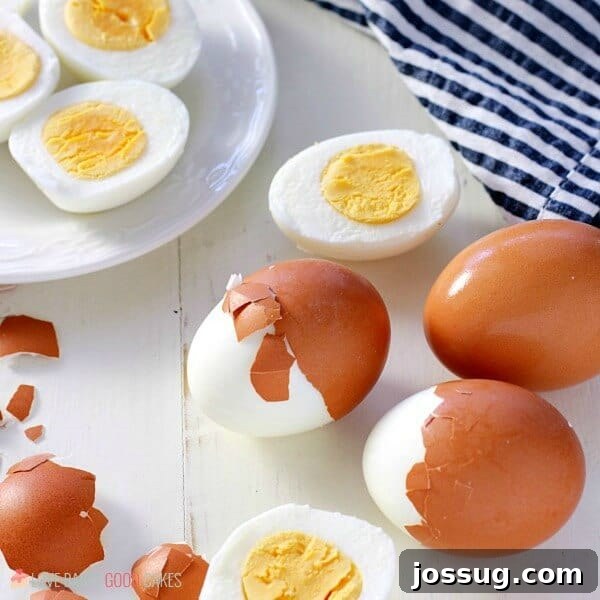
Mastering Perfect Hard-Boiled Eggs: Stovetop, Instant Pot, & Egg Cooker Methods
Achieving truly perfect hard-boiled eggs can seem like a culinary challenge, but it’s a skill that elevates simple meals and snacks. This comprehensive guide shares three reliable methods for consistently making hard-boiled eggs with firm, tender whites, creamy yolks, and shells that peel away effortlessly. Whether you prefer the classic stovetop approach, the efficiency of an Instant Pot (or other electric pressure cooker), or the convenience of a dedicated egg cooker, you’ll find foolproof steps here.
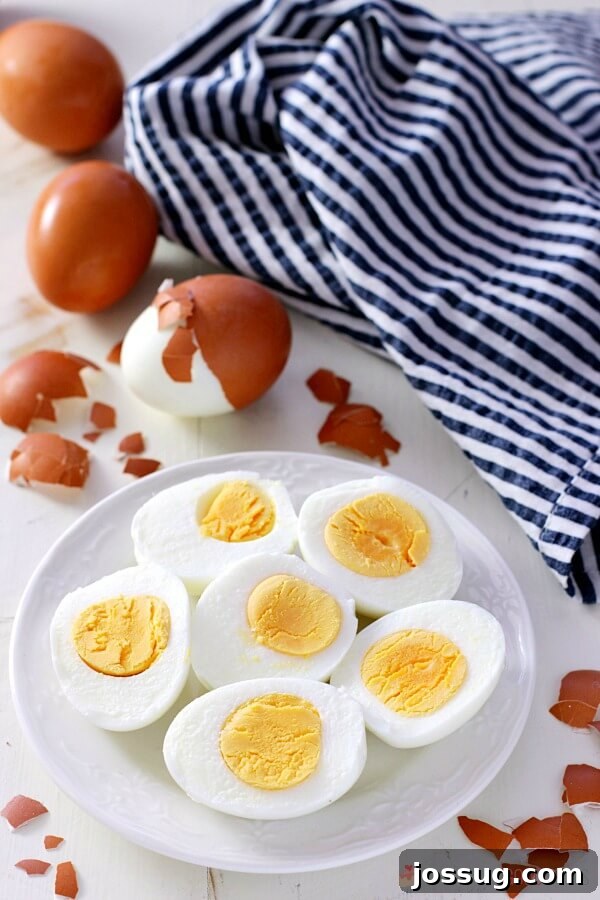
The Quest for Perfect Hard-Boiled Eggs: Beyond Just “Boiling”
Hard-boiled eggs are a staple in kitchens worldwide, offering an inexpensive, protein-rich ingredient for everything from quick breakfasts to elaborate holiday appetizers. From a broke college student relying on budget-friendly egg salad to a busy parent needing a nutritious snack, these versatile spheres are incredibly useful. However, many home cooks have experienced the frustration of rubbery whites, chalky yolks, that unappetizing gray-green ring, or stubborn shells that cling to the egg, taking half the white with them.
Over the years, I’ve experimented with countless methods and “secret” ingredients – adding vinegar, baking soda, or salt to the water, trying both fresh and older eggs. My journey led me to discover that simplicity and technique are key. The goal isn’t just to boil an egg; it’s to gently cook it to perfection, ensuring a consistently delightful texture and appearance. A truly perfect hard-boiled egg features a firm, yet yielding white and a beautifully cooked, creamy yellow yolk, free from any discoloration. They’re excellent on their own, sliced into salads, or as the star in beloved recipes like deviled eggs or classic egg salad.
What Makes an Egg “Perfectly” Hard-Boiled?
Defining the “perfect” hard-boiled egg comes down to a few critical factors:
- Texture of the White: It should be firm but not rubbery, offering a pleasant bite.
- Texture and Color of the Yolk: The yolk should be fully cooked, creamy, and a uniform vibrant yellow, completely free from any grayish or greenish discoloration around its edges.
- Ease of Peeling: The shell should separate easily from the cooked egg, leaving a smooth, intact white.
Choosing the Right Eggs for Easy Peeling
One of the most crucial, yet often overlooked, factors in making easy-to-peel hard-boiled eggs is the age of the eggs. While farm-fresh eggs are fantastic for frying or scrambling, they are notoriously difficult to peel when hard-boiled. The reason lies in the pH level of the egg white. Very fresh eggs have a lower pH, which causes the egg white to stick more firmly to the inner membrane of the shell. As eggs age (typically for a week or two in your refrigerator), their pH level rises, making the white less adhesive to the membrane, thus facilitating easier peeling. So, for your perfect hard-boiled eggs, reach for those older eggs in the back of your fridge!
The Secret to Avoiding That Gray-Green Yolk
That unattractive gray or green ring often seen around the yolk of hard-boiled eggs is a common issue caused by overcooking. It’s a chemical reaction: hydrogen sulfide from the egg white reacts with iron in the yolk when exposed to high heat for too long. This forms iron sulfide, which is harmless but visually unappealing. The key to preventing this is precise cooking times and, importantly, a rapid cooling process.
Three Foolproof Methods for Perfect Hard-Boiled Eggs
Below, we’ll delve into three distinct techniques, each offering consistent results. Regardless of the method you choose, the principle remains the same: gentle cooking followed by a swift cool-down in an ice bath. You won’t need any “secret ingredients” like vinegar or baking soda; just eggs, water, and ice are sufficient for success.
Method 1: The Classic Stovetop Approach
The traditional stovetop method is a time-tested favorite, relying on residual heat to gently cook the eggs. This prevents overcooking and ensures that beautiful creamy yolk.
Ingredients:
- 6 large eggs (preferably 1-2 weeks old)
- Cold water
- Ice
Equipment:
- Large saucepan with lid
- Large bowl
- Slotted spoon or tongs
Instructions:
- Prepare the Eggs: Gently place your eggs in a single layer at the bottom of a large saucepan. Avoid overcrowding the pan.
- Add Water: Pour enough cold water into the pan to cover the eggs by at least one inch.
- Bring to a Boil: Place the pan over medium-high heat and bring the water to a full, rolling boil.
- Remove from Heat & Cover: As soon as the water reaches a rolling boil, immediately remove the pan from the heat. Cover it tightly with a lid.
- Let Them Cook: Allow the eggs to sit undisturbed in the hot water bath for the following durations, depending on egg size:
- Small eggs: 14-16 minutes
- Medium eggs: 15-17 minutes
- Large eggs: 16-18 minutes
- Extra-large eggs: 17-19 minutes
(For standard large eggs, 17 minutes is often ideal for a perfectly creamy yolk.)
- Prepare Ice Bath: While the eggs are cooking, fill a large bowl with ice and enough cold water to fully submerge the eggs.
- Cool Rapidly: Once the cooking time is up, use a slotted spoon or tongs to carefully transfer the hot eggs directly into the ice bath. Let them cool for at least 10 minutes. This rapid cooling halts the cooking process, preventing the gray-green ring, and helps the egg whites contract, making them easier to peel.
- Peel & Enjoy: For even easier peeling, gently tap and roll the cooled eggs on a hard surface to create small cracks before peeling under cool running water.
- Store: Use immediately in your desired recipe or store covered in the refrigerator for up to one week.
Method 2: The Instant Pot (or Electric Pressure Cooker) 5-5-5 Method
The Instant Pot offers a remarkably consistent and hands-off way to make hard-boiled eggs, especially for larger batches. The popular “5-5-5 method” ensures easy peeling and perfectly cooked yolks every time.
Ingredients:
- 6-12 large eggs (preferably 1-2 weeks old)
- 1 cup cold water
- Ice
Equipment:
- Instant Pot (or electric pressure cooker)
- Trivet or egg rack
- Large bowl
- Tongs
Instructions:
- Add Water: Pour 1 cup of cold water into the bottom of your Instant Pot liner.
- Place Eggs: Insert the trivet or egg rack into the pot. Carefully place your eggs on the rack in a single layer (you can stack them if using an egg rack, ensuring they fit below the lid).
- Pressure Cook: Close and lock the lid, making sure the sealing valve is in the “Sealing” position. Press the “Manual” button (or “Pressure Cook” depending on your model) and set the time to 5 minutes on high pressure.
- Natural Release (5 Minutes): Once the cooking cycle is complete, let the pressure release naturally for 5 minutes. Do not force a quick release immediately.
- Quick Release: After 5 minutes of natural release, carefully turn the pressure valve to “Venting” to perform a quick pressure release. Once the float valve drops, you can safely open the lid.
- Ice Bath (5 Minutes): Using tongs, immediately transfer the hot eggs to a large bowl filled with ice water. Let them cool in the ice bath for at least 5 minutes. This rapid cooling is essential for easy peeling and preventing the gray ring.
- Peel & Store: Peel the eggs under cool running water and use as desired. Store any unpeeled eggs in the refrigerator, covered, for up to one week.
Note on Egg Size: While the 5-5-5 method is generally reliable for large eggs, you might adjust the pressure cooking time slightly for very small (reduce to 4 minutes) or extra-large eggs (increase to 6 minutes) to achieve your preferred doneness.
Method 3: The Dash Egg Cooker Method
For ultimate simplicity and consistent results, an electric egg cooker is a fantastic gadget. It uses steam to gently cook the eggs to perfection, often with minimal fuss and mess.
Ingredients:
- 6-12 large eggs (preferably 1-2 weeks old)
- Cold water
- Ice
Equipment:
- Electric Deluxe Rapid Cooker for Eggs (or similar egg cooker)
- Measuring cup (usually included with cooker)
- Large bowl
- Tongs
Instructions:
- Add Water: Fill the measuring cup provided with your egg cooker to the “hard” line corresponding to the number of eggs you are cooking (e.g., 5 oz. line for 6 eggs, or 3.5 oz. line for 12 eggs for some models). Pour this water onto the heating plate of the egg cooker.
- Pierce Eggs: Using the pin at the bottom of the measuring cup, carefully pierce the fatter end of each egg. This tiny hole helps prevent cracking during cooking and aids in easier peeling.
- Place Eggs: Place the eggs, pointy side down, onto the egg tray. If your cooker has multiple tiers, use the base ring for a second layer of eggs as needed.
- Start Cooking: Cover the egg cooker with its lid. Press the power switch to begin cooking.
- Cool Rapidly: When the buzzer sounds, indicating the eggs are cooked, immediately turn off the egg cooker and unplug it. Using tongs, carefully transfer the hot hard-boiled eggs to a bowl of ice water to cool for about 10 minutes.
- Peel & Store: Once cooled, peel and enjoy your perfectly steamed hard-boiled eggs. Store any unused eggs in their shells, covered, in the refrigerator for up to one week.
Essential Tips for Success & Troubleshooting
How Long Do Hard-Boiled Eggs Last?
Once cooked, hard-boiled eggs (whether peeled or unpeeled) should be consumed within one week if stored properly in the refrigerator. It’s generally recommended to store them in their shells until you’re ready to use them, as the shell provides a natural protective barrier that can extend their freshness slightly and prevent them from absorbing odors from other foods in the fridge.
Why Do My Eggs Still Stick or Have a Gray Ring?
- Sticky Shells: If your eggs are still difficult to peel, consider these factors:
- Egg Freshness: Are you using older eggs (1-2 weeks old)? Fresh eggs are the primary culprit for sticky shells.
- Ice Bath Duration: Did you cool them quickly and sufficiently in an ice bath for at least 5-10 minutes? The rapid temperature change is key.
- Cracking Before Cooling: Gently cracking the eggs before submerging them in the ice bath can allow water to seep between the membrane and the egg, further aiding peeling.
- Gray or Green Ring: This is almost always a sign of overcooking. Adjust your cooking times slightly downward for your chosen method. The ice bath also plays a crucial role in preventing this by stopping the cooking process quickly.
More Ways to Enjoy Hard-Boiled Eggs
Beyond being a simple snack, hard-boiled eggs are incredibly versatile:
- Salads: Chop them into a classic Cobb salad, Nicoise salad, or any green salad for added protein.
- Egg Salad Sandwiches: The quintessential use! Mix with mayo, mustard, celery, and seasonings.
- Deviled Eggs: A party favorite, especially with recipes like Classic Deviled Eggs.
- Snacks: A dash of salt and pepper, or “Everything Bagel” seasoning.
- Breakfast Bowls: Add to avocado toast, ramen, or grain bowls.
- Garnish: Sliced or quartered eggs make an attractive garnish for soups and main dishes.
Nutrition Spotlight: The Humble Egg
Eggs are a powerhouse of nutrition, offering high-quality protein, essential vitamins (like D and B12), and minerals. Despite past concerns about cholesterol, current dietary guidelines generally consider eggs a healthy part of a balanced diet. They provide sustained energy and satiety, making them an excellent choice for any meal.
Nutrition information for one large hard-boiled egg (approximate):
- Calories: 63 kcal
- Carbohydrates: 0.3g
- Protein: 6g
- Fat: 4g (Saturated Fat: 1g, Polyunsaturated Fat: 1g, Monounsaturated Fat: 2g, Trans Fat: 0.02g)
- Cholesterol: 164mg
- Sodium: 62mg
- Potassium: 61mg
- Sugar: 0.2g
- Vitamin A: 238 IU
- Calcium: 25mg
- Iron: 1mg
Note: Nutrition information is automatically calculated and should only be used as an approximation.
Conclusion
Achieving perfect hard-boiled eggs doesn’t have to be a mystery. By understanding a few simple principles – using slightly older eggs, controlling the cooking temperature, and employing a rapid ice bath – you can consistently produce beautiful, easy-to-peel eggs with creamy yolks, free from any greenish discoloration. Experiment with the stovetop, Instant Pot, or egg cooker methods to find the one that best suits your kitchen and lifestyle. Enjoy these versatile and nutritious gems in countless culinary creations!
Other Posts You May Enjoy
- Classic Deviled Eggs
- 10 Egg Yolk Recipes
- Creamy Stovetop Mac & Cheese
- Old-Fashioned Egg Salad Recipe
- Taco Ring