
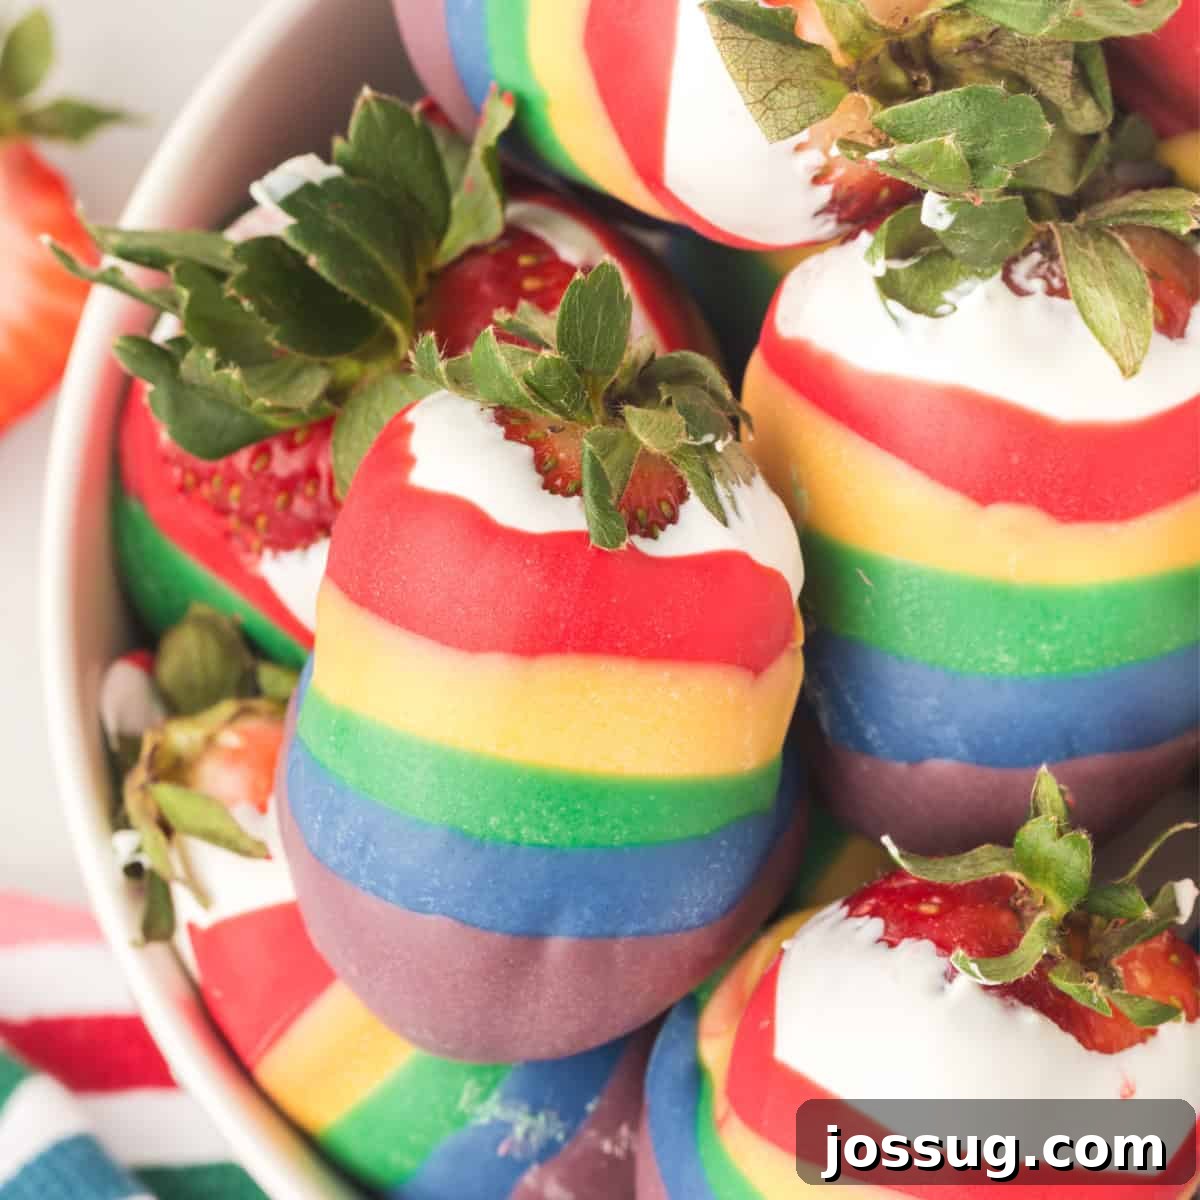
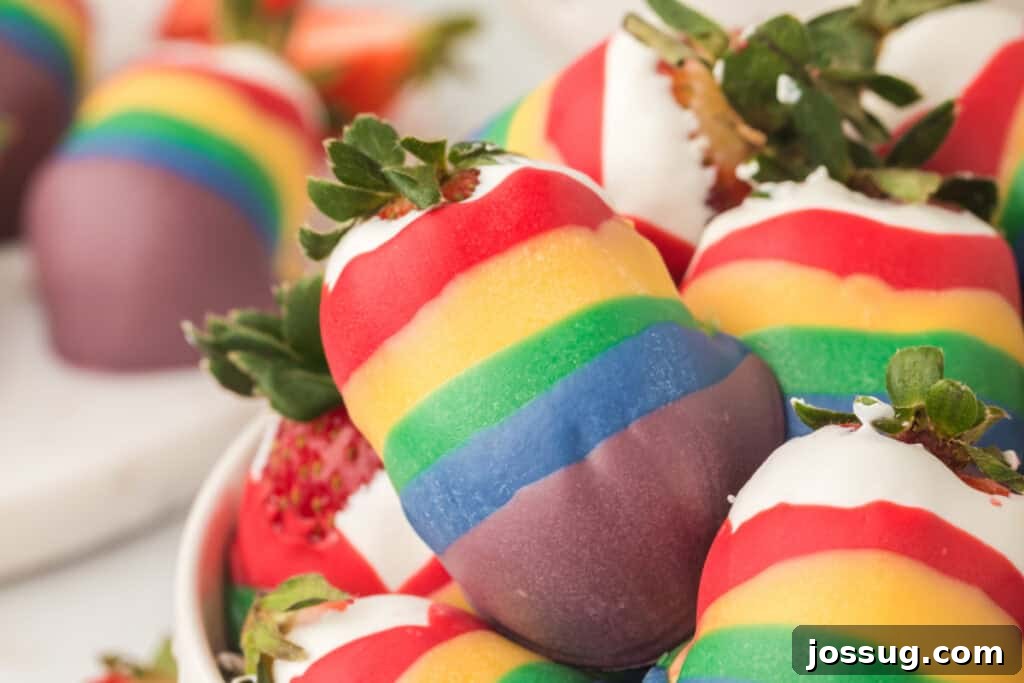
Transform your dessert table into a vibrant spectacle with these incredibly delightful **Rainbow Candy Coated Strawberries**! 🍓✨ Each juicy, fresh strawberry is meticulously enveloped in layers of shimmering, colorful candy, creating a visually stunning and irresistibly sweet treat. Far more than just a dessert, these vibrant berries are a statement piece, perfect for bringing joy and a burst of color to any occasion. Whether you’re planning an extravagant birthday party, a festive holiday gathering, a casual potluck, or simply want to brighten an ordinary day, these candy-coated marvels are guaranteed to captivate and charm everyone. Get ready to impress your guests and treat your taste buds to a truly magical experience! 🌈💖
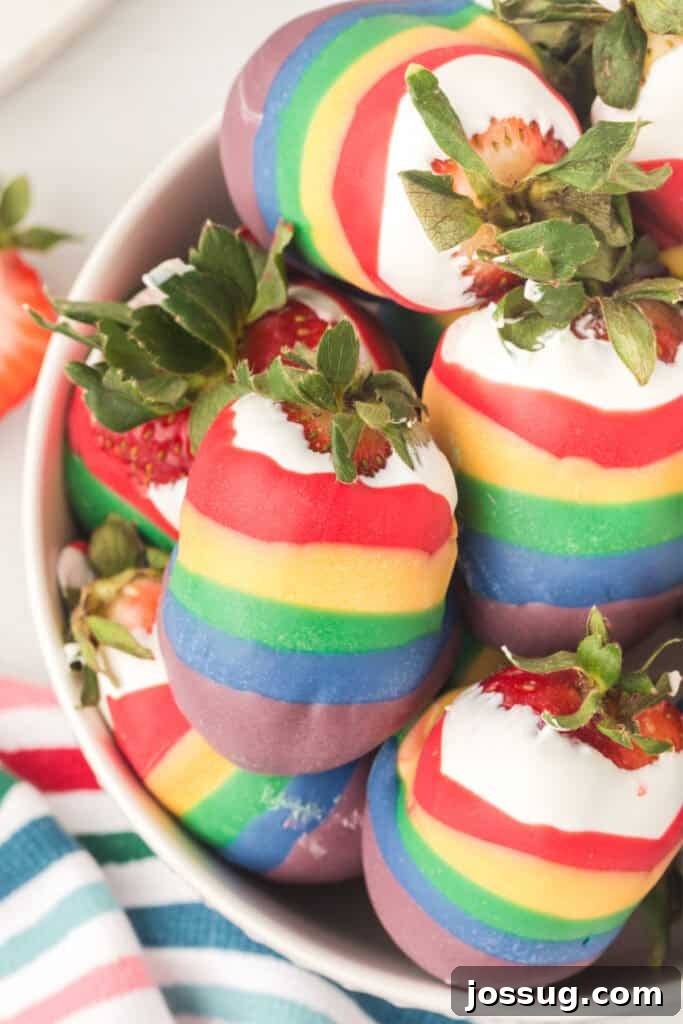
Embrace the Joy of Rainbow Foods: A Celebration of Color and Flavor
Are you searching for a dessert that not only tastes incredible but also creates an unforgettable visual impact? Look no further than this sensational **Rainbow Candy Coated Strawberries** recipe! In a world full of delicious treats, rainbow foods stand out, transforming simple ingredients into dazzling culinary art. From rainbow cakes to colorful fruit platters, the concept of eating the rainbow is synonymous with joy, celebration, and creativity in the kitchen. This recipe perfectly embodies that spirit, offering a delightful way to infuse your gatherings with energy and cheer.
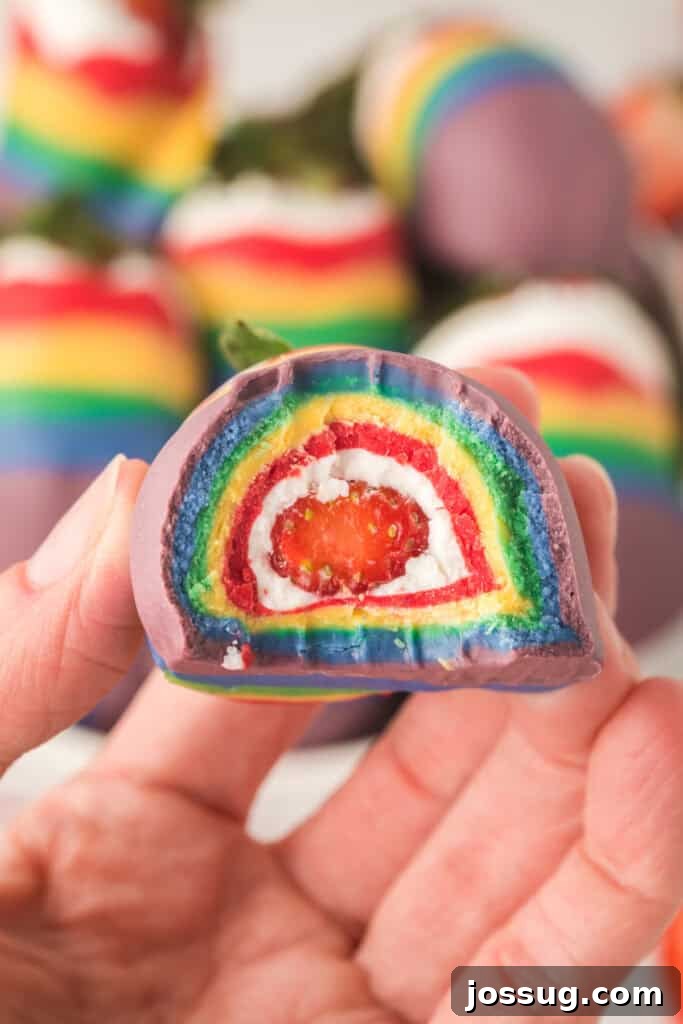
Each strawberry is a tiny masterpiece, layered with a spectrum of vivid candy colors that will instantly draw the eye and excite the palate. Imagine the delight on your guests’ faces as they bite into a perfectly ripe, sweet strawberry, encased in a crisp, colorful candy shell. It’s an experience that awakens all senses!
These incredibly easy-to-make, no-bake treats are an absolute triumph at any event. They require minimal effort but deliver maximum impact, making them ideal for busy hosts who still want to create something truly special. Whether you’re planning a child’s birthday bash, a vibrant spring brunch, a summer barbecue, or simply want to surprise your family with a fun, sweet snack, these rainbow strawberries are sure to be a showstopper. Try them out and prepare to wow your guests with this enchanting and utterly delicious rainbow food idea that is truly a delight to behold and savor!
⭐ Why You’ll Adore This Rainbow Candy Coated Strawberries Recipe
- Effortlessly Easy & Incredibly Fun to Make: Forget complicated baking! This recipe involves simple dipping steps that are not only straightforward but also incredibly enjoyable, allowing you to create a stunning rainbow effect with ease. It’s a fantastic project for all skill levels, even for getting kids involved (with supervision!).
- Absolutely No Baking Required: Perfect for hot days or when you simply don’t want to turn on the oven. All you need is a microwave or double boiler to melt the candy, then dip and let them set – it’s that simple! This makes it a fantastic last-minute dessert option.
- A Show-Stopping Dessert for Any Occasion: From lively birthday parties and festive holidays to elegant baby showers or a casual weekend treat, these rainbow strawberries are always a hit. Their vibrant colors make them visually appealing and a fantastic centerpiece for any dessert spread.
- Highly Customizable to Your Taste and Theme: While we love the classic rainbow, feel free to unleash your creativity! Easily swap out colors to match a specific party theme, incorporate school colors, or create a chic pastel ombré effect. Add sprinkles, edible glitter, or even a drizzle of contrasting chocolate for extra flair and texture.
- Fresh and Flavorful: Beneath the sweet candy coating lies a fresh, juicy strawberry, offering a delightful contrast in texture and a burst of natural fruit flavor that balances the sweetness.
🛒 Essential Ingredients & Creative Substitutions
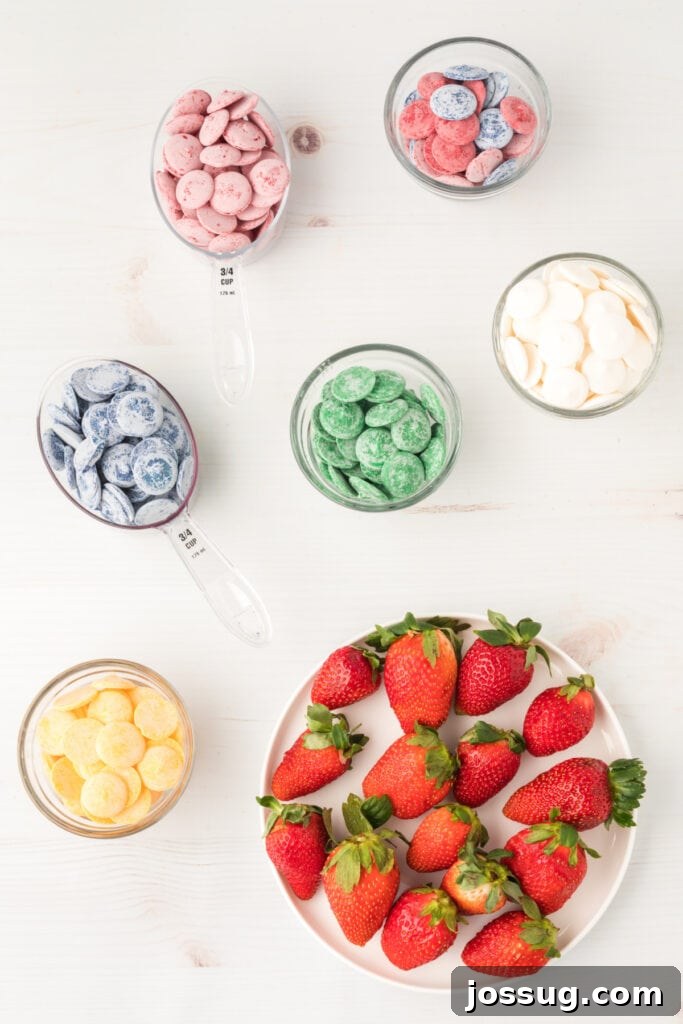
Crafting these beautiful Rainbow Candy Coated Strawberries requires just a few key components. The magic truly happens with the vibrant candy wafers and, of course, fresh, ripe strawberries. Here’s what you’ll need, along with some fantastic ideas for substitutions to suit your dietary needs or creative whims.
- Candy Wafers: For this visually stunning recipe, we recommend using a full spectrum of colors to achieve that iconic rainbow effect. Specifically, we’ll be using white, red, yellow, green, blue, and purple candy melts (also known as candy wafers or melting chocolates). These are designed to melt smoothly and set quickly, providing a professional-looking finish. You can find these at most craft stores, baking supply shops, or online retailers.
- 12 Large Whole Strawberries: The star of our show! Select firm, ripe, and unblemished strawberries. Ensure they are thoroughly washed and, most importantly, completely dried before dipping. Any residual moisture can cause the candy coating to seize or not adhere properly. Look for strawberries with their green stems still attached, as these provide a convenient handle for dipping.
Smart Substitutions for Your Rainbow Treats
- Chocolate Alternative: If you prefer the rich taste of chocolate over candy melts, you can absolutely use high-quality white chocolate. For coloring, always opt for oil-based food coloring specifically designed for chocolate. Water-based dyes will cause chocolate to seize and become unusable. Melt white chocolate gently, then stir in your oil-based colors one at a time to create your rainbow hues.
- Dairy-Free Option: For those with dairy sensitivities or following a vegan diet, choose readily available dairy-free candy melts. Alternatively, you can use vegan white chocolate chips or bars, again remembering to use oil-based food coloring if you’re adding color.
- Sugar-Free Choice: To reduce the sugar content, look for sugar-free chocolate or sugar-free candy melts. These products are formulated to provide a sweet taste without added sugars. Always check labels for suitability for your specific dietary needs.
- Color Variations & Themed Treats: Don’t feel limited to the traditional rainbow!
- Pastel Ombré: Use varying shades of a single color (e.g., light pink, medium pink, dark pink) for an elegant ombré effect.
- Holiday Themes: Red and green for Christmas, orange and black for Halloween, or red, white, and blue for patriotic celebrations.
- School or Team Colors: Dip strawberries in your favorite team’s colors for a spirited game-day snack.
- Extra Toppings & Textures: Elevate your candy-coated strawberries with additional embellishments!
- Sprinkles: Add immediately after dipping each layer, or apply a final top coat and sprinkle liberally.
- Edible Glitter: For a dazzling shimmer, dust with edible glitter while the candy is still slightly wet.
- Crushed Nuts: Chopped almonds, pistachios, or walnuts add a satisfying crunch.
- Coconut Flakes: Toasted or plain coconut flakes offer a tropical twist.
- Contrasting Drizzle: Drizzle melted dark or milk chocolate over the set rainbow layers for an extra decadent touch.
🔥 Expert Tips for Flawless Rainbow Candy Coated Strawberries
Achieving perfectly coated, vibrant rainbow strawberries is simpler than you might think, especially with these helpful tips designed to ensure your success and minimize common mishaps.
- Ensure Strawberries Are Completely Dry: This is arguably the most crucial tip! Water and melted candy/chocolate do not mix. Even a tiny bit of moisture on the strawberries can cause your candy coating to seize, thicken, or develop an unappetizing grainy texture. After washing your strawberries, lay them out on a paper towel-lined baking sheet and gently pat them dry. Allow them to air dry for at least 30 minutes, or even longer, until every berry is bone dry.
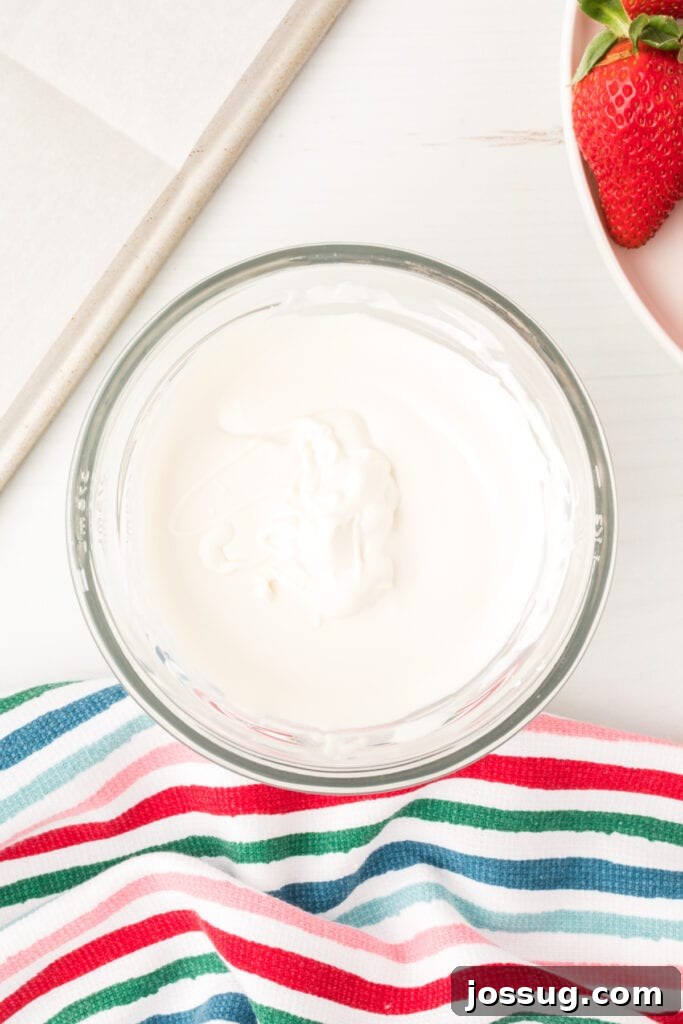
- Melt Candy in Small Batches: To prevent your candy melts from hardening too quickly or becoming too difficult to work with, it’s best to melt each color in a separate, small, microwave-safe bowl. Work with one color at a time, keeping the other colors warm on a low setting if needed (e.g., in a small slow cooker or a double boiler setup). This ensures a smooth, workable consistency throughout your dipping process.
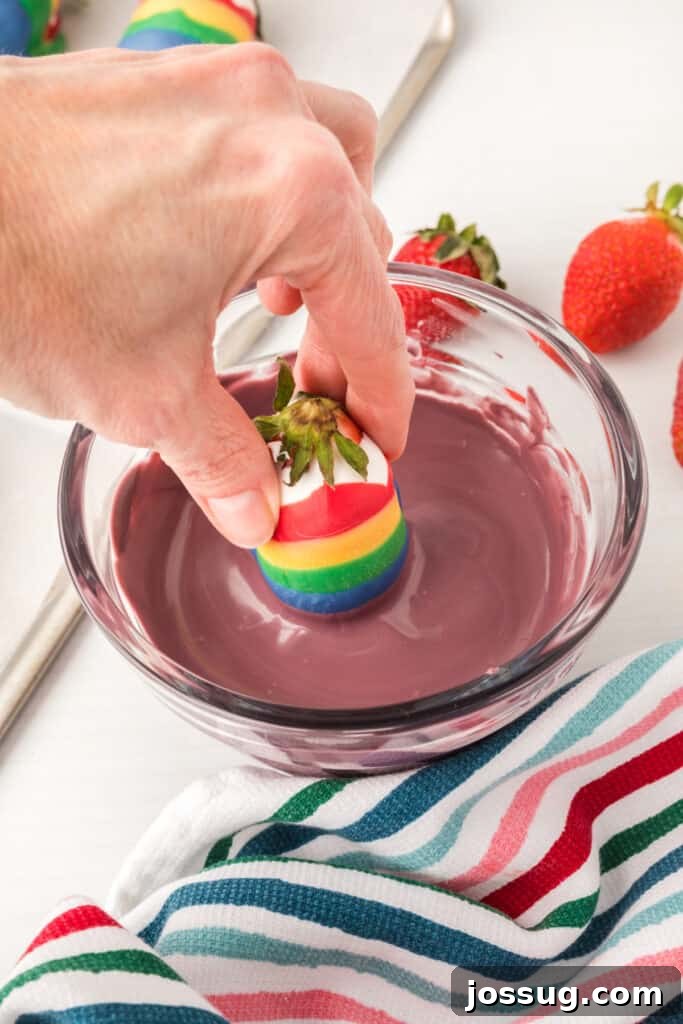
- Hold by the Stem or Use a Toothpick: The strawberry stem is your natural handle, making dipping much cleaner and easier. Gently hold the strawberry by its stem as you dip it into the melted candy. If your strawberries don’t have stems, insert a sturdy toothpick into the top of the berry to create a makeshift handle. This keeps your fingers clean and allows for precise dipping.
- Allow Each Layer to Set Completely: Patience is key for defined, clean layers. After dipping a strawberry in one color, place it on your parchment-lined baking sheet and let that layer set firm before applying the next color. This typically takes about 10-15 minutes at room temperature, or a few minutes in the refrigerator. Rushing this step will cause the colors to bleed together, losing that distinct rainbow definition.
- Work Efficiently and Quickly: Melted candy cools and hardens relatively fast. While you don’t want to rush your dipping technique, working efficiently will ensure you get all your strawberries coated before the candy becomes too thick to work with. If a candy color starts to thicken, pop it back into the microwave for a few seconds to loosen it up.
- Thin Out Thick Candy Melts: If your candy coating seems too thick for smooth dipping, add a teaspoon of vegetable shortening or coconut oil (not water!) and stir until it reaches a desired, pourable consistency. Add only a small amount at a time, stirring well after each addition, to avoid making it too thin.
- Achieve Even Layers: For a beautiful, gradual rainbow effect, dip the strawberry at a slight angle, twisting it gently as you lift it from the candy. This technique helps create a clean, crisp line between each color, adding to the professional finish of your rainbow creation.
❓ Frequently Asked Questions About Rainbow Candy Coated Strawberries
While these delicious treats are undeniably best enjoyed fresh for optimal texture and flavor, you can certainly prepare them a little in advance. They hold up well when made up to 24 hours prior to serving. Just be sure to store them properly in the refrigerator.
To minimize the risk of cracking, it’s essential to allow each candy layer to set thoroughly at room temperature before you consider refrigerating them. Rapid and drastic temperature changes are often the culprit behind cracked candy coatings. Gradual cooling helps the candy to set evenly and maintain its integrity.
Absolutely! Using real white chocolate can add a richer flavor profile. If you choose this option, remember to use only oil-based food coloring to create your vibrant rainbow effect. It’s crucial to avoid water-based food dyes when working with real chocolate, as they can cause the chocolate to seize and become thick and clumpy.
Strawberries naturally release moisture, especially in a cold environment. To prevent them from sweating and affecting the candy coating, place a layer of paper towels under them within an airtight container. The paper towels will absorb any excess moisture, keeping your strawberries looking fresh and crisp.
Unfortunately, freezing is not recommended for this recipe. Strawberries contain a high water content, and freezing will cause them to become mushy and lose their firm texture when thawed. Additionally, the candy coating is very likely to crack due to the expansion and contraction during freezing and thawing.
If your melted candy coating appears too thick or starts to harden while you’re working, don’t worry! You can easily thin it out. Add a small amount (about a teaspoon at a time) of vegetable shortening or coconut oil, stirring well until it reaches a smoother, more liquid consistency suitable for dipping. Avoid adding water.
For beautiful, distinct color layers, hold the strawberry by its stem (or a toothpick) and dip it into the melted candy at a slight angle. As you lift it out, twist it gently to help excess candy drip off and create a clean, even edge for the next color. Allowing each layer to set completely before dipping into the next color is also vital.
No, frozen strawberries are not suitable for this recipe. As they thaw, frozen strawberries release a significant amount of moisture, which will prevent the candy coating from adhering properly and result in a soggy, unappealing texture. Always use fresh, thoroughly dried strawberries for the best results.
Leftovers should be stored in an airtight container in a single layer in the refrigerator. Placing a paper towel at the bottom of the container can help absorb any moisture. They are best enjoyed within 24-48 hours. After this time, the strawberries may start to soften, and the candy coating might become slightly tacky due to condensation.
🍽️ Explore More Delicious & Colorful Recipes You May Enjoy
If you loved the fun and flavor of these Rainbow Candy Coated Strawberries, you’re in for a treat! Discover more vibrant and delightful recipes that are perfect for adding a splash of color to your kitchen and your plate:
- Rainbow Pancakes: Start your day with a cheerful stack of colorful pancakes.
- Rainbow Cupcakes: These festive cupcakes are perfect for any celebration, bursting with color and flavor.
- Strawberry Fudge: A classic, sweet, and creamy treat with the irresistible taste of fresh strawberries.
- Rainbow Candy Bark: An easy, customizable, and visually appealing candy creation.
- Rainbow Fruit Salad with Honey Citrus Dressing: A healthy and refreshing way to enjoy the colors of the rainbow.

★
★
★
★
Rainbow Candy Coated Strawberries
Brighten any dessert table with these stunning Rainbow Candy Coated Strawberries! Juicy berries are artfully layered in colorful candy coatings for a fun, sweet, and unforgettable treat that’s perfect for any celebration.
Print Recipe
Equipment
- Baking Sheets
- Parchment Paper
- Microwave-Safe Bowls
- Spoon or Dipping Tools
Ingredients
- 1 cup white Make ‘n Mold Candy Wafers
- 1 cup red Make ‘n Mold Candy Wafers
- ¾ cup yellow Make ‘n Mold Candy Wafers
- ¾ cup green Make ‘n Mold Candy Wafers
- ¾ cup blue Make ‘n Mold Candy Wafers
- ¾ cup purple Make ‘n Mold Candy Wafers
- 12 large whole strawberries, washed and thoroughly dried
Instructions
-
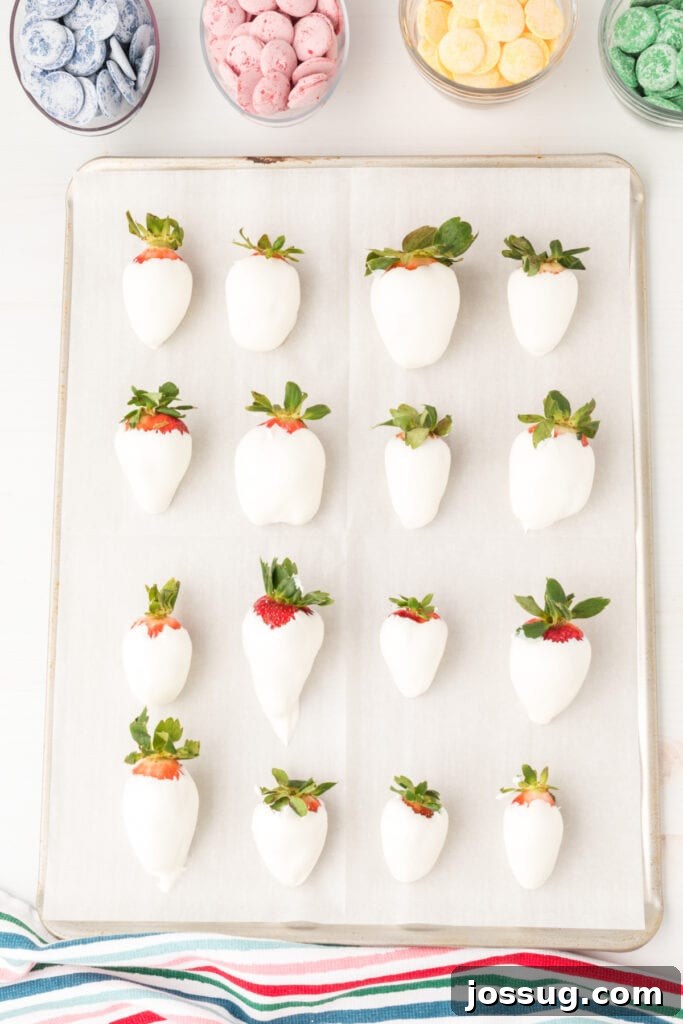
Prepare Your Workspace: Line a large baking sheet with parchment paper. This will provide a non-stick surface for your candy-coated strawberries to set on.
-
First Dip (White Layer): Melt the white candy wafers according to the package instructions. Typically, this involves heating them in a microwave-safe bowl in 30-second intervals, stirring well after each, until smooth. Hold each strawberry by its stem, dip it into the melted white candy, twisting slightly to ensure full coverage. Gently tap or twist to let any excess candy drip off. Place the dipped strawberry onto the prepared parchment paper. Allow this first white layer to set for about 10-15 minutes at room temperature, or a few minutes in the refrigerator, until firm.
-
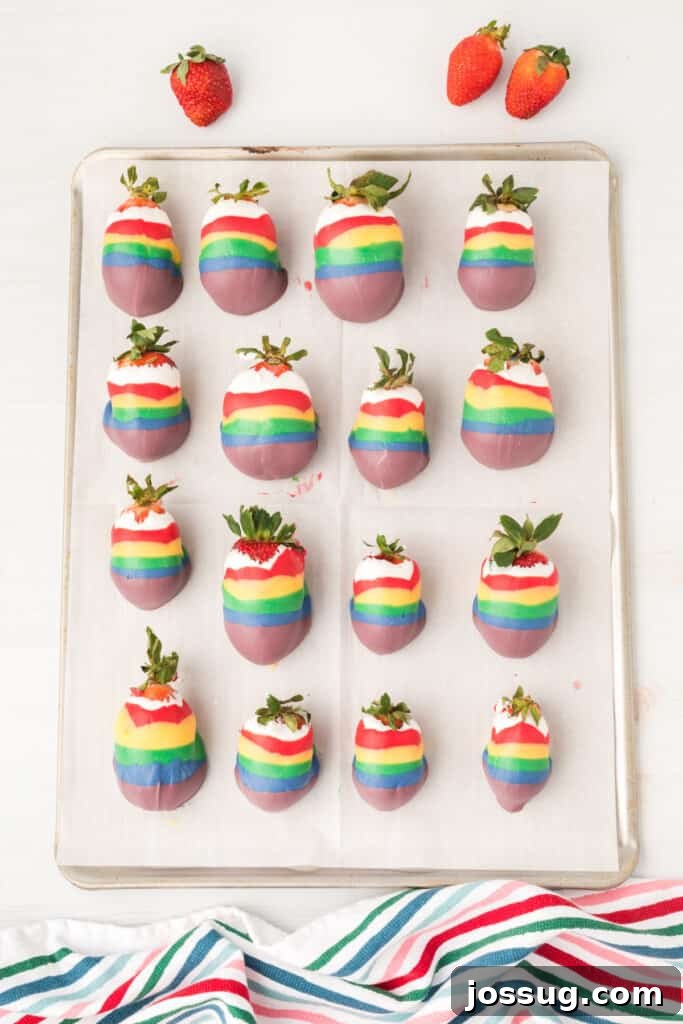
Second Dip (Red Layer): Melt the red candy wafers in a separate microwave-safe bowl. Once the white layer on your strawberries is completely set, dip each strawberry into the melted red candy, covering approximately 90% of the white layer. This creates the first distinct color band. Place back on the parchment paper and let set for another 10-15 minutes, or until the candy coating is firm.
-
Third Dip (Yellow Layer): Melt the yellow candy wafers. Following the same method, dip the strawberries into the yellow candy, covering about 75% of the red layer. Return to the parchment paper and allow to set for 10-15 minutes.
-
Fourth Dip (Green Layer): Melt the green candy wafers. Dip the strawberries, covering approximately 75% of the yellow layer. Place back on the parchment paper and let set for 10-15 minutes.
-
Fifth Dip (Blue Layer): Melt the blue candy wafers. Dip the strawberries, covering about 75% of the green layer. Once again, place on the parchment paper and allow to set for 10-15 minutes.
-
Final Dip (Purple Layer): Melt the purple candy wafers. For the final color, dip the strawberries, covering approximately 75% of the blue layer, leaving a small sliver of blue visible. Place the fully coated strawberries back onto the parchment paper. Allow this final layer to set completely for at least 30 minutes at room temperature, or longer if needed, until the candy coating is firm and not tacky to the touch. For best results, you can place them in the refrigerator for 10-15 minutes after the final dip.
Notes
Storage & Shelf Life of Rainbow Candy-Coated Strawberries
🍓 Storage Tips:
- Refrigeration: For optimal freshness and to maintain their crisp coating, store your beautiful rainbow strawberries in a single layer on a parchment-lined plate or an airtight container in the refrigerator.
- Avoid Moisture: To combat condensation and prevent the candy coating from becoming sticky, place a layer of paper towels beneath the strawberries in the container. These will absorb any excess moisture, keeping your treats perfect.
- No Stacking: To preserve the integrity of the delicate candy layers and prevent them from sticking or cracking, always avoid stacking the strawberries on top of each other.
🕒 Shelf Life:
- Best Enjoyed Fresh: For the most vibrant colors, crispest candy coating, and juiciest strawberry, these are best savored within 24 hours of preparation.
- Refrigerated: They can be stored in the refrigerator for up to 48 hours. Beyond this, the strawberries may start to soften, and the candy coating might show signs of condensation, slightly affecting its texture.
- Not Freezer-Friendly: We strongly advise against freezing these strawberries. The freezing process will cause the delicate strawberries to become mushy upon thawing, and the candy coating will inevitably crack due ruining their visual appeal and texture.
For the absolute best experience, serve these Rainbow Candy Coated Strawberries fresh and enjoy their delightful sweet, crunchy coating before the natural moisture of the fruit begins to soften them! They are a true feast for the eyes and the palate! 🌈✨
This recipe was originally shared to Love Bakes Good Cakes by Sandra from Dash of Sanity.
Nutrition
Serving: 1g,
Calories: 211kcal,
Carbohydrates: 26g,
Protein: 0.1g,
Fat: 11g,
Saturated Fat: 10g,
Polyunsaturated Fat: 0.02g,
Monounsaturated Fat: 0.01g,
Sodium: 42mg,
Potassium: 18mg,
Fiber: 0.2g,
Sugar: 26g,
Vitamin A: 1IU,
Vitamin C: 7mg,
Calcium: 2mg,
Iron: 0.05mg
Nutrition information is automatically calculated and should only be used as an approximation. Individual results may vary based on specific ingredients and preparation methods.
Enjoyed this delightful recipe? We’d love to hear from you! Leave a comment below and share your thoughts.
Originally published on March 13, 2015. Updated and enhanced on March 6, 2025.