
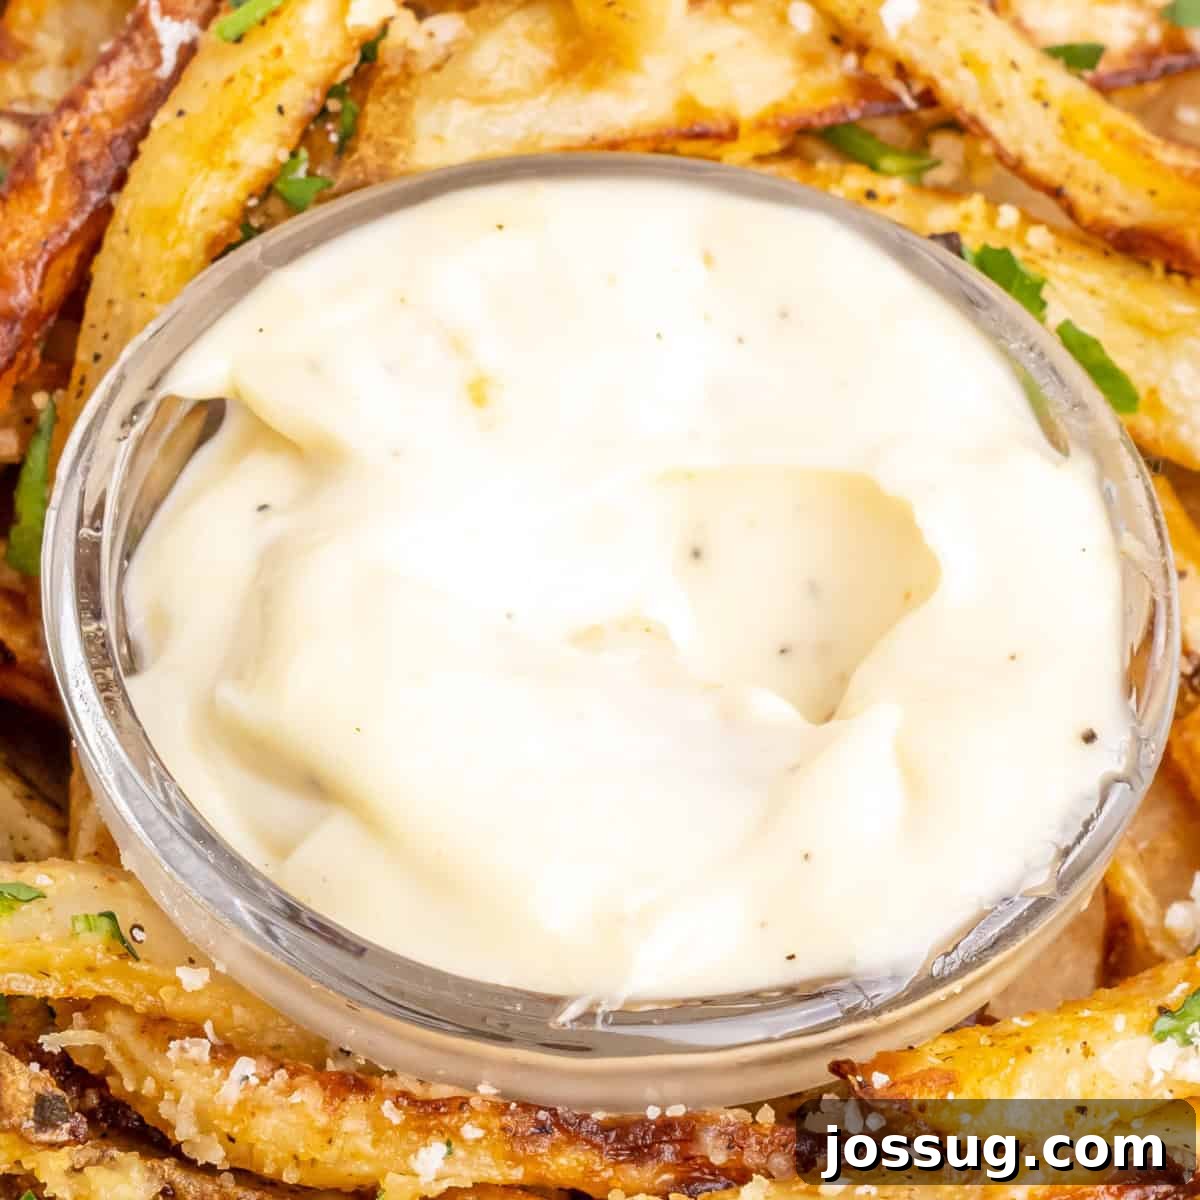
Take your dishes to the next level with this irresistible homemade Roasted Garlic Aioli recipe! Made with sweet roasted garlic, creamy mayo, and zesty lemon juice, it’s perfect for dipping, spreading, or as a flavorful topping. 🌿🍋
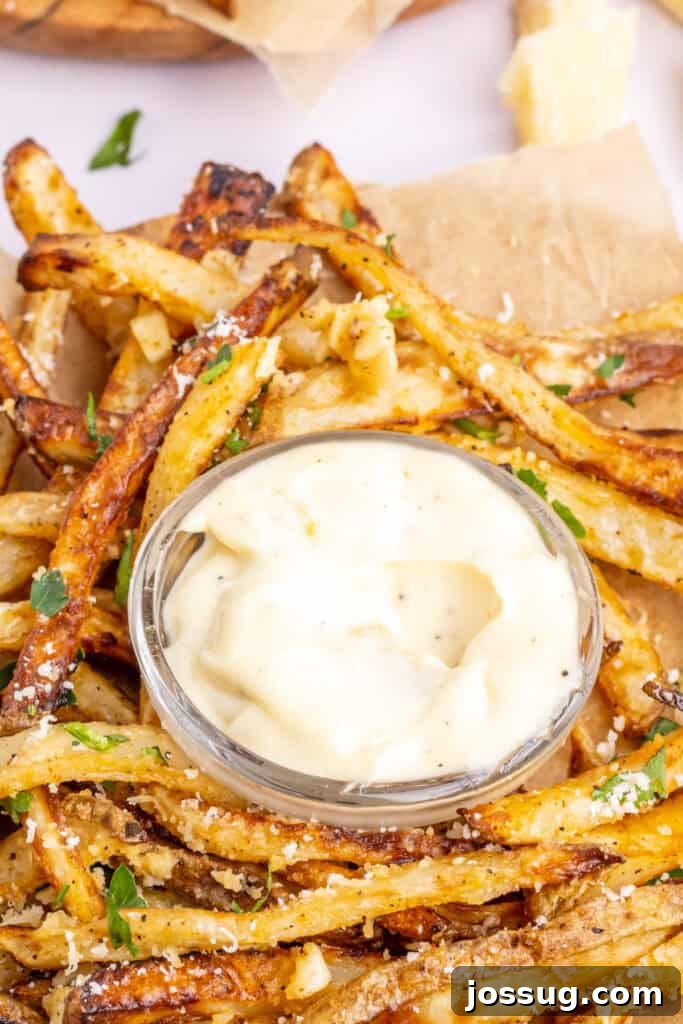
Elevate Your Culinary Creations with Homemade Roasted Garlic Aioli
Are you ready to transform your everyday meals into extraordinary culinary experiences? Look no further than the enchanting world of homemade Roasted Garlic Aioli. This creamy, richly flavored condiment is more than just a sauce; it’s a versatile masterpiece that can enhance virtually any dish. Forget bland store-bought options – crafting your own garlic aioli at home unlocks a depth of flavor and freshness that will truly impress your taste buds and your guests.
Originating from the sun-drenched Mediterranean, aioli has long been revered for its simplicity and vibrant taste. While traditionally made with just garlic, olive oil, and sometimes egg yolk, our recipe introduces the sublime character of roasted garlic. This key step softens the garlic’s pungency, transforming it into a sweet, nutty, and profoundly aromatic ingredient that forms the heart of this irresistible sauce. Paired with creamy mayonnaise and a bright squeeze of lemon, our roasted garlic aioli is a symphony of flavors that promises to become a staple in your kitchen. It’s perfect for those who appreciate gourmet tastes with minimal effort.
What Makes Roasted Garlic Aioli So Special?
Aioli, often described as a garlic mayonnaise, holds a distinguished place in culinary history, particularly in the Mediterranean region, where it’s a beloved staple. The term “aioli” itself comes from “alhòli” in Occitan, a contraction of “alh e òli,” meaning “garlic and oil.” While classic aioli traditionally relies on emulsifying raw garlic with olive oil, our recipe opts for a slightly modern, yet incredibly rewarding twist: roasted garlic. This seemingly small change makes a world of difference in flavor and aroma.
When garlic is roasted, its complex compounds undergo a magical transformation. The intense, pungent flavor associated with raw garlic mellows considerably, replaced by a sweet, caramelized, and nutty aroma. The cloves become incredibly tender, almost spreadable, and lose their sharp bite. This roasting process is what elevates our aioli from merely good to truly exceptional. It infuses the creamy base with a deep, sophisticated garlic essence that is both comforting and exhilarating, without overpowering the palate. This creates a more approachable and universally appealing flavor that even those wary of strong raw garlic will adore.
This roasted garlic aioli provides a perfect balance of textures and tastes. The creamy base, often mayonnaise in modern interpretations, offers a smooth and luxurious texture, while the roasted garlic contributes warmth, sweetness, and an umami depth. Fresh lemon juice cuts through the richness, adding a vital zing that brightens the entire profile and prevents it from feeling heavy. The result is a condiment that is effortlessly sophisticated, incredibly flavorful, and astonishingly versatile, truly making it a special addition to any meal.
The Versatility of Homemade Garlic Aioli: Endless Culinary Possibilities
One of the most remarkable qualities of homemade roasted garlic aioli is its incredible versatility. Far from being a one-trick pony, this creamy condiment effortlessly adapts to countless dishes, elevating their flavor profiles with its rich, savory goodness. Its adaptability makes it a perennial favorite among home cooks and professional chefs alike, proving that a truly great sauce can inspire endless creativity in the kitchen and simplify meal preparation.
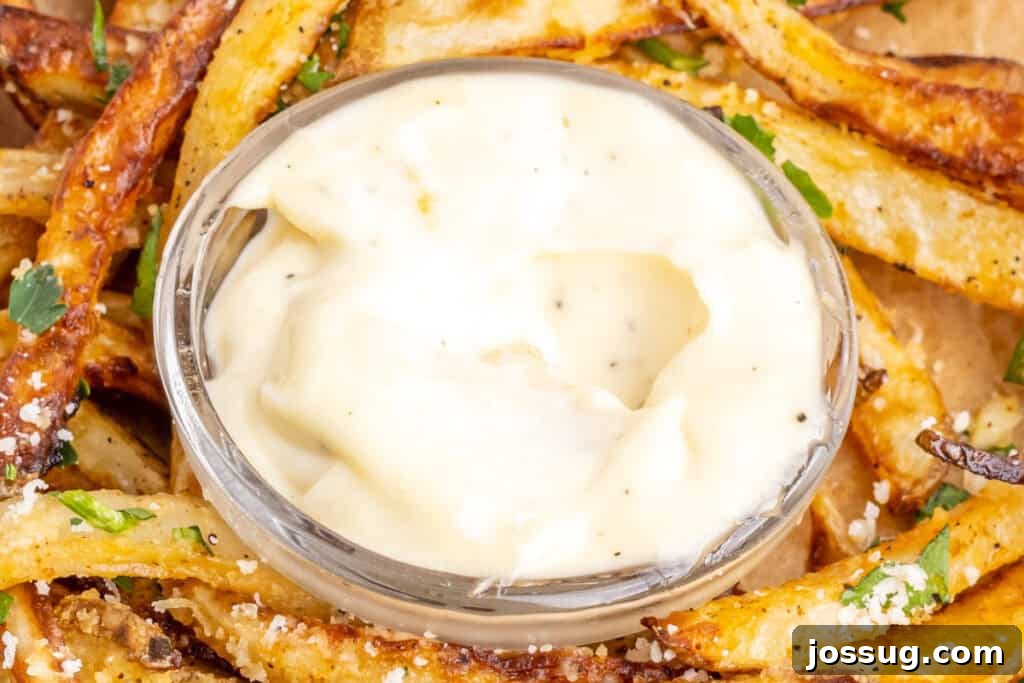
Imagine a simple plate of crispy golden fries transformed by a generous dip into this luscious aioli, or a mundane sandwich instantly upgraded to gourmet status with a dollop spread across its bread. From grilled meats and roasted vegetables to fresh salads and hearty sandwiches, garlic aioli serves as the perfect companion. It can be a vibrant dip for appetizers, a luxurious spread for burgers, a flavorful dressing for salads, or a sophisticated sauce to drizzle over seafood and poultry. Its ability to complement a wide array of ingredients, from the robust flavors of red meat to the delicate nuances of fresh fish, makes it an indispensable addition to your culinary repertoire. It even works beautifully as a base for other dressings or marinades.
Whether you’re hosting a sophisticated dinner party, preparing a quick weeknight meal, or simply looking to add a touch of gourmet flair to everyday snacks, the possibilities with homemade roasted garlic aioli are truly endless. Its inviting aroma and irresistible taste will make it a go-to condiment. Get ready to tantalize your taste buds and impress your diners with this rich, savory, and wonderfully adaptable sauce that promises to become a star in your kitchen.
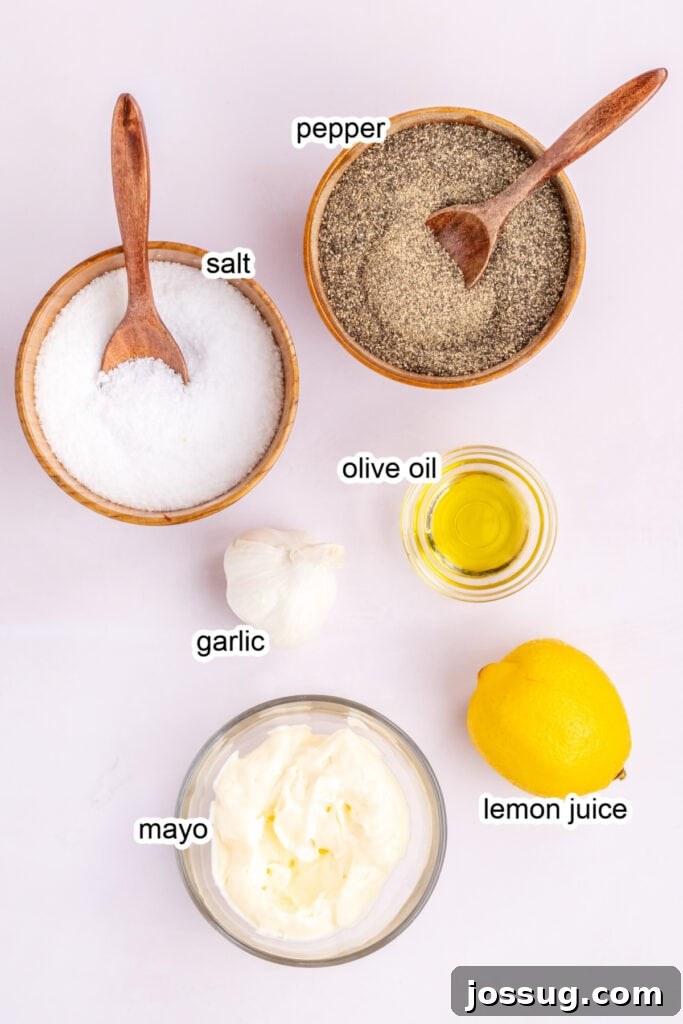
Homemade Garlic Aioli: Essential Ingredients & Smart Substitutions
Crafting the perfect homemade roasted garlic aioli requires just a few key ingredients, each playing a crucial role in achieving that creamy texture and bold flavor. What’s even better is the flexibility these ingredients offer, allowing for substitutions to suit various dietary needs or simply what you have on hand. Here’s a detailed look at what you’ll need and how you can adapt it to your preferences:
Core Ingredients
- Garlic (1 head): The undisputed star of our aioli. We use a full head of fresh garlic, which will be roasted to bring out its sweet, mellow, and nutty flavors. This transformation is crucial for the unique taste of this aioli. While fresh, whole heads are ideal for roasting, if you’re in a pinch, you can use garlic powder (about 1 teaspoon for a subtle flavor, adjust to taste) or pre-minced garlic from a jar (use 2-3 teaspoons). Keep in mind that roasted garlic offers a unique depth and sweetness that these substitutes can’t fully replicate, resulting in a slightly different flavor profile.
- Olive Oil (1 teaspoon): Essential for roasting the garlic, helping it caramelize and imparting a subtle fruity note. Use a good quality extra virgin olive oil for the best flavor and aroma. For a neutral flavor, or if olive oil isn’t preferred due to taste or availability, any neutral-flavored oil like vegetable oil, canola oil, grapeseed oil, or even avocado oil can be substituted. These won’t significantly alter the final flavor beyond the garlic and lemon, making them safe alternatives.
- Mayonnaise (½ cup): This forms the creamy, rich base of our aioli, providing body and a smooth texture. For a classic taste, a good quality full-fat mayonnaise works best. If you’re looking for lighter alternatives, Greek yogurt or sour cream can be used for a tangier, slightly less rich aioli, perfect for lighter meals. For a plant-based or vegan version, simply opt for your favorite store-bought vegan mayonnaise, which emulsifies just as beautifully.
- Lemon Juice (2 teaspoons, freshly squeezed): Freshly squeezed lemon juice is crucial for balancing the richness of the mayo and the sweetness of the roasted garlic, adding a bright, zesty acidity that elevates all the flavors. Always use fresh lemon juice for the best, most vibrant results. In a pinch, white wine vinegar or apple cider vinegar can be used as a substitute, but start with a smaller amount and adjust to taste, as their acidity levels and flavor nuances can vary.
- Salt (¼ teaspoon) and Ground Black Pepper (¼ teaspoon): These are fundamental for seasoning the aioli, enhancing and unifying all the other flavors. Start with the recommended amounts and then adjust to your personal preference. A pinch of flaky sea salt can add a lovely texture and burst of flavor. Freshly cracked black pepper is always recommended for a more intense peppery kick and better aroma compared to pre-ground versions.
Optional Enhancements & Flavor Variations to Explore
Don’t be afraid to customize your aioli! Once you’ve mastered the basic recipe, consider these additions to tailor it to your preferences or the dish you’re serving:
- Fresh Herbs: Finely chopped fresh parsley, chives, dill, or tarragon can add a fresh, aromatic dimension and a pop of color. Add a tablespoon or two, adjusting to your liking.
- Spices for Depth: A pinch of smoked paprika can add a wonderful smoky depth, while a dash of cayenne pepper or a small amount of finely minced fresh chili can introduce a subtle heat. For an exotic twist, try a tiny bit of curry powder.
- Mustard: A teaspoon of Dijon mustard can add an extra layer of complexity and a mild tang, complementing the garlic and lemon beautifully.
- Umami Boost: A tiny dash of Worcestershire sauce or a pinch of nutritional yeast can add an extra layer of savory umami flavor, particularly if you’re aiming for a vegan version.
With these ingredients and substitution ideas, you have the freedom to create a homemade roasted garlic aioli that perfectly suits your taste, dietary needs, and culinary imagination.
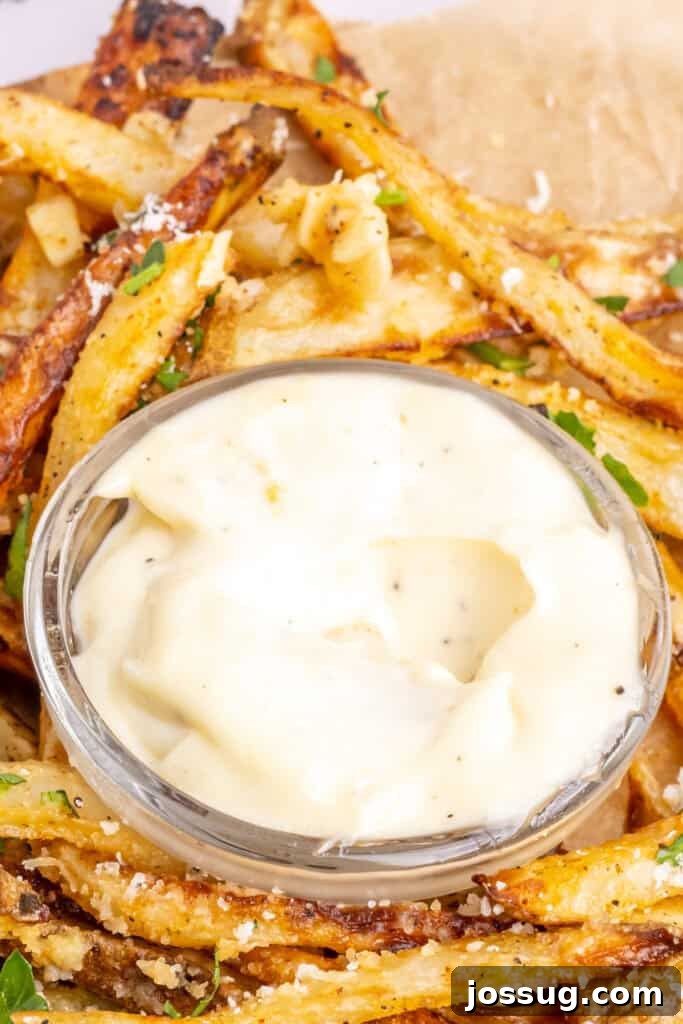
How to Make Homemade Roasted Garlic Aioli: A Simple Step-by-Step Guide
Making your own roasted garlic aioli might sound fancy, but it’s surprisingly simple and incredibly rewarding. The key to its unparalleled flavor is the initial roasting of the garlic, which transforms its sharp bite into a mellow, sweet, and deeply aromatic essence. Follow these easy, detailed steps to create a rich, creamy, and deeply flavorful aioli that will impress everyone.
Tips for Perfect Homemade Aioli Every Time:
- Don’t Rush the Roasting: The long, slow roasting process is absolutely key to developing the garlic’s sweet, mellow flavor. Don’t be tempted to crank up the heat to speed it up, as this can burn the garlic and make it bitter, ruining the delicate balance of the aioli. Patience is a virtue here.
- Always Use Fresh Lemon Juice: Bottled lemon juice often lacks the vibrant acidity and fresh zestiness of freshly squeezed lemons. The fresh citrus brightens the aioli and cuts through the richness, which is essential for a balanced flavor.
- Adjust Seasoning to Your Palate: Everyone’s palate is different. Start with the recommended amounts of salt and pepper, then taste and add more incrementally until the flavor perfectly suits you. You might prefer a bit more salt, a stronger peppery kick, or an extra squeeze of lemon.
- Mash Garlic Thoroughly: Ensure the roasted garlic is fully mashed into a smooth paste before mixing it with the other ingredients. This prevents chunky aioli and ensures even flavor distribution throughout the sauce. A smooth aioli is a sign of good technique.
- Chill for Flavor Development: While you can serve it immediately, allowing the aioli to chill in the refrigerator for at least 30 minutes (or even a few hours) lets the flavors meld and deepen, resulting in an even more delicious and cohesive condiment. This resting period truly enhances its complexity.
Endless Serving Suggestions for Your Homemade Roasted Garlic Aioli
Once you’ve whipped up a batch of this luscious homemade roasted garlic aioli, you’ll quickly find yourself reaching for it to accompany almost everything. Its rich, savory, and subtly sweet profile makes it incredibly versatile, pairing beautifully with a wide array of dishes. Here are some comprehensive serving suggestions to inspire your culinary adventures and make every meal memorable:
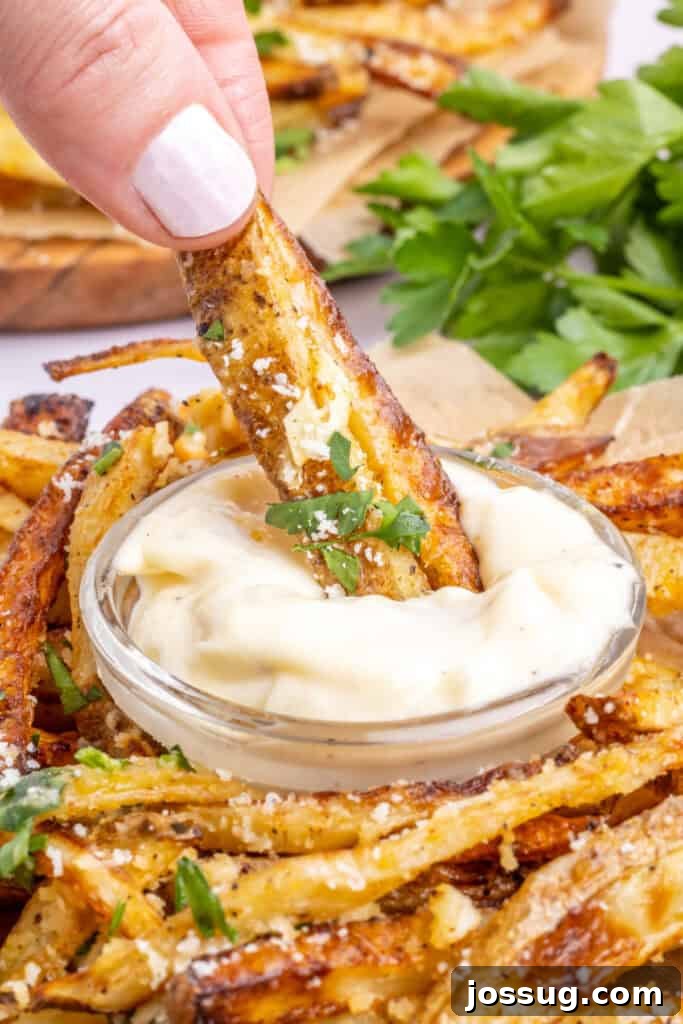
- Classic Dipping Sauce: This is arguably its most popular and satisfying use! Serve it as an irresistible dip for crispy French fries, sweet potato fries, crunchy onion rings, seasoned potato wedges, or even homemade potato chips. It also effortlessly elevates a simple crudités platter with fresh vegetable sticks like carrots, celery, bell pepper strips, cucumber slices, and cherry tomatoes.
- Elevate Seafood Dishes: Roasted garlic aioli is a match made in heaven for seafood. Use it as a vibrant dipping sauce for fried calamari, grilled shrimp skewers, flaky fish and chips, savory crab cakes, or as a creamy drizzle over fresh fish tacos. It adds a creamy, zesty, and aromatic dimension that perfectly complements the fresh flavors of the sea.
- Gourmet Spreads for Sandwiches & Burgers: Transform ordinary sandwiches and burgers into gourmet delights with a generous smear of aioli. Spread it liberally on grilled chicken sandwiches (like a Grilled Chicken Club), turkey clubs, classic beef burgers (try it with a BBQ Bacon Jalapeño Cheddar Stuffed Burger), or even vegetarian options like portobello mushroom burgers or veggie wraps. It’s also fantastic on toasted bread with grilled vegetables or avocado.
- Roasted & Grilled Vegetable Enhancer: Drizzle or dollop aioli generously over hot roasted or grilled vegetables. It adds a burst of flavor and luxurious creaminess to dishes like roasted asparagus, broccoli, Brussels sprouts, grilled zucchini, bell peppers, corn on the cob, or even baked potatoes and potato salad.
- Flavorful Wraps & Burritos: Incorporate it into your favorite wraps and burritos for an extra layer of creaminess and robust flavor. It pairs wonderfully with grilled chicken, steak, or various vegetarian fillings (like bean and rice burritos), making every bite more satisfying.
- Creamy Salad Dressing: Thin out the aioli slightly with a little extra lemon juice or a tablespoon of warm water to create a creamy dressing for hearty salads. It’s particularly good with salads featuring roasted vegetables, grains like quinoa or farro, or legumes like chickpeas and lentils, adding depth and richness.
- Accompaniment for Meat & Poultry: Serve it as a sophisticated dipping sauce or condiment for grilled meats and poultry. Think perfectly seared steak, succulent chicken tenders, lamb kebabs, grilled pork chops, or even as a spread in savory meat pies. It provides a delightful counterpoint to the savory richness of the meat.
- Creative Appetizers & Starters: Use it as a topping or dipping sauce for a variety of appetizers to impress your guests. It’s excellent with croquettes, stuffed mushrooms, bruschetta, crispy arancini, deviled eggs, or even as a flavorful base for canapés and open-faced sandwiches.
- Breakfast & Brunch Boost: Don’t limit aioli to just lunch and dinner! A dollop on scrambled eggs, a smear on a breakfast sandwich, or alongside savory waffles or frittatas can elevate your morning meal with a flavorful kick.
No matter the occasion, this homemade roasted garlic aioli recipe with its rich, savory, and perfectly balanced flavor profile is sure to elevate your culinary creations and become a highly requested item in your kitchen. Enjoy the incredible versatility and the gourmet touch it brings to every dish!
Homemade Roasted Garlic Aioli: Frequently Asked Questions
Absolutely! Homemade roasted garlic aioli is excellent for meal prep. It can be made ahead of time and stored in an airtight container in the refrigerator for up to 3-4 days. For optimal flavor, give it a good stir before serving, as the flavors can meld and deepen over time, making it even more delicious. Always ensure it’s kept chilled to maintain freshness and prevent spoilage.
The basic ingredients for our roasted garlic aioli – roasted garlic, mayonnaise (which typically contains egg yolks, oil, and vinegar), and lemon juice – are naturally gluten-free. However, it’s always prudent to check the labels of any store-bought mayonnaise you use to ensure there are no hidden gluten-containing additives or cross-contamination warnings. For strict dietary needs, consider making your own mayonnaise from scratch to guarantee it meets specific gluten-free requirements.
While technically possible, freezing is generally not recommended for mayonnaise-based sauces like aioli. The emulsified texture of the sauce tends to break down when frozen and thawed, leading to a separated, oily, or grainy consistency that is often undesirable. It’s best to enjoy it fresh or within its refrigerated shelf life for the best texture and flavor.
Yes, absolutely! Customizing your garlic aioli is part of the fun and allows you to tailor it to your personal taste or specific dishes. You can easily alter its flavor profile by incorporating fresh herbs like finely chopped parsley, chives, basil, or dill for an aromatic boost. For a little heat, add a pinch of cayenne pepper, red pepper flakes, or a dash of your favorite hot sauce. Smoked paprika can provide a lovely earthy depth. Feel free to experiment with different flavor combinations to suit your unique palate and the dishes you plan to serve it with.
Yes, absolutely! You can achieve perfectly roasted garlic using a conventional oven. Here’s the simple method: Preheat your oven to 400°F (200°C). Take a head of garlic, cut off the top quarter to expose the cloves, and drizzle the exposed cloves with about 1 teaspoon of olive oil. Wrap the entire head tightly in aluminum foil. Place the wrapped garlic head on a baking sheet or directly on the oven rack and roast in the preheated oven for about 35-45 minutes. The garlic is ready when the cloves are very soft when pressed and appear lightly golden brown. Once roasted, allow the garlic to cool slightly before handling. Then, carefully unwrap the foil and squeeze the soft, caramelized cloves out of their skins. They will be sweet, tender, and perfectly ready for your aioli.
You certainly can, but it will result in a traditional aioli with a much more pungent and sharp raw garlic flavor, rather than the sweet and mellow notes achieved by roasting. If you prefer a bolder, more intense raw garlic kick, you can finely mince or grate 1-2 raw garlic cloves and incorporate them directly into the mayonnaise and lemon juice mixture. However, start with a smaller amount and adjust to your taste, as raw garlic can be quite strong and might overpower the other flavors.
If your aioli is too thick, you can easily thin it out by stirring in a very small amount (start with half a teaspoon at a time) of warm water, additional olive oil, or extra lemon juice until you reach your desired pouring or spreading consistency. If it’s too thin, you can try mixing in a tiny bit more mayonnaise to thicken it slightly, though this is less common with a mayonnaise-based aioli. Ensure that your roasted garlic was thoroughly mashed into a smooth paste to begin with, as lumps can affect the texture.
More Delicious Garlic & Dipping Sauce Recipes You’ll Love
If you’ve enjoyed the rich flavors of this homemade roasted garlic aioli, you’re in for a treat! Garlic is a truly magical ingredient that can transform simple dishes into unforgettable culinary experiences. Here are some other fantastic recipes featuring garlic or perfect for dipping, guaranteed to satisfy your cravings and expand your repertoire:
- BEST Garlic Bread: The ultimate classic side dish, crispy, buttery, and packed with irresistible garlic flavor. Perfect for sharing!
- Garlic Butter Dipping Sauce: A simple yet incredibly versatile sauce that pairs perfectly with almost anything, from seafood and breadsticks to pizza crusts.
- Garlic Cheddar Quick Bread: A savory, cheesy bread that’s incredibly easy to make and bursting with robust garlic goodness – no yeast required!
- Oven Roasted Potatoes: Crispy on the outside, fluffy on the inside, and infused with delicious roasted flavors, these make an excellent side to any meal.
- Healthy Sheet Pan Chicken and Veggies: An easy, nutritious, and flavorful one-pan meal that makes cleanup a breeze, made even better with a side of your homemade aioli!
4
servings
Roasted Garlic Aioli
Jamie Sherman
10 minutes
25 minutes
35 minutes
Save
Saved
Pin
Rate
Would you like to save this recipe?
We’ll email this post to you, so you can come back to it later!
Equipment You’ll Need
-
Heavy Duty Aluminum Foil (essential for wrapping the garlic head for roasting)
-
Air Fryer (or a conventional oven for roasting the garlic)
-
Tongs (for safe handling of the hot garlic packet)
-
Small Mixing Bowl (for combining and blending all your aioli ingredients)
-
Whisk or Fork (for thoroughly mashing the garlic and mixing the aioli)
Ingredients for Roasted Garlic Aioli
-
1
head
garlic -
1
teaspoon
olive oil -
½
cup
mayonnaise -
2
teaspoons
lemon juice,
freshly squeezed -
¼
teaspoon
salt -
¼
teaspoon
ground black pepper
Detailed Instructions
-
1. Prepare to Roast: Begin by preheating your air fryer to 390°F (200°C). Take a whole head of garlic and use a sharp knife to carefully cut off the top quarter, just enough to expose the individual cloves inside. Place the garlic head, cut-side up, onto a piece of heavy-duty aluminum foil. Drizzle the exposed cloves with 1 teaspoon of olive oil, ensuring a light, even coating.
-
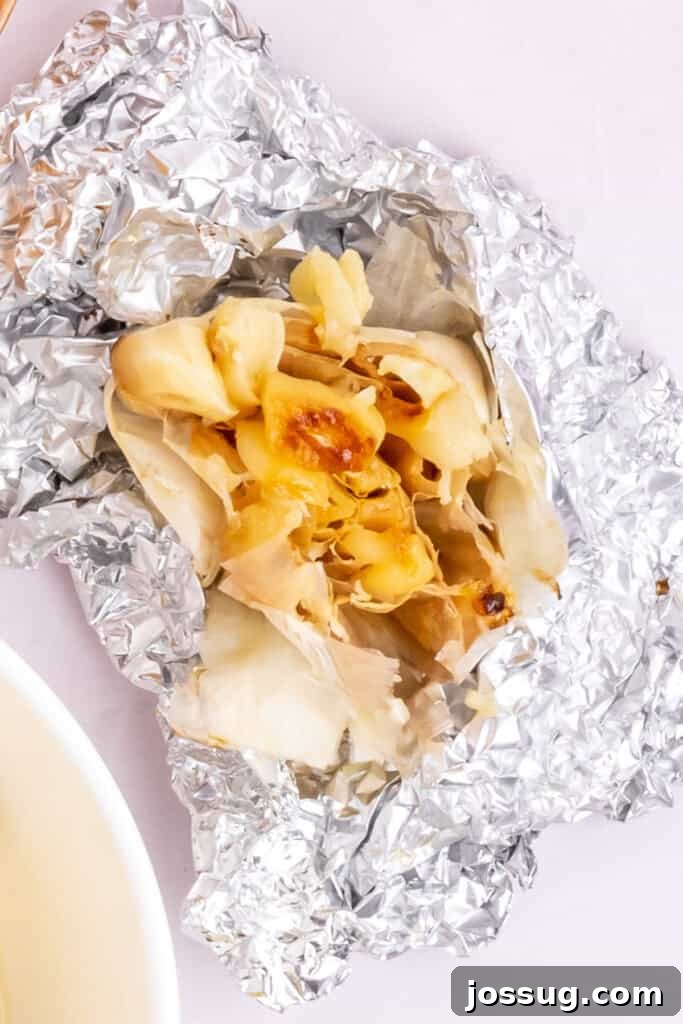
2. Roast the Garlic: Tightly wrap the garlic head in the aluminum foil, creating a securely sealed packet. Place this wrapped garlic directly into the air fryer basket. Cook for 25 minutes, or until the cloves are incredibly soft and tender when gently pressed (you can test this through the foil), and have developed a beautiful, light golden-brown hue. The aroma will be wonderfully sweet and nutty.
-
3. Extract the Roasted Garlic: Once the garlic is perfectly roasted, carefully remove the foil packet from the air fryer using tongs and let it cool for a few minutes until it’s comfortable enough to handle. Unwrap the foil and gently squeeze the bottom of the garlic head. The soft, caramelized cloves should easily slide out of their papery skins directly into a small mixing bowl. Discard the empty skins.
-
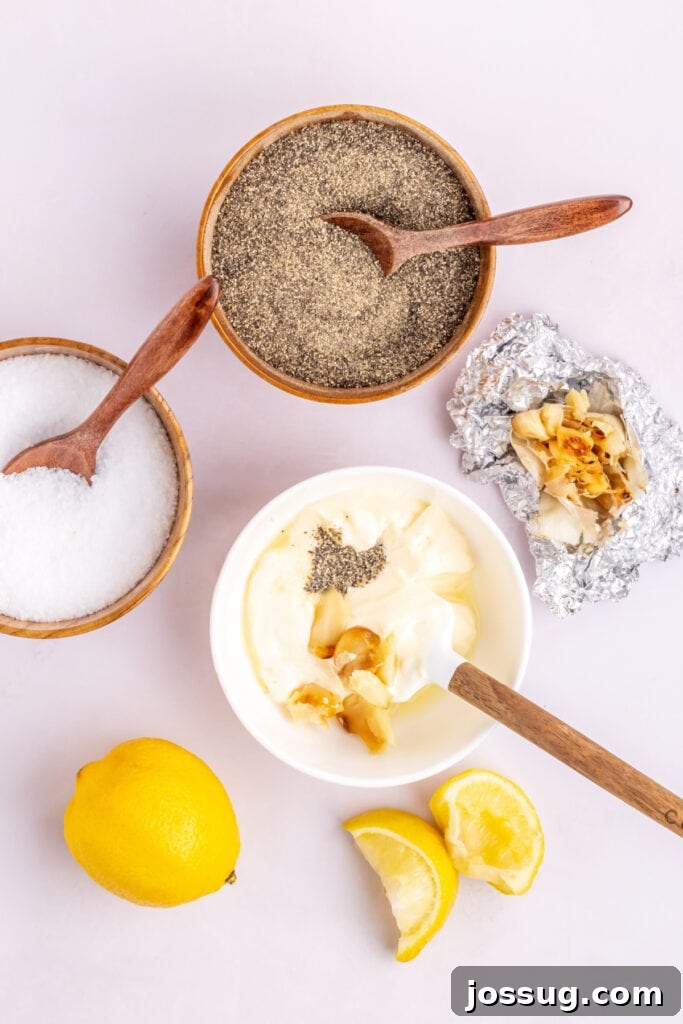
4. Combine Aioli Ingredients: To the bowl containing the mashed roasted garlic, add the ½ cup of mayonnaise, 2 teaspoons of freshly squeezed lemon juice, ¼ teaspoon of salt, and ¼ teaspoon of ground black pepper. These are your foundational flavors for a perfectly balanced aioli.
-
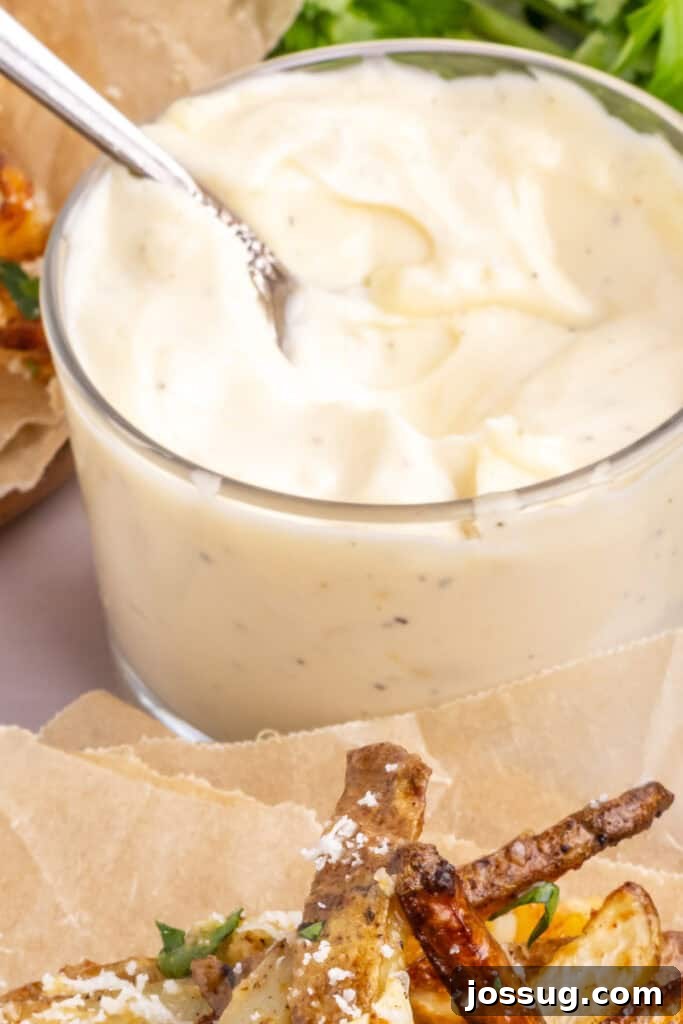
5. Mash and Mix Thoroughly: Using a whisk or a sturdy fork, first thoroughly mash the roasted garlic cloves against the side of the bowl until they form a smooth paste with no large chunks. Once mashed, vigorously mix all the ingredients together until they are fully incorporated and the aioli is smooth, creamy, and uniform in color and texture.
-
6. Taste and Adjust Seasoning: Take a small taste of your aioli. This is your moment to customize! If you desire more tang, add a touch more lemon juice. For enhanced savory depth, sprinkle in a bit more salt and pepper. You can also incorporate any optional additions like fresh herbs or spices at this stage to perfectly suit your palate.
-
7. Serve and Enjoy: Your delicious homemade Roasted Garlic Aioli is now ready! For best results and optimal flavor development, cover the bowl and chill it in the refrigerator for at least 30 minutes before serving. Enjoy it as a delectable dip, a flavorful spread, or a gourmet topping for your favorite dishes. Store any leftovers in an airtight container in the fridge for up to 3-4 days.
Chef’s Notes & Pro Tips for Best Results
- Advance Preparation: This Roasted Garlic Aioli is perfect for making ahead! Prepare it up to 3-4 days in advance and store it in an airtight container in the refrigerator. The flavors actually deepen and become even more harmonious after a day or two. Remember to give it a good stir just before serving to re-emulsify if needed.
- Freezing Not Recommended: Due to the emulsified nature of the mayonnaise base, freezing is not recommended for this aioli. The texture tends to separate and become undesirable upon thawing, leading to a grainy or oily consistency. It’s always best to consume it fresh or within its refrigerated shelf life.
- Oven Roasting Garlic (Alternative Method): No air fryer? No problem! You can roast garlic just as effectively in a conventional oven. Here’s the simple method:
- Preheat the Oven: Set your oven to 400°F (200°C).
- Prepare the Garlic: Trim the top of a whole garlic head to expose the cloves. Drizzle with 1 teaspoon of olive oil and wrap the entire head tightly in aluminum foil.
- Roast: Place the foil-wrapped garlic on a baking sheet or directly on the oven rack. Roast for approximately 35-45 minutes, or until the cloves are incredibly soft and golden.
- Cool & Use: Let it cool slightly, then squeeze out the sweet, tender cloves. Proceed with the recipe as directed.
- Flavor Intensity: For a stronger, yet still mellow garlic flavor, you can add an extra clove or two of roasted garlic to the recipe. For an even more pungent, spicy kick, consider adding a very small amount of finely minced raw garlic (start with half a clove) along with the roasted garlic, but be cautious as raw garlic can easily overpower the dish.
- Perfect Consistency: If your aioli turns out too thick, you can easily thin it with a tiny amount of warm water or extra lemon juice until the desired consistency is reached. For a perfectly smooth texture, ensure that the roasted garlic is thoroughly mashed into a paste before mixing it into the mayonnaise base.
Nutrition Information (Approximate)
Serving:
2
tablespoons
,
Calories:
201
kcal
,
Carbohydrates:
1
g
,
Protein:
0.3
g
,
Fat:
22
g
,
Saturated Fat:
3
g
,
Polyunsaturated Fat:
13
g
,
Monounsaturated Fat:
5
g
,
Trans Fat:
0.1
g
,
Cholesterol:
12
mg
,
Sodium:
323
mg
,
Potassium:
13
mg
,
Fiber:
0.1
g
,
Sugar:
0.2
g
,
Vitamin A:
19
IU
,
Vitamin C:
1
mg
,
Calcium:
4
mg
,
Iron:
0.1
mg
Nutrition information is automatically calculated, so should only be used as an approximation and for general guidance.
Did you love this recipe? Leave a comment and rating below!