
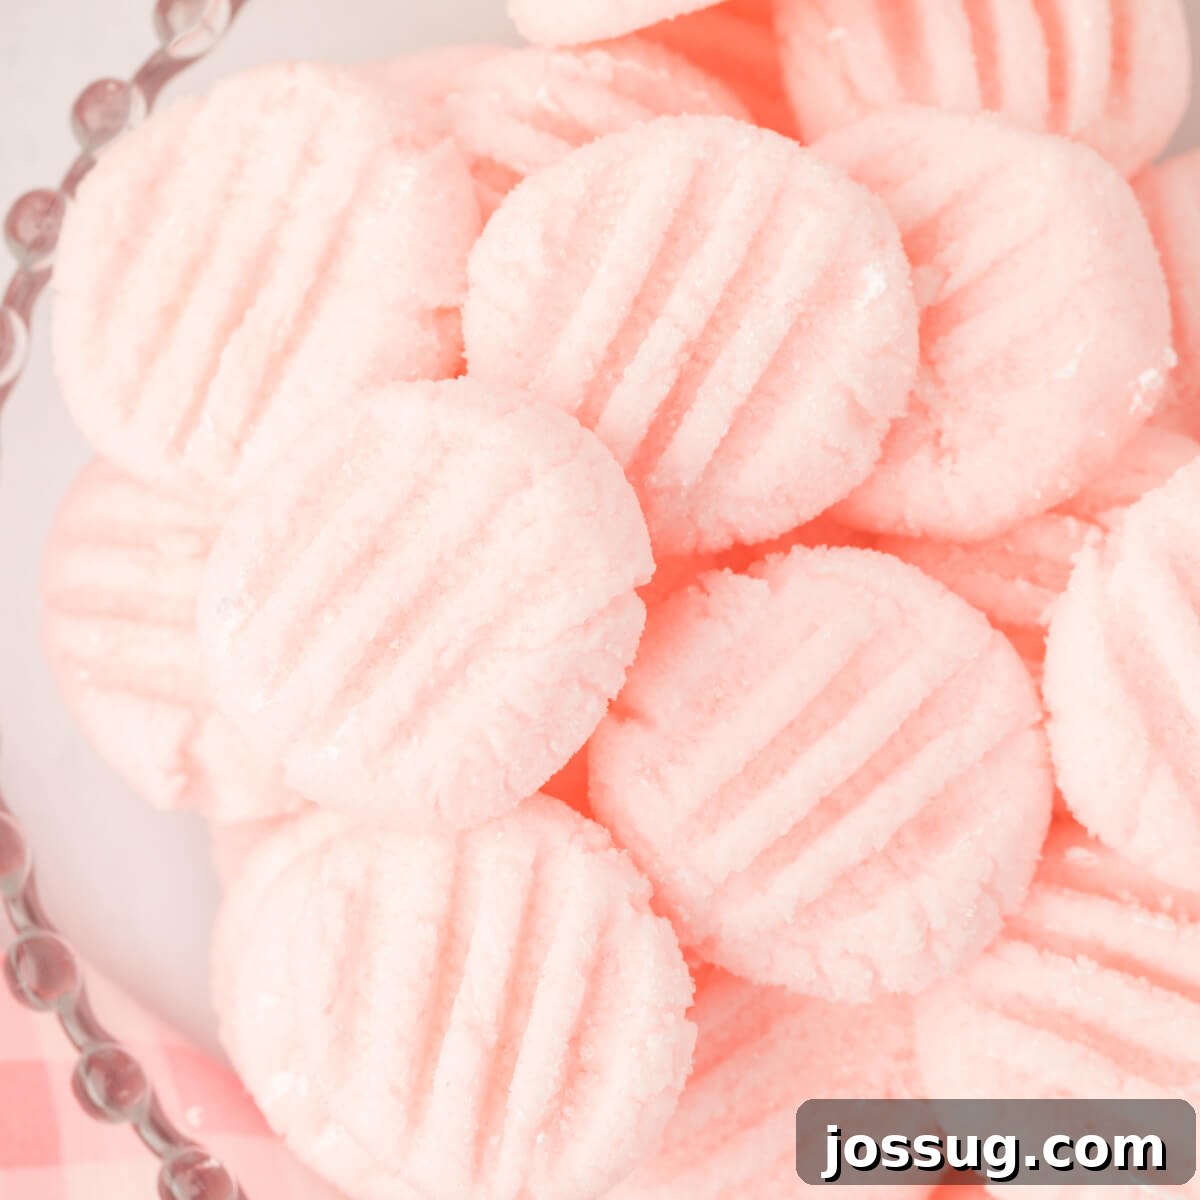
Satisfy your sweet tooth cravings with these creamy and delicious Cream Cheese Mints. These easy-to-make mints offer a delectable blend of rich cream cheese and invigorating peppermint flavor, creating a treat that truly melts in your mouth. Perfect for special occasions, thoughtful gifts, or simply as a delightful indulgence for yourself.
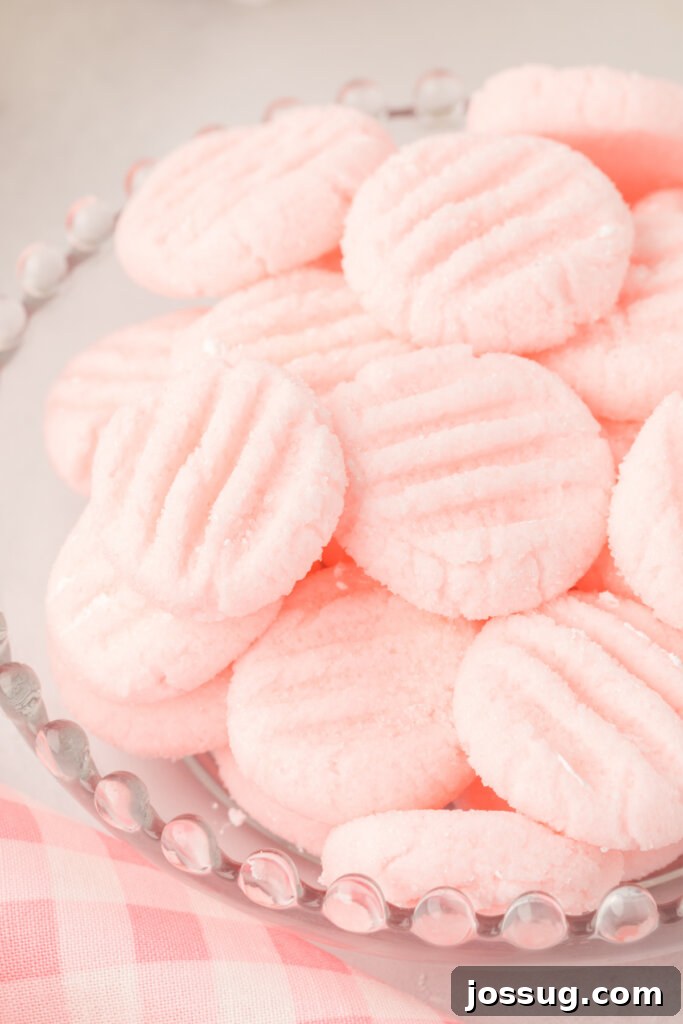
Homemade Cream Cheese Mints: Your Ultimate Guide to Sweet Perfection
Welcome to the enchanting world of homemade cream cheese mints – delightful, bite-sized confections that have charmed dessert lovers for generations. These wonderfully creamy and refreshing treats are more than just candies; they represent a tradition, a thoughtful gesture, and a moment of pure sweet pleasure, all rolled into one. Crafted from a harmonious blend of velvety cream cheese, fine powdered sugar, and a hint of invigorating mint, these candies quite literally melt in your mouth, leaving behind a cool, sweet sensation that is utterly irresistible. Whether you’re planning an elaborate celebration or simply yearning for a sweet escape, this comprehensive guide will equip you with all the knowledge to master the art of making flawless cream cheese mints right in your own kitchen.
The Timeless Allure of Cream Cheese Mints
Cream cheese mints hold a cherished spot in many people’s hearts, often evoking fond memories of family gatherings, festive holidays, and elegant special events. Their universal appeal stems from their unique texture—a perfect balance of soft, pliable, and supremely creamy—seamlessly combined with a refreshing burst of flavor. While classic peppermint remains the most beloved choice, the true beauty of these homemade mints lies in their incredible versatility. This allows for an extensive spectrum of flavors and colors, enabling them to perfectly suit any palate, party theme, or seasonal occasion.
Beyond their delightful taste, these mints serve as a superb addition to any dessert table. They function wonderfully as a gentle palate cleanser after a rich meal or can be enjoyed as a standalone sweet snack anytime. They are particularly sought after at momentous events such as weddings, baby showers, engagement parties, and various holiday celebrations, where they are frequently presented as charming favors or as an integral part of an elaborate candy buffet. Their effortless ability to be tinted with food coloring means they can effortlessly complement any event’s decor or color scheme, effortlessly transforming from simple candies into personalized, decorative accents. Imagine crafting delicate pastel pink mints for a baby girl shower, serene blues for a sophisticated winter wonderland party, or a vibrant medley of cheerful hues for a lively spring celebration! The creative possibilities are truly endless.
Making cream cheese mints from scratch is not merely about baking a dessert; it’s an engaging, creative, and often therapeutic process. It offers a wonderful avenue to express care and affection, whether you’re meticulously preparing them as heartfelt gifts for loved ones or simply treating yourself to a well-deserved moment of sweet indulgence. With this detailed recipe and collection of expert tips, you’ll discover just how straightforward and enjoyable it is to bring these beloved confections to life, ensuring every batch is a resounding success.
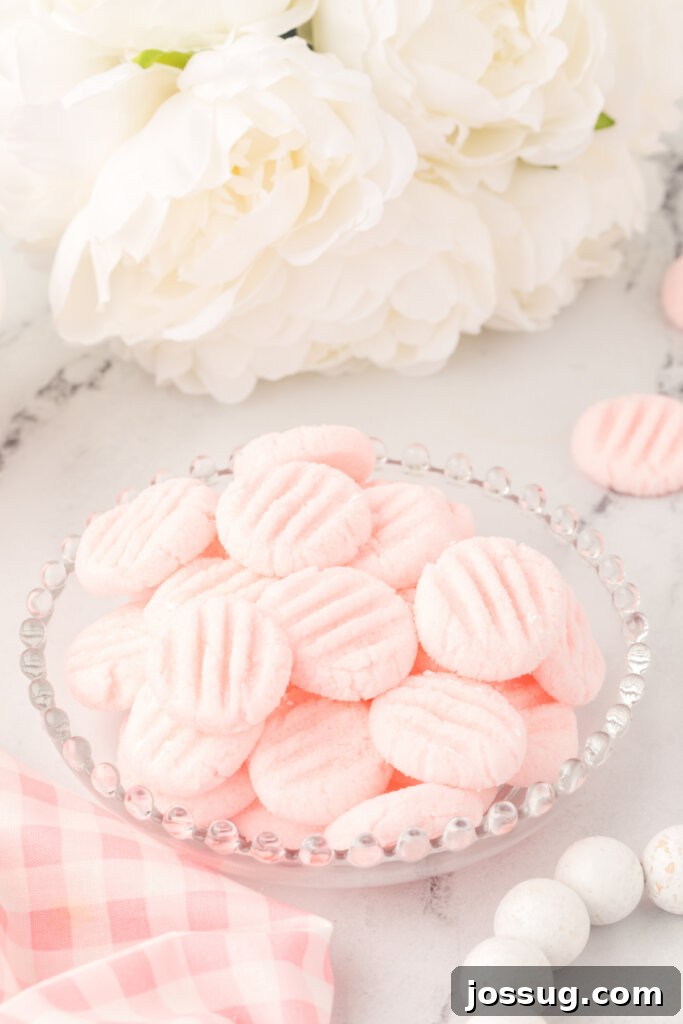
Mastering the Cream Cheese Mints Recipe: A Step-by-Step Approach
This recipe is thoughtfully designed for both ease and enjoyment, yielding a generous batch of approximately 100 perfectly formed mints. This makes it an ideal quantity for sharing with friends and family, gifting to loved ones, or perhaps even keeping all to yourself (we promise not to judge!). The active preparation time is remarkably minimal, requiring only about 30 minutes of hands-on work. However, it’s crucial to factor in a subsequent two-hour drying period, which is essential for the mints to achieve their signature firm yet tender consistency. While this waiting period demands a bit of patience, the straightforward steps make this a truly rewarding culinary project for home bakers of all skill levels, promising a delicious outcome that’s well worth every moment spent.
Essential Ingredients for Creamy Mints
Crafting these delightful mints requires just a handful of readily available ingredients, each playing a crucial role in achieving the perfect texture and unforgettable flavor. Selecting high-quality ingredients will undoubtedly make a noticeable difference in the final product, so choose with care!
- Cream Cheese: It is paramount to opt for full-fat block cream cheese, ensuring it’s softened to absolute room temperature. This ingredient forms the very cornerstone of your mints, lending them their signature creaminess and an incredibly smooth texture. Steer clear of whipped or low-fat varieties, as their altered composition can significantly compromise the final consistency and richness of your mints.
- Butter: Similar to the cream cheese, use unsalted butter that has been softened thoroughly to room temperature. Butter not only enhances the rich, indulgent flavor but also contributes significantly to achieving a pliable dough that is a pleasure to work with during the shaping process.
- Powdered Sugar (Confectioners’ Sugar): This serves as both the primary sweetener and the structural backbone of your mints. Powdered sugar dissolves seamlessly into the mixture, guaranteeing a silky-smooth texture completely free of any unwanted graininess. Additionally, you’ll liberally use it to dust your work surface and your fork, which is crucial for preventing the mint mixture from sticking excessively during shaping. While a good electric mixer can often handle slight lumps, sifting your powdered sugar beforehand is an excellent preventative measure for a truly flawless dough.
- Peppermint Oil (or Extract): This is where the invigorating minty kick comes from! Peppermint oil is considerably more concentrated than extract, meaning a very small amount goes a very long way. If you opt to use peppermint extract instead, you will likely need to add a bit more to achieve your desired intensity, so adjust carefully according to your taste preferences. Peppermint oil can typically be found in the baking aisle of larger supermarkets or in specialty candy-making supply stores.
- Food Coloring Paste (Optional): For vibrant and consistent coloring, a gel or paste food coloring is highly recommended. Liquid food coloring can introduce too much moisture into the dough, altering its texture. When adding color, start with an incredibly tiny amount on the tip of a toothpick and gradually incorporate more until your desired shade is reached. This offers a fantastic opportunity for creative expression, allowing you to perfectly match your mints to specific holiday themes, party decor, or simply your personal aesthetic preferences.
Pro Tip for Efficiency: For those looking to save time and effort, utilizing a food processor can dramatically speed up the mixing process. It effortlessly ensures a perfectly smooth and uniformly textured dough with minimal exertion, making it an invaluable tool, especially when preparing larger batches of these delightful confections!
Essential Tools for Mint Making
While this recipe is fundamentally straightforward, having the appropriate tools within reach can significantly streamline the entire preparation process, ensuring an even smoother and more enjoyable experience:
- Large Mixing Bowl: An indispensable item for thoroughly combining all your ingredients without any mess or spillover.
- Electric Mixer (Hand or Stand Mixer): Absolutely crucial for effectively creaming the butter and cream cheese together, and for ensuring the powdered sugar is thoroughly and evenly incorporated. A reliable hand mixer will perform this task perfectly.
- Rubber Spatula or Wooden Spoon: Essential for frequently scraping down the sides of the mixing bowl. This ensures that all ingredients are fully and uniformly incorporated into the dough, leaving no unmixed pockets.
- Measuring Cups and Spoons: For precision and accuracy in your ingredient measurements, which is key to consistent results in candy making.
- Waxed Paper: Absolutely essential! This provides a non-stick surface, preventing your delicate mints from adhering to the counter or baking sheet while you shape and dry them.
- Baking Sheets: Used to hold the sheets of waxed paper and the freshly shaped mints during their crucial drying period.
- Fork: Your simple tool for flattening the rolled mint balls into classic patties, creating that charming and recognizable ridged pattern.
- Candy Molds (Optional): For those who wish to add an extra touch of creativity and theme, candy molds in various shapes (like hearts, flowers, or holiday symbols) can elevate the visual appeal of your mints.
Step-by-Step Guide to Perfect Cream Cheese Mints
Follow these straightforward steps to craft a batch of utterly irresistible cream cheese mints that are guaranteed to impress everyone who tastes them!
1. Prepare the Creamy Base
In a large mixing bowl, combine the thoroughly softened cream cheese and softened butter. Using an electric mixer, cream these two ingredients together on medium speed until the mixture becomes wonderfully light, fluffy, and completely smooth. This process typically takes about 2-3 minutes. It’s vital to ensure there are absolutely no lumps of cream cheese or butter remaining. Periodically pause and use your rubber spatula to scrape down the sides and bottom of the bowl, ensuring that all components are uniformly combined and no unmixed pockets are left behind.
2. Incorporate the Sugar and Flavor
Gradually add the powdered sugar to the creamed mixture, incorporating it one cup at a time. Mix on low speed initially until each addition is fully incorporated. As you continue to add more sugar, the mixture will progressively thicken, eventually transforming into a dense, pliable dough-like consistency. Once all the powdered sugar has been added, increase the mixer speed to medium-low and continue mixing until the dough is perfectly smooth and free of any visible sugar streaks. Remember to scrape down the sides of the bowl once more to ensure thorough mixing. Next, thoroughly mix in the peppermint oil. Begin with the recommended amount and, if you wish and it’s safe to do so, taste a tiny speck of the mixture to ensure the mint flavor is precisely to your liking. If you are using food coloring paste, add it at this stage. Start with just 1-2 drops and mix until the color is evenly distributed throughout the dough; add more drops if a deeper, more vibrant hue is desired.
3. Shape Your Mints
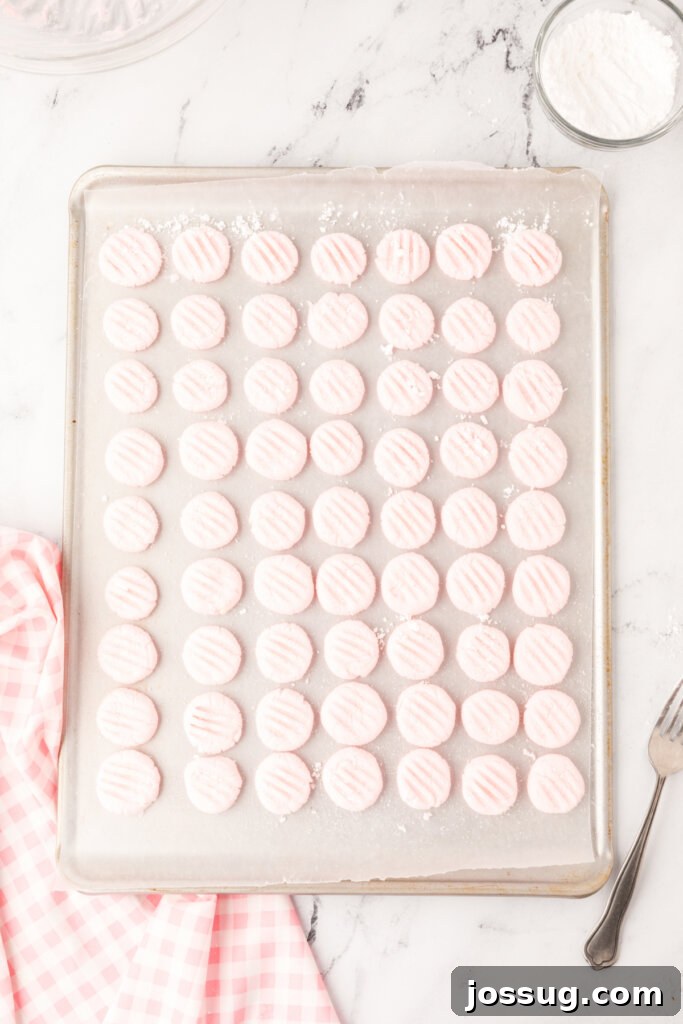
Prepare your work surface by laying out several sheets of waxed paper. Lightly sprinkle the waxed paper with a thin, even layer of powdered sugar; this step is absolutely crucial for preventing the mint mixture from sticking excessively. Pinch off small, uniform portions of the mint dough and roll them gently between your palms to form consistent pea-sized or marble-sized balls, aiming for about ½ to ¾ inch in diameter. Carefully place these small balls onto the prepared waxed paper, ensuring you leave a small amount of space between each one to prevent them from merging.
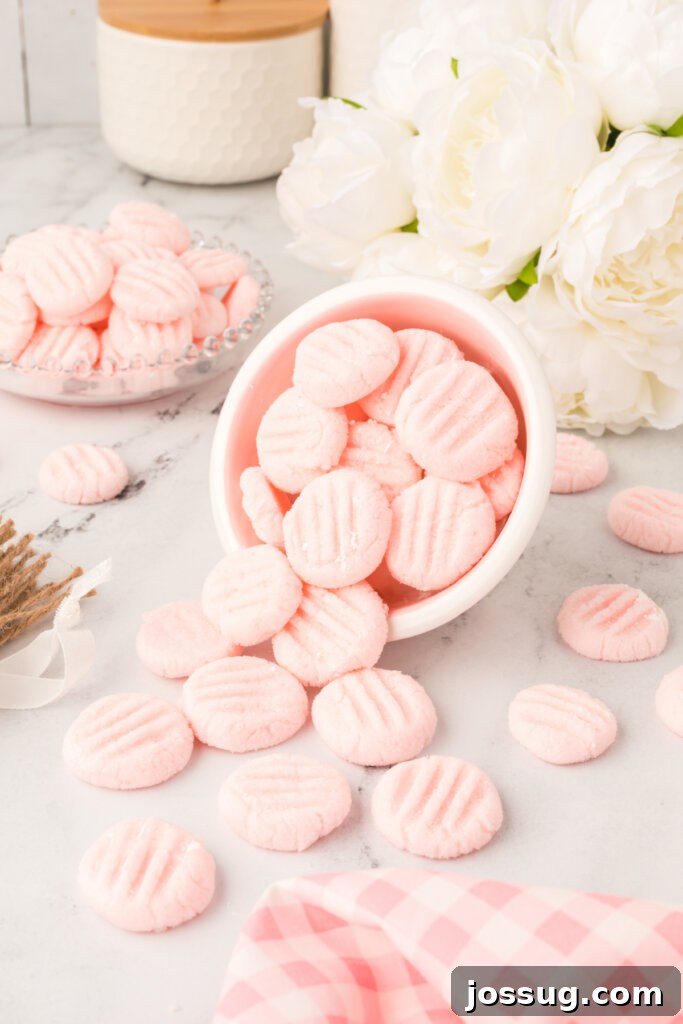
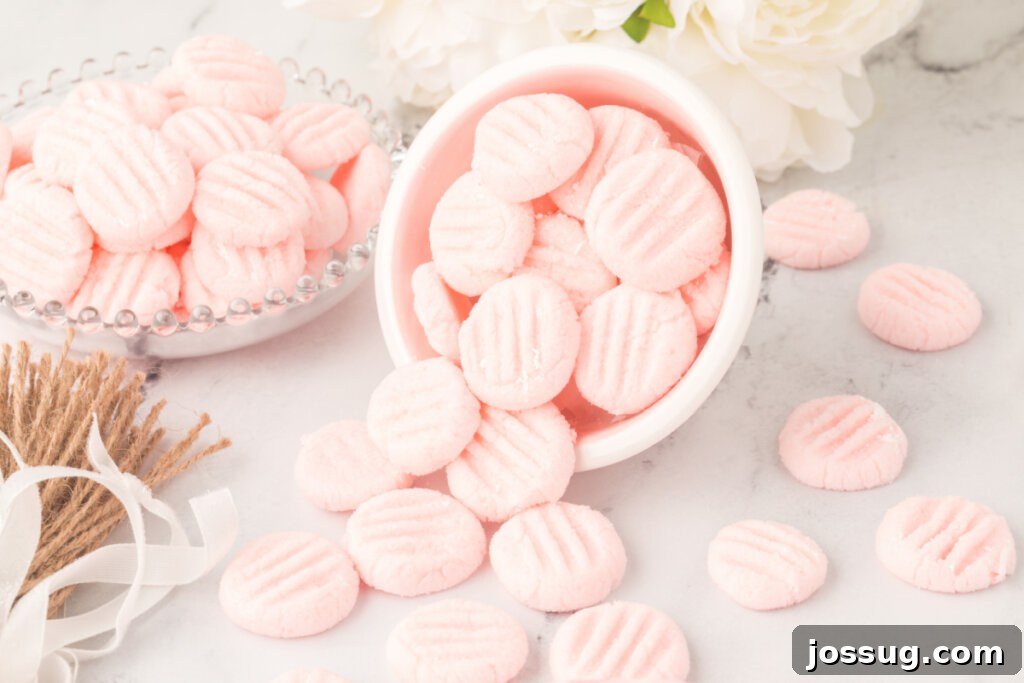
To achieve the classic mint patty shape, lightly dip a fork into powdered sugar – this prevents sticking and ensures a clean impression – then gently but firmly press down on each dough ball to flatten it into a neat disc. The powdered sugar on the fork will leave an attractive, ridged pattern on the surface of each mint. If you decide to use candy molds for unique shapes, first roll the dough balls in granulated sugar (this helps them release much more easily from the molds and adds a lovely, subtle sparkle). Then, press them firmly into your chosen molds. Carefully un-mold them and place them onto the waxed paper to dry.
4. Dry and Set
Once all your mints have been meticulously shaped, allow them to air dry uncovered on the waxed paper at room temperature for a minimum of 2 hours. This drying period is absolutely essential. It allows the exterior of the mints to firm up slightly, which effectively prevents them from becoming too sticky and helps them maintain their carefully crafted shape. After this drying period, your cream cheese mints are ready to be served and enjoyed immediately. For enhanced firmness or for longer-term preservation, you can also refrigerate or freeze them as desired.
Expert Tips for Flawless Cream Cheese Mints
Achieving cream cheese mint perfection is surprisingly simple with the application of a few insider tricks and careful considerations:
- Optimal Ingredient Temperature is Paramount: It cannot be stressed enough: ensure your cream cheese and butter are truly at perfect room temperature. This crucial detail allows them to cream together effortlessly and smoothly, preventing any stubborn lumps and guaranteeing a uniformly soft and pliable dough. If your ingredients are too cold, your mixture will be lumpy and difficult to work with; if they are too warm, the dough might become overly soft and sticky.
- Mastering the Art of Non-Sticking: Do not underestimate the importance of powdered sugar when dusting both your waxed paper and your fork. This liberal application is your absolute best defense against a sticky dough. If, even after dusting, the dough still feels excessively sticky or unmanageable, gradually incorporate an additional tablespoon or two of powdered sugar directly into the main mixture. Mix it in until the dough achieves a perfectly pliable, non-sticky consistency that is easy and enjoyable to roll and shape.
- Ensuring Consistent Sizes: For a presentation that is truly aesthetically pleasing and professional-looking, strive to make your mint balls as uniform in size as possible. A small cookie scoop or even a leveled measuring spoon can be incredibly helpful tools to achieve this consistency with ease.
- Refined Coloring Techniques: When the time comes to add food coloring, always opt for high-quality gel or paste colors. These types of colorings provide vibrant hues without introducing excess liquid, which can negatively affect the dough’s texture. Begin with an incredibly tiny amount on the tip of a toothpick and gradually build up the color intensity until your desired shade is achieved. If you’re planning to make mints in multiple colors, divide your plain dough into separate portions before adding individual colors to each.
- Embarking on Flavor Exploration: While peppermint holds its revered place as the traditional flavor, do not hesitate to unleash your culinary creativity and experiment! Vanilla extract, almond extract, zesty lemon extract, fragrant orange extract, or even a subtle hint of rum extract can all be used to create entirely distinct and equally delicious mints. Just ensure that for these flavor variations, you exclusively use baking extracts rather than essential oils, as oils can be significantly more potent and may drastically alter the delicate texture of the mints.
- The Virtue of Drying Patience: The recommended 2-hour drying time is not merely a suggestion; it is a critical step. This period allows the mints to properly set up and firm, which is essential for preventing them from melding together or becoming overly soft and messy. If you reside in a particularly humid climate, your mints might require a slightly longer drying period to achieve the desired consistency.
Storage and Making Ahead: Prepare for Future Enjoyment
One of the most appealing qualities of cream cheese mints is their remarkable shelf life, which makes them an ideal candidate for preparing well in advance of special events or simply to have on hand for impromptu sweet cravings.
- Refrigeration: Once your cream cheese mints have fully dried, store them in an airtight container within the refrigerator. Layer them carefully between sheets of waxed paper to prevent any sticking or merging. When stored correctly, they will remain wonderfully fresh and delicious for up to 2 weeks.
- Freezing: For extended preservation, cream cheese mints freeze exceptionally well for a period of up to 2 months. To freeze, first arrange the completely dried mints in a single layer on a baking sheet and place them in the freezer until they are solid. Once frozen, transfer them to a freezer-safe airtight container or bag, again separating layers with waxed paper. When you’re ready to enjoy them, simply thaw the mints in the refrigerator before serving.
- Make-Ahead Dough: For ultimate convenience, you can also prepare the mint dough in advance. Wrap the unshaped dough tightly in plastic wrap and store it securely in the refrigerator for 2-3 days. Before you plan to shape your mints, allow the dough to sit at room temperature for approximately 15-20 minutes to soften slightly and become more pliable, making it easier to work with.
Creative Serving and Gifting Ideas for Cream Cheese Mints
These beautiful little candies are just as versatile in their presentation as they are in their flavor, making them perfect for a variety of occasions:
- Dessert Table Delight: Create a stunning focal point by arranging different colored and uniquely shaped mints on a tiered serving tray, or elegantly present them in decorative glass bowls for an eye-catching and inviting display.
- Charming Wedding Favors: For a personal and memorable touch, package a few mints in small cellophane bags tied with a ribbon that perfectly matches your wedding colors. This makes for a delightful and cherished favor for your guests.
- Festive Holiday Treats: Embrace the spirit of the season by using appropriate colors and shapes (e.g., vibrant green and red for Christmas, soft pastels for Easter). Present these festive mints in decorative tins or charming gift boxes for a truly special holiday treat.
- Elegant Tea Party Delicacy: Elevate your afternoon tea experience by serving these delicate mints alongside other fine pastries and a selection of exquisite teas.
- Thoughtful Homemade Gifts: A lovingly homemade batch of cream cheese mints makes an exceptionally wonderful hostess gift, a heartfelt thank-you present, or simply a sweet and unexpected surprise for a dear friend.
Frequently Asked Questions About Homemade Cream Cheese Mints
How many mints does this recipe make?
This recipe typically yields a generous batch of approximately 100 small mints! This quantity is perfectly suited for parties, larger gatherings, or simply ensuring you have an abundant supply to enjoy at your leisure (no judgment here, enjoy every one!).
How long does it take to make Cream Cheese Mints?
The active preparation time for these mints is roughly 30 minutes. However, it’s essential to allow for at least 2 hours of dedicated drying time for the mints to properly set and achieve their desired texture. While it’s certainly not an instant treat, the hands-on time is relatively brief, and the delicious, melt-in-your-mouth results are absolutely worth the anticipation! For those looking to expedite the process, utilizing a food processor can significantly speed up the initial mixing stage.
How long will these mints stay fresh?
When meticulously stored in an airtight container within the refrigerator, your homemade cream cheese mints will retain their freshness and delicious taste for up to 2 weeks. For considerably longer preservation, they can be securely frozen for a period of up to 2 months. Always ensure that the mints are thoroughly dried before placing them into storage.
My mixture is too sticky! What can I do to fix it?
A sticky mixture is a common issue and usually indicates that your dough simply requires a bit more powdered sugar. The solution is straightforward: gradually add additional powdered sugar, one tablespoon at a time, mixing it into the dough until it achieves a pliable, non-sticky consistency that is easy and pleasant to roll and shape. The precise amount needed can sometimes vary slightly due to factors like ambient humidity or the specific brand of cream cheese used.
Can these mints be flavored differently?
Absolutely! The wonderful aspect of this recipe is its remarkable adaptability. While peppermint is undoubtedly a timeless classic, you are entirely free to substitute other extracts for an array of different flavors. Popular and delicious alternatives include vanilla, almond, lemon, orange, or even coconut extract. When experimenting with these variations, it’s crucial to ensure you use baking extracts rather than essential oils, as oils can be significantly stronger and may unpredictably affect the delicate texture of the mints.
Why did my mints turn out crumbly or too stiff?
If your mints exhibit a crumbly texture, it might be attributed to either an excessive amount of powdered sugar or insufficient creaming of the butter and cream cheese. To rectify this, ensure that your base ingredients (cream cheese and butter) are at perfect room temperature and thoroughly creamed until they reach an impeccably smooth consistency. If the mixture appears too stiff, try adding a tiny bit more softened butter or cream cheese (start with just ½ teaspoon) until the dough becomes more pliable and manageable.
Can I use low-fat cream cheese?
For optimal results and the authentic creamy texture, it is highly recommended to use full-fat block cream cheese. Low-fat varieties contain a higher water content and less fat, which can regrettably result in a stickier, less firm, and ultimately less creamy mint. The desired texture and rich taste will simply not be the same with low-fat alternatives.
Other Delightful Homemade Candy Recipes You May Enjoy
- Martha Washington Candies
- Coconut Snowballs
- Saltine Toffee Candy – aka “Christmas Crack”
- Chocolate Turtle Candy
- Slow Cooker Chocolate Candy
100 mints
Cream Cheese Mints Recipe Card
Print Recipe
Equipment
- Cut-Rite Wax Paper – Pack of 3
- Baking Sheets
- Rubber Spatula or Wooden Spoon
- Hand Mixer
- Mixing Bowl
- Measuring Cups and Spoons
Ingredients
- 4 oz. cream cheese, softened
- 1 tablespoon butter, softened
- 3 cups powdered sugar
- ½ teaspoon peppermint oil
- 1 – 5 drops food coloring paste, any color, optional
Instructions
-
In a large bowl, cream the cream cheese and butter until well combined. Mix in the powdered sugar. Be sure to scrape down the sides at least once.
-
Mix in the peppermint oil and the food coloring paste, if using.
-
Divide and roll the mixture into small balls, and place them on waxed paper. Flatten each ball with a fork dipped in powdered sugar.
-
Let the mints dry for about 2 hours on waxed paper, then freeze or refrigerate.
Notes
- To help prevent the mints from sticking to the paper, sprinkle a wax paper-lined baking sheet with granulated sugar.
- Try making this recipe in a food processor – it makes it even faster and easier!
- If your mixture is too sticky, add a little more powdered sugar until your desired consistency is reached.
- These can also be made into pretty shapes by rolling the balls in granulated sugar, then pressing them into candy molds, and dropping them out to dry.
- Cream Cheese Mints should be stored in an airtight container in the refrigerator. They can be stored in the refrigerator for up to 2 weeks or frozen for up to 2 months.
Nutrition
, Calories: 19kcal
, Carbohydrates: 4g
, Protein: 0.1g
, Fat: 1g
, Saturated Fat: 0.3g
, Polyunsaturated Fat: 0.02g
, Monounsaturated Fat: 0.1g
, Trans Fat: 0.005g
, Cholesterol: 1mg
, Sodium: 5mg
, Potassium: 2mg
, Sugar: 4g
, Vitamin A: 19IU
, Calcium: 1mg
, Iron: 0.003mg
Nutrition information is automatically calculated, so should only be used as an approximation.