
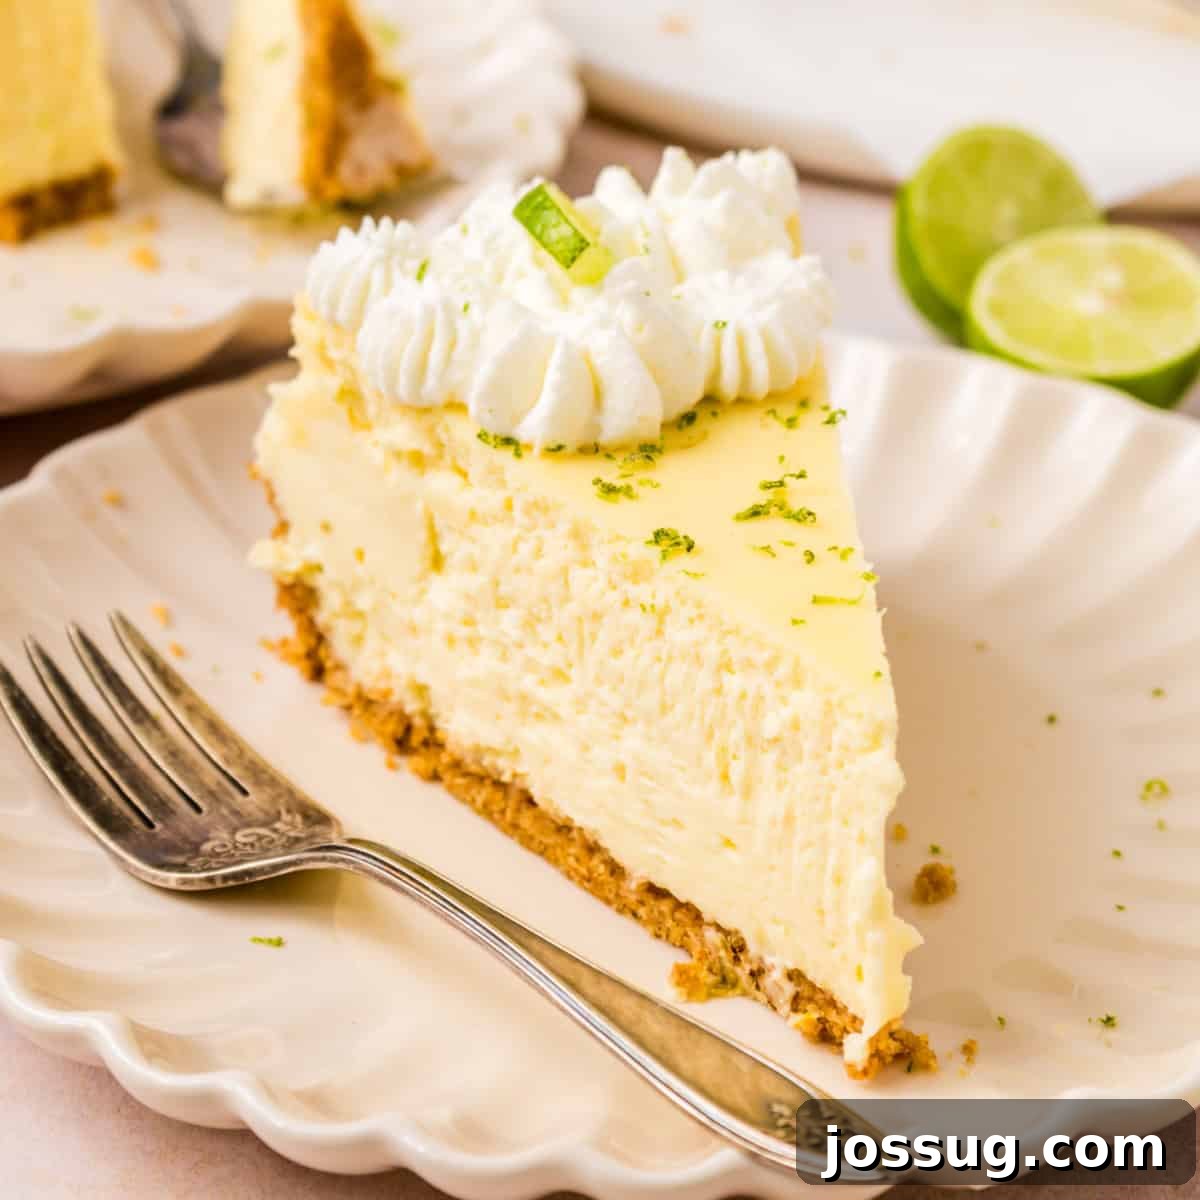
This rich and creamy Key Lime Cheesecake is a quintessential dessert, perfectly blending the bright, tangy zest of Key limes with the smooth, luxurious texture of a classic cheesecake. Resting on a buttery graham cracker crust, each slice offers an irresistible burst of fresh citrus flavor. Whether you’re a connoisseur of Key Lime Pie or a dedicated cheesecake enthusiast, this recipe delivers the best of both worlds, creating an impressive yet surprisingly easy treat that’s guaranteed to be a crowd-pleaser for any gathering or a delightful indulgence just for you.
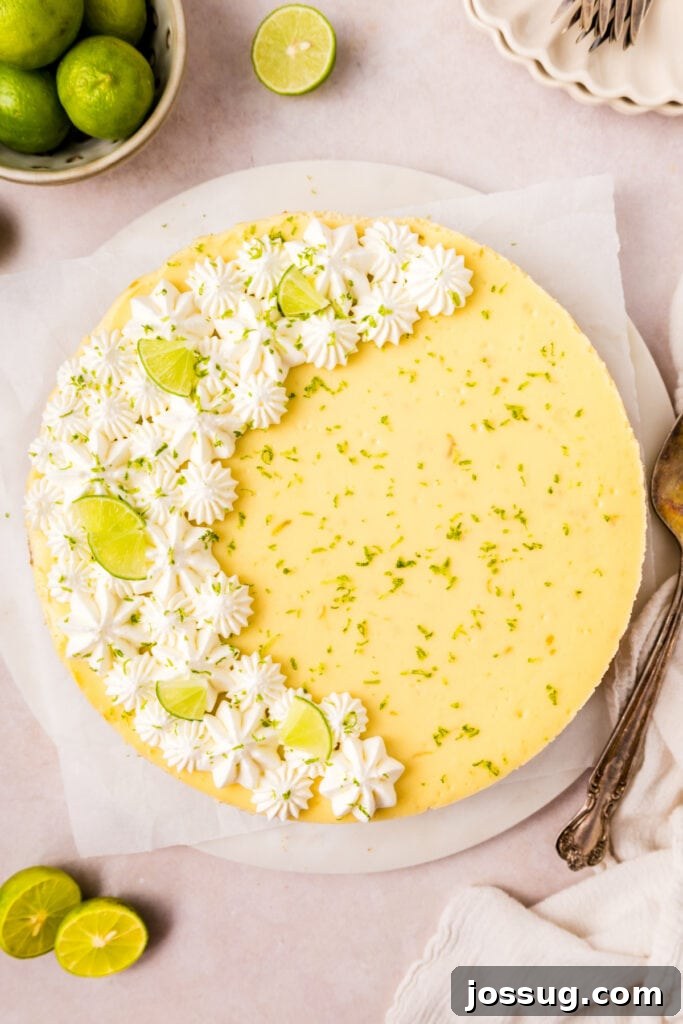
The Ultimate Key Lime Cheesecake Recipe: A Zesty Tropical Treat
Prepare to delight your taste buds with this exceptional Key Lime Cheesecake recipe. It’s a culinary masterpiece that seamlessly marries the iconic tartness of a traditional Key Lime Pie with the unparalleled creaminess of a classic baked cheesecake. This dessert isn’t just a treat; it’s an experience, featuring a perfectly balanced tangy lime filling nestled upon a sturdy, buttery graham cracker crust. Its vibrant flavor and luxurious texture make it an ideal choice for any occasion, from casual family dinners to elegant celebrations. Plus, with our straightforward instructions, you’ll find that achieving cheesecake perfection is much simpler than you might imagine, bringing a taste of the tropics right to your home.
⭐ Why You’ll Adore This Key Lime Cheesecake Recipe
- A Symphony of Flavors: Experience the perfect harmony of bright, zesty Key lime, sweet cream cheese, and a hint of vanilla, all culminating in a refreshingly tangy and deeply satisfying dessert that stands out from typical cheesecakes. The unique flavor profile is both vibrant and comforting.
- Effortless Elegance for Any Occasion: This cheesecake is not only delicious but also stunningly beautiful, making it a show-stopping centerpiece for dinner parties, holidays, or any special gathering. Its make-ahead nature means less stress on event day, allowing you to focus on other preparations.
- Straightforward Preparation with Accessible Ingredients: Don’t let its sophisticated taste fool you; this recipe uses simple, easy-to-find ingredients and follows a clear, step-by-step process that even novice bakers can confidently tackle. No exotic tools or complex techniques required.
- Versatile Lime Choice: While authentic Key limes offer a unique aromatic depth and distinct flavor profile, this recipe is incredibly forgiving. You can easily achieve fantastic results using regular Persian limes, making it accessible no matter what your local grocery store offers. Fresh juice, however, is always preferred for optimal taste.
- Ultimate Creaminess Guaranteed: With careful attention to detail and our expert tips, you’ll achieve a velvety smooth, melt-in-your-mouth texture without any cracks, ensuring a professional-looking and tasting cheesecake every single time. It’s the secret to a truly indulgent experience.
🛒 Essential Ingredients & Smart Substitutions for Key Lime Cheesecake
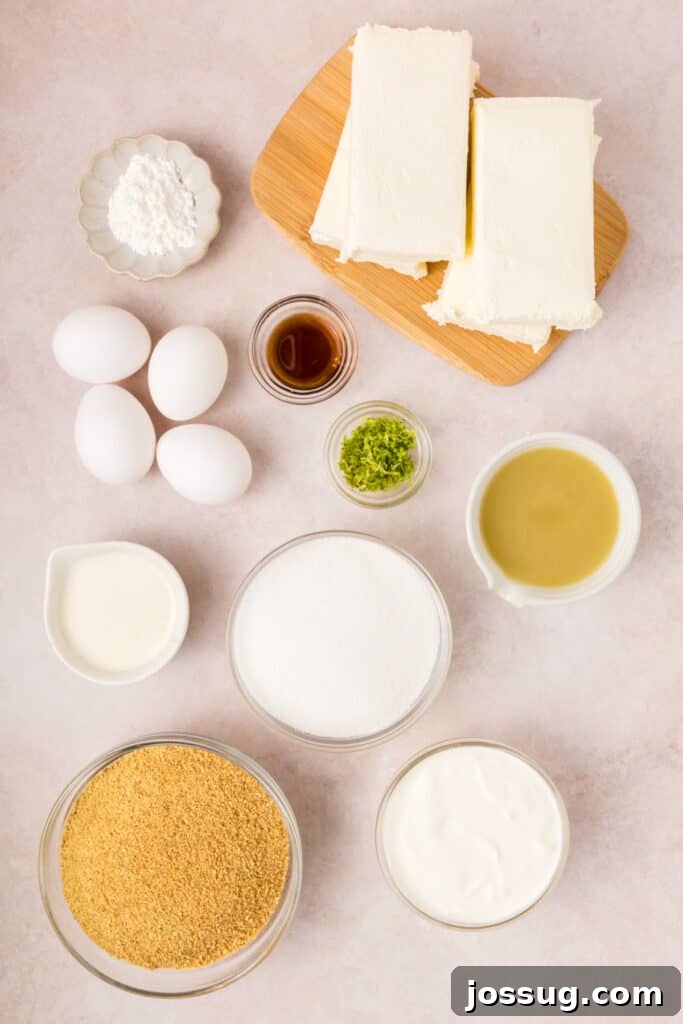
Crafting the perfect Key Lime Cheesecake begins with selecting the right ingredients and understanding their roles. Here’s a detailed look at what you’ll need and some helpful substitutions to ensure success and maximize flavor.
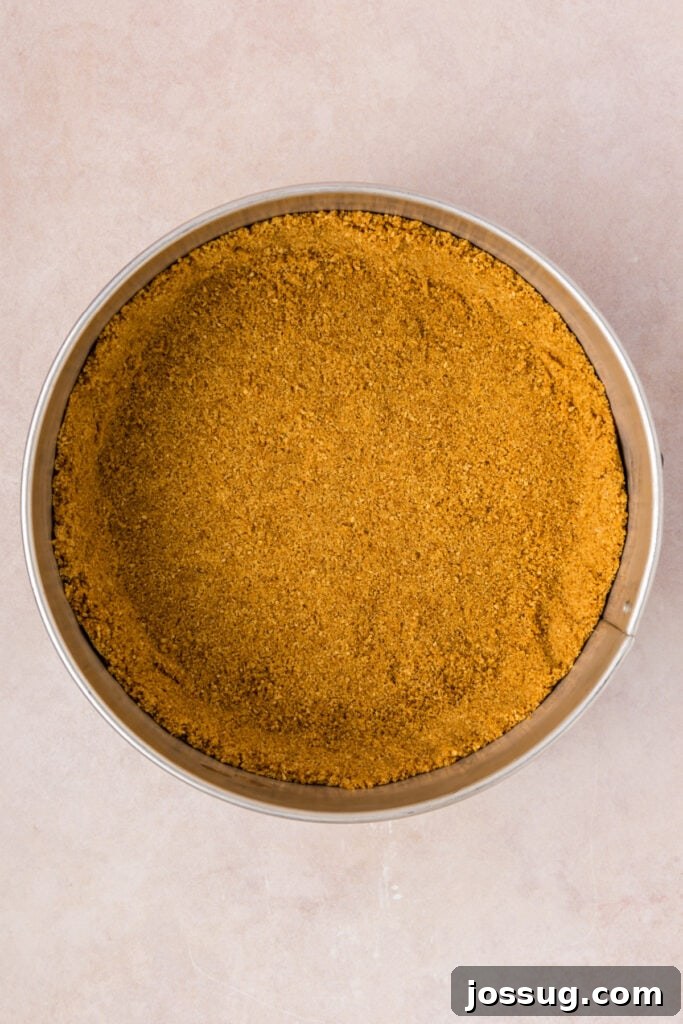
- Graham Cracker Crumbs: The foundation of our cheesecake is a classic buttery graham cracker crust, providing a sweet and slightly spiced contrast to the tangy filling. For a unique twist, consider using finely crushed gingersnaps for a more prominent spiced flavor, or vanilla wafers for a milder, sweeter base. Ensure crumbs are uniform for a compact and stable crust.
- Unsalted Butter: Melted unsalted butter acts as the binder for the crust, giving it that essential rich flavor and firm texture. Using unsalted butter allows you to control the overall saltiness of the dessert. If only salted butter is available, you can use it, but no additional salt should be added to the crust mixture.
- Full-Fat Cream Cheese: Opt for high-quality, full-fat cream cheese, softened completely to room temperature. This is absolutely crucial for achieving a smooth, lump-free, and wonderfully creamy filling that won’t curdle during mixing or baking. Low-fat or whipped varieties can result in a less stable and drier cheesecake with an inferior texture.
- Granulated Sugar: Provides the perfect level of sweetness to balance the tartness of the Key lime juice. It sweetens the filling without overpowering the delicate citrus notes, allowing the lime flavor to shine.
- Sour Cream: A vital ingredient that adds an extra layer of richness, moisture, and a subtle tang that complements the Key lime flavor beautifully. Like cream cheese, ensure it is at room temperature. For a healthier alternative, or if sour cream is unavailable, full-fat plain Greek yogurt can be used as a 1:1 substitute, providing a similar texture and tang.
- Key Lime Juice: Freshly squeezed Key lime juice is highly recommended for the most authentic and vibrant flavor. Key limes are smaller, more aromatic, and have a distinctive tartness compared to regular limes. If fresh Key limes are hard to find, regular fresh lime juice works very well; just be sure it’s freshly squeezed for the best taste. Bottled Key lime juice can be used in a pinch, but always check that it’s 100% juice with no added sweeteners for optimal flavor and to avoid an overly sweet or artificial taste.
- Lime Zest: Do not skip this! Lime zest holds concentrated essential oils that provide an intense lime aroma and a deeper, brighter flavor without adding extra liquid. It significantly enhances the overall citrus profile of the cheesecake and offers visual appeal.
- Cornstarch: A secret ingredient that helps stabilize the cheesecake filling, contributing to its smooth, custardy texture and acting as an insurance policy against cracks during baking. It provides a little extra structure.
- Vanilla Extract: A touch of pure vanilla extract rounds out the flavors, adding warmth, depth, and a subtle sweetness that beautifully complements the bright acidity of the lime.
- Large Eggs: Eggs act as a binder, giving the cheesecake its structure, richness, and helping it set. Ensure they are at room temperature to ensure they incorporate smoothly into the cream cheese mixture, preventing curdling and promoting a uniform, silky texture.
✨ Creative Variations to Explore for Your Key Lime Cheesecake
- Tropical Coconut Infusion: Elevate your crust by mixing 1/2 cup of finely shredded and lightly toasted coconut into the graham cracker crumbs before adding the melted butter. This adds a delightful texture and a wonderfully tropical flavor that pairs perfectly with lime.
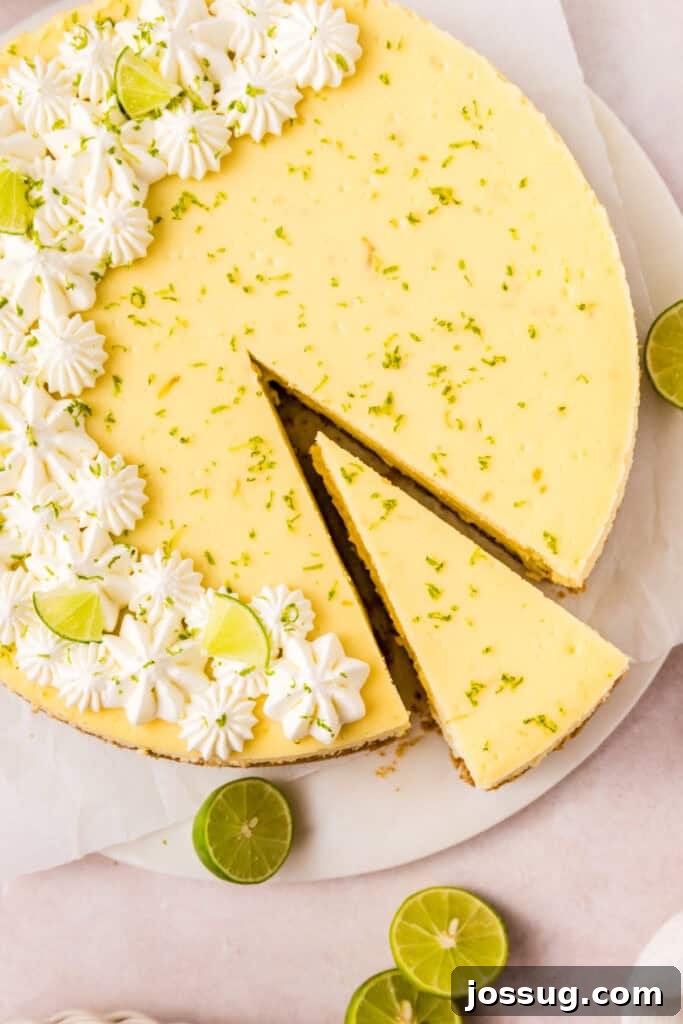
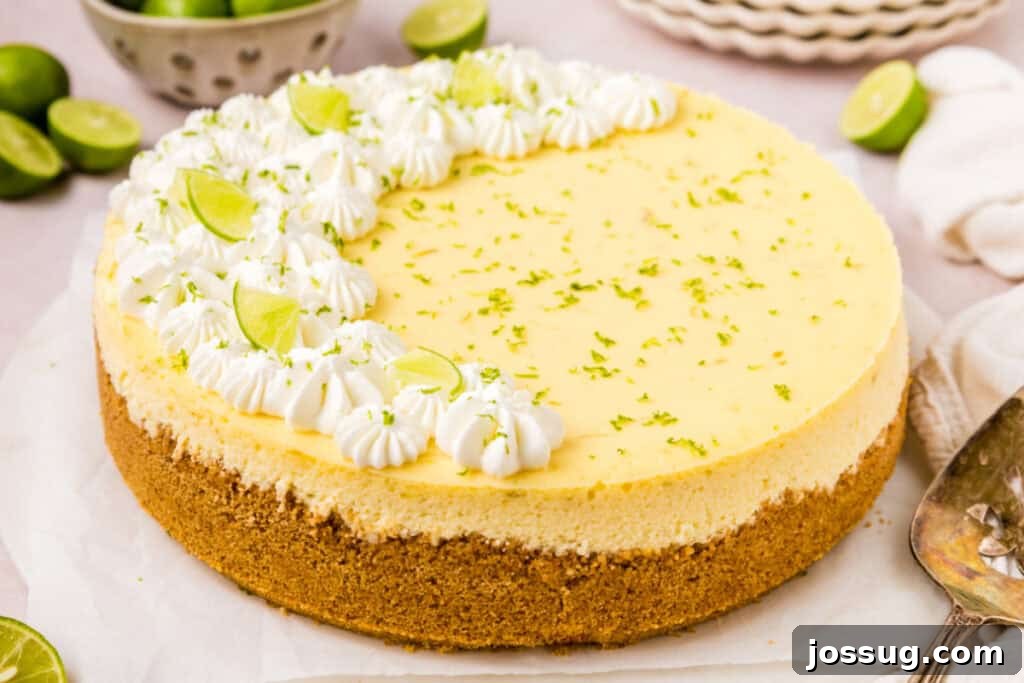
- Decadent Toppings: Crown your cheesecake with a generous layer of freshly whipped cream, delicate lime slices, or a sprinkle of extra lime zest for a classic finish. For an added touch of sweetness and tang, consider drizzling a simple Key lime glaze (made from powdered sugar and a touch of Key lime juice) over the top. Fresh berries like raspberries or blueberries also add a beautiful pop of color and complementary flavor.
- Charming Mini Cheesecakes: For individual servings perfect for parties, picnics, or portion control, adapt this recipe by preparing it in a muffin tin lined with paper wrappers. Reduce the baking time to approximately 20-25 minutes, or until the centers are just set.
- White Chocolate Swirl: After pouring the filling into the crust, gently swirl in a few tablespoons of melted white chocolate for a beautiful marbled effect and a subtle, sweet contrast.
- Ginger Snap Crust: Instead of graham crackers, use crushed ginger snaps for a spicier, more sophisticated crust that complements the tangy lime filling exceptionally well.
🔥 Expert Tips for Key Lime Cheesecake Perfection
Achieving a flawless, creamy, and crack-free Key Lime Cheesecake is easier than you think with these essential tips:
- Bring Ingredients to Room Temperature: This is arguably the most crucial tip for any cheesecake! Ensure your cream cheese, eggs, and sour cream are all at room temperature before you begin mixing. Cold ingredients don’t emulsify properly with sugar and other wet ingredients, leading to a lumpy batter and a cheesecake with an inconsistent, potentially grainy texture. Plan ahead and take them out of the fridge at least 1-2 hours before you start baking.
- Avoid Overmixing the Batter: Once the cream cheese and sugar are beaten until smooth, add the remaining ingredients and mix *just* until combined. Overmixing incorporates too much air into the batter, which can cause the cheesecake to puff up excessively in the oven and then collapse and crack dramatically as it cools. Mix on low speed and scrape down the bowl frequently to ensure everything is well combined without aeration.
- Utilize a Water Bath for Ultimate Creaminess: Baking your cheesecake in a water bath (also known as a bain-marie) is the key to achieving that signature silky-smooth, almost custardy texture and is your best defense against cracks. The water bath creates a moist, even heat environment, allowing the cheesecake to bake gently and evenly without drying out or firming up too quickly. To do this, wrap the bottom of your springform pan tightly with several layers of heavy-duty foil to prevent water from seeping in, then place it in a larger roasting pan. Pour hot water into the roasting pan until it comes halfway up the sides of the springform pan.
- Cool Slowly to Prevent Cracks: Sudden temperature changes are a common culprit for cheesecake cracks. Once baked, turn off the oven and prop the door open slightly (you can use a wooden spoon or heat-safe spatula to hold it ajar), allowing the cheesecake to cool slowly inside the oven for at least an hour. This gradual cooling prevents the cheesecake from shrinking too rapidly and creating fissures.
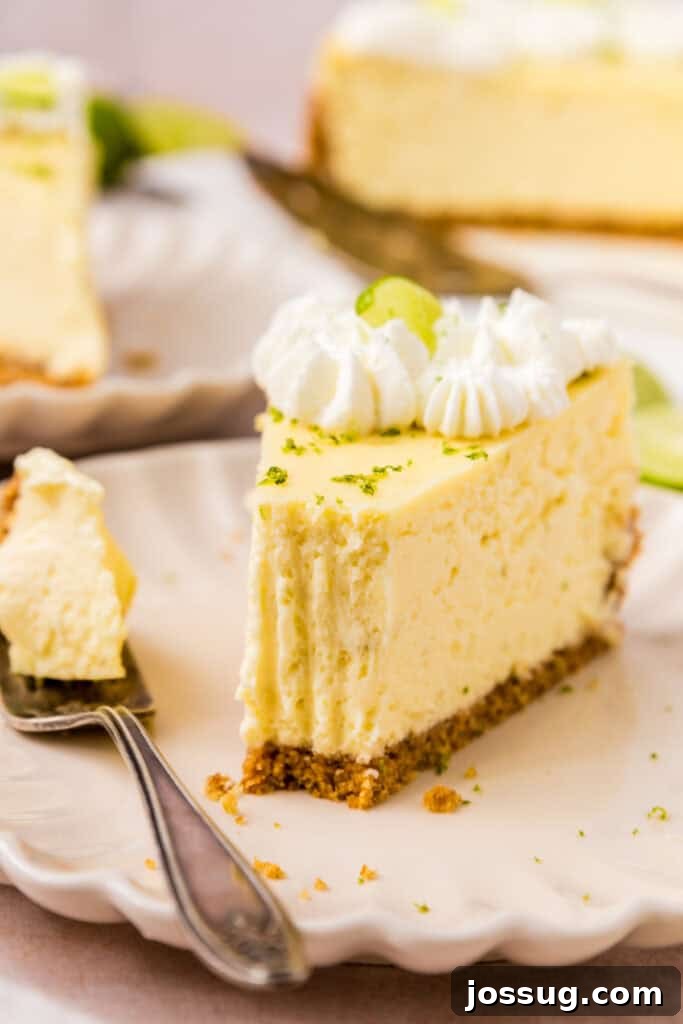
- Chill Thoroughly Before Slicing: Patience is a virtue when it comes to cheesecake! For the cleanest, most beautiful slices and the absolute best flavor development, refrigerate your Key Lime Cheesecake for a minimum of 4 hours, or ideally, overnight (8-12 hours). Chilling allows the cheesecake to fully set, firm up, and allows all the vibrant flavors to meld beautifully, making for a much more enjoyable experience.
- Perfect Zesting Technique: When zesting your limes, use a microplane zester or the fine side of a box grater. Only remove the bright green outer layer of the lime. The white pith directly underneath the zest is bitter and should be meticulously avoided, as it can impart an unpleasant taste to your delicate cheesecake. The zest adds incredible aromatic flavor without altering the texture.
❓ Frequently Asked Questions About Key Lime Cheesecake
Cracks in cheesecake are commonly caused by overmixing the batter (which incorporates too much air), baking at too high a temperature, or cooling too quickly after baking. To prevent these unsightly cracks, ensure all your ingredients are at room temperature before mixing. Mix the batter *just* until smooth on the lowest speed possible to avoid introducing excess air. Always bake in a water bath to create a moist, even heat environment, and allow the cheesecake to cool slowly in the oven with the door propped open before transferring it to the refrigerator. These steps collectively help maintain a gentle, consistent temperature and prevent rapid shrinking that leads to cracks.
While you can technically bake a cheesecake without a water bath, it is highly recommended and almost essential for achieving the creamiest, silkiest texture and significantly minimizing the risk of cracks. The water bath (or bain-marie) provides a moist, humid environment that helps the cheesecake bake evenly and gently, preventing the edges from drying out and cracking before the center sets. If you absolutely cannot use a water bath, you can try placing a separate pan of hot water on the rack below the cheesecake to add some moisture to the oven, but the results may not be as consistently smooth. For optimal results and a truly luxurious cheesecake, embrace the water bath.
Absolutely! This Key Lime Cheesecake is an excellent make-ahead dessert, making it perfect for entertaining or holiday meals. In fact, many people find that the cheesecake tastes even better the day after it’s made, as the flavors have more time to fully develop and meld. It requires a minimum of 4 hours of chilling time to set properly, but chilling it overnight (8-12 hours) will consistently yield the best texture, firmest set, and most pronounced flavor. This flexibility allows you to prepare it a day or two before your event, greatly reducing last-minute stress.
To get the most aromatic zest without any bitterness, a microplane zester is your best tool. Alternatively, you can use the fine side of a box grater. Gently rub the lime across the grater, rotating the lime frequently, until you’ve removed only the bright green outer layer. Be very careful to avoid grating into the white pith (the spongy layer between the zest and the fruit), as the pith is extremely bitter and can negatively impact the delicate flavor of your cheesecake.
Your cheesecake is done when the edges appear set and slightly puffed, but the very center (a circle about 2-3 inches in diameter) still has a slight, gentle jiggle when you carefully shake the pan. It should not look liquidy or sloshy. The residual heat will continue to cook and firm up the center as it cools in the oven and then sets completely during refrigeration. It’s crucial not to overbake, as this can lead to a dry, dense texture and is a primary cause of cracks.
A 9-inch springform pan is the ideal choice for baking this Key Lime Cheesecake. Its unique design, with removable sides that can be unlatched from the base, allows for easy and gentle removal of the delicate cheesecake without damaging its pristine shape. This makes it much simpler to serve and present beautifully, ensuring your hard work is displayed to perfection.
Generally, you do not need to grease the springform pan when using a graham cracker crust for cheesecake. The butter in the crust helps it adhere to the pan sides slightly and prevents sticking, allowing for easy removal once baked and thoroughly cooled. However, if you are particularly concerned or using a pan that tends to stick, you can lightly spray the bottom of the pan with non-stick cooking spray before pressing in the crust.
While freshly squeezed Key lime juice will always provide the superior flavor profile with its bright, aromatic, and authentic notes, you can use high-quality bottled Key lime juice in a pinch. If opting for bottled, it is paramount to ensure it is 100% pure Key lime juice without any added sugars, preservatives, or artificial flavors, as these can significantly affect the taste and potentially the setting of your cheesecake. You might need to slightly adjust the amount of sugar in the recipe if the bottled juice happens to be sweetened.
📝 Storing and Freezing Your Key Lime Cheesecake
Proper storage is key to enjoying your delicious Key Lime Cheesecake for as long as possible:
- Refrigeration: To maintain its freshness, creamy texture, and vibrant flavor, store any leftover Key Lime Cheesecake covered loosely with plastic wrap or in an airtight container in the refrigerator for up to 5 days. Ensure it’s well-sealed to prevent it from absorbing odors from other foods in the fridge.
- Freezing for Longer Storage: This cheesecake freezes beautifully, allowing you to enjoy a slice whenever a craving strikes! To freeze, ensure the cheesecake is fully chilled and completely set. For individual slices, wrap each one tightly in plastic wrap, then an additional layer of heavy-duty aluminum foil. For a whole cheesecake, place it on a freezer-safe plate, then cover it tightly with multiple layers of plastic wrap and foil. Store in an airtight freezer-safe container or heavy-duty freezer bag for up to 2 months.
- Thawing Instructions: When you’re ready to indulge in a frozen slice or a whole cheesecake, transfer it from the freezer to the refrigerator and allow it to thaw slowly overnight (typically 8-12 hours for a whole cake, less for slices). Avoid thawing at room temperature, as this can affect the delicate creamy texture and compromise food safety.
This Key Lime Cheesecake is more than just a dessert; it’s a refreshing escape, a vibrant burst of flavor, and a testament to the simple joy of homemade treats. Its creamy texture and lively citrus tang make it an unforgettable finale to any meal, a perfect offering for guests, or a delightful treat to savor on your own. Prepare to impress, indulge, and fall in love with every single bite of this tropical masterpiece, proving that homemade desserts are always the best.
🍽️ Other Zesty & Sweet Recipes You’ll Love
- No-Bake Key Lime Cheesecake Bars – A refreshing, cool, and creamy dessert bursting with citrusy flavor, perfect for warm weather and requiring no oven.
- Effortless No-Bake Key Lime Pie – A simple, zesty classic that’s always a hit, delivering authentic Key lime taste without ever needing to turn on your oven.
- Key Lime Pie Fudge – A playful, unique twist on a beloved dessert, offering creamy, citrusy delight in every sweet, tangy square.
- Light & Airy Lime Fluff Salad – A wonderfully light, airy, and nostalgically charming dessert, perfect for potlucks, barbecues, or as a refreshing side.
- Delightful Mini Key Lime Cheesecakes – Tangy, creamy, and perfectly portioned, these mini cheesecakes are ideal for sharing (or enjoying all to yourself!).

No ratings yet. Be the first to rate this recipe!
12
servings
Key Lime Cheesecake
Jamie Sherman
15
1
4
5
15
Print Recipe
Equipment
-
9-inch Springform Pan
-
Large Mixing Bowl
-
Electric Hand Mixer
-
Rubber Spatula or Wooden Spoon
-
Large Roasting Pan (for water bath)
-
Microplane or Fine Grater
Ingredients
For the Crust:
- 2 cups graham cracker crumbs
- 5 tablespoons unsalted butter, melted
For the Filling:
- 32 ounces full-fat cream cheese, softened to room temperature
- 1½ cups granulated sugar
- 1 cup sour cream, room temperature
- ½ cup fresh Key lime juice (or regular lime juice)
- 1 tablespoon Key lime zest
- 1 tablespoon cornstarch
- 1 teaspoon vanilla extract
- 4 large eggs, room temperature
Instructions
-
Prepare the Crust: Preheat your oven to 325°F (160°C). In a medium bowl, combine the graham cracker crumbs and melted butter. Mix thoroughly until the crumbs are evenly moistened and resemble wet sand. Press this mixture firmly and evenly into the bottom of a 9-inch springform pan. Bake for 10 minutes to set the crust, then remove from the oven and allow to cool completely on a wire rack while you prepare the filling.
-
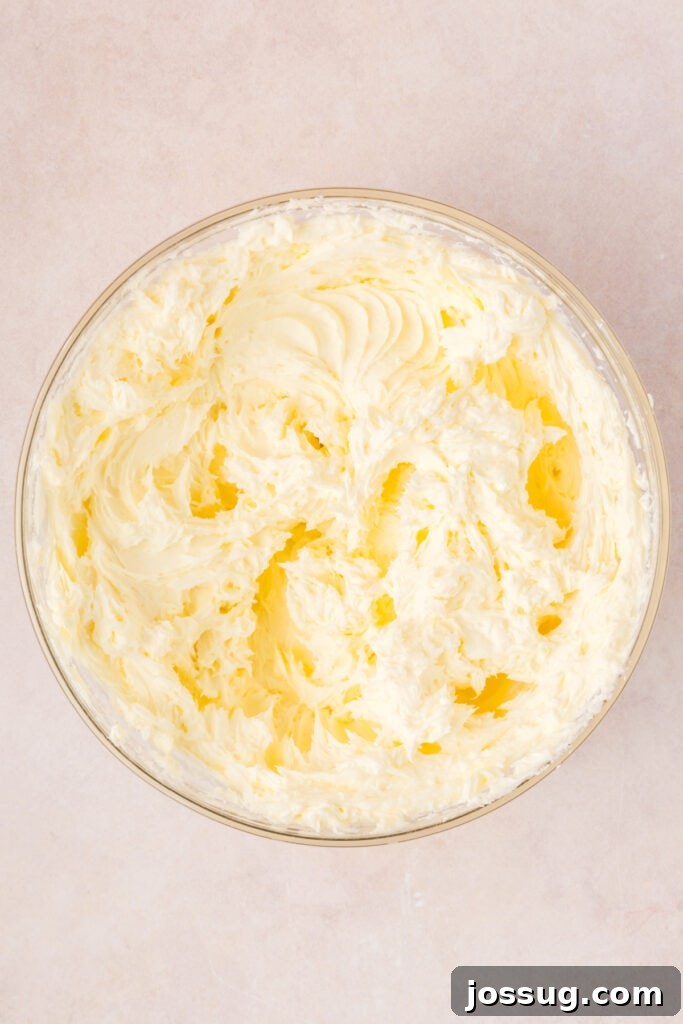
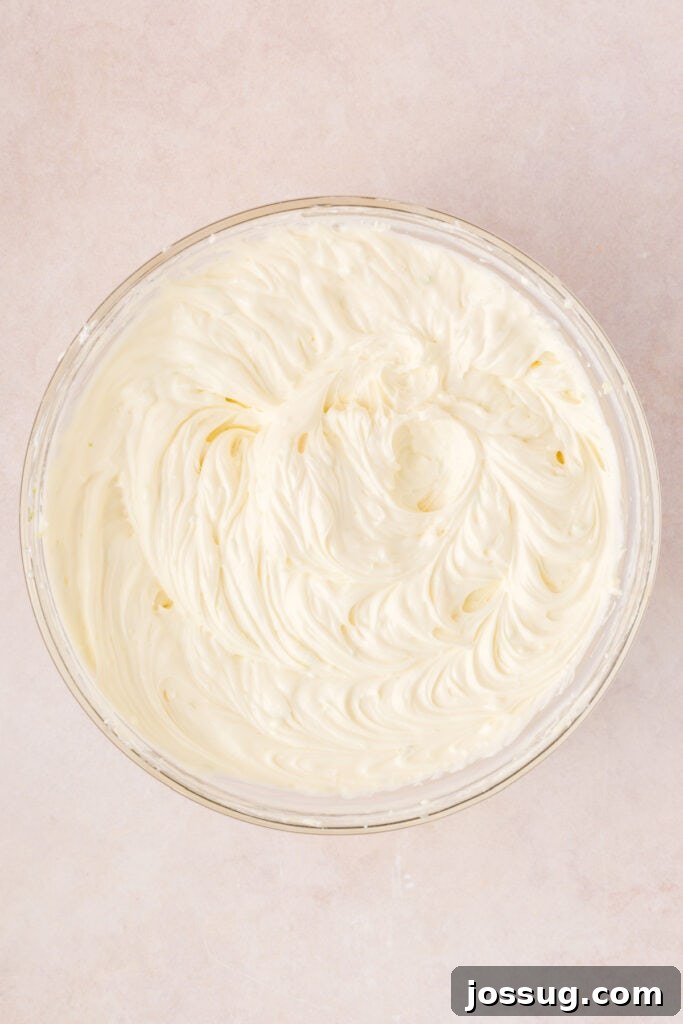
Make the Filling Base: In a large mixing bowl, using an electric hand mixer (or stand mixer with paddle attachment), beat the softened cream cheese and granulated sugar on medium speed until the mixture is light, fluffy, and completely smooth, with no lumps remaining. This step is crucial for a silky cheesecake texture. Scrape down the sides of the bowl frequently to ensure even mixing.
-
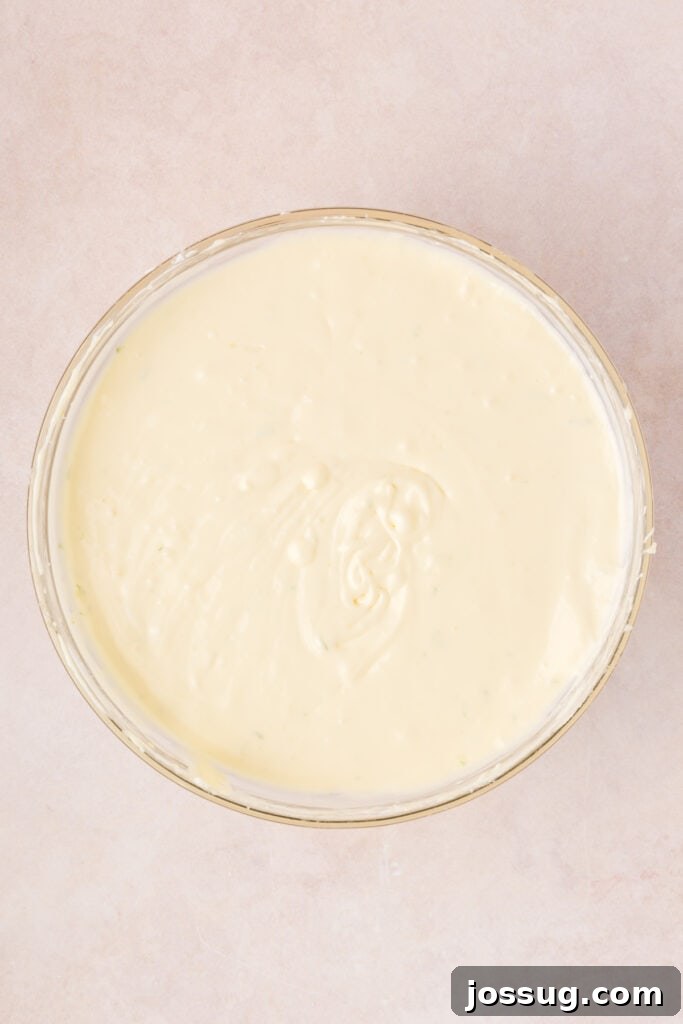
Add Wet Ingredients: To the cream cheese mixture, add the room temperature sour cream, fresh Key lime juice, lime zest, cornstarch, and vanilla extract. Beat on low speed *just* until all ingredients are thoroughly combined and the mixture is smooth and uniform. Be careful not to overmix at this stage, as introducing too much air can cause cracks later.
-
Incorporate Eggs: Gently add the room temperature eggs, one at a time, mixing on the lowest speed possible after each addition. Mix only until the egg is just incorporated into the batter; stop as soon as it disappears. Overmixing the eggs can incorporate too much air, which can lead to cracks in the baked cheesecake.
-
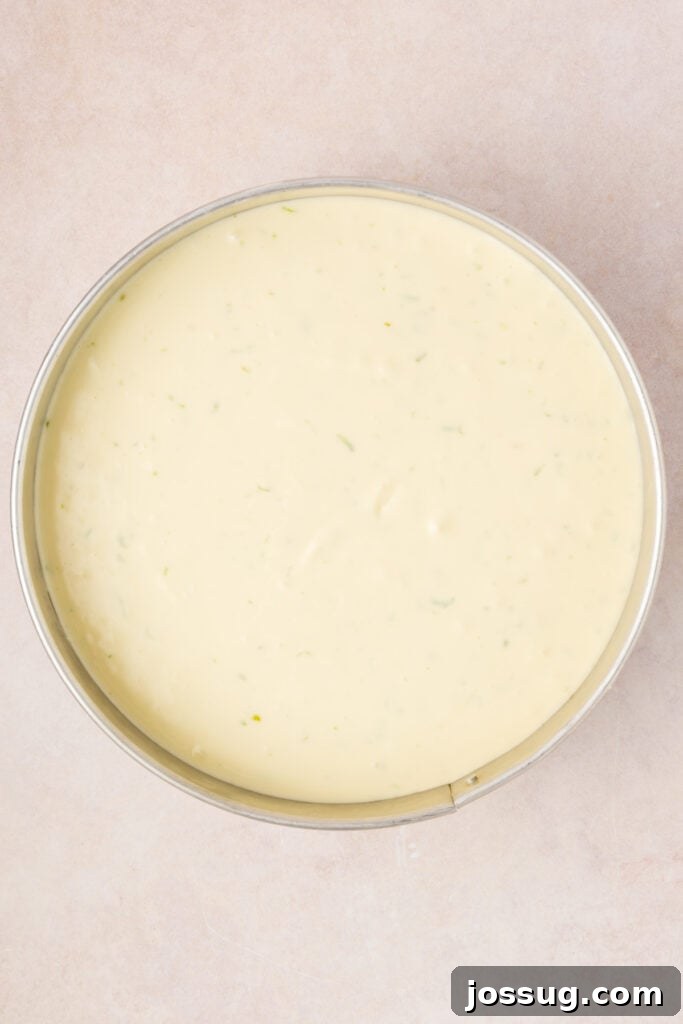
Prepare for Baking: Carefully pour the finished cheesecake filling over the cooled graham cracker crust in the springform pan, spreading it evenly. To create a water bath, wrap the bottom of the springform pan tightly with several layers of heavy-duty aluminum foil to prevent any water from seeping into the crust. Place the foil-wrapped springform pan into a larger roasting pan. Carefully pour hot water into the roasting pan until it reaches about halfway up the sides of the springform pan.
-
Bake the Cheesecake: Carefully transfer the roasting pan with the cheesecake to the preheated oven. Bake for 50 to 60 minutes. The cheesecake is done when the edges appear set and slightly puffed, but the very center (a circle about 2-3 inches wide) still has a slight, gentle jiggle when you gently shake the pan. Do not overbake, as this can lead to dryness and cracks.
-
Cool Gradually: Once baked, turn off the oven. Prop the oven door open slightly (you can use a wooden spoon or a heat-safe spatula to hold it ajar) and allow the cheesecake to cool slowly inside the oven for 1 hour. This slow cooling process is vital for preventing cracks caused by sudden temperature changes.
-
Chill Thoroughly: After 1 hour of cooling in the oven, carefully remove the cheesecake from the water bath (and remove the foil from the bottom of the pan). Let it cool completely to room temperature on a wire rack. Once at room temperature, transfer the cheesecake to the refrigerator and chill for at least 4 hours, or preferably overnight (8-12 hours), to allow it to fully set and for the vibrant flavors to deepen and meld.
-
Serve and Enjoy: Once thoroughly chilled, carefully run a thin knife around the edge of the pan before releasing the springform sides. Garnish with freshly whipped cream, delicate lime slices, or a sprinkle of extra lime zest just before serving for a beautiful and appetizing presentation. Slice with a warm, clean knife for perfect pieces.
Recipe Notes
- Store any leftover cheesecake covered in the refrigerator for up to 5 days.
- To freeze, wrap individual slices tightly in plastic wrap and then aluminum foil. Place in an airtight container and freeze for up to 2 months.
- Thaw frozen slices in the refrigerator overnight before serving for best texture and flavor.
- For the most vibrant lime flavor, always prioritize freshly squeezed Key lime juice and fresh zest.
- Ensure all dairy and eggs are at room temperature for a smooth, lump-free batter and to prevent curdling.
Nutrition Facts (per serving)
Calories: 530kcal,
Carbohydrates: 42g,
Protein: 8g,
Fat: 38g,
Saturated Fat: 21g,
Polyunsaturated Fat: 2g,
Monounsaturated Fat: 10g,
Trans Fat: 0.2g,
Cholesterol: 162mg,
Sodium: 397mg,
Potassium: 186mg,
Fiber: 1g,
Sugar: 32g,
Vitamin A: 1376IU,
Vitamin C: 3mg,
Calcium: 116mg,
Iron: 1mg
Nutrition information is automatically calculated and should only be used as an approximation.
Enjoyed this recipe? Share your thoughts below!
We love hearing from you. Don’t forget to leave a comment and rate the recipe if you tried it!