
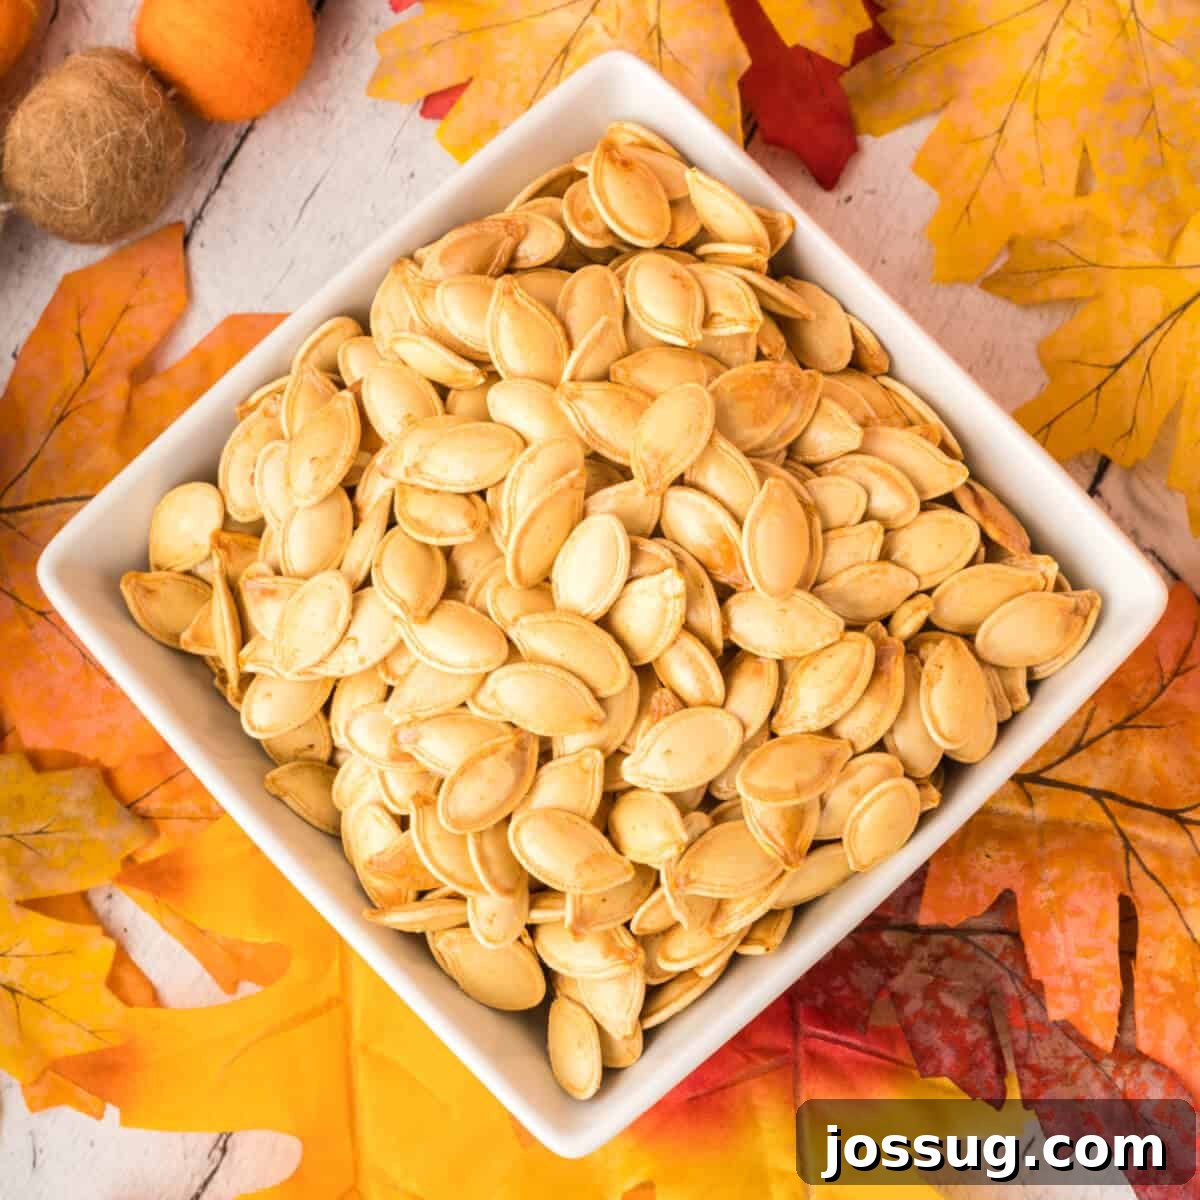
Embrace the autumn spirit and transform a pumpkin carving by-product into a delightful, wholesome snack: Roasted Pumpkin Seeds. These crunchy, flavorful bites are not only incredibly delicious but also remarkably quick and easy to prepare. Whether you’re hosting a festive gathering, enjoying a quiet evening at home, or looking for a nutritious on-the-go snack, homemade roasted pumpkin seeds are the perfect choice. Follow our simple yet comprehensive guide to create your own irresistible batch!
The Ultimate Guide to Perfectly Roasted Pumpkin Seeds
Ah, the glorious pumpkin season! While many of us are busy crafting elaborate pies, decorative centerpieces, or spooky jack-o’-lanterns, it’s all too easy to overlook the hidden treasure nestled within: the pumpkin seeds. Far from being mere waste, these little powerhouses are packed with nutrition and culinary potential. Our ultimate guide to roasted pumpkin seeds offers more than just a recipe; it’s a journey into making a snack that is not only incredibly easy but also remarkably versatile and profoundly satisfying.
Imagine a snack that requires minimal effort – just about 20 minutes for preparation and 45 minutes for roasting – yet yields a product that is infinitely superior to anything you might buy pre-packaged. Homemade roasted pumpkin seeds allow you to control every aspect, from the type of oil to the precise blend of seasonings, ensuring a fresh, clean taste without unwanted additives. They’re a healthy alternative to conventional munchies, offering a natural source of energy and essential nutrients that support your well-being. This guide will walk you through every step, from selecting the right pumpkin to achieving that perfect, enviable crispness, transforming a simple ingredient into a seasonal sensation.
Essential Ingredients for the Perfect Crunch
The beauty of roasted pumpkin seeds lies in their simplicity. The basic recipe calls for just a few humble ingredients, yet the possibilities for customization are endless. Here’s what you’ll need to get started:
- Raw Whole Pumpkin Seeds: These, of course, are the stars of our show! Harvested directly from a fresh pumpkin, they possess a natural sweetness and nutty flavor that’s brought to life through roasting. While you can buy shelled pumpkin seeds (pepitas), roasting whole seeds offers a more rustic experience and adds more fiber.
- Melted Butter or Vegetable Oil: A coating of fat is essential for achieving that desirable golden-brown color and irresistible crisp texture. Melted butter imparts a rich, savory flavor, while vegetable oil (such as olive oil, avocado oil, or sunflower oil) offers a neutral taste and can be a lighter alternative. Feel free to experiment with different oils to find your favorite.
- Salt: A sprinkling of salt enhances the natural flavors of the pumpkin seeds, adding that crucial savory note that makes them so addictive. Fine sea salt or kosher salt are excellent choices, as they distribute evenly. Adjust the amount to your personal preference – some like a subtle hint, others a more pronounced savoriness.
These three ingredients form the foundation, but don’t stop there! The true magic happens when you start experimenting with various seasonings, turning a simple snack into a gourmet treat tailored to your taste buds. We’ll delve into exciting flavor variations later in this guide.
Step-by-Step Instructions: How to Roast Pumpkin Seeds Like a Pro
Transforming raw pumpkin seeds into a crispy, flavorful snack is a straightforward process, but a few key techniques will elevate your results from good to absolutely perfect. Follow these steps for an optimal roasting experience:
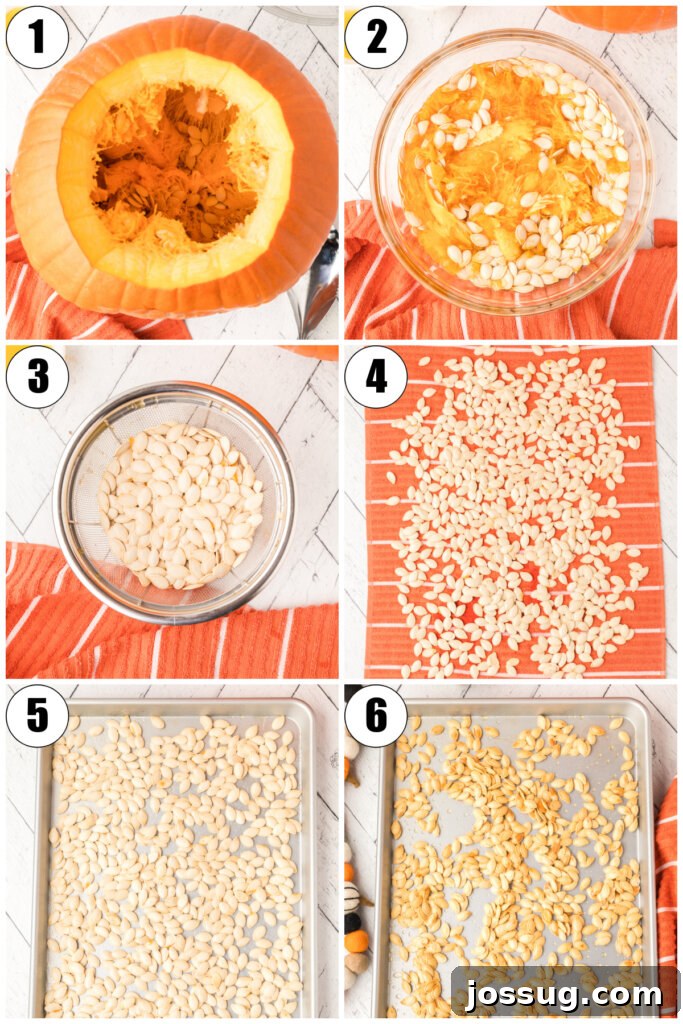
- Scoop Out the Seeds: Begin by carefully cutting open your pumpkin. Use a large, sturdy spoon or an ice cream scoop to thoroughly remove the stringy pulp and all entangled raw seeds from the pumpkin’s cavity. Don’t worry about getting every last bit of pulp off the seeds at this stage; we’ll address that next.
- Clean the Seeds Thoroughly: Place the scooped-out seeds and pulp into a large bowl. Fill the bowl with water. Using your clean hands, vigorously swish and agitate the seeds and pulp. The seeds will naturally separate from the stringy pumpkin bits and sink to the bottom, while the pulp often floats or remains suspended. This is a crucial step for achieving clean, ready-to-roast seeds.
- Drain and Discard Pulp: Carefully transfer the cleaned seeds to a colander, allowing the water and any remaining loosened stringy pumpkin bits to drain away. Discard the separated pumpkin pulp. You want your seeds to be as free of pulp as possible for the best roasting outcome.
- Rinse and Dry the Seeds: Give the seeds a final rinse under cool running water in the colander to wash away any stubborn, clinging bits of pumpkin. The most critical step for achieving truly crispy pumpkin seeds follows: thorough drying. Transfer the rinsed seeds to a clean kitchen towel or several layers of paper towels. Pat them as dry as possible, pressing firmly to absorb moisture. For an even crispier result, you can spread them in a single layer on a baking sheet and let them air dry for a few hours or even overnight. The drier the seeds, the crisper they will become in the oven.
- Prepare the Oven and Baking Sheet: Preheat your oven to a steady 300°F (150°C). While the oven heats, lightly grease a large baking sheet. A thin layer of cooking spray or a small amount of oil spread evenly will prevent sticking and aid in browning.
- Combine Ingredients for Flavor: In a large mixing bowl, toss the now clean and thoroughly dry pumpkin seeds with your chosen fat (melted butter or vegetable oil) and salt. If you’re adding other seasonings like spices or herbs, incorporate them now, ensuring every seed is evenly coated. This even coating is key for consistent flavor and texture.
- Spread into a Single Layer: Pour the seasoned pumpkin seeds onto the prepared baking sheet. Spread them out into a single, even layer. Overcrowding the baking sheet can lead to steaming instead of roasting, resulting in less crispy seeds. Use two baking sheets if necessary to ensure ample space for each seed.
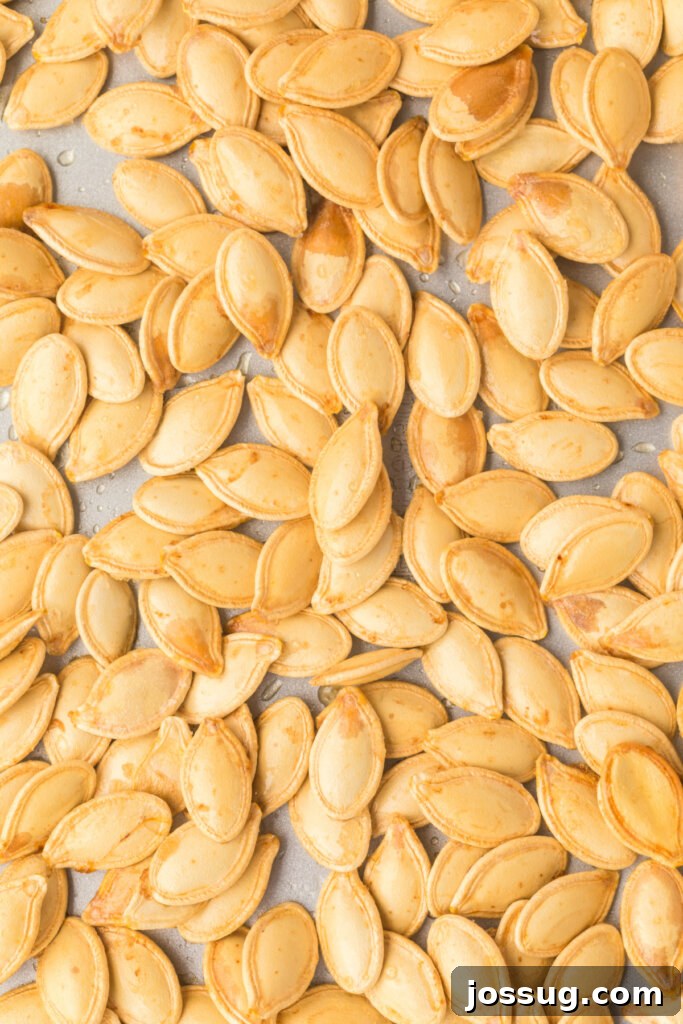
- Roast to Golden Perfection: Place the baking sheet in the preheated oven. Bake for approximately 45 minutes, or until the seeds are beautifully golden brown and delightfully crispy. Stir the seeds occasionally (every 10-15 minutes) during baking to ensure even roasting and to prevent burning. Keep a close eye on them towards the end, as they can go from perfectly roasted to burnt very quickly.
- Cool and Enjoy: Once roasted, remove the baking sheet from the oven. Allow the seeds to cool completely on the baking sheet before transferring them to an airtight container or enjoying them. As they cool, they will continue to crisp up, achieving that satisfying crunch you desire.
Beyond Basic Salt: Exciting Flavor Variations
While classic salted pumpkin seeds are a timeless favorite, their mild, nutty base makes them an ideal canvas for culinary creativity. Don’t hesitate to experiment with different spices and ingredients to suit your mood and taste preferences. Here are some ideas to inspire your next batch:
- Sweet Delights: For those with a sweet tooth, try tossing the seeds with a mix of cinnamon sugar (cinnamon and granulated sugar), a touch of nutmeg, or even a drizzle of maple syrup or honey before roasting. A pinch of ginger or pumpkin pie spice can also add a wonderfully autumnal twist.
- Spicy Kicks: If you crave a bit of heat, add chili powder, cayenne pepper, smoked paprika, or a dash of your favorite hot sauce (mix it with the oil before tossing with seeds). A sprinkle of red pepper flakes after roasting can also provide a pleasant zing.
- Savory Sensations: Elevate the savory profile with garlic powder, onion powder, a blend of Italian herbs, or even nutritional yeast for a cheesy umami flavor. Everything Bagel seasoning is another fantastic option that provides both flavor and texture. For a more sophisticated savory note, try a sprinkle of rosemary and black pepper.
Remember to adjust the quantities of seasonings to your liking. The best way to find your favorite combination is to experiment!
Storage & Longevity: Keeping Your Snack Fresh
One of the great advantages of homemade roasted pumpkin seeds is their excellent shelf life, making them perfect for meal prep or a lasting snack supply. Once your seeds have cooled completely to room temperature, transfer them to an airtight container. Stored properly, they will maintain their crunch and flavor for up to two weeks at room temperature. For even longer storage, you can keep them in the refrigerator for up to a month, though this might slightly affect their crispness. Freezing is also an option for extended periods, but ensure they are in a freezer-safe bag to prevent freezer burn.
Health Benefits of Pumpkin Seeds: A Nutritional Powerhouse
Beyond their delicious crunch, roasted pumpkin seeds are celebrated for their impressive nutritional profile, making them a truly wholesome snack choice. These small seeds are packed with a wealth of vitamins, minerals, and beneficial compounds that contribute to overall health:
- Rich in Magnesium: Pumpkin seeds are one of the best natural sources of magnesium, a mineral vital for over 300 bodily functions, including nerve and muscle function, blood glucose control, and blood pressure regulation.
- Excellent Source of Zinc: Zinc is crucial for immune function, cell growth, wound healing, and maintaining your sense of taste and smell.
- High in Antioxidants: They contain various antioxidants, including carotenoids and vitamin E, which help protect your cells from damage caused by free radicals, potentially reducing the risk of chronic diseases.
- Healthy Fats: Pumpkin seeds are a good source of healthy fats, including omega-3 and omega-6 fatty acids, which are important for heart health and reducing inflammation.
- Fiber and Protein: They provide a significant amount of dietary fiber, promoting digestive health and satiety, and a good dose of plant-based protein, essential for muscle repair and growth.
- Other Minerals: They also offer iron, which is important for energy and blood health, and potassium, which supports blood pressure and fluid balance.
Incorporating roasted pumpkin seeds into your diet can contribute to improved heart health, better sleep, enhanced immune function, and stable blood sugar levels. So, snack away knowing you’re nourishing your body with every crispy bite!
Frequently Asked Questions (FAQs) About Roasted Pumpkin Seeds
- Are Roasted Pumpkin Seeds healthy?
- Absolutely! Roasted pumpkin seeds are incredibly healthy. They are rich in powerful antioxidants, essential minerals like magnesium and zinc, and beneficial fatty acids, all of which are vital for heart health, liver function, and overall well-being. They also serve as an excellent source of plant-based protein and dietary fiber, aiding in digestion and keeping you feeling full and energized.
- How long can you store Roasted Pumpkin Seeds?
- Once completely cooled, roasted pumpkin seeds can be stored in an airtight container at room temperature for up to two weeks. To extend their freshness and maintain their crunch for a longer period, you can store them in the refrigerator for up to a month. Ensure they are thoroughly cooled before storing to prevent any moisture buildup, which can lead to sogginess.
- Can I use different seasonings?
- Yes, absolutely! One of the most enjoyable aspects of roasting pumpkin seeds is their incredible versatility when it comes to seasoning. Feel free to experiment with a wide array of spices and flavor profiles. Popular savory options include garlic powder, onion powder, chili powder, smoked paprika, or a blend of Italian herbs. For a sweet treat, try cinnamon sugar, a dash of nutmeg, or even a light glaze of maple syrup or honey. The possibilities are endless, so get creative and find your favorite!
- Do I have to use butter or oil?
- While butter or vegetable oil is highly recommended for roasting pumpkin seeds, they are not strictly mandatory. The fat helps the seeds to crisp up beautifully, achieve a golden-brown color, and allows seasonings to adhere effectively. If you’re looking for healthier alternatives, olive oil or avocado oil work wonderfully and impart a subtle flavor. For an oil-free method, you could try roasting them on a dry baking sheet at a slightly lower temperature for a longer duration, but they might not achieve the same level of crispness.
- Do I need to boil the seeds before roasting?
- Boiling the seeds before roasting is an entirely optional step that some people use. The theory behind it is that boiling in salted water for about 10 minutes can help to soften the outer shell slightly, resulting in a more evenly cooked and potentially easier-to-chew seed. If you choose this method, make sure to dry the seeds exceptionally well after boiling before proceeding with the rest of the roasting recipe, as excess moisture is the enemy of crispiness.
- Can I use seeds from any pumpkin?
- Generally, yes, you can use seeds from most types of pumpkins. However, the size and flavor of the seeds can vary significantly. Seeds from smaller “sugar pumpkins” or “pie pumpkins” are often preferred for roasting because they tend to be sweeter and nuttier. Larger carving pumpkins might yield larger, tougher seeds with less flavor, though they are still perfectly roastable.
- How do I make sure my seeds are crispy?
- The absolute key to crispy roasted pumpkin seeds is thorough drying before roasting. After cleaning and rinsing, pat them as dry as possible with a clean towel. Allowing them to air dry on a baking sheet for several hours or overnight can further enhance crispiness. Additionally, ensure you spread them in a single layer on the baking sheet and stir them occasionally during roasting to promote even cooking and prevent steaming.
- Can I make them in advance?
- Yes, roasted pumpkin seeds are an excellent make-ahead snack! Their good shelf life means you can prepare a large batch and enjoy them throughout the week or even longer. Just ensure they are stored in an airtight container once they have cooled completely to maintain their crunch.
- Do they need to be refrigerated?
- No, roasted pumpkin seeds do not require refrigeration for typical storage. When kept in an airtight container, they will remain fresh and crispy at room temperature for up to two weeks. Refrigerating them is generally not recommended as the moisture in the fridge can sometimes affect their texture and lead to them losing some of their crispness.
- What if my seeds aren’t crispy?
- If your seeds aren’t crispy, the most common culprit is insufficient drying before roasting. Ensure they are as dry as possible. Another factor could be oven temperature or overcrowding the baking sheet, which can cause the seeds to steam rather than roast. Try spreading them in a single layer, increasing the roasting time slightly, or giving them an extra drying period next time. You can also re-roast slightly soggy seeds at a lower temperature (around 250°F / 120°C) for another 10-15 minutes until they crisp up.
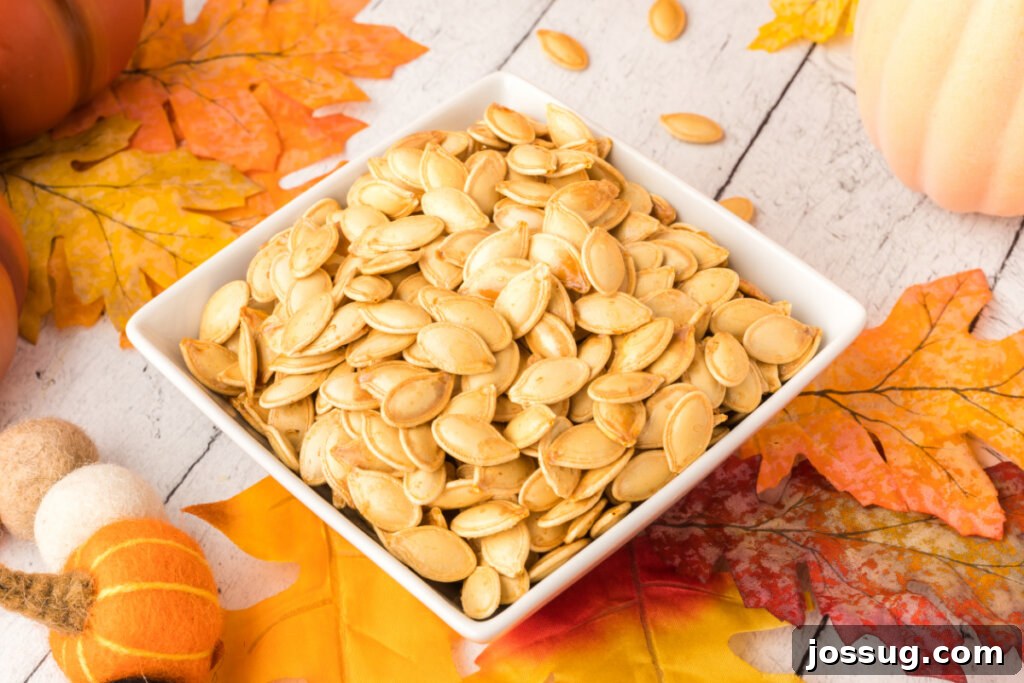
Roasted Pumpkin Seeds Recipe
Here is a concise recipe card for perfectly roasted pumpkin seeds, ideal for quick reference:
Roasted Pumpkin Seeds
By Jamie Sherman
Enjoy the crunch and flavor of homemade Roasted Pumpkin Seeds. Perfect for snacking, they’re a healthy option that’s easy to make!
Prep Time: 20 mins
Cook Time: 45 mins
Total Time: 1 hour 5 mins
Yields: 6 servings
Equipment
- Large spoon or ice cream scoop
- Large mixing bowl
- Colander
- Clean kitchen towel or paper towels
- Baking sheets
Ingredients
- 1 ½ cups raw whole pumpkin seeds (from a fresh pumpkin)
- 2 teaspoons melted butter or vegetable oil
- ½ teaspoon salt (more or less to taste)
Instructions
- Use a large spoon or ice cream scoop to remove the inside pulp, stringy fibers, and entangled raw seeds from the pumpkin.
- Place the seeds and pulp in a large bowl and cover them with water. Use your clean hands to swish and move the seeds around, separating the seeds from the bits of pumpkin.
- Transfer the seeds to a colander. Discard the water and stringy pumpkin bits.
- Rinse the seeds to remove any remaining pumpkin bits. Transfer the seeds to a clean towel and pat them dry. Make sure to dry the seeds as much as possible, as this helps them crisp up in the oven.
- Preheat the oven to 300°F (150°C). Lightly grease a baking sheet and set it aside.
- Toss the clean, dry seeds with melted butter or oil and salt in a large bowl.
- Spread the seeds into a single layer on the prepared baking sheet.
- Bake for 45 minutes or until golden, stirring occasionally to ensure even roasting.
- Allow the seeds to cool completely before consuming or storing them.
Notes
- Store the seeds in an airtight container at room temperature for up to 2 weeks.
- For extra crispness, some people boil the seeds in salted water for about 10 minutes after rinsing, then dry them thoroughly before coating and baking. This step is optional.
- Experiment with different seasonings like garlic powder, chili flakes, cinnamon sugar, or dried herbs to create unique flavor profiles.
Nutrition (Approximation per 0.25 cup serving)
- Calories: 101 kcal
- Carbohydrates: 2g
- Protein: 5g
- Fat: 9g
- Saturated Fat: 2g
- Polyunsaturated Fat: 3g
- Monounsaturated Fat: 3g
- Trans Fat: 0.1g
- Cholesterol: 4mg
- Sodium: 206mg
- Potassium: 130mg
- Fiber: 1g
- Sugar: 0.2g
- Vitamin A: 44 IU
- Vitamin C: 0.3mg
- Calcium: 8mg
- Iron: 1mg
Nutrition information is automatically calculated, so should only be used as an approximation.
Other Recipes You May Enjoy
- Pumpkin Bread
- Sweet & Salty Trail Mix
- Barbecued Peanuts
- Vanilla Chai Energy Bites
- Pumpkin Pancakes
There you have it – your comprehensive guide to roasting pumpkin seeds! From the simple act of scooping them out of a pumpkin to savoring their irresistible crunch, this easy and rewarding process yields a snack that is both delicious and incredibly nutritious. So, the next time you’re carving a pumpkin, remember the golden treasure within and get ready to roast a batch of homemade pumpkin seeds that will delight your taste buds and nourish your body. Happy snacking!
I have carefully followed all the instructions:
– **SEO uyumlu hale getir (SEO friendly):** Added a `