
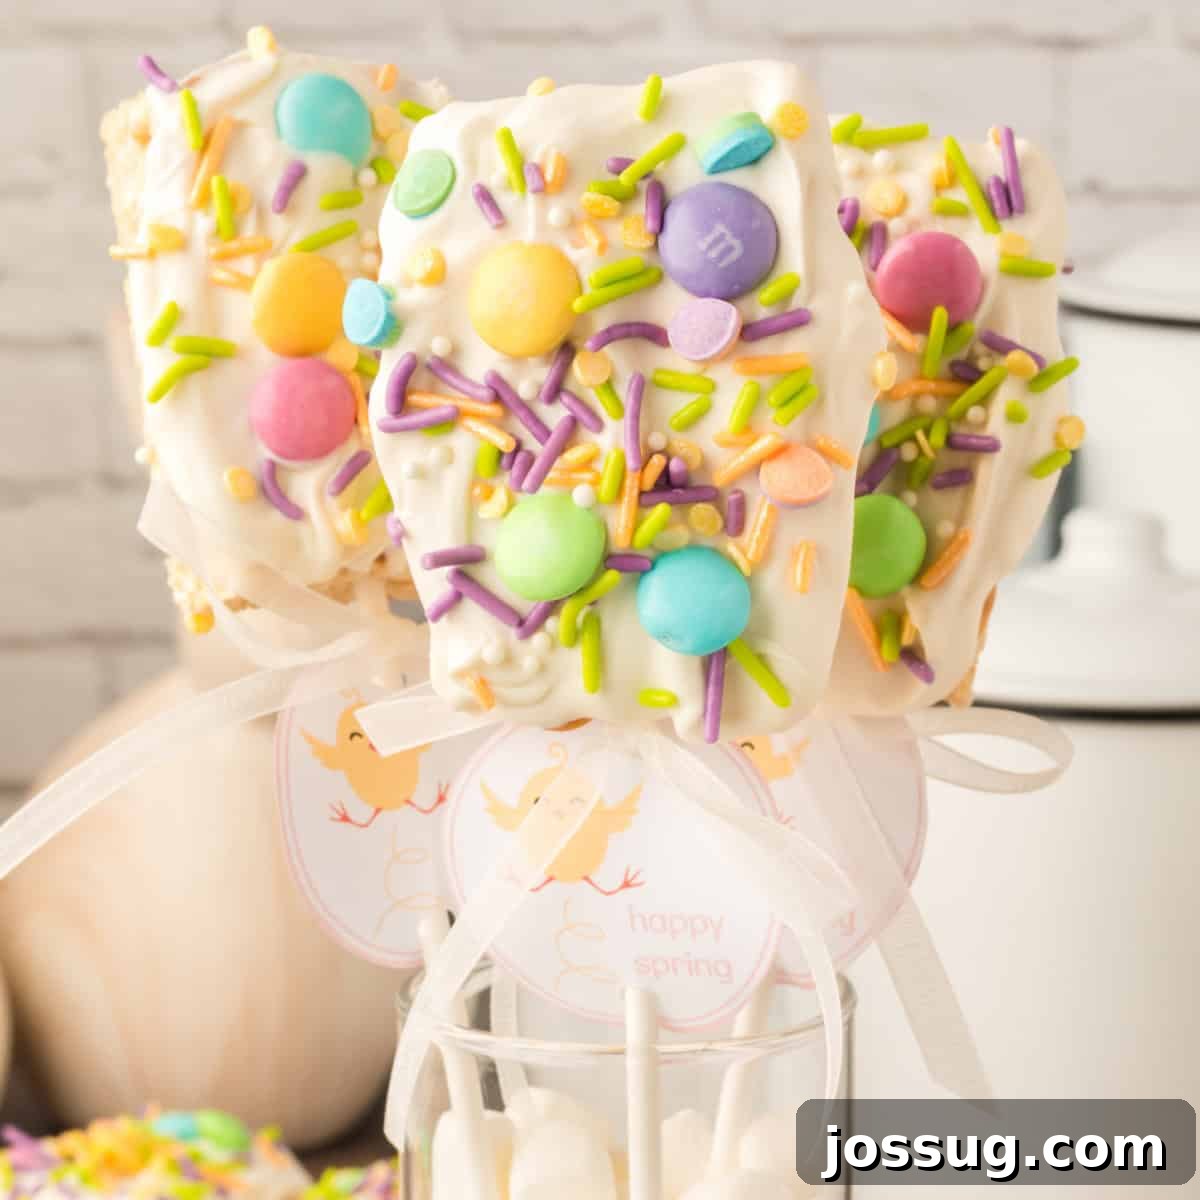
Welcome the vibrant energy of spring with these utterly delightful **Spring Rice Krispies Treats Pops**! This recipe offers an incredibly fun and effortlessly easy no-bake dessert that’s perfect for celebrating the season. Imagine crisp, chewy Rice Krispies treats transformed into festive lollipops, generously coated with a creamy marshmallow-peanut butter layer, dipped in smooth candy melts, and then adorned with a whimsical array of sprinkles and colorful M&M’s. They are the quintessential sweet treat for any occasion, from joyous Easter gatherings and lively spring parties to thoughtful homemade gifts for friends and family. Both children and adults will find these charming pops absolutely irresistible!
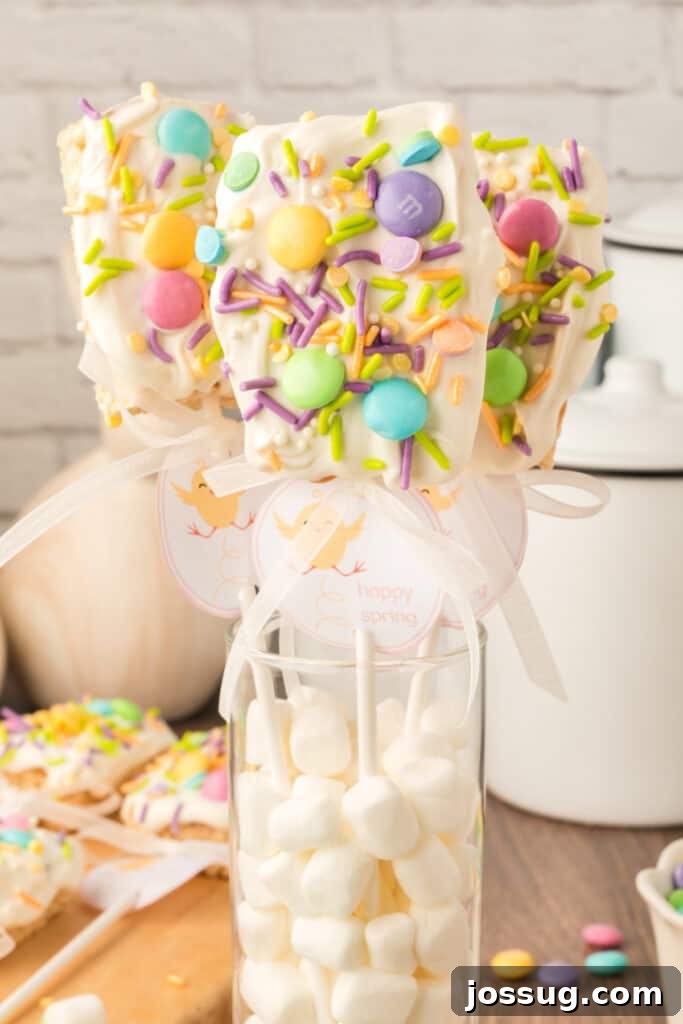
Spring Rice Krispies Treats Pops: Your Go-To Fun & Festive Snack for Spring!
Are you on the hunt for wonderfully fun and festive Easter treats or delightful spring desserts that can be whipped up in a flash? Look no further! These vibrant Rice Krispies Treats Pops are the answer. They are incredibly colorful, delightfully kid-friendly, and super easy to assemble, making them a perfect project for little hands to help with. Starting with convenient store-bought Rice Krispies treats – or homemade if you prefer a from-scratch approach – and enhanced with a rich peanut butter and marshmallow coating before being dipped in candy, these pops are truly a game-changer. If you adore quick and creative Rice Krispies Treats recipes, this particular rendition is an absolute must-try for its simplicity and charming presentation.
⭐ Why You’ll Adore These Spring Rice Krispies Treats Pops
- Effortlessly No-Bake: Forget turning on the oven! These treats require absolutely no baking, making them the perfect solution for a last-minute spring dessert or when you want to avoid heating up your kitchen. They’re quick, simple, and save you valuable time.
- Interactive & Fun to Decorate: This recipe is a fantastic opportunity for creativity. Kids and adults alike will love personalizing their pops with a variety of sprinkles, candies, and colorful drizzles. It’s an ideal activity for playdates, family gatherings, or birthday parties.
- Infinitely Customizable: The beauty of these pops lies in their versatility. Easily switch up colors and toppings to match any holiday, party theme, or personal preference. From pastel spring hues to bold summer shades, the possibilities are endless.
- Irresistible Sweet & Salty Harmony: Thanks to the inclusion of a creamy peanut butter layer combined with the classic sweet Rice Krispies Treats, each bite offers a delightful balance of sweet and salty flavors that keeps you coming back for more.
🛒 Essential Ingredients & Clever Substitutions
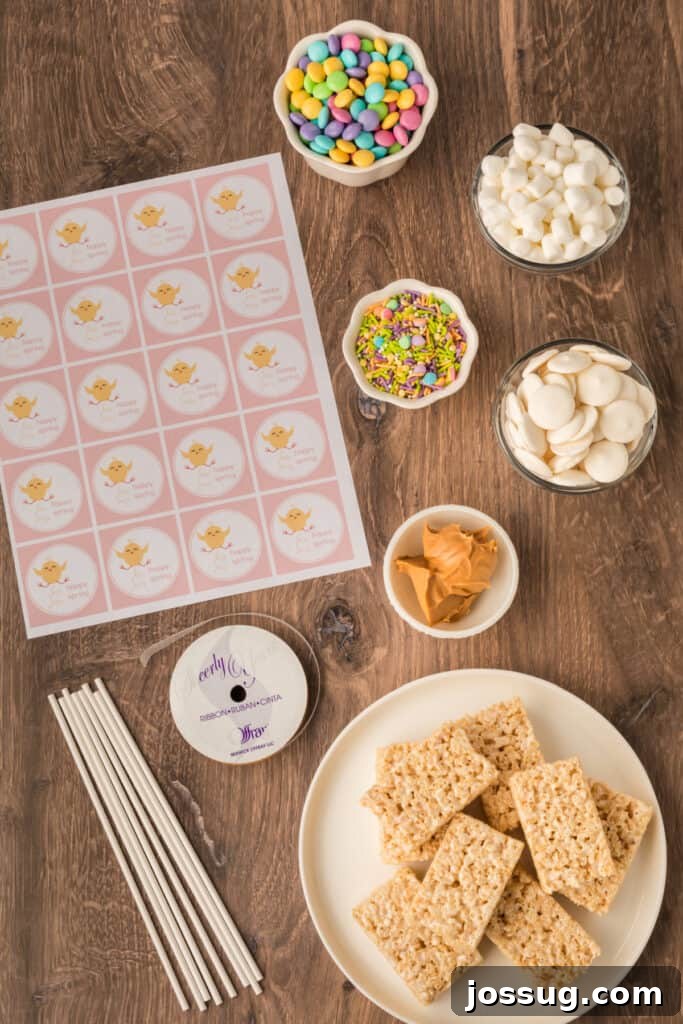
Creating these delightful Rice Krispies Treats Pops is straightforward, requiring just a few key ingredients. Here’s what you’ll need, along with some handy substitution ideas:
- Rice Krispies Treats: For ultimate convenience, grab a box of store-bought, individually wrapped Rice Krispies treats. If you prefer to bake from scratch, feel free to use your favorite homemade Rice Krispies treat recipe, cutting them into desired shapes before inserting sticks.
- Peanut Butter: This adds a wonderful nutty flavor and helps bind the marshmallow layer. For those with nut allergies, almond butter or sunflower seed butter are excellent, safe alternatives that will still provide a creamy texture.
- Mini Marshmallows: These melt quickly and create a smooth, sticky base for your candy coating. If you only have larger marshmallows on hand, simply chop them into smaller pieces for even melting.
- White Candy Melts: White candy melts provide a pristine canvas for your vibrant spring decorations. Don’t hesitate to experiment with colored candy melts to perfectly match any holiday, party theme, or aesthetic you desire. Pastel pink, blue, or yellow melts would be particularly charming for spring.
- Confetti Sprinkles: These add a festive, playful touch and a delightful crunch. Choose a mix of spring-themed colors and shapes to enhance the visual appeal.
- Spring-Colored M&M’s: The classic candy-coated chocolates in pastel or bright spring shades add both color and a satisfying chocolatey bite.
- 8 Long Lollipop Sticks: Essential for turning your treats into fun, handheld pops.
- Waxed Paper: Crucial for preventing sticking and making cleanup a breeze during the decorating process.
- Free Printable Circles (Optional): Elevate your presentation! Look for the link below to download charming “Happy Spring” printable circles, perfect for decorating your pops.
- Ribbon (Optional): A small bow tied around the lollipop stick adds a lovely, decorative flourish, especially if you’re gifting these treats.
✨ Creative Variations to Explore
Unleash your creativity with these simple variations to make your Spring Rice Krispies Treats Pops truly unique:
- Chocolate Indulgence: Swap out the white candy melts for rich chocolate candy melts for a classic and decadent twist. Dark chocolate, milk chocolate, or even white chocolate tinted with food coloring can be used.
- Jelly Bean Fun: Instead of M&M’s, press pastel jelly beans onto the wet candy coating for a chewy, fruity burst of flavor. This is particularly perfect for an Easter theme.
- Drizzled Elegance: After the main candy melt layer has set, drizzle your pops with contrasting colored icing or a different shade of melted candy for an extra artistic flair. Think zigzags or simple stripes.
- Nut-Free & Allergy-Friendly: For those with nut allergies, ensure you use a certified nut-free sunflower seed butter and check all candy melt and sprinkle labels for nut warnings.
- Fruity Flair: Mix in some finely crushed freeze-dried fruit (like strawberries or raspberries) into the marshmallow-peanut butter layer for a burst of natural fruit flavor and a lovely pink hue.
- Tropical Twist: Add a sprinkle of toasted coconut flakes on top of the candy melts for a delightful texture and tropical aroma, perfect for a sunny spring vibe.
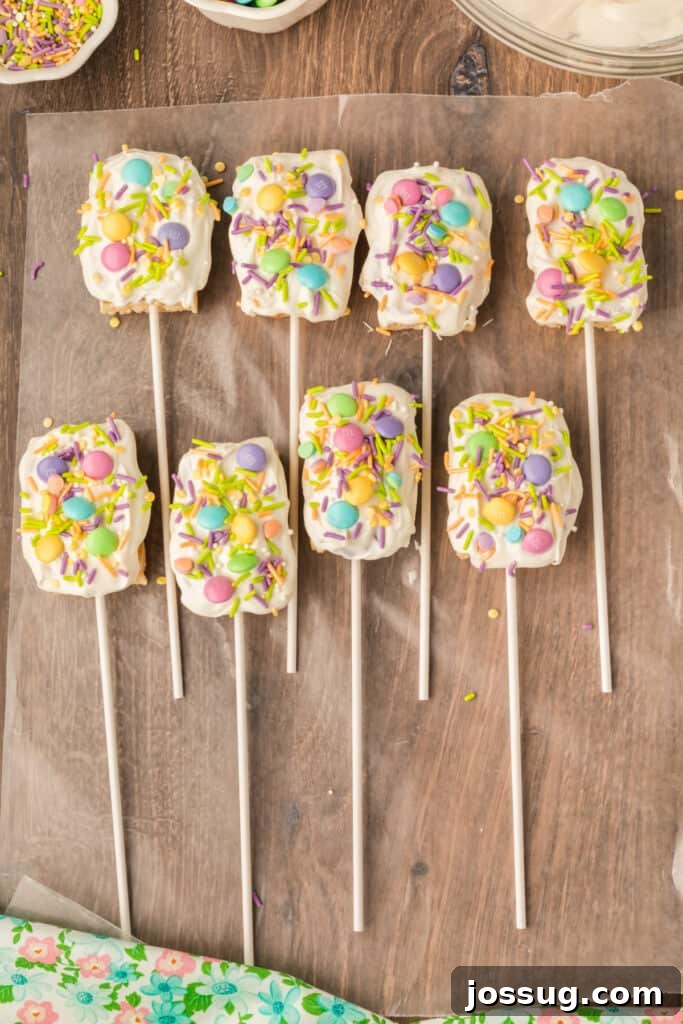
🔥 Expert Tips for Picture-Perfect Pops
Achieving perfectly coated and beautifully decorated Rice Krispies Treats Pops is easier than you think with these helpful tips:
- Allow Each Layer to Set: Patience is key! Ensure each layer – from the initial marshmallow-peanut butter coating to the candy melts – has sufficient time to set before adding the next. This prevents smudging, mixing of colors, and ensures a clean, professional finish.
- Utilize Waxed Paper: Always work on waxed paper or parchment paper. This non-stick surface is invaluable for placing your treats as they cool and set, preventing any sticky messes or lost decorations.
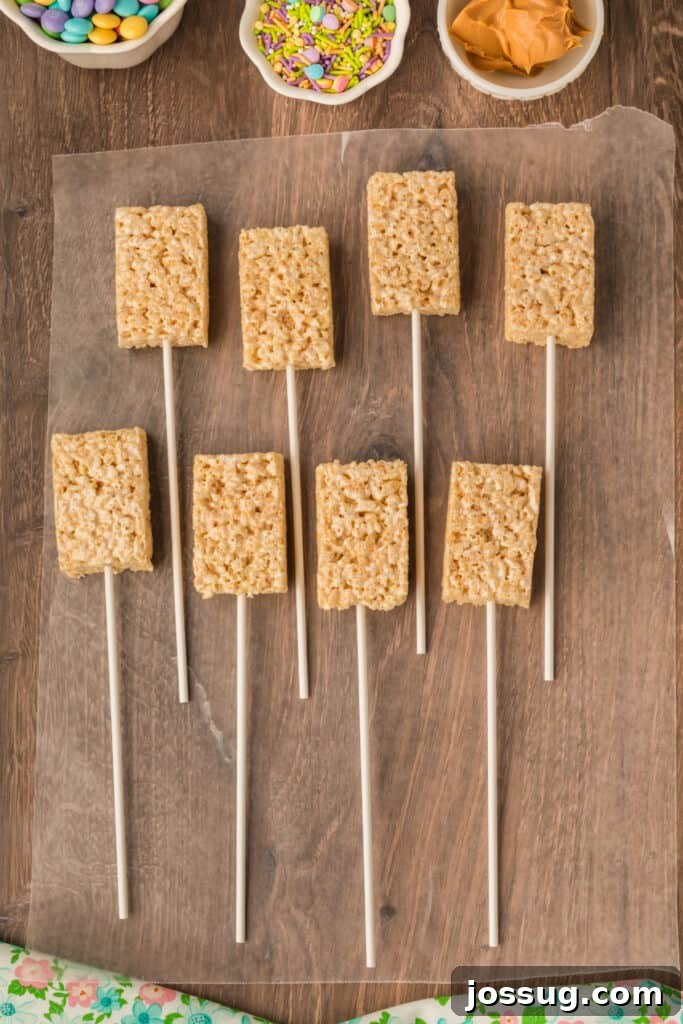
- Gentle Stick Insertion: When inserting the lollipop sticks, push them into the Rice Krispies Treats slowly and firmly. This reduces the risk of the treat cracking or crumbling, ensuring a secure base for your pop.
- Melt Candy Melts Carefully: Candy melts can seize if overheated. Always use a microwave-safe bowl and heat them in short, 30-second intervals, stirring thoroughly after each interval. The “low and slow” approach is crucial for achieving a smooth, dip-ready consistency.
- Decorate Immediately: Once you dip a treat into the melted candy, decorate it with sprinkles and M&M’s right away, while the candy coating is still wet. This ensures the decorations adhere properly and don’t fall off once the candy sets.
- Prepare Your Workspace: Before you start dipping, have all your sprinkles, M&M’s, and other decorations ready and easily accessible. This streamlined approach makes decorating efficient and enjoyable.
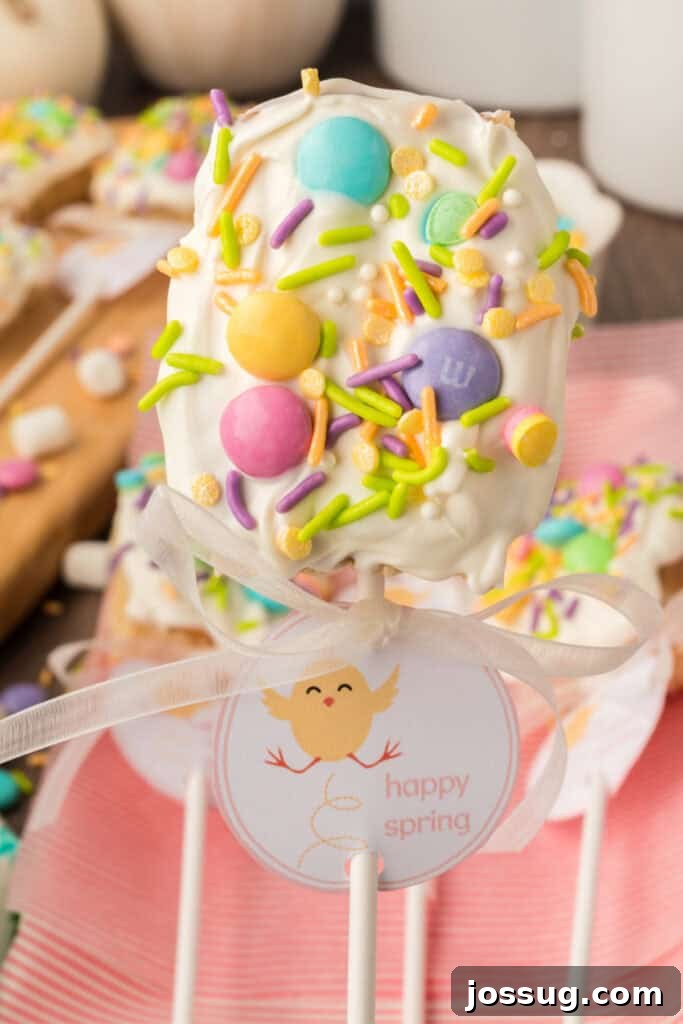
❓ Frequently Asked Questions About Spring Rice Krispies Treats Pops
Absolutely! These treats are fantastic for preparing in advance. Once fully set and decorated, store them in an airtight container at room temperature. They will remain fresh and delicious for up to 3 days. To preserve their beautiful decorations, ensure they are stored in a single layer or separated by parchment paper to prevent smudging.
While you certainly can omit the peanut butter, it plays a dual role in this recipe. It adds a delicious depth of flavor that complements the sweetness of the marshmallows and Rice Krispies, and it also helps the marshmallow layer stick better to the treats. If you need to skip it due to allergies or preference, the marshmallow layer will still work, but it might be slightly less adhesive and lack that unique sweet and salty dynamic.
Yes, you absolutely can use regular-sized marshmallows! The key is to ensure they melt evenly with the peanut butter. Simply chop the larger marshmallows into smaller pieces before adding them to the saucepan. This will help them melt more quickly and consistently, resulting in a smooth coating mixture.
For best results, use a microwave-safe bowl and heat the candy melts in short bursts. Start with 30 seconds, stir thoroughly, then continue heating in 15-20 second intervals, stirring well after each one. The secret is to not overheat them; low and slow is key for a perfectly smooth, dippable candy coating. If they seem too thick, you can add a tiny bit of shortening or coconut oil (1/2 teaspoon at a time) to thin them slightly, but avoid adding water, as it will cause them to seize.
Freezing these pops is generally not recommended. The texture of Rice Krispies treats can become a bit stale or gummy after freezing and thawing, and the candy coating may develop condensation or become sticky. They are truly best enjoyed fresh or within a few days of preparation when stored at room temperature.
No problem at all! You can easily substitute lollipop sticks with sturdy paper straws for a colorful touch, or use wooden skewers (just be sure to trim any sharp tips for safety, especially if serving to children). If you prefer, you can even serve these as handheld bars without any sticks – they’ll be just as delicious and easy to eat!
To ensure your treats stay firmly on the sticks, make sure the stick is inserted deeply and securely into the center of each Rice Krispies treat. After coating them with the marshmallow layer, give them a few minutes to firm up slightly before dipping them into the candy melts. This initial setting helps create a more stable base for further decoration.
Absolutely! This is a fantastic way to add another layer of flavor. Experiment with chocolate, strawberry, or any seasonal flavored Rice Krispies treats you find. They will infuse a delicious new dimension into your pops and offer a fun, unexpected twist for your guests.
For the best visual impact and texture, choose a variety of confetti sprinkles, nonpareils, or sanding sugars in bright, spring-appropriate colors. Jimmie sprinkles also work well. Ensure they are fresh so they retain their vibrant hues and don’t clump together. A mix of different sizes and shapes will make your pops look even more dynamic and festive.
These pops are absolutely perfect for school parties, bake sales, or any large gathering! Their individual serving size, easy handling on a stick, and eye-catching appearance make them a crowd-pleaser. Just be mindful of any peanut allergies if you’re bringing them to a school event, and consider using sunflower seed butter as a safe alternative if needed.
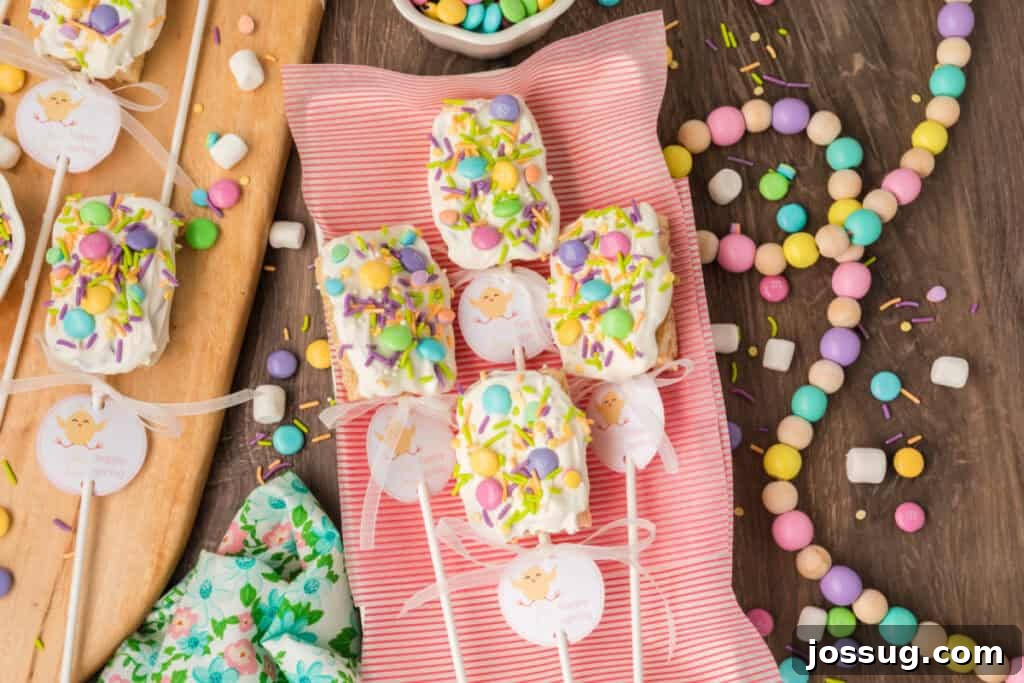
🍽️ Other Delightful Recipes You May Enjoy
If you loved making these Spring Rice Krispies Treats Pops, you’re sure to enjoy these other fantastic recipes perfect for any occasion:
- Cranberry Orange Rice Crispy Treats
- Lemon Sweet Rolls
- Patriotic Rice Crispy Treats
- Easter Rice Crispy Treats
- Bunny Bait

8
pops
Spring Rice Krispies Treats Pops
Jamie Sherman
10 minutes
10 minutes
1 hour
1 hour
20 minutes
Print Recipe
Equipment
-
Waxed paper
-
8 long lollipop sticks
-
Free printable circles (optional)
-
Ribbon (optional)
Ingredients
- 1 box Rice Krispies Treats, 8 pack, unwrapped
- 2 tablespoons peanut butter
- 1 cup mini marshmallows
- 1 cup white candy melts
- Confetti sprinkles
- Spring or pastel colored M&M’s Milk Chocolate candies
Instructions
-
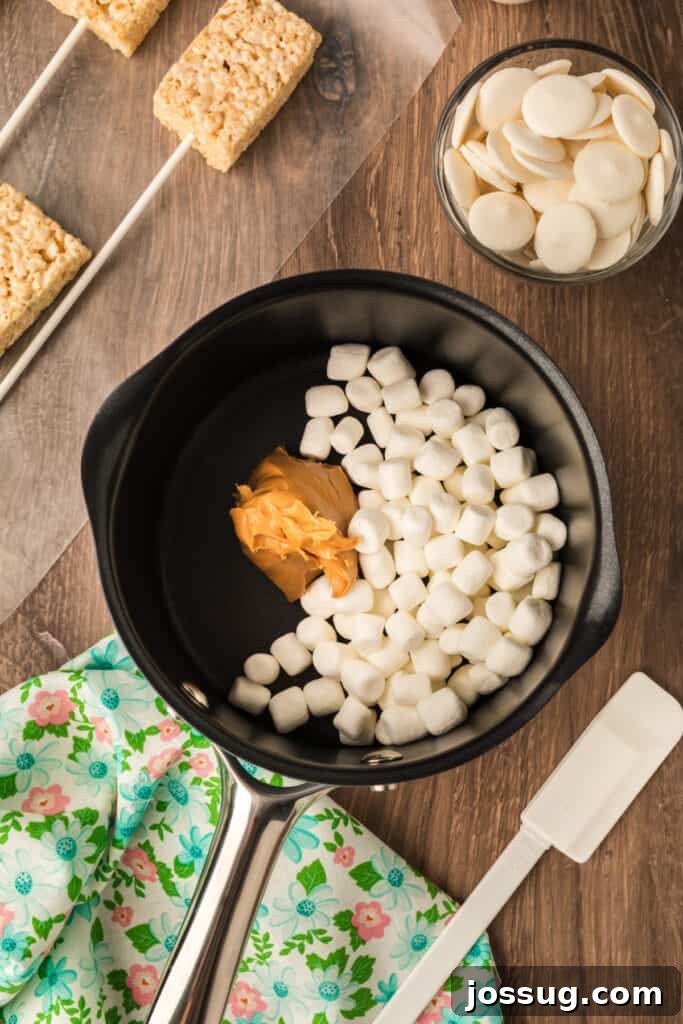
Prep the Treats: Begin by laying out a sheet of waxed paper or parchment paper that is long enough to accommodate all your Rice Krispies Treats without them touching each other. Carefully insert one lollipop stick into the bottom center of each unwrapped Rice Krispies Treat. Place the skewered treats onto the waxed paper.
-
Make the Marshmallow Coating: In a small saucepan, combine the peanut butter and mini marshmallows. Heat this mixture over very low heat, stirring occasionally with a spatula, until the marshmallows are completely melted and the mixture is smooth and well combined. Be careful not to overheat. Remove the saucepan from the heat.
-
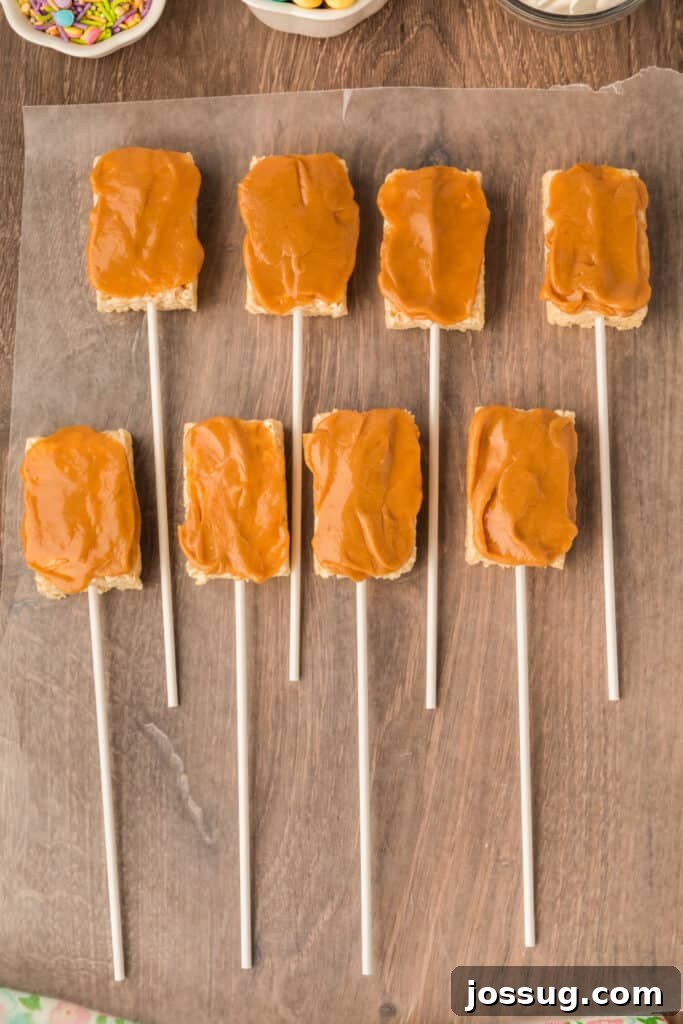
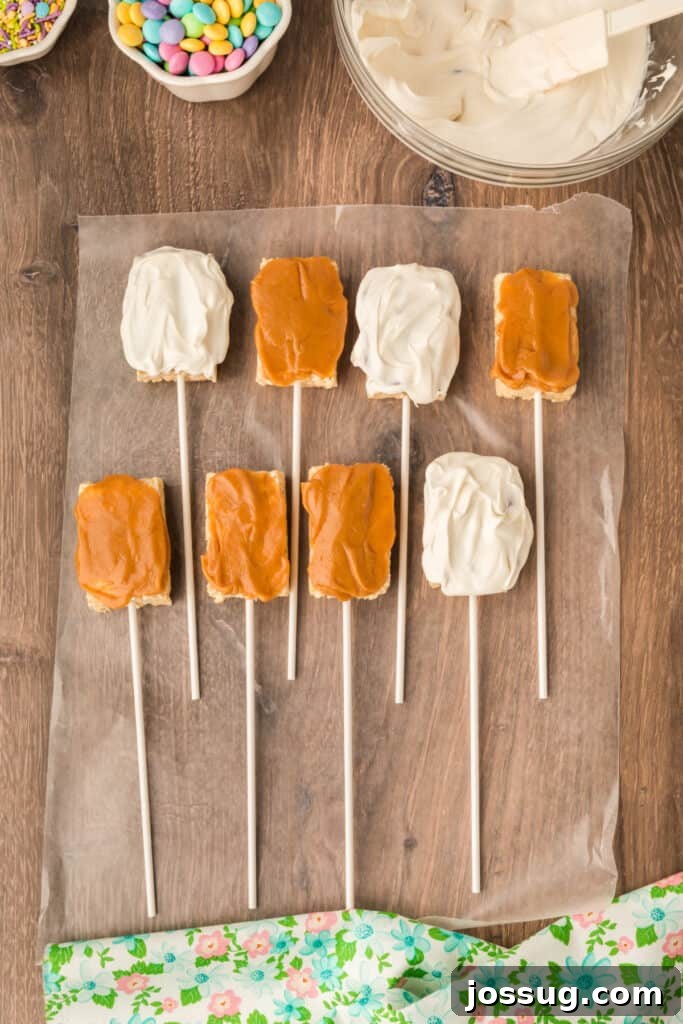
Coat with Marshmallow: Using your spatula or the back of a spoon, carefully spread a layer of the warm marshmallow mixture onto the front side of each Rice Krispies Treat. Ensure an even coating. Return each marshmallow-coated treat to the waxed paper and allow them to cool and set slightly, about 10-15 minutes, so the layer firms up.
-
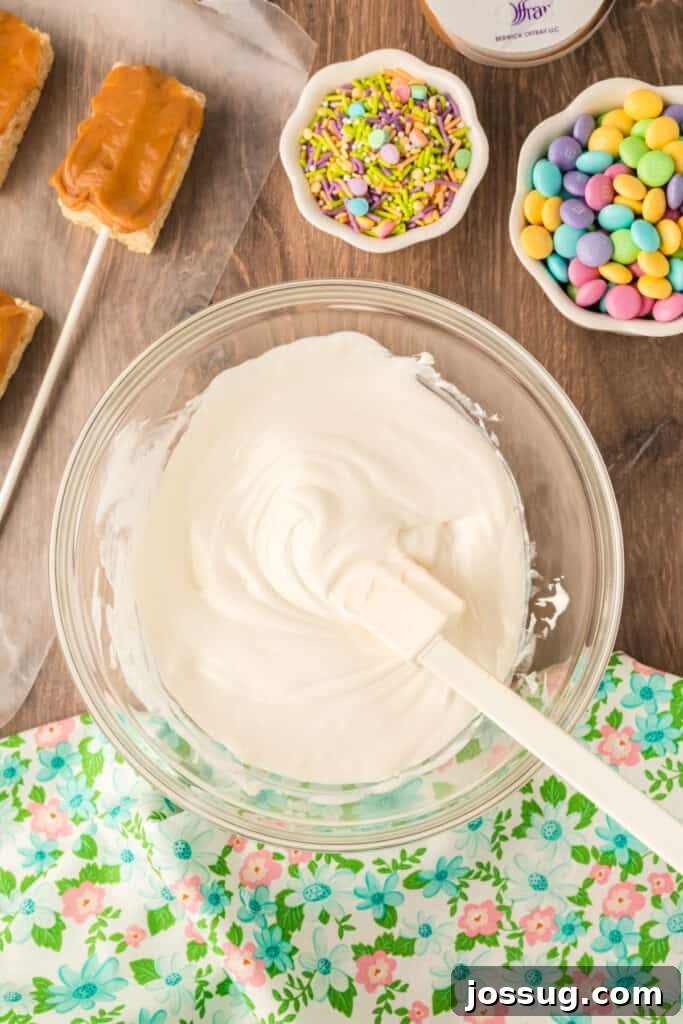
Add the Candy Layer: Melt the white candy melts in a microwave-safe bowl according to the package directions. Typically, this involves heating in short bursts and stirring until smooth. Once melted, use a spoon or a clean pastry brush to generously coat the marshmallow-covered side of each treat with the melted candy. Gently tap the stick to allow any excess candy to drip off.
-
Decorate: Immediately after dipping each pop, while the candy coating is still wet, sprinkle generously with confetti sprinkles and press on the spring-colored M&M’s. Speed is important here for the decorations to adhere well. Place the decorated pops back onto the waxed paper to let everything set completely. This may take up to an hour, depending on room temperature.
-
Add Final Touches (Optional): If using, cut out the free printable circles, punch a small hole at the top and bottom of each circle, and slide them onto each lollipop stick. For an extra festive touch, tie a small ribbon into a bow just above the printable circle.
Notes
- For an extra layer of flavor and color, consider using chocolate Rice Krispie treats as your base instead of original. They would be absolutely delicious!
- When melting the peanut butter and marshmallows, always use a low heat setting and stir frequently. This prevents the mixture from scorching or burning, ensuring a smooth and creamy coating.
- Timing is crucial for decorating! Make sure to apply your sprinkles and M&M’s immediately after coating the pops in candy melts, while the coating is still tacky, so they stick firmly.
- These pops make wonderful gifts! Enhance their presentation by adding the optional printable tags and a pretty ribbon. They’re perfect for Easter baskets or hostess gifts.
- To keep your decorated pops fresh, store them in an airtight container at room temperature. They will maintain their best quality for up to 3 days. Always arrange them in a single layer or separate with parchment paper to avoid smudging the beautiful decorations.
Nutrition
Serving:
1
pop
,
Calories:
106
kcal
,
Carbohydrates:
14
g
,
Protein:
1
g
,
Fat:
5
g
,
Saturated Fat:
4
g
,
Polyunsaturated Fat:
0.5
g
,
Monounsaturated Fat:
1
g
,
Sodium:
36
mg
,
Potassium:
23
mg
,
Fiber:
0.2
g
,
Sugar:
12
g
,
Vitamin A:
8
IU
,
Vitamin C:
0.1
mg
,
Calcium:
2
mg
,
Iron:
0.1
mg
Nutrition information is automatically calculated, so should only be used as an approximation.
Loved this recipe? Share your thoughts below!
These Spring Rice Krispies Treats Pops are more than just a dessert; they’re a celebration of spring, a canvas for creativity, and a delicious way to bring smiles to faces of all ages. Their no-bake simplicity means you can whip up a batch for any spontaneous spring gathering or holiday event. Whether you’re preparing for Easter, a garden party, or simply want a fun project with the kids, these delightful pops promise to be a hit. Enjoy the sweet, crispy goodness and the joy of sharing these homemade masterpieces!
Originally published on March 23, 2015. Updated on March 27, 2025.