
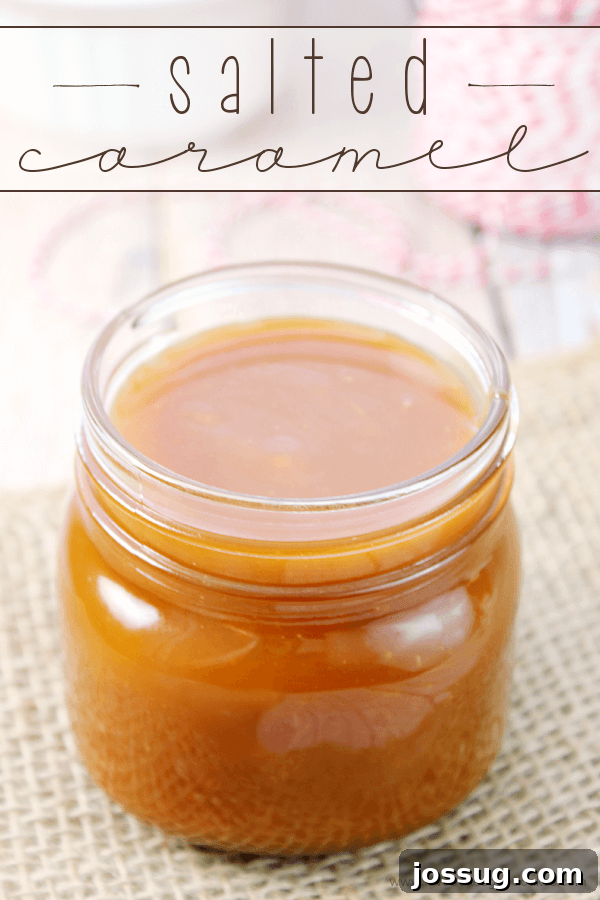
This recipe for homemade Salted Caramel is incredibly easy to make and serves as the perfect luxurious topping for all your favorite desserts!
The Ultimate Guide to Easy Homemade Salted Caramel Sauce
There’s a reason why salted caramel has captured the hearts (and taste buds) of dessert enthusiasts worldwide. That perfect balance of sweet, rich caramel with a hint of savory salt creates an unforgettable flavor profile that elevates almost any treat. For me and my family, it’s a constant debate who loves this homemade salted caramel more – me, or my kiddos! We literally find ourselves adding it to everything, but its absolute best home is drizzled generously over a scoop of creamy ice cream. And let me tell you, one of my personal favorite indulgences is stirring a spoonful of this decadent sauce into my iced coffee. It’s an instant upgrade, transforming a simple drink into a gourmet experience. Whoever first thought to combine salt with caramel was, without a doubt, a culinary genius!
While the idea of making caramel from scratch might sound daunting, I’m here to assure you that this recipe is surprisingly straightforward. The key to success, as with many culinary endeavors, is a little patience and attention. You’ll watch as humble granulated sugar transforms into a mesmerizing pool of molten gold, and that’s where the magic truly begins. Once the sugar has achieved its perfect melted state, the rest of the process moves along quite swiftly. The most challenging part, I’ve found, is resisting the urge to taste it too soon – all in the name of “quality control,” of course! I’ve certainly rushed it a few times and paid the price with a minor burn. It’s just that good, making it incredibly hard to keep my hands off this irresistible sauce!
The Irresistible Allure of Salted Caramel
The combination of sweet and salty isn’t new, but salted caramel takes it to a whole new level. The salt enhances the deep, complex flavors of the caramelized sugar, creating a multifaceted taste that is both comforting and exciting. It’s that delicate dance between opposing flavors that makes it so addictive. A truly great salted caramel boasts a rich, buttery depth with just enough salt to cut through the sweetness, leaving your palate wanting more. This versatile condiment has evolved from a gourmet confection to a mainstream favorite, proving its timeless appeal in everything from candies and chocolates to savory dishes, though its starring role remains firmly in the dessert world.
Tips for Perfect Homemade Caramel Sauce Every Time
Making caramel might seem intimidating, but with a few expert tips, you’ll achieve a smooth, silky sauce with a perfect flavor and consistency. Forget about store-bought versions once you master this simple process!
- Patience is Your Best Friend: The most crucial step is melting the sugar. Resist the urge to crank up the heat to speed things along. High heat can lead to burnt sugar or a grainy texture. Start with medium-high heat and let the sugar melt slowly and evenly. It will clump up and crystalize before it melts into a liquid, which is completely normal. Keep stirring gently but consistently.
- Use the Right Pan: A heavy-bottomed saucepan is essential. It distributes heat more evenly, reducing the risk of burning and ensuring a consistent caramelization process. Avoid thin-bottomed pans that can create hot spots.
- Watch the Color, Not Just the Clock: The exact cooking time can vary. Focus on the visual cues. You’re looking for a beautiful amber or deep golden-brown color, similar to an old penny. If it’s too light, it won’t have that rich caramel flavor. If it goes too dark, it will taste bitter and burnt. Once it reaches the desired color, remove it from the heat immediately.
- Safety First: Melted sugar is extremely hot. Be very careful throughout the process. When adding butter and especially heavy cream, the mixture will bubble up and create a lot of steam. Stand back, wear oven mitts if you prefer, and add ingredients slowly.
- Room Temperature Ingredients: Ensure your butter is cut into pieces and your heavy cream is at room temperature. Cold ingredients can cause the caramel to seize and clump. While seized caramel can sometimes be rescued by returning it to low heat and stirring until smooth, starting with warmer ingredients makes the process smoother.
- Whisk Vigorously: Once the sugar is melted and you add the butter and cream, whisk vigorously to combine everything smoothly. This helps incorporate the fats and liquids into the sugar base, preventing separation.
- The Right Salt: Use a good quality salt, like sea salt or kosher salt. The size of the salt crystals can impact how quickly it dissolves and how noticeable the saltiness is. Fine sea salt is usually a safe bet for even distribution.
Beyond Ice Cream: Versatile Uses for Your Homemade Salted Caramel
While drizzling over ice cream is a classic, this homemade salted caramel sauce is incredibly versatile. Here are just a few ideas to inspire your culinary creativity:
- Elevate Your Beverages: Stir into hot coffee, iced lattes, hot chocolate, or milkshakes for a decadent twist.
- Dessert Enhancer: Use it as a topping for brownies, apple pie, cheesecake, banana bread, or even fruit tarts. It’s also fantastic layered in trifles or as a dip for fresh fruit slices like apples and bananas.
- Breakfast Bliss: Spoon it over pancakes, waffles, French toast, or oatmeal for a luxurious start to your day.
- Baking Ingredient: Incorporate it into frostings, fillings for cupcakes or cakes, or swirl it into cookie dough or blondies before baking.
- Gourmet Gifts: Pour the cooled caramel into small, decorative jars and give them as homemade gifts. It’s a thoughtful and delicious present for any occasion.
- Popcorn & Snacks: Drizzle over freshly popped popcorn or mix with nuts for a sweet and salty snack.
Troubleshooting Common Caramel Issues
Even with careful attention, sometimes things don’t go exactly as planned. Here are solutions to common caramel problems:
- Grainy Caramel: This usually happens when sugar crystals don’t fully dissolve or cling to the sides of the pan. To prevent it, ensure your sugar is fully melted before adding other ingredients. You can also “wash down” the sides of the pan with a wet pastry brush if crystals form. If it’s already grainy, sometimes adding a tablespoon of hot water and reheating gently while stirring can help re-dissolve the crystals.
- Seized Caramel: If your caramel hardens into a solid mass when adding butter or cream, it’s often because those ingredients were too cold, or added too quickly. Don’t panic! Return the pan to very low heat and stir gently. As it warms, the caramel should melt back into a smooth liquid.
- Burnt Taste: If your sugar browns too quickly or gets too dark, it will develop a bitter, burnt taste that can’t be fixed. Unfortunately, in this case, it’s best to discard it and start fresh. It’s better to err on the side of a lighter caramel than a burnt one.
How do you plan on using your delicious homemade salted caramel? I’d love for you to leave a comment below and share your favorite ways to enjoy this incredible sauce!
8
servings
Salted Caramel Recipe
Jamie Sherman
5
mins
15
mins
20
mins
Print Recipe
Ingredients
- 1 cup granulated sugar
- 6 tablespoons butter, cut into pieces (room temperature)
- ½ cup heavy cream (room temperature)
- 1 teaspoon salt (fine sea salt recommended)
Instructions
-
In a large, heavy-bottomed saucepan over medium-high heat, add the granulated sugar. Cook the sugar, stirring constantly with a heat-proof spatula or wooden spoon. The sugar will first clump together and crystalize, but keep stirring until it completely melts and transforms into a clear, caramel-colored liquid. Aim for a rich amber color, not too dark to avoid bitterness.
-
Once the sugar is completely melted and has reached a beautiful amber hue, immediately remove the pan from the heat. Carefully add the butter pieces, stirring them into the hot caramel. The mixture will bubble vigorously, but this is normal. Continue stirring until the butter is completely melted and fully incorporated. Next, very slowly and gradually pour in the room temperature heavy cream while continuously stirring with a whisk. The caramel will bubble up intensely again. Continue whisking until all the cream is incorporated and the mixture is smooth. Return the pan to low heat and boil gently for one minute, stirring occasionally. Remove from heat and stir in the salt until well combined.
-
Allow the salted caramel to cool completely at room temperature. It will thicken as it cools. Once cooled, transfer it to an airtight container and refrigerate. The caramel sauce can be stored in the refrigerator for up to 10-14 days.
Notes
- If the caramel is too thick after refrigeration, you may reheat it gently in the microwave in 15-second intervals, stirring in between, or in a small saucepan over low heat until it reaches your desired consistency.
- This recipe typically yields about 1 to 1 ½ cups of salted caramel sauce, depending on how much it cooks down and your desired thickness.
Nutrition
Serving:
2 tablespoons
,
Calories:
222 kcal
,
Carbohydrates:
25 g
,
Protein:
1 g
,
Fat:
14 g
,
Saturated Fat:
9 g
,
Polyunsaturated Fat:
1 g
,
Monounsaturated Fat:
4 g
,
Trans Fat:
0.3 g
,
Cholesterol:
39 mg
,
Sodium:
362 mg
,
Potassium:
17 mg
,
Sugar:
25 g
,
Vitamin A:
481 IU
,
Vitamin C:
0.1 mg
,
Calcium:
13 mg
,
Iron:
0.03 mg
Nutrition information is automatically calculated, so should only be used as an approximation.
Enjoyed this recipe? Leave a comment below!
Your feedback helps us create more delicious content.
Other Delicious Posts You May Enjoy:
No-Churn Chocolate Cake Batter Ice Cream with Chocolate Chunks
Classic County Fair Funnel Cake