
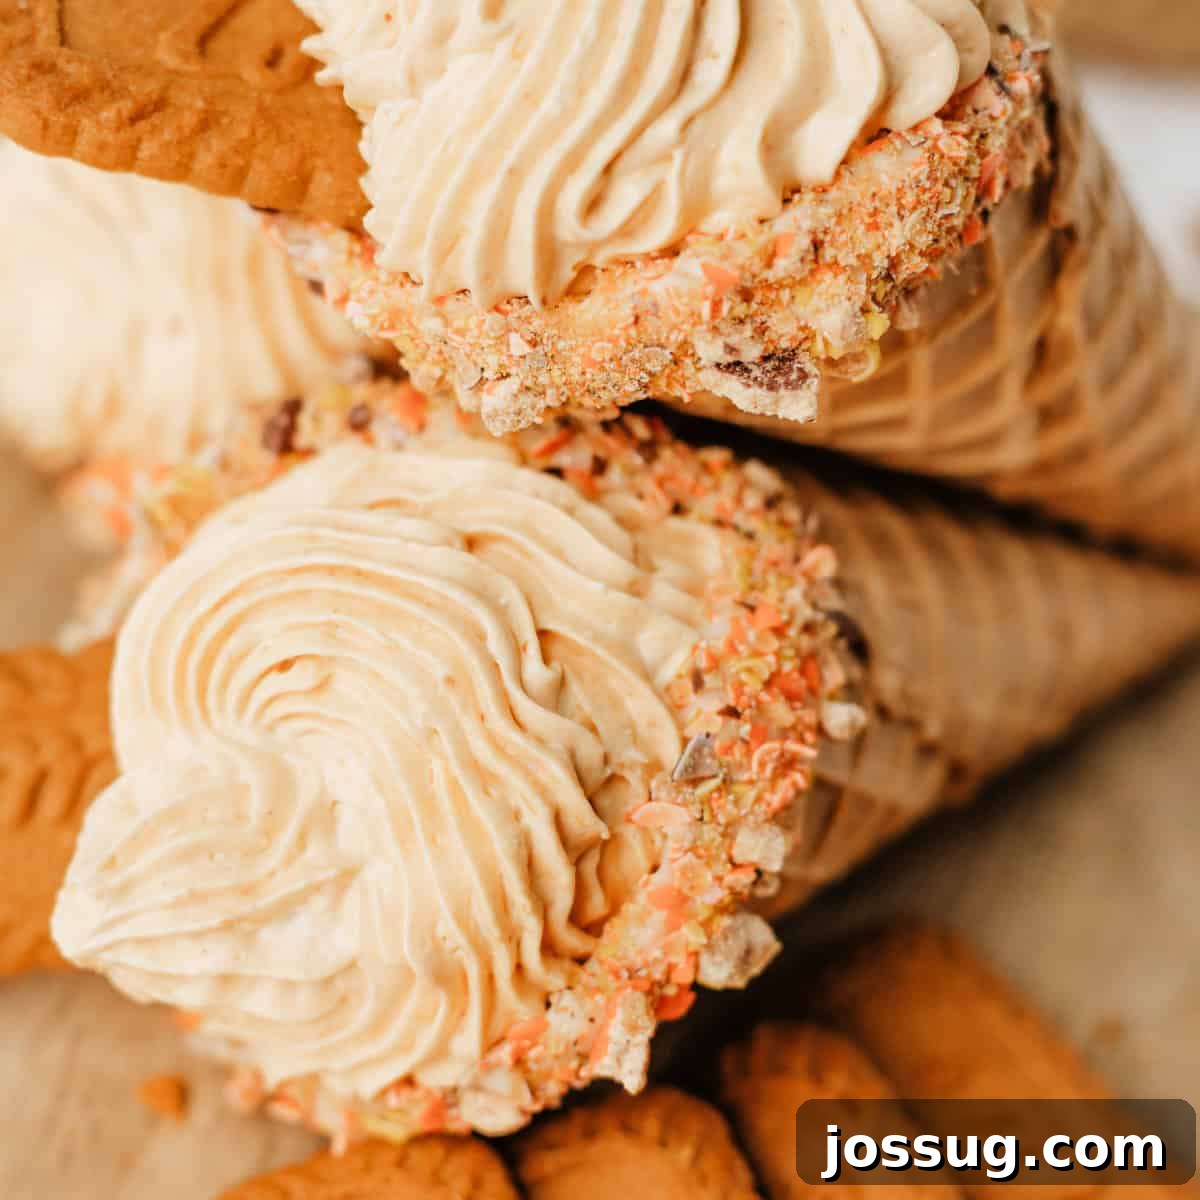
🎃 As autumn leaves begin to fall and a crisp chill fills the air, our thoughts inevitably turn to the comforting flavors of pumpkin and spice. This year, ditch the oven and create an unforgettable fall treat that’s both fun to make and incredibly delicious: these **No Bake Pumpkin Cheesecake Cones**! Imagine a luscious, creamy pumpkin cheesecake filling nestled inside a crisp, candy-coated waffle cone, topped with extra crunch. It’s the perfect blend of texture and flavor, capturing the essence of the season in every bite. 🍁🍦
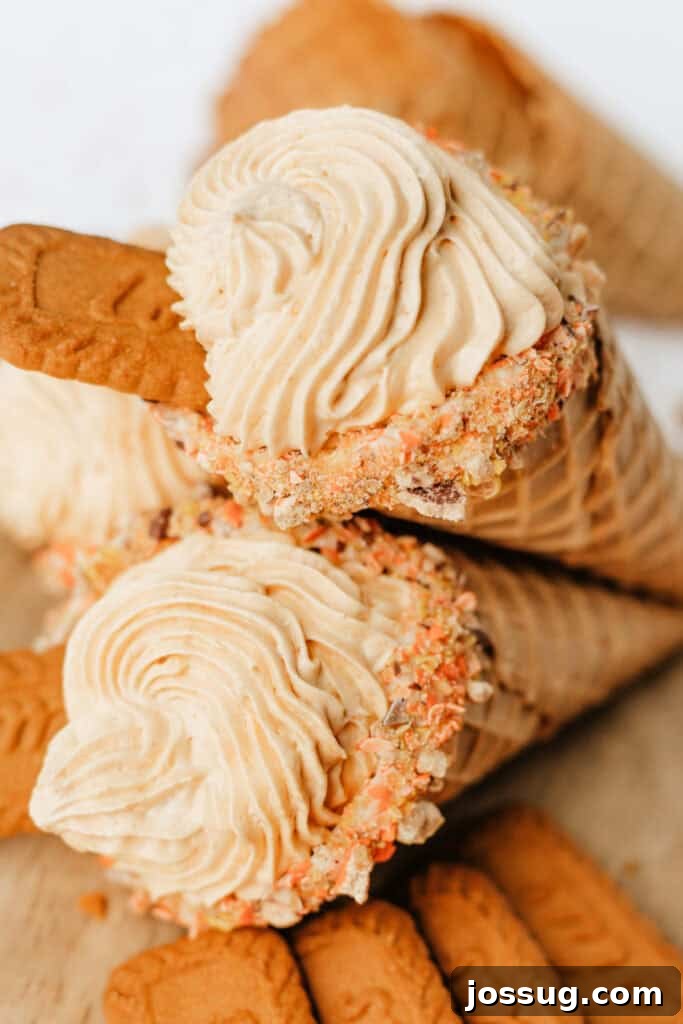
No Bake Pumpkin Cheesecake Cones: Your Ultimate Fall Dessert
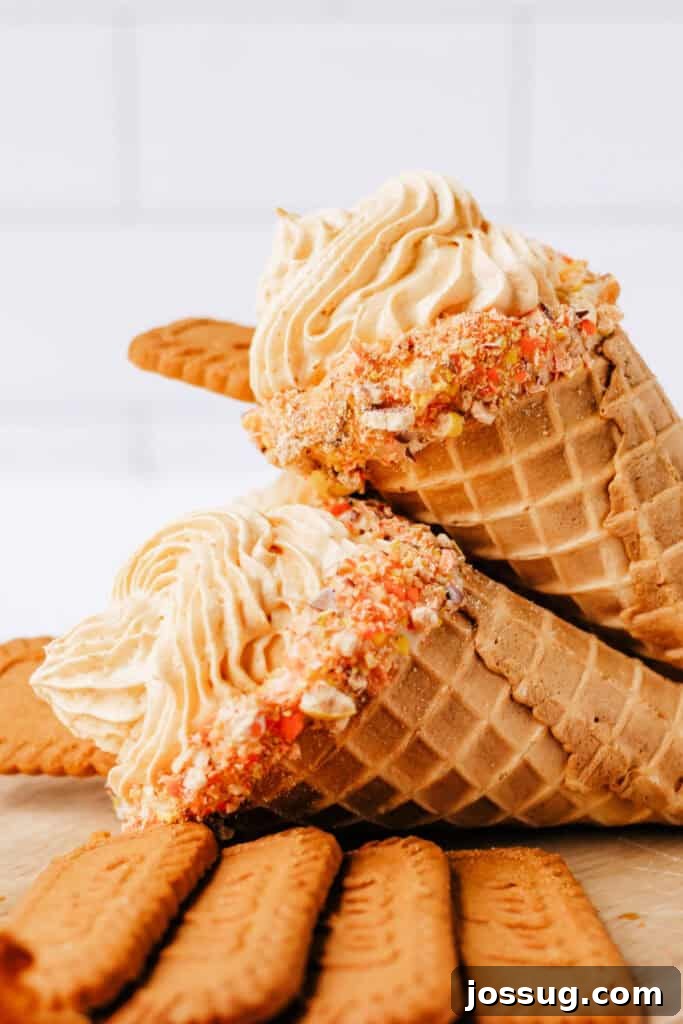
When the craving for a delightful pumpkin dessert strikes, but you’re short on time or prefer to keep your oven off, these No Bake Pumpkin Cheesecake Cones are your answer. They stand out as one of the most festive and enjoyable autumn treats you can create. This recipe is designed for ease, making it perfect for busy weeknights, holiday gatherings, or simply satisfying that sweet tooth without any fuss. Each cone is a harmonious mashup of a light and fluffy pumpkin cheesecake mousse, a sweet candy-dipped cone, and a crunchy topping of crushed candies and cookies.
These cones are not just desserts; they’re an experience. They’re quick, incredibly creamy, and guaranteed to be a crowd-pleaser. Whether you’re planning a fall-themed party, need a special after-school snack, or just desire a quick, indulgent craving fix, this recipe is a true gem. It’s one of those easy-to-make autumnal delights that you’ll want to revisit season after season. Hosting a cozy get-together or looking for a fun culinary activity for the family? These no-bake pumpkin cheesecake cones offer a simple yet spectacular solution, making entertaining effortless and delicious. They are also fantastic last-minute dessert ideas when you need something that feels special and festive but comes together with minimal effort.
⭐ Why You’ll Adore This Easy Recipe
-
Impressively Simple
Despite their elegant appearance, these no-bake pumpkin cheesecake cones are incredibly easy to assemble. You don’t need expert baking skills to create a dessert that looks like it came from a gourmet bakery. The simple steps and minimal equipment make this a stress-free option for any occasion, proving that impressive treats don’t have to be complicated.
-
No Oven Required
Say goodbye to heating up your kitchen, especially on those surprisingly warm fall days, or when your oven is already occupied with other holiday dishes. This truly “no-bake” aspect makes it a perfect dessert for any season, allowing you to enjoy rich, creamy pumpkin flavors without the added heat or complexity of baking.
-
Perfect for Any Gathering
These cheesecake cones are incredibly versatile and make a fantastic addition to any event. Whether it’s a casual potluck, a sophisticated dinner party, a Halloween celebration, or a Thanksgiving dessert spread, their individual portions and unique presentation make them stand out. They’re a fun and unexpected twist on traditional fall desserts.
-
Fun for All Ages
Get the whole family involved! This recipe is wonderfully kid-friendly, offering opportunities for little helpers to participate in crushing candies, dipping cones, or piping the filling. It’s a delightful hands-on project that culminates in a treat everyone will love, fostering cherished memories in the kitchen.
-
Quick & Convenient
When time is of the essence, but you still want a homemade touch, this recipe delivers. With minimal prep time and no baking, you can have these delightful desserts ready in a flash. It’s the ultimate solution for those moments when a sweet craving hits unexpectedly or when you need a speedy dessert for unexpected guests.
🛒 Essential Ingredients & Smart Substitutions
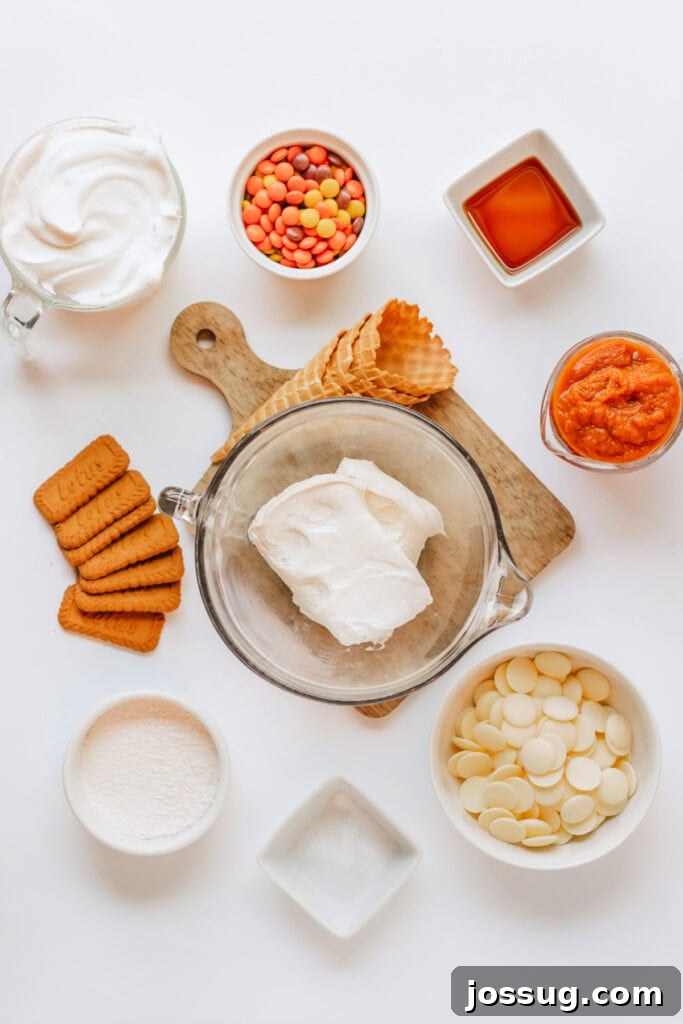
Creating these delightful no-bake pumpkin cheesecake cones requires a few key ingredients, most of which are readily available. Here’s what you’ll need and some handy substitutions to ensure success:
- Cream Cheese: For the best, smoothest cheesecake filling, always opt for full-fat, brick-style cream cheese. Ensure it’s fully softened to room temperature before mixing to prevent lumps and ensure a creamy consistency.
- Salt: A small pinch of salt enhances all the sweet flavors, balancing the richness of the cream cheese and pumpkin.
- Vanilla Extract: Pure vanilla extract adds a warm, classic depth of flavor that complements the pumpkin beautifully.
- Cheesecake Instant Pudding Mix: This is a key ingredient for both flavor and structure, helping to set the filling without baking. If cheesecake flavor isn’t available, instant white chocolate pudding mix can be a good substitute, adding a similar creaminess and sweetness.
- Pumpkin Pie Mix: This is crucial! **Do not confuse this with plain pumpkin puree.** Pumpkin pie mix is pre-sweetened and spiced, ready to use, providing the signature pumpkin pie flavor. Using plain pumpkin puree will result in a bland and less sweet filling unless you add additional sugar and spices.
- Cool Whip: This light and airy whipped topping gives the cheesecake mousse its fluffy texture. For those who prefer homemade, a stabilized whipped cream (made with heavy cream, sugar, and a touch of gelatin or cornstarch) can be a luxurious substitute.
- White Candy Melts: These create a smooth, quick-setting coating for your cones. White chocolate chips can be used as an alternative, though they might require a touch of shortening or coconut oil to achieve a smoother dipping consistency.
- Reese’s Pieces: These iconic peanut butter candies add a fantastic crunch and a salty-sweet counterpoint to the pumpkin. Feel free to swap them with other seasonal M&M’s, crushed butterscotch candies, or even crushed pretzels for a unique twist.
- Biscoff Cookies: Optional but highly recommended for topping, crushed Biscoff cookies (speculoos) offer a warm, spiced, caramelly flavor that pairs perfectly with pumpkin. Crushed gingersnaps or graham crackers are excellent alternatives.
✨ Creative Variations to Try
These No Bake Pumpkin Cheesecake Cones are fantastic as is, but don’t hesitate to get creative and customize them to your liking! Here are some exciting variations to inspire your next batch:
-
Miniature Marvels
Transform these treats into bite-sized delights by using mini waffle cones or sugar cones. These are perfect for fall gatherings, kids’ parties, or when you want to offer a variety of small desserts. They’re easier to handle and allow guests to sample more without overindulging.
-
Sweet Potato Swirl
For a slightly different autumnal flavor, swap out the pumpkin pie mix with an equal amount of smooth sweet potato puree. Remember to add a dash of pumpkin spice (or even apple pie spice) to achieve a similar spiced warmth, as sweet potato puree is typically less spiced than pumpkin pie mix.
-
Festive Candy Coatings & Sprinkles
Experiment with different colored candy melts for the cone coating. Orange for a classic pumpkin look, black for Halloween, or even a mix of fall colors can make them visually stunning. Instead of Reese’s Pieces, try using autumn-themed sprinkles, chopped nuts, or even finely crushed candy corn for an extra festive touch.
-
Caramel Infusion
Elevate the indulgence by adding a swirl of caramel sauce inside the cone before piping in the cheesecake filling. You can also drizzle extra caramel over the top of the piped filling for a beautiful finish and an extra layer of richness that perfectly complements the pumpkin.
-
Spice It Up
For those who love a bold spice profile, consider adding an extra pinch of cinnamon, nutmeg, or a ready-made pumpkin pie spice blend directly into the cheesecake filling. This will intensify the warm, aromatic flavors, making each bite even more comforting.
🔥 Top Tips for Perfect Pumpkin Cheesecake Cones
Achieving perfectly delightful no-bake pumpkin cheesecake cones is easy with a few expert tips. Follow these guidelines to ensure your treats are as delicious and beautiful as possible:
-
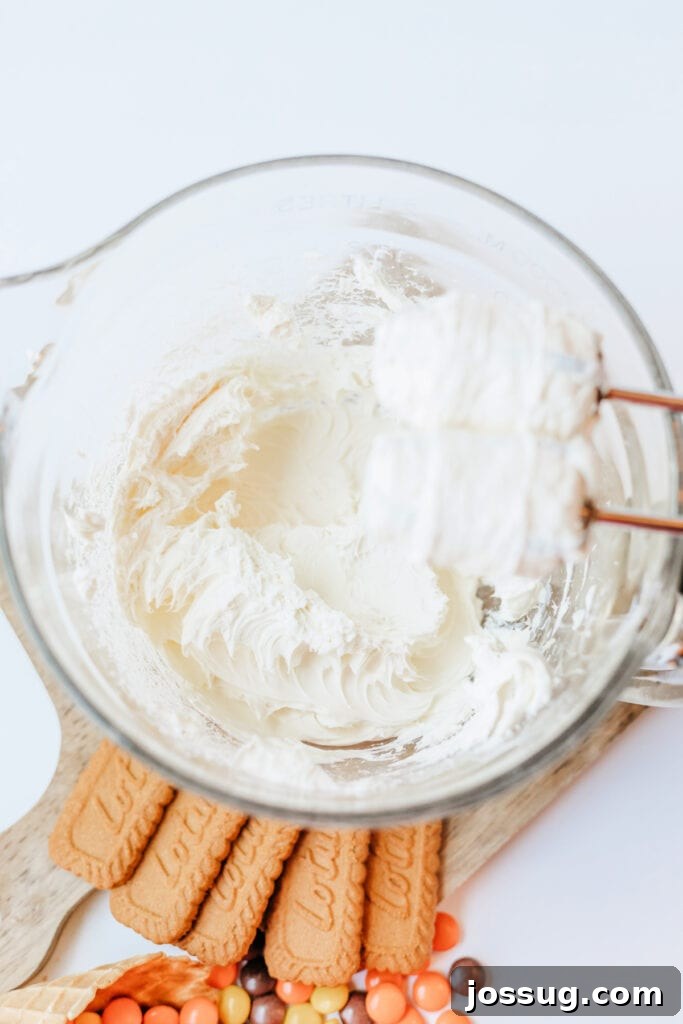
Ensure Cream Cheese is Fully Softened: This is a critical step! Cold cream cheese will result in a lumpy filling that’s difficult to pipe smoothly. Allow your cream cheese to sit at room temperature for at least an hour (or microwave briefly on low power) until it’s perfectly soft and pliable. This ensures a silky, uniform cheesecake mousse.
-
Chill the Filling Adequately: After mixing, refrigerate the pumpkin cheesecake filling for at least one hour. This allows the pudding mix to set properly and the mixture to firm up, making it much easier to pipe into the cones. A chilled filling holds its shape better and creates a cleaner presentation.
-
Fill Cones Just Before Serving: To maintain the crispness of the waffle cones, it’s best to pipe the filling in no more than a few hours before you plan to serve them. The moisture from the filling can gradually soften the cones over time, making them less enjoyable. If preparing ahead, keep the filling and cones separate.
-
Apply Crushed Toppings Promptly: For the best adhesion, coat the dipped cones with your crushed candies or cookies while the melted candy coating is still slightly warm and tacky. This ensures the toppings stick firmly and don’t fall off as the chocolate sets.
-
Use a Piping Bag for a Professional Look: While you can spoon the filling into the cones, using a piping bag fitted with a star tip (or even just a snipped corner) will give your cones a beautiful, professional swirl on top, making them even more appealing.
❓ Frequently Asked Questions
Yes, absolutely! The pumpkin cheesecake filling can be prepared and refrigerated in an airtight container for up to 2-3 days. However, to ensure the cones remain delightfully crisp, it is highly recommended to fill them just before serving, or at most, a few hours beforehand. This prevents the cones from becoming soggy.
If you only have plain pumpkin puree, you can create a suitable substitute. For every cup of pumpkin puree, mix in ¼ cup of brown sugar and 1 teaspoon of pumpkin pie spice (or a mix of cinnamon, nutmeg, ginger, and cloves). This will give you a flavor profile similar to pumpkin pie mix.
It’s incredibly kid-friendly! This recipe offers many opportunities for children to get involved. Kids can help crush the candies, dip the cones in melted chocolate and toppings, or even assist with gently folding in the Cool Whip. It’s a fun, hands-on activity that results in a delicious treat they’ll be proud to have helped create, making it one of the best fall recipe ideas for families.
Certainly! To make these no-bake pumpkin cheesecake cones gluten-free, simply use gluten-free waffle cones, which are available in most major grocery stores or specialty food shops. Ensure any crushed cookies or toppings (like Biscoff) are also gluten-free. This ensures a delightful treat for everyone.
While it’s essential to chill the cheesecake filling before piping, the assembled cones are best served immediately or within a few hours to keep the waffle cones as crisp as possible. If you need to store them for a short period after assembly, a quick chill of 15-30 minutes can help the filling firm up further, but prolonged chilling will soften the cones.
You can use sugar cones, but keep in mind they are typically smaller and more fragile than waffle cones. Waffle cones provide a sturdier base, hold more filling, and offer a more substantial crunch. If using sugar cones, you might need to adjust the number of servings and handle them with extra care.
There are a few simple tricks! You can place them upright in tall drinking glasses, a muffin tin (the cups will hold them securely), or a specialized cone stand if you have one. This will keep them stable as the chocolate coating sets and while they await serving.
These cones are absolutely perfect for parties and potlucks! They are individual portions, easy to serve, and look incredibly appealing. For transport, simply bring the prepared cheesecake filling in a piping bag (kept chilled) and the coated cones separately. Assemble them on-site for the freshest, crispiest experience. They’re a unique alternative to traditional fall desserts.
No, they are distinct products. Pumpkin pie mix is a blend of pumpkin, sugar, and spices (like cinnamon, ginger, nutmeg, and allspice) and is ready to be used as a pie filling. Pumpkin puree, on the other hand, is simply cooked and pureed pumpkin, with no added sugar or spices. Using pumpkin puree instead of pumpkin pie mix will drastically alter the flavor and sweetness of your cheesecake filling, requiring significant adjustments.
🍽️ More Delicious Pumpkin & Fall Recipes You May Enjoy
Dessert
Pumpkin Spice Cheesecake Bars
Dessert
Pumpkin Spice Cheesecake Enchiladas with Caramel Drizzle
Dessert
No-Bake Pumpkin Spice Cheesecake
Dessert
Pumpkin Layer Cheesecake
Servings: 3 servings
No Bake Pumpkin Cheesecake Cones
No Bake Pumpkin Cheesecake Cones are fun, creamy, and packed with irresistible fall flavor. An incredibly easy no-bake dessert perfect for autumn parties, simple family treats, or a delightful sweet craving!
Print Recipe
Equipment
- Mixing bowls (large and small)
- Hand mixer or stand mixer
- Rubber spatula
- Piping bag with tip
- Microwave-safe bowl
- Spoon or small dish (for dipping)
- Food processor or zip-top bag and rolling pin (for crushing candy)
Ingredients
- 3 waffle cones
- 8 oz white candy melts
- 1 cup Reese’s Pieces, finely crushed
- 2 packages cream cheese, (8 oz each), softened
- ¼ teaspoon salt
- 1 tablespoon vanilla extract
- 1 box cheesecake flavored instant pudding mix, (3.4 oz)
- 1 cup pumpkin pie mix
- 2 cups Cool Whip, thawed
- Biscoff cookies, crushed (for topping, optional)
Instructions
- In a large mixing bowl, using a hand mixer or stand mixer, beat the softened cream cheese until it is completely smooth and free of any lumps.
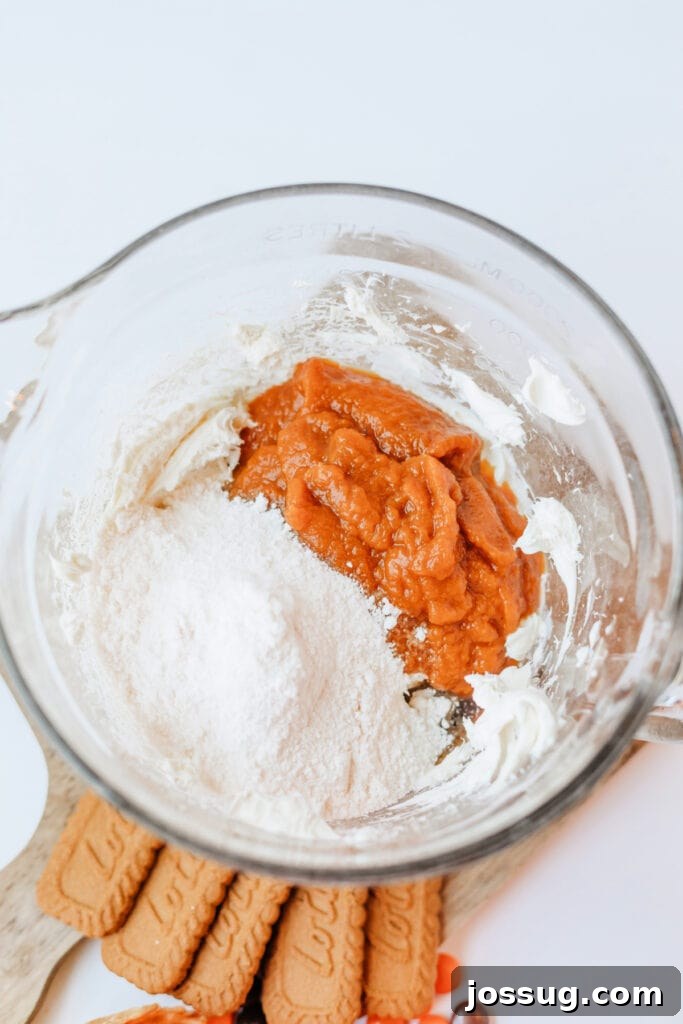
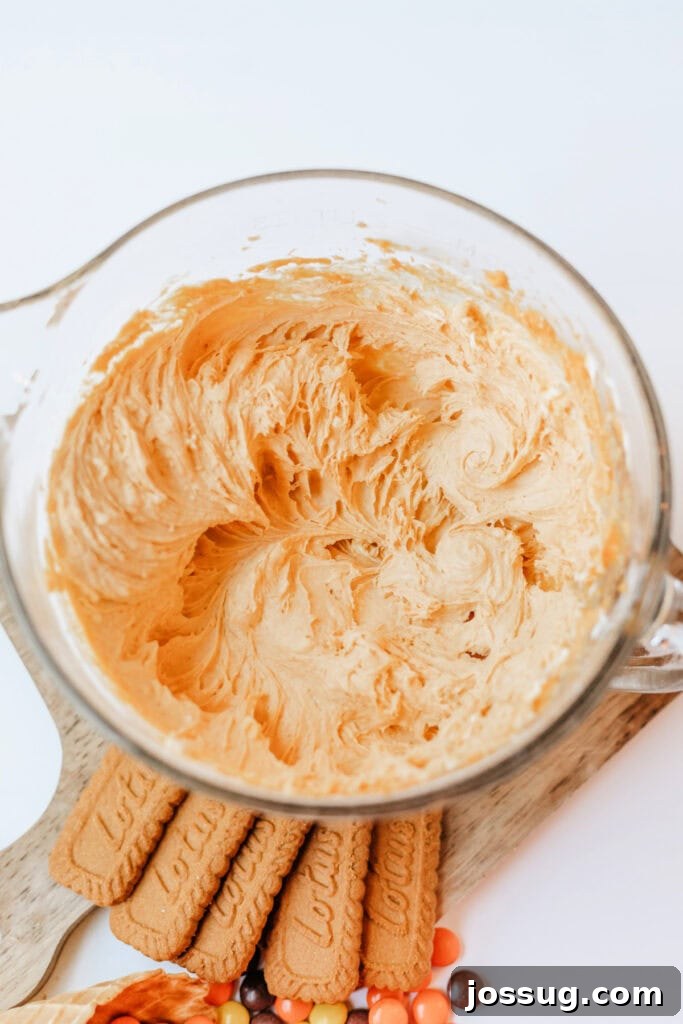
- Add the salt, vanilla extract, cheesecake instant pudding mix, and pumpkin pie mix to the cream cheese. Continue to beat the mixture until all ingredients are fully combined and the filling is smooth and creamy.
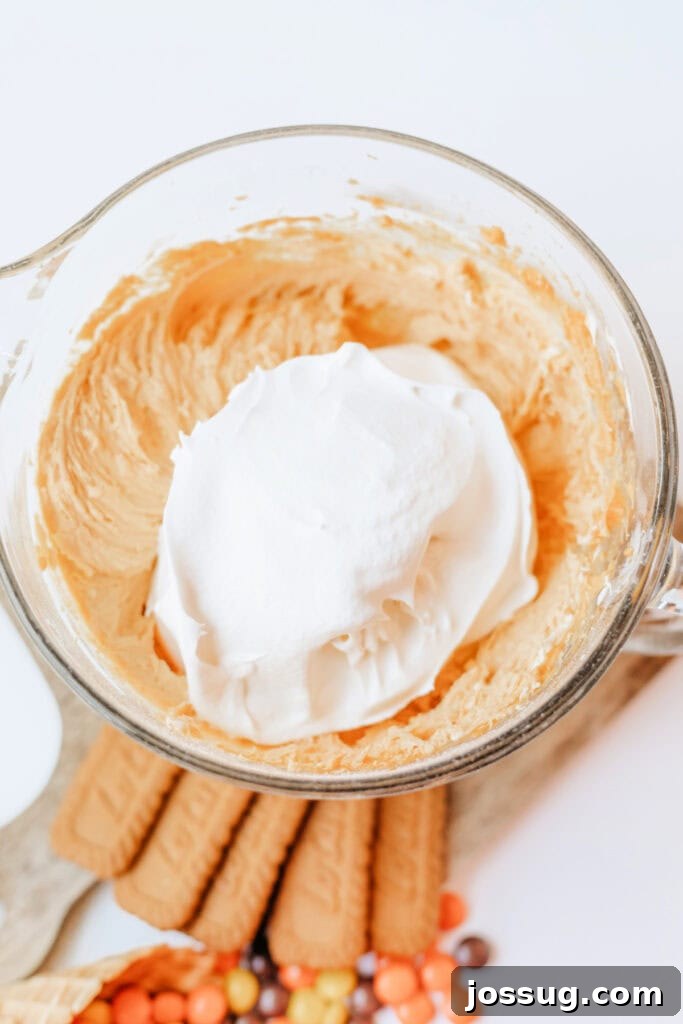
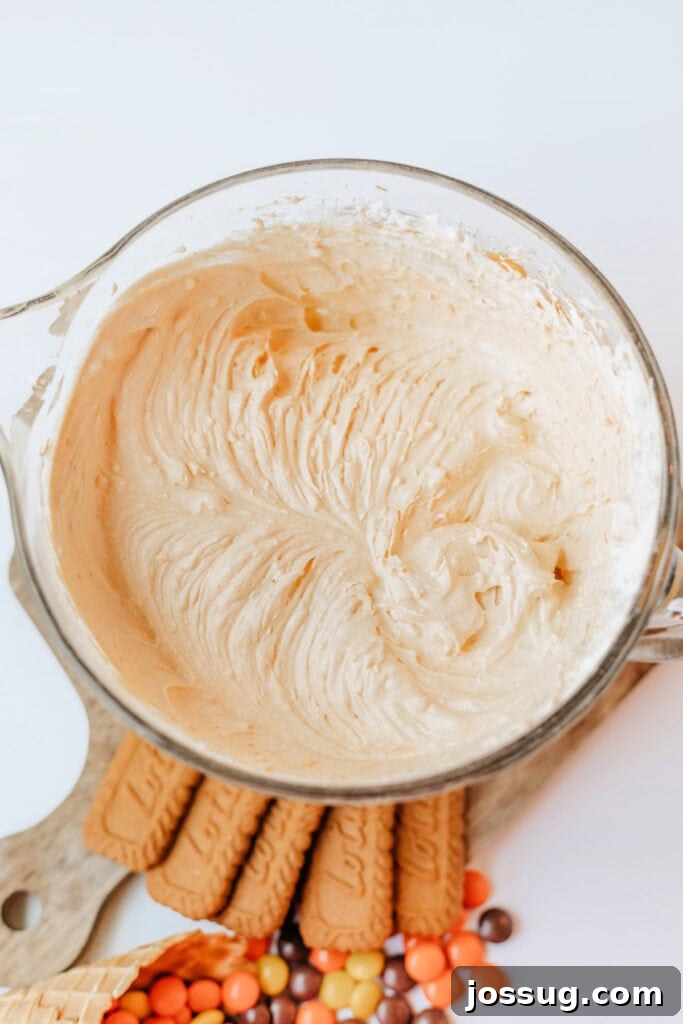
- Gently fold in the Cool Whip until the mixture is uniform and light. Be careful not to overmix to maintain the airy texture. Transfer this delightful pumpkin cheesecake mixture into a piping bag fitted with your preferred tip (a star tip works wonderfully for a decorative swirl). Refrigerate for at least 1 hour to allow the filling to set and firm up.
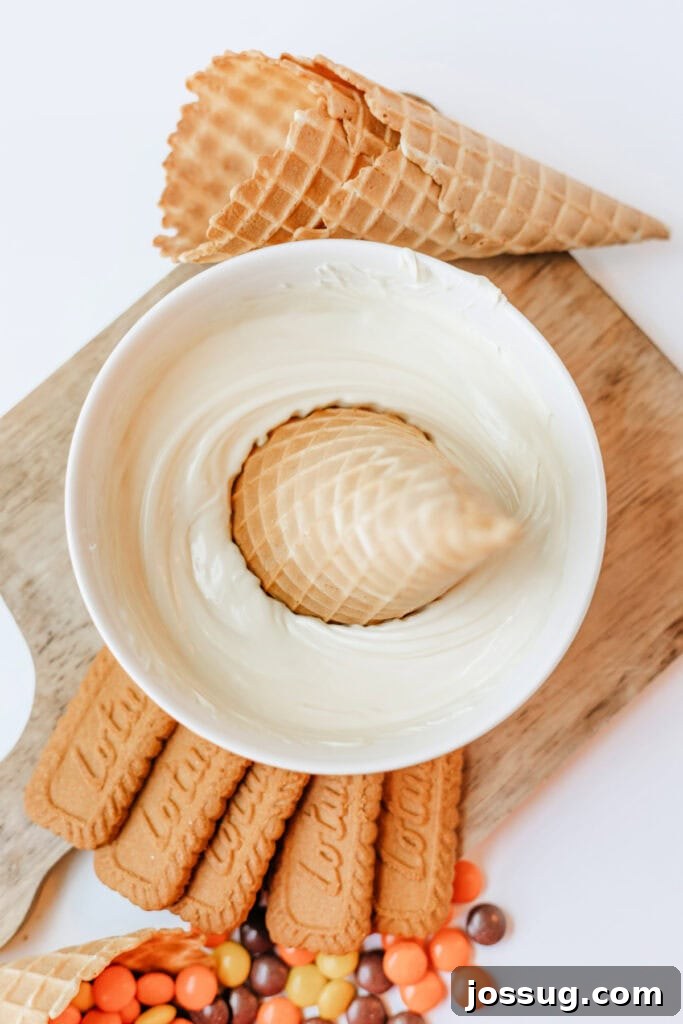
- While the filling chills, prepare your cones. Melt the white candy melts in a microwave-safe bowl according to package directions, typically in 1-minute intervals, stirring thoroughly after each interval until completely smooth.
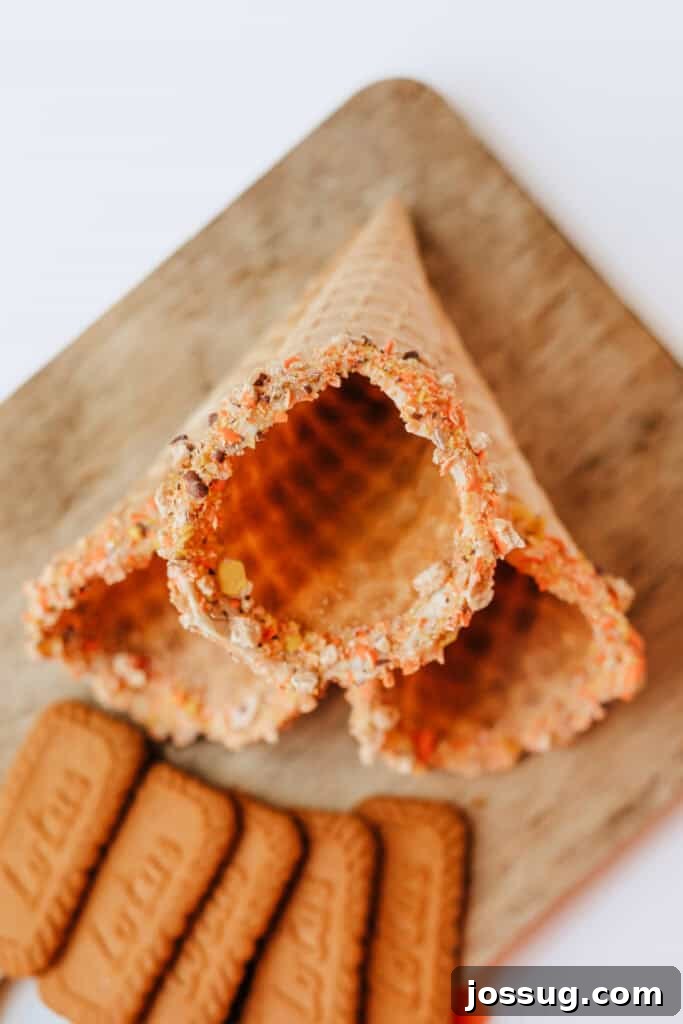
- Dip the tops of the waffle cones into the melted chocolate, coating them evenly. Immediately after dipping, coat the chocolate-dipped rims with the finely crushed Reese’s Pieces. Set the cones aside, upright in a glass or muffin tin, until the chocolate coating is firm.
- Once the filling is chilled and the cones are set, pipe the creamy pumpkin cheesecake filling into each cone, filling them generously.
- If desired, sprinkle additional crushed Biscoff cookies over the piped filling for an extra layer of flavor and crunch.
- Serve your No Bake Pumpkin Cheesecake Cones chilled and enjoy this ultimate fall treat!
Notes
🥡 Storage
- Store any leftover filled cones loosely covered in the refrigerator for up to 3 days. Please note that the cones may soften slightly the longer they are stored due to moisture from the filling.
- To prevent them from tipping and messing up your beautiful decorations, store the cones upright in a tall glass, a muffin tin, or a dedicated cone stand.
♨️ Reheating
- This is a cold dessert recipe and is not suitable for reheating. Serve chilled for the best experience.
❄️ Freezing
- Do not freeze the assembled cones, as the waffle cones will become soggy and lose their texture upon thawing.
- The pumpkin cheesecake filling, however, can be frozen separately in an airtight container for up to 1 month. Thaw it in the refrigerator overnight, then stir well before piping into fresh cones.
💡 Tips for Best Results
- Always use softened cream cheese for a smooth, lump-free filling that pipes beautifully.
- Chilling the filling for at least an hour is crucial; it helps the mousse set and maintain its shape when piped.
- Assemble and fill the cones right before serving to keep them wonderfully crisp.
- For perfect adherence, make sure to add crushed candy or cookie toppings while the melted chocolate on the cones is still slightly wet.
🍳 Alternate Cooking Methods
- No alternate methods are needed for this delightful recipe – it is completely no-bake, offering maximum convenience!
♻️ Leftovers
- Store any remaining cheesecake filling in a covered container in the refrigerator for 2-3 days.
- Get creative with leftover filling! It makes an excellent dip for graham crackers, Nilla wafers, or even sliced apples.
Nutrition Information
Serving: 1 cone, Calories: 1073 kcal, Carbohydrates: 103g, Protein: 13g, Fat: 68g, Saturated Fat: 45g, Polyunsaturated Fat: 3g, Monounsaturated Fat: 14g, Cholesterol: 153mg, Sodium: 1157mg, Potassium: 401mg, Fiber: 8g, Sugar: 66g, Vitamin A: 9529IU, Vitamin C: 3mg, Calcium: 222mg, Iron: 2mg
Nutrition information is automatically calculated and should only be used as an approximation. Values can vary based on specific brands and ingredient preparations.
Tried this delicious recipe? We’d love to hear your thoughts!
Leave a comment and rating below to share your experience and tips with other fall dessert lovers.