

Craving that iconic, comforting bowl of Wendy’s chili? Look no further! This ultimate copycat recipe brings the beloved fast-food classic right into your kitchen. Perfect for chilly evenings or a hearty family meal, this chili is thick, rich, and bursting with flavor. Made with tender ground beef, a medley of beans, and a robust tomato base, it’s a dish that truly satisfies. Forget the drive-thru; your new favorite homemade chili is just a few simple steps away.

Recreating the Magic of Wendy’s Chili at Home
Chili holds a special place in the hearts of many, and Wendy’s chili is certainly no exception. Its unique flavor profile, characterized by its meaty texture and perfectly spiced tomato base, makes it a go-to comfort food. Beyond just tasting incredibly good and filling you up, this copycat recipe offers a secret weapon for parents: it’s an incredibly effective way to sneak a generous portion of vegetables into your family’s diet without any complaints. I’ve personally seen my youngest son, who famously declares his dislike for tomatoes, happily devour this Wendy’s Copycat Chili by the bowlful. Considering how packed with tomatoes this recipe is, it feels nothing short of a culinary miracle! Rest assured, whether you’re dealing with picky eaters or just want a truly delicious chili, this recipe is a guaranteed winner.
What makes this particular recipe stand out even further? It’s an award-winning recipe, celebrated for its authentic taste that closely mirrors the original. It might seem hard to believe that a fast-food copycat could achieve such acclaim, but trust me, the proof is in the pudding — or rather, in the chili bowl! This recipe has triumphed in numerous chili cook-offs, leading countless people to beg for the secret. Now, you get to experience that award-winning flavor in your own home, impressing friends and family alike.
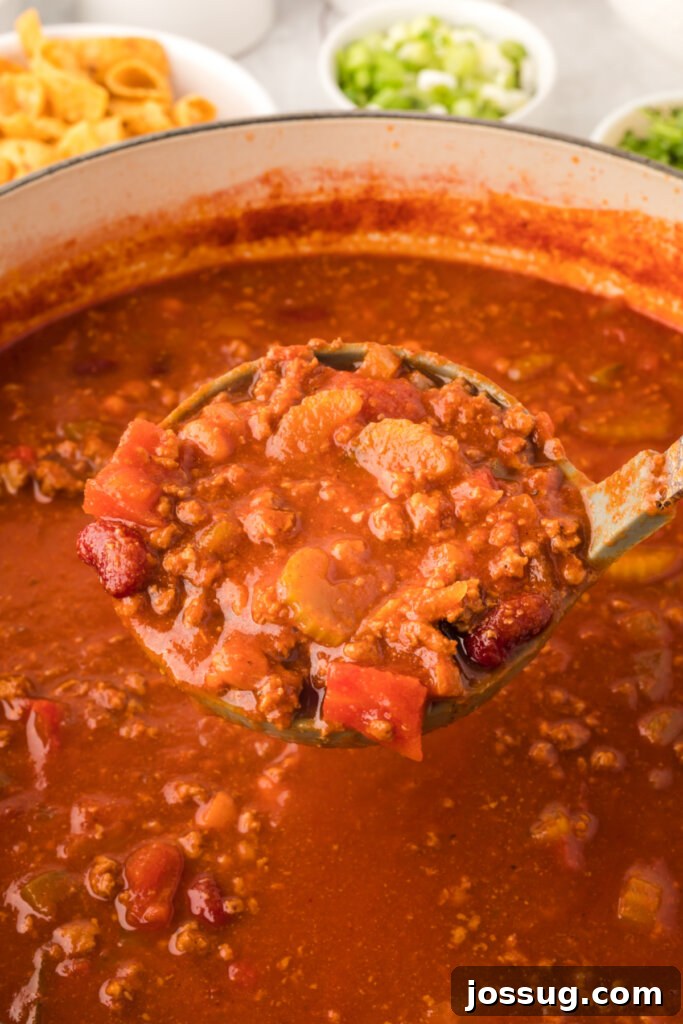
Essential Ingredients and Tools for Your Copycat Wendy’s Chili
Crafting a chili that rivals Wendy’s means selecting the right components and having the proper tools. Here’s a comprehensive look at everything you’ll need to create this fantastic dish.
Key Ingredients for Authentic Flavor
- Ground Beef: The foundation of this hearty chili. Opt for a leaner ground beef (around 85/15 or 90/10) to avoid excessive grease, ensuring a cleaner, richer flavor. The beef provides the robust, savory depth that Wendy’s chili is known for.
- Tomato Juice & Tomato Sauce: These form the liquid base, contributing to the chili’s signature consistency and deep tomato flavor. The combination provides both body and a smooth, rich backdrop for the spices.
- Diced Tomatoes: Adding texture and chunks of fresh tomato flavor, these are crucial for achieving that characteristic Wendy’s chili mouthfeel. They break down slightly during simmering but retain enough structure to be noticeable.
- Celery, Green Pepper, Onion: The aromatic trifecta! These humble vegetables are sautéed to create a flavorful base, releasing essential oils that infuse the entire chili with a fragrant, subtly sweet, and savory aroma. They “pop” with freshness and texture.
- Chili Powder, Cayenne Pepper, Cumin, Garlic Powder, Salt, Pepper, White Sugar, Dried Oregano: This carefully balanced blend of spices is the secret to unlocking Wendy’s distinctive taste.
- Chili Powder: The dominant spice, providing classic chili warmth and color. Its generous use is key to counteracting the high tomato content.
- Cumin: Adds an earthy, smoky depth that is essential to Tex-Mex and chili flavors.
- Cayenne Pepper: Provides a subtle kick of heat. Adjust to your preferred spice level.
- Garlic Powder & Dried Oregano: Contribute classic aromatic notes that build complexity.
- Salt & Pepper: Basic seasonings to enhance all other flavors.
- White Sugar: A small touch of sugar helps to balance the acidity of the tomatoes, rounding out the overall flavor profile without making the chili sweet.
- Pinto Beans & Kidney Beans: Classic chili beans that contribute essential protein, fiber, and a satisfying texture. A chili just doesn’t feel complete without these hearty additions.
- Your Choice of Toppings: While the chili is fantastic on its own, a personalized touch of toppings elevates the experience. Think shredded cheese (cheddar or Monterey Jack), sour cream, crushed Frito’s corn chips, fresh cilantro, sliced jalapeños, or chopped green onions. The possibilities are endless, allowing everyone to customize their bowl.
Essential Utensils for Seamless Preparation
- Large Soup Pot or Dutch Oven: Essential for browning the ground beef and simmering the chili. A heavy-bottomed pot, such as a Dutch oven, ensures even heat distribution and prevents scorching during the long simmer, which is crucial for flavor development.
- Knife and Cutting Board: For safely and efficiently prepping all your vegetables (onion, celery, green pepper). Sharp knives make quick work of chopping and dicing.
- Measuring Spoons and Cups: Precision is key for the spice blend. Accurate measurements ensure your chili achieves that perfect Wendy’s flavor profile.
- Meat Chopper or Wooden Spoon: Ideal for breaking up the ground beef into fine crumbles as it browns, ensuring a consistent texture throughout the chili.
- Large Stirring Spoon or Spatula: For combining ingredients, stirring regularly during simmering to prevent sticking, and scraping the bottom of the pot.
- Ladle: For serving up generous portions of your delicious, homemade chili.
- Can Opener: To easily open cans of beans, diced tomatoes, and tomato sauce.
Dietary Note: One of the great advantages of Wendy’s chili is that it’s naturally gluten-free, and this copycat recipe maintains that quality, making it an excellent choice for individuals with special dietary needs. However, it’s always prudent to double-check the ingredient labels on all canned goods and spices to confirm that no hidden wheat products have been included. Vigilance ensures your homemade chili remains truly gluten-free for everyone to enjoy.
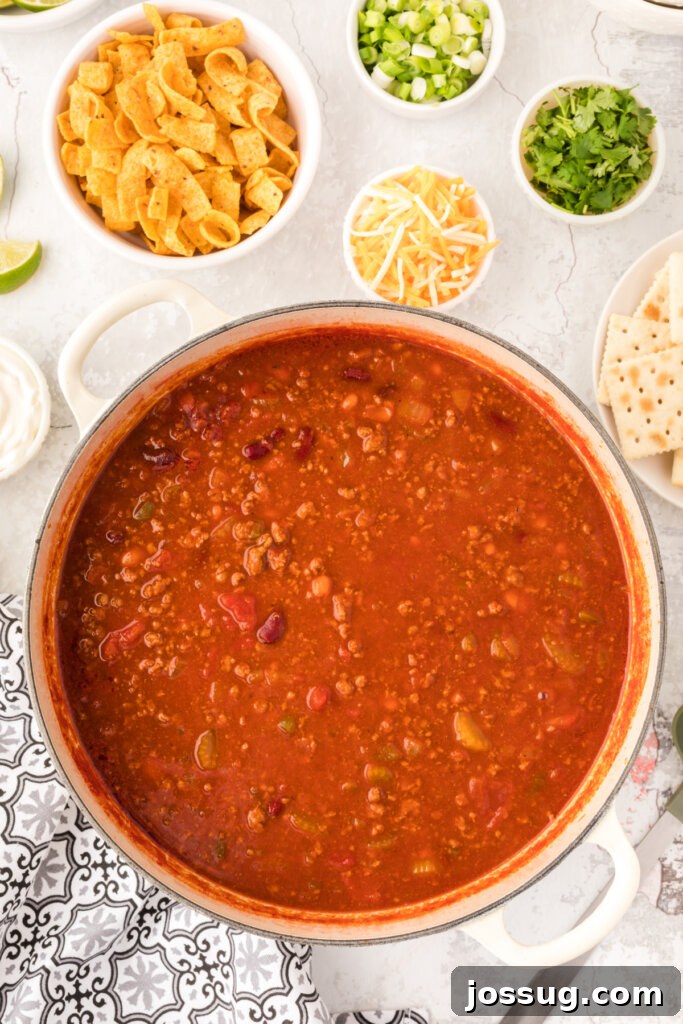
Crafting Your Bowl of Wendy’s Copycat Chili: Step-by-Step
Making this award-winning chili is simpler than you might think. Follow these straightforward steps to achieve a rich, flavorful, and perfectly hearty meal.
Instructions
- Brown the Beef: Begin by placing your ground beef in a large soup pot or Dutch oven over medium-high heat. Use your meat chopper or a wooden spoon to break the beef into small crumbles as it cooks. Continue until the meat is thoroughly browned and no longer pink. This step is crucial for developing deep flavor. Once cooked, carefully drain any excess grease from the pot to ensure your chili isn’t overly oily.
- Combine All Ingredients: Return the browned beef to the pot. Now, add all the remaining ingredients — tomato juice, tomato sauce, diced tomatoes, chopped onion, celery, green pepper, chili powder, cumin, garlic powder, salt, black pepper, dried oregano, granulated sugar, cayenne pepper, pinto beans, and kidney beans. Stir everything thoroughly until all components are well combined.
- Simmer to Perfection: Bring the mixture to a rolling boil over medium-high heat. Once boiling, immediately reduce the heat to low, allowing the chili to gently simmer. Cover the pot, leaving a slight vent for steam to escape. Let it simmer for a minimum of 1 hour, or up to 1 1/2 hours, stirring every 15-20 minutes to prevent sticking and ensure even cooking. Simmering allows the flavors to meld and deepen, transforming the individual ingredients into a harmonious, rich chili. This long, slow cook is key to its authentic taste and thickness.
- Serve and Garnish: Once the simmering is complete and the chili has reached your desired consistency and flavor, remove it from the heat. Serve the chili hot, offering a variety of your favorite toppings on the side for everyone to customize their bowl. Enjoy!
Your Top Questions About This Copycat Wendy’s Chili Answered
This is perhaps the most common question I receive! A quarter cup of chili powder might initially seem like a significant amount. However, it is precisely this quantity that is needed to stand up to the large volume of tomatoes in the recipe and achieve that robust, signature Wendy’s chili flavor without being overly spicy. Chili powder is a blend of various spices, not just pure cayenne, so it provides more flavor than heat. That being said, feel free to adjust the amount to perfectly match your family’s personal taste and spice preferences.
From start to finish, you can expect the process to take approximately 1 hour and 45 minutes. This includes about 15 minutes of active preparation time for chopping vegetables and browning the beef, followed by a leisurely 1 hour and 30 minutes of cooking and simmering time. The simmering phase is essential for developing the chili’s deep, complex flavors and rich texture.
This recipe is designed to yield a generous batch, providing approximately ten servings. The exact number can vary slightly depending on individual portion sizes, but it’s certainly more than enough to feed a hungry family, with potential for delicious leftovers!
The ideal heat setting will depend on your specific stovetop and pot, but the key is to maintain a gentle simmer. This means the chili should be just barely bubbling. If the heat is too high, too much liquid will evaporate quickly, resulting in a chili that is overly thick and potentially lacking the authentic Wendy’s consistency and rich, developed flavors. A low, slow simmer allows the ingredients to meld beautifully.
Absolutely! This recipe adapts wonderfully to a slow cooker. First, brown the ground beef on the stovetop and drain any fat. Then, transfer the browned beef and all other chili ingredients into your crockpot. Cover and cook on the LOW setting for 8-10 hours, or on the HIGH setting for 3-4 hours. Do note that chili cooked in a slow cooker might not become as thick as stovetop chili because the liquid evaporation is minimized. However, it will still be incredibly flavorful and just as delicious!
Yes, chili freezes exceptionally well! Once cooked and cooled completely, transfer the chili into airtight freezer-safe containers or heavy-duty freezer bags. It can be stored in the freezer for up to 3-4 months. Thaw overnight in the refrigerator before reheating gently on the stovetop or in the microwave.
Chili is fantastic with a variety of sides! Classic pairings include warm cornbread, saltine crackers, grilled cheese sandwiches, or a simple green salad to balance the richness. For something extra hearty, try serving it over rice or alongside some crispy tortilla chips for dipping.

Elevate Your Chili: Toppings and Serving Ideas
While this Copycat Wendy’s Chili is incredibly satisfying on its own, adding your favorite toppings can transform it into a gourmet experience. The right accompaniments can add contrasting textures, enhance flavors, and allow everyone to customize their bowl to perfection.
Top Tier Topping Ideas:
- Shredded Cheese: A classic for a reason! Cheddar, Monterey Jack, or a Mexican blend melt beautifully, adding a creamy, savory layer.
- Sour Cream or Greek Yogurt: A dollop of cool, tangy sour cream or plain Greek yogurt provides a lovely contrast to the chili’s warmth and spice.
- Chopped Green Onions or Chives: Offer a fresh, mild oniony bite and a pop of vibrant color.
- Diced White or Red Onion: For those who love a sharper, raw onion flavor and a satisfying crunch.
- Crushed Fritos Corn Chips or Tortilla Strips: Adds a fantastic salty crunch and a playful texture that makes every spoonful exciting.
- Saltine Crackers or Cornbread Crumbs: Perfect for dipping, soaking up the delicious broth, and adding a homey touch.
- Sliced Jalapeños: Fresh or pickled, these provide a spicy kick for those who like extra heat.
- Crushed Red Pepper Flakes: A simple way to boost the chili’s spice level to your preference.
- Fresh Cilantro: Offers a bright, herbaceous note that complements the rich tomato and beef flavors beautifully.
- Avocado Slices or Guacamole: Adds a creamy, healthy fat that mellows the spices and adds a luxurious touch.
- Crispy Bacon Bits: For an extra layer of smoky, salty deliciousness that pairs wonderfully with beef.
- Black Olives: Sliced black olives contribute a mild, briny flavor and a unique texture.
- Lime Wedges: A squeeze of fresh lime juice just before eating can brighten the entire dish and bring out its flavors.
- Cooked Elbow Macaroni: Stirring in cooked pasta turns your chili into a hearty chili mac, a comforting meal in itself.
Serving Suggestions:
Beyond simply topping your bowl, consider these ways to serve your homemade Wendy’s chili:
- Chili Dogs or Burgers: Use it as a delectable topping for hot dogs or burgers.
- Chili Cheese Fries or Nachos: Pour it over crispy fries or tortilla chips with melted cheese for an indulgent snack.
- Stuffed Baked Potatoes: Spoon hot chili into fluffy baked potatoes and load up with your favorite toppings.
- Chili Mac & Cheese: Combine with creamy macaroni and cheese for a truly comforting fusion dish.
Storage and Make-Ahead Brilliance
This Wendy’s Copycat Chili isn’t just delicious; it’s also incredibly convenient for meal prep and future enjoyment. Its flavors often deepen and improve overnight, making it an ideal dish to prepare in advance.
Refrigeration:
Once cooled to room temperature, transfer any leftover chili into an airtight container. It will keep beautifully in the refrigerator for up to 3-4 days. This makes it perfect for packed lunches or quick dinners throughout the week.
Freezing for Later:
For longer storage, chili is an excellent candidate for freezing. Ensure the chili is completely cool before transferring it into freezer-safe containers or heavy-duty freezer bags. Leave a little headspace in containers as liquids expand when frozen. Label with the date. Frozen chili can be stored for up to 3-4 months without significant loss of quality or flavor. It’s a fantastic option for having a comforting meal ready on busy days.
Reheating Instructions:
From Refrigerated: Gently reheat on the stovetop over medium-low heat, stirring occasionally, until heated through. You may add a splash of water or broth if it has thickened too much. Alternatively, microwave in individual portions, stirring halfway through.
From Frozen: For best results, thaw the chili overnight in the refrigerator. Then, reheat as you would refrigerated chili. If reheating from frozen, do so over very low heat on the stovetop, stirring frequently, until fully thawed and hot. This might take longer but ensures even heating.
More Hearty Recipes You Might Love
If you’ve fallen in love with this comforting chili, you’ll surely enjoy exploring other delicious and satisfying recipes from our collection:
- White Chicken Chili
- Chili Dog Casserole
- Easy Chili Cheese Burrito
- Chili Cheese Tater Tot Casserole
- Chili Cheese Dog Mac n’ Cheese

10 servings
Chili – Just Like Wendy’s!
Jamie Sherman
15
1 30
1 45
Print Recipe
Ingredients
- 2 pounds ground beef
- 48 ounce tomato juice
- 29 ounce tomato sauce
- 1 large onion, chopped
- 2 stalks celery, chopped
- ¼ cup chopped green pepper
- ¼ cup chili powder
- 2 teaspoons ground cumin
- 1 ½ teaspoons garlic powder
- 1 teaspoon salt
- ½ teaspoon ground black pepper
- ½ teaspoon dried oregano
- ½ teaspoon granulated sugar
- ⅛ teaspoon ground cayenne pepper
- 1 can diced tomatoes, 14.5 oz.
- 1 can dark red kidney beans, drained, 15 oz.
- 1 can pinto beans, drained, 15 oz.
- Your choice of toppings, optional
Instructions
-
In a large soup pot, cook and crumble the beef over medium-high heat until meat is no longer pink; drain.
-
Return meat to the pan and place all remaining ingredients, except toppings, in the soup pot, stir to combine.
-
Bring to a boil. Reduce heat and simmer for 1 to 1-1/2 hours. Stir every 15-20 minutes.
-
Serve hot with your choice of toppings!
Notes
Topping ideas
- Crackers, Fritos corn chips, cheese, sour cream, green onions, chopped white onions, jalapeno slices, crushed red pepper, crumbled cornbread, avocado slices, bacon, tomatoes, black olives, cilantro, lime wedges, Corn Nuts, hot sauce, cooked elbow macaroni, or a few dark chocolate chips.
Can I make this in a slow cooker?
- Yes, you can! Brown the ground beef and then combine all of the soup ingredients in your crockpot. Cover and cook on LOW for 8-10 hours or on HIGH for 3-4 hours. Note, your chili will not get as thick since the liquid can’t evaporate away making it thicker – but it’ll still be just as delicious!
Nutrition
Nutrition information is automatically calculated, so should only be used as an approximation.
Enjoyed this recipe? Share your thoughts below!
Originally published on June 15, 2012. Last updated on February 17, 2022.