
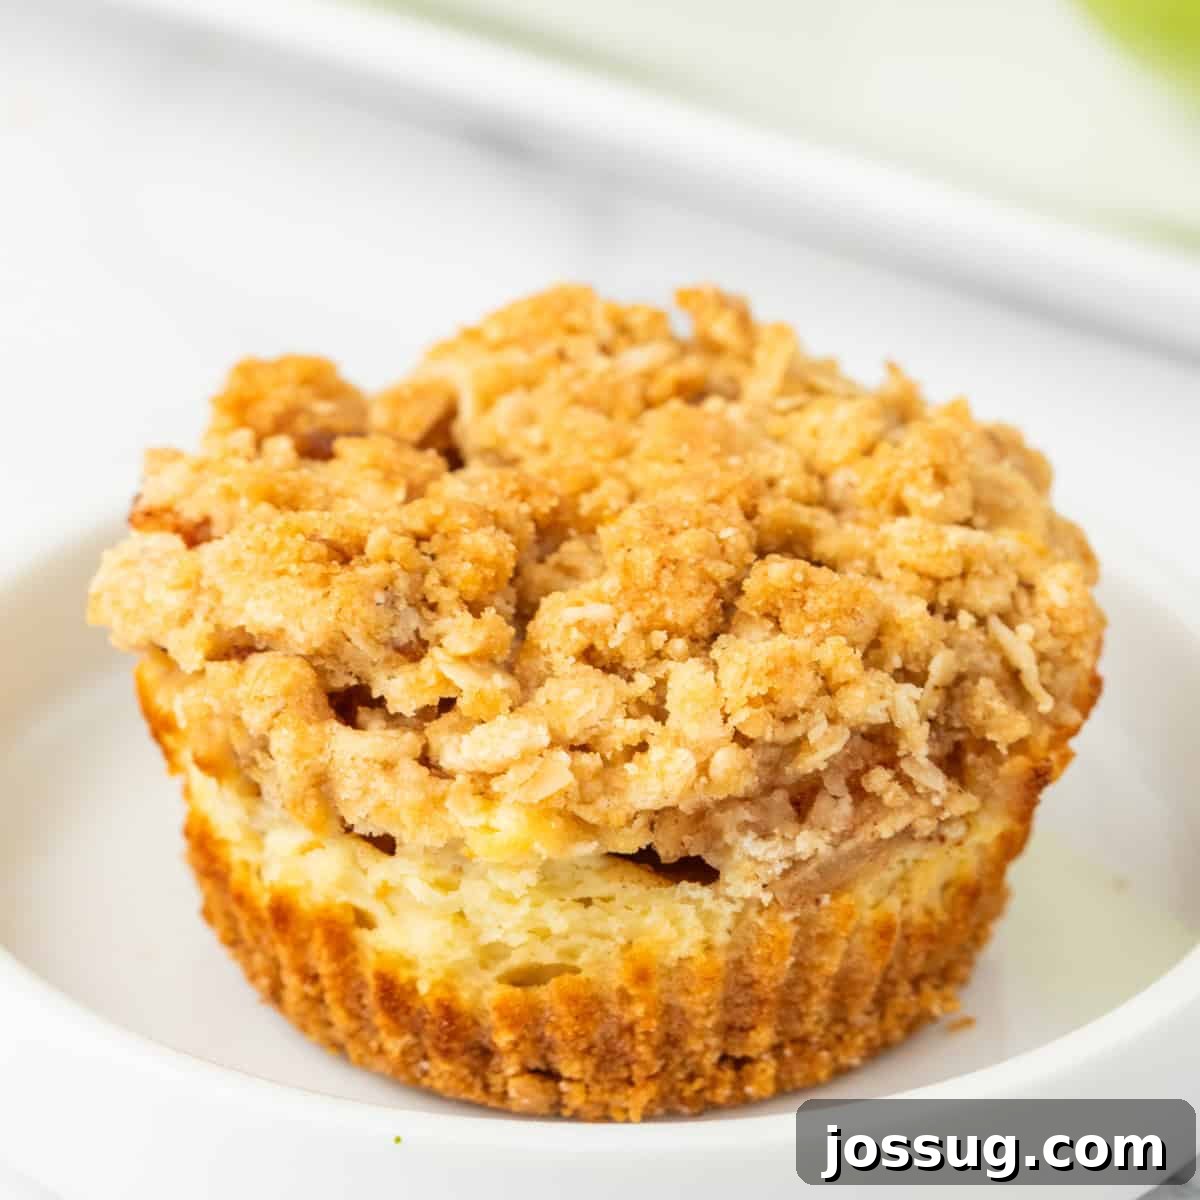
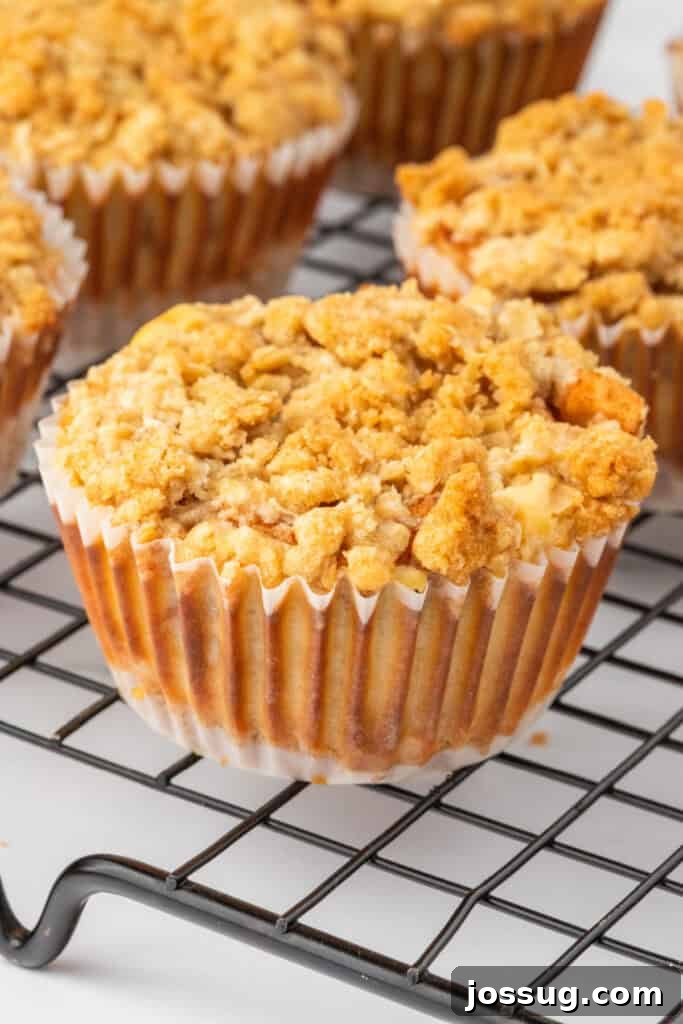
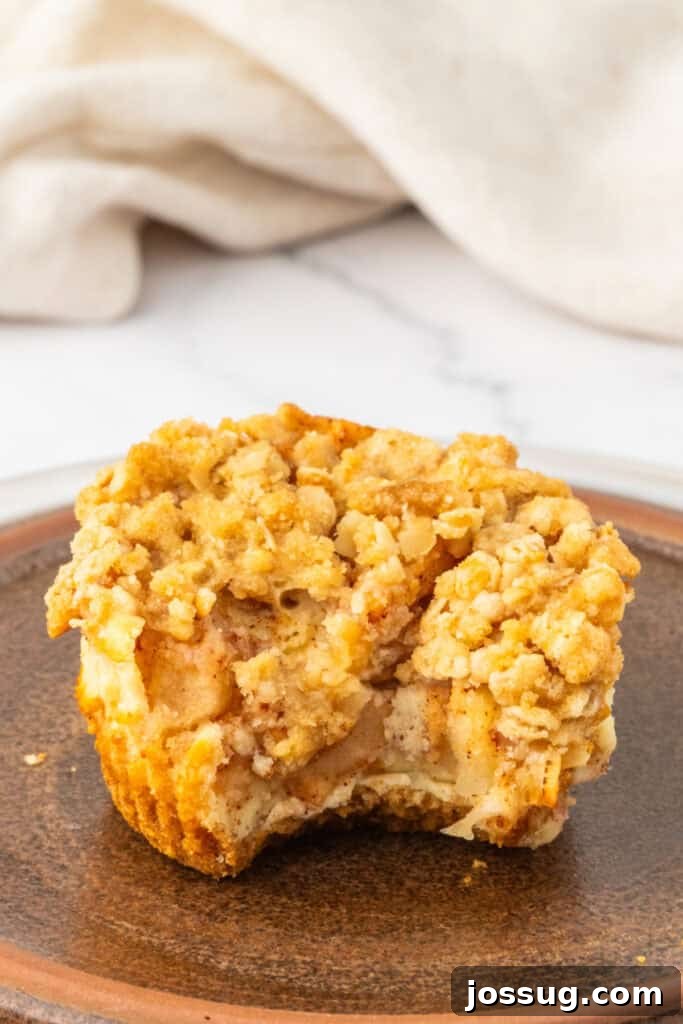
Experience the perfect harmony of flavors and textures with these irresistible Mini Apple Crumble Cheesecakes. Imagine the comforting taste of a classic apple pie seamlessly blended with the creamy indulgence of a rich cheesecake, all presented in a delightful, individual portion. Each bite offers a symphony of a buttery graham cracker crust, a velvety smooth vanilla cheesecake filling, tender spiced apple pieces, and a golden, crunchy oat crumble topping. This isn’t just a dessert; it’s a true celebration of cozy fall baking, bringing together the best of autumn’s bounty in one bite-sized treat!
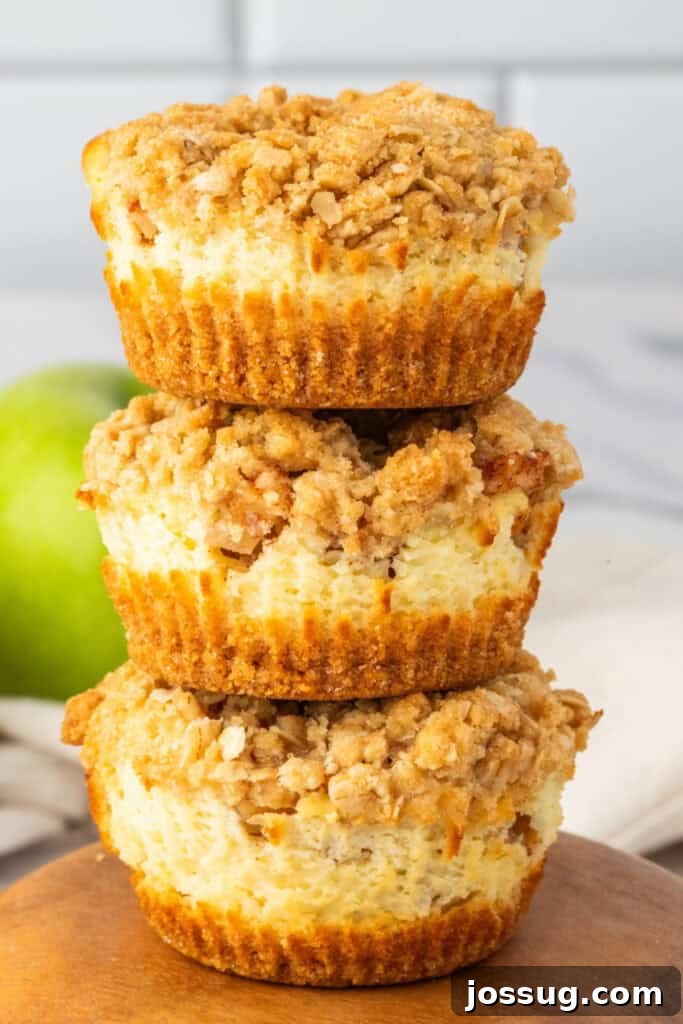
Mini Apple Crumble Cheesecakes: Your Ultimate Fall Dessert Recipe
As the crisp autumn air settles in and leaves transform into a vibrant palette of reds and golds, there’s nothing quite as inviting as the aroma of warm spices and baked apples filling your kitchen. These Mini Apple Crumble Cheesecakes perfectly encapsulate that cozy fall spirit. They offer a delightful fusion where the comforting essence of a homemade apple crumble meets the smooth, luxurious texture of a classic cheesecake, all scaled down into charming, individual servings. Whether you’re planning a special holiday gathering, contributing to a bake sale, or simply craving a sweet and satisfying treat, this recipe promises to deliver a memorable dessert experience.
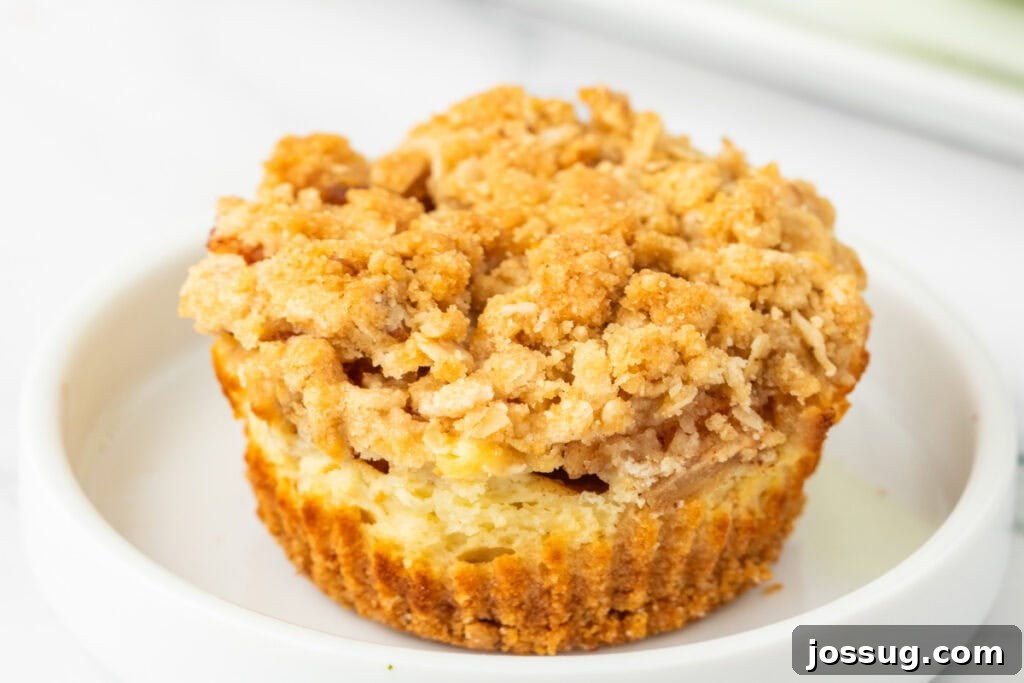
Often referred to as miniature apple cheesecakes or a crumble apple cheesecake, each component is carefully crafted to create a balanced flavor profile. The sturdy yet crumbly graham cracker base provides a fantastic foundation for the creamy, tangy cheesecake filling. This smooth layer is then generously topped with sweet and tender apples, infused with warm spices like cinnamon, before being crowned with a buttery, golden oat crumble. The interplay of textures – the crisp crust, the soft cheesecake, the yielding apples, and the crunchy topping – makes every bite an adventure. This easy apple crumble cheesecake recipe stands out as one of the best mini apple cheesecakes you’ll ever try, offering an impressive dessert without the fuss typically associated with full-sized cheesecakes.
If your quest has been for the ultimate apple cheesecake recipe that is both approachable for home bakers and spectacular enough for any occasion, look no further. This recipe is designed to be simple to execute, yet yields a sophisticated dessert that tastes like pure autumn bliss. Its perfectly portioned nature means no messy slicing, making it ideal for entertaining and ensuring everyone gets their own delightful individual dessert. Prepare to fall in love with these charming, flavorful apple crumble cheesecakes!
⭐ Why You’ll Fall in Love with This Mini Apple Crumble Cheesecake Recipe
These Mini Apple Crumble Cheesecakes are more than just a dessert; they are a delightful culinary experience packed with compelling reasons to become your new favorite autumn baking tradition:
- Harmonious Flavor Fusion: This recipe masterfully combines all your beloved fall flavors – crisp, cinnamon-spiced apples, a rich and velvety vanilla cheesecake, and a rustic, buttery oat crumble – into one incredibly cohesive and delightful dessert experience. It’s like enjoying an apple pie and a cheesecake simultaneously!
- Perfectly Portioned & Utterly Convenient: Baked in individual cupcake liners, these cheesecakes are naturally portion-controlled. This makes them an absolute dream for hosting parties, contributing to potlucks, or simply indulging in a sweet treat without the hassle of cutting and serving a larger cake. Each guest gets their own perfect dessert.
- An Innovative Twist on a Beloved Classic: While a traditional apple cheesecake is undeniably delicious, the addition of a crunchy, golden oat crumble topping elevates this dessert to new heights. It introduces an exciting textural contrast and a homemade rustic charm that makes it truly special and memorable.
- Effortlessly Make-Ahead Friendly: Planning for an event? These beauties can be prepared well in advance. Simply bake, allow them to cool completely, and then chill them until you’re ready to serve. This fantastic feature frees up your valuable time on the day of your gathering, allowing you to relax and enjoy.
- Impressive Yet Surprisingly Simple: Despite their elegant appearance and complex layers of flavor and texture, this recipe is remarkably straightforward to follow. Even home bakers with moderate experience can achieve bakery-quality results, making you look like a dessert maestro!
- Versatile for Any Occasion: From casual family dinners and cozy movie nights to elegant holiday feasts and festive celebrations, these mini cheesecakes fit every bill. Their individual size makes them adaptable for any setting.
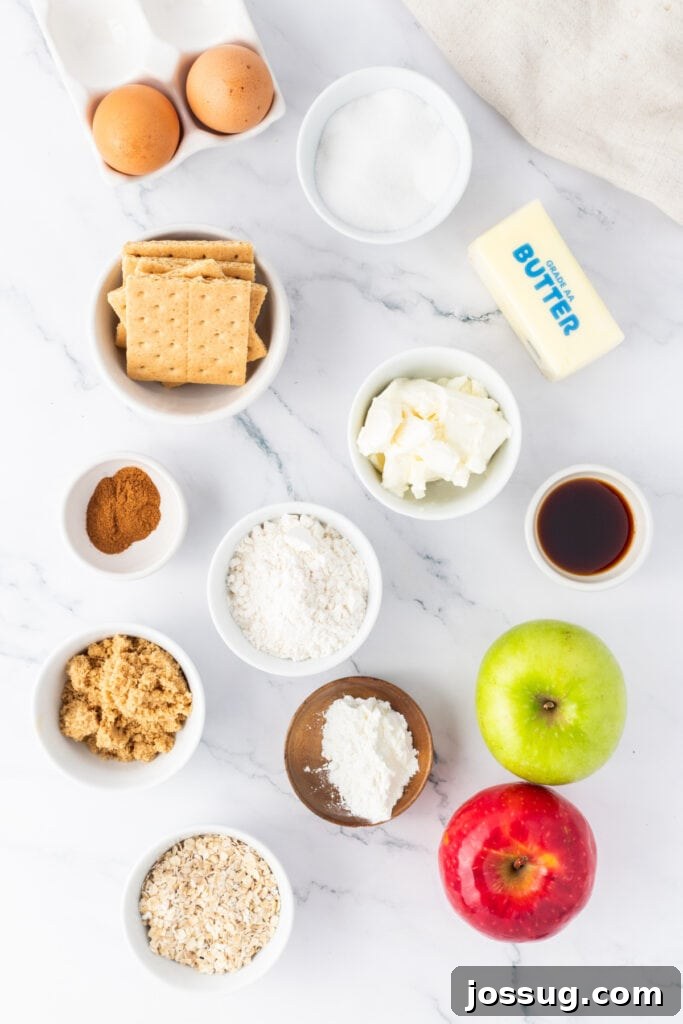
🛒 Essential Ingredients & Smart Substitutions for Your Apple Crumble Cheesecakes
Crafting these mini apple crumble cheesecakes requires a few common pantry staples and fresh, flavorful ingredients. Here’s a detailed look at what you’ll need for each component and some helpful substitutions you can consider:
The Golden Graham Cracker Crust
- Graham Cracker Crumbs: These form the foundational crispy, buttery crust, providing a classic flavor and perfect texture. For a delightful variation, you can easily substitute with crushed vanilla wafers, which offer a sweeter, more delicate flavor, or digestive biscuits for a slightly denser, less sweet option.
- Granulated Sugar: A small amount of sugar is added to the crust mixture to enhance its sweetness and aid in caramelization during baking. Light brown sugar is a fantastic alternative here, lending a subtle molasses flavor and a deeper caramel note that beautifully complements the apples.
- Unsalted Butter, melted: Melted butter is crucial for binding the cracker crumbs together and creating that rich, firm, and flavorful base. If you only have salted butter on hand, you can certainly use it; just be sure to omit any additional salt in the crust mixture to ensure the perfect balance of flavors.
The Velvety Cheesecake Filling
- Cream Cheese, room temperature: This is the undeniable star of any cheesecake, providing its signature creamy and tangy profile. Using full-fat cream cheese at room temperature is essential for achieving a super smooth, lump-free, and rich filling. Neufchâtel cheese (a lighter cream cheese) is a great option if you’re looking to reduce fat content without significantly compromising on texture.
- Granulated Sugar: Sweetens the cheesecake filling to perfection. Swapping this for an equal amount of light or dark brown sugar will infuse a lovely, deeper caramel-like sweetness and a hint of warmth into the creamy layer, enhancing its autumnal character.
- All-Purpose Flour: A small amount of all-purpose flour acts as a gentle stabilizer, helping to prevent the cheesecake from cracking during baking and cooling, and contributing to its smooth texture. If you require a gluten-free option, an equal amount of a good quality 1:1 gluten-free all-purpose flour blend can be used.
- Cornstarch: Another effective stabilizer, cornstarch contributes to the cheesecake’s desirable silky and custardy texture. Arrowroot powder is an excellent natural and gluten-free alternative if you prefer.
- Vanilla Extract: Enhances the overall flavor of the cheesecake with its warm, aromatic, and comforting notes. For a unique twist, consider using almond extract for a subtle nutty undertone, or even a hint of maple extract to further lean into the fall theme.
- Eggs, room temperature: Eggs provide essential structure, richness, and help the cheesecake set beautifully. It is crucial that they are at room temperature to ensure they incorporate smoothly and evenly into the batter without curdling or creating lumps. For those seeking an egg-free option, you could experiment with 1/2 cup of unsweetened applesauce per egg, although this may result in a slightly different texture.
The Spiced Apple & Crunchy Crumble Topping
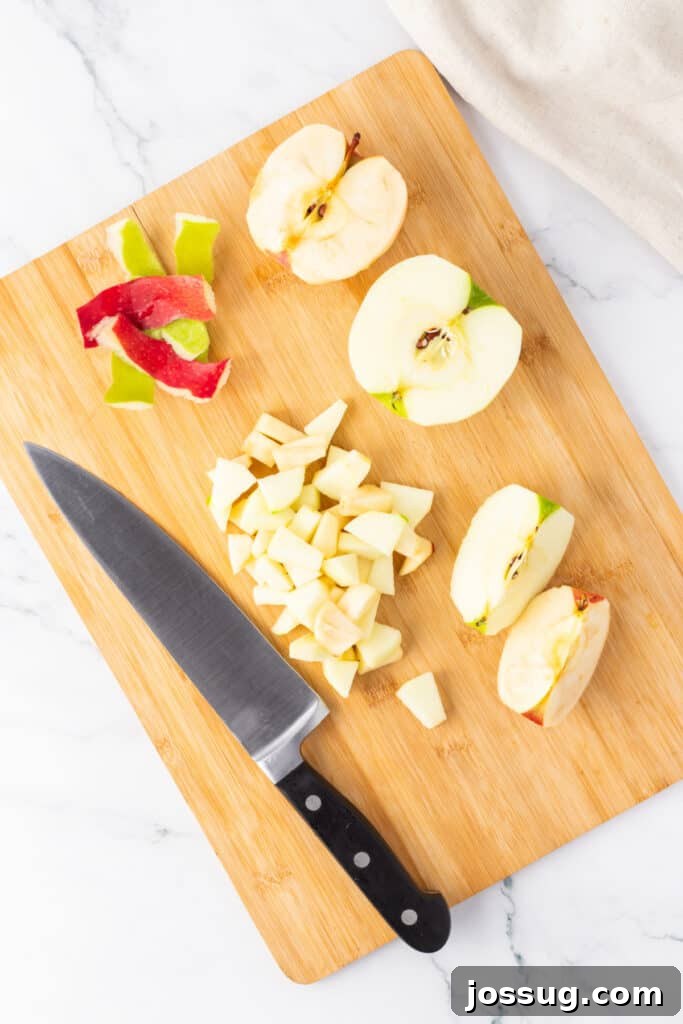
- Apples, finely diced: The choice of apple significantly impacts the flavor and texture of your crumble layer. Granny Smith offers a lovely tartness that balances the sweetness, Honeycrisp provides a perfect balance of sweet and tart with a firm, crisp texture, and Gala is a sweeter, softer option. Finely dicing the apples ensures they cook quickly and distribute evenly across the mini cheesecakes.
- Granulated Sugar (for apples): Sweetens the apples and, when combined with cornstarch and heat, helps create a slightly syrupy coating that clings to the apple pieces. Coconut sugar is a healthier, less refined alternative that adds a subtle caramel and almost nutty flavor.
- Vanilla Extract (for apples): Complements the natural sweetness of the apples and the warmth of the spices. Maple extract can be used as a delicious substitute to introduce an even more distinct and rich fall profile.
- Cornstarch (for apples): This acts as a thickener for the apple mixture, preventing it from becoming too watery and ensuring a cohesive, juicy apple layer. Tapioca starch is a suitable and effective substitute.
- Ground Cinnamon: The quintessential fall spice, adding incredible warmth and aroma to the apples. Feel free to experiment by adding a pinch of freshly grated nutmeg, ground cloves, or a robust pumpkin pie spice blend for extra depth and complexity in your autumn spiced apples.
- All-Purpose Flour (for crumble): Forms the base of the delicious, golden crumble topping. For a slightly nuttier, more wholesome crumble, oat flour makes a wonderful substitute, or a gluten-free all-purpose flour blend for dietary needs.
- Light Brown Sugar (for crumble): Provides depth, moisture, and a lovely chewiness to the crumble topping, contributing to its signature texture. Dark brown sugar can be used for an even richer molasses flavor.
- Rolled Oats: Add a wonderful chewy texture, rustic appeal, and hearty goodness to the crumble. Quick oats can be used if you prefer a finer, less prominent oat texture in your topping.
- Butter, melted (for crumble): Melted butter is crucial for binding the crumble ingredients together, ensuring it bakes into a beautifully golden, crisp, and flavorful topping. For a dairy-free version, melted coconut oil is an excellent and equally effective alternative.
✨ Creative Variations to Elevate Your Mini Apple Crumble Cheesecakes
While these mini cheesecakes are truly delicious in their classic form, don’t hesitate to unleash your inner pastry chef! Here are a few creative ideas to customize your dessert, adding unique twists and making it uniquely yours:
- Decadent Caramel Drizzle: For an extra layer of indulgence that perfectly complements the apple and cheesecake flavors, swirl a generous amount of homemade or high-quality store-bought caramel sauce over the top of each cheesecake just before serving. A sprinkle of sea salt flakes with the caramel can provide a fantastic sweet and salty contrast.
- Crunchy Nut Topping: Enhance both the texture and flavor of the crumble by sprinkling a handful of finely chopped pecans, walnuts, or even toasted almonds directly over the oat crumble before the cheesecakes go into the oven. The nuts will toast lightly during baking, adding an irresistible crunch and depth of flavor.
- Warm Spiced Twist: Take the fall flavors up a notch by deepening the spice profile. In addition to the ground cinnamon, consider adding a pinch of freshly grated nutmeg, a touch of ground cloves, a dash of allspice, or a ready-made pumpkin pie spice blend to either the apple mixture or even a tiny bit to the cheesecake filling for a more complex and aromatic autumnal essence.
- Gluten-Free Friendly Adaptation: Easily adapt this recipe to accommodate those with gluten sensitivities or dietary restrictions. Ensure you use certified gluten-free graham crackers (or use a gluten-free biscuit alternative) for the crust, and swap out regular rolled oats for certified gluten-free rolled oats. For the small amounts of flour in both the cheesecake filling and the crumble topping, utilize a reliable 1:1 gluten-free all-purpose flour blend.
- Berry Blast or Other Fruit Explorations: While apples are a beloved classic for fall, you can absolutely experiment with other seasonal fruits! Try folding in a half cup of fresh or frozen (and thoroughly thawed and drained) berries like blueberries, raspberries, or mixed berries into the apple layer. Alternatively, replace some or all of the apples with finely diced pears, peaches, or even a mix of fall fruits for a different delightful fruit crumble cheesecake experience.
- Chocolate Chips Addition: For chocolate lovers, a small handful of mini chocolate chips can be folded into the cheesecake batter or sprinkled over the top of the apple layer before adding the crumble. Dark chocolate pairs surprisingly well with spiced apples.
🔥 Expert Tips for Baking Perfect Mini Apple Crumble Cheesecakes Every Time
Achieving bakery-quality mini cheesecakes that are both beautiful and incredibly delicious is easier than you think, especially with these simple yet crucial tips in mind:
- Achieve Ultimate Smoothness with Room Temperature Ingredients: This is arguably the most important tip for any cheesecake! Always ensure your cream cheese and eggs are at room temperature before you begin mixing. Cold ingredients won’t emulsify properly, leading to a lumpy batter. Room temperature ingredients blend together seamlessly, creating a velvety smooth filling that bakes evenly and without cracks.
- Prevent Cracks – The Golden Rule of Not Overmixing: Once you’ve added the eggs to your cream cheese mixture, mix only until they are just combined – no more! Overmixing incorporates too much air into the batter, which causes the cheesecake to puff up excessively during baking and then dramatically crack and sink as it cools. Gentle, low-speed mixing is key here.
- Recognizing When They’re Perfectly Baked: Bake your mini cheesecakes until the edges appear set and slightly firm to the touch, but the centers still have a very slight, gentle wobble when you lightly jiggle the muffin pan. They will continue to set and firm up significantly as they cool down, so resisting the urge to overbake is crucial for a creamy texture. The crumble topping should also be a beautiful golden brown.
- The Importance of Gradual Cooling for Flawless Texture: For the best texture and to prevent any undesirable condensation from forming on the surface, allow the cheesecakes to cool completely in the muffin pan at room temperature first. Once they’ve reached room temperature, then transfer the entire pan to the refrigerator to chill for at least 2 hours, or ideally, overnight. This slow, gradual cooling process is absolutely essential for preventing cracks and achieving that perfectly smooth, firm cheesecake finish.
- For Effortless Removal: While using cupcake liners is specified and generally effective, for ultimate ease of removal and a super clean presentation, consider lightly greasing the inside of your cupcake liners (especially paper ones) with a bit of non-stick spray before adding the crust. Foil liners also tend to be sturdier and easier to peel away.
- Don’t Rush the Chill: We know it’s tempting, but adequate chilling time (at least 2 hours, preferably overnight) allows the cheesecake to fully set, develop its rich flavor, and achieve its ideal creamy texture. Patience truly pays off with cheesecakes!
❓ Frequently Asked Questions About Mini Apple Crumble Cheesecakes
Absolutely, these mini apple crumble cheesecakes are an excellent make-ahead dessert, making them perfect for busy hosts or meal prep. You can prepare and bake them a full day, or even two days, in advance. Once they are baked and completely cooled to room temperature, simply transfer them to an airtight container and store them in the refrigerator. In fact, chilling them overnight often allows the flavors to deepen and meld together even more beautifully, enhancing their overall taste and texture.
Yes, this recipe is wonderfully versatile and can be adapted to feature other fruits! While apples are traditional and perfect for a fall crumble, you can certainly experiment with a variety of other options. Finely diced pears, ripe peaches (fresh or frozen and thawed, then drained), or a mix of seasonal berries (such as raspberries or blueberries) would all work exceptionally well. Just ensure your chosen fruit is diced or chopped to a similar small size so it bakes evenly and fits neatly on top of the mini cheesecakes.
Whether to peel the apples or not is entirely a matter of personal preference and desired texture. Peeled apples will create a softer, more uniform texture in the spiced apple layer, which some individuals prefer for a smoother mouthfeel. However, leaving the skins on adds a lovely rustic touch, a bit of extra fiber, and can contribute to a more robust apple flavor. If you opt to keep the skins on, ensure your apples are thoroughly washed and any bruised spots are removed.
Absolutely, this easy apple cheesecake recipe can easily be doubled if you’re serving a larger crowd or simply want more delicious treats! When doubling, remember to multiply all the ingredient quantities by two. You’ll likely need two standard 12-cup muffin pans to accommodate the 24 mini cheesecakes. Just ensure your mixing bowls are large enough to handle the increased volume of batter, and you might need to bake in batches if your oven isn’t large enough for two pans simultaneously.
Yes, for an even quicker and more convenient version of this crumble apple cheesecake, you can certainly use canned or store-bought apple pie filling! This is a fantastic shortcut when you’re short on time but still want that wonderful homemade taste. If the apple pieces in the filling are large, simply chop them a bit smaller before spooning them over the cheesecake batter so they fit neatly and bake evenly on top of the mini portions.
While the oat crumble topping adds a fantastic textural contrast, a delightful buttery crunch, and a delicious layer of flavor that truly makes these cheesecakes special, you can certainly omit it if you prefer a different finish or are short on ingredients. If you choose to skip the crumble, for a smoother or alternative topping, you could instead add a simple caramel drizzle, a generous dollop of whipped cream, a dusting of cinnamon sugar, or even fresh berries just before serving.
The mini apple cheesecakes are ready when the edges of the cheesecake filling appear set and are slightly firm to the touch, and the crumble topping has achieved a beautiful golden brown color. The very center of the cheesecake might still have a slight, delicate jiggle when you gently shake the muffin pan. This jiggle indicates that they are perfectly cooked and will continue to firm up as they cool and chill in the refrigerator. Be careful not to overbake, as this can lead to a dry texture and potential cracks.
Yes, you can absolutely adapt this recipe to bake as a full-size apple crumble cheesecake! You will need an 8-inch or 9-inch springform pan. Prepare the graham cracker crust as instructed and press it evenly into the bottom of the pan. Pour the entire cheesecake filling over the crust, then evenly spoon the spiced apple mixture and crumble topping over the cheesecake. Bake at 325°F (160°C) for approximately 45-55 minutes, or until the edges are set and the center still has a slight jiggle. You may need to slightly adjust the crumble amount to ensure it covers the larger surface evenly.
Cheesecakes can sometimes sink in the middle for a couple of reasons. The most common causes are overmixing the batter, which incorporates too much air, or opening the oven door too soon during baking, causing a sudden temperature drop. While a sunken center might not be visually perfect, rest assured that it won’t affect the delicious taste! You can easily disguise it by adding a generous amount of extra apple crumble, a dollop of whipped cream, or a luscious caramel drizzle right before serving to make it look just as appealing.
It’s generally best practice to add liquid toppings like caramel sauce, chocolate ganache, or whipped cream right before you plan to serve the cheesecakes. If these toppings are added too early, especially before or during the chilling process, they can melt, spread, or soak into the delicate crumble layer, making it soggy or affecting the overall presentation. For optimal freshness and aesthetic appeal, fresh fruit garnishes are also best added just before serving.
🍽️ Explore More Delicious Mini Cheesecake Recipes You Might Enjoy
If you loved creating and tasting these delightful Mini Apple Crumble Cheesecakes, you’re in for a treat! Discover other fantastic mini cheesecake recipes perfect for any occasion, from holiday feasts to everyday indulgences:
Dessert
Mini Eggnog Cheesecakes
Dessert
No Bake Mini Chocolate Peanut Butter Cheesecakes
Dessert
Mini Key Lime Cheesecakes
Dessert
Mini Chocolate Cheesecakes
12
servings
Mini Apple Crumble Cheesecakes
Jamie Sherman
25
28
2
2
53
Print Recipe
Equipment Needed
-
12-cup muffin pan
-
cupcake liners
-
food processor (or a large zip-top bag and rolling pin)
-
mixing bowls (small, medium, and large are useful)
-
electric hand mixer (or stand mixer with paddle attachment)
-
rubber spatula
-
measuring cups and spoons
-
small glass or measuring cup (for pressing crust)
-
wire cooling rack
Ingredients
For the Graham Cracker Crust
-
1
cup
graham cracker crumbs -
2
tablespoons
granulated sugar -
4
tablespoons
unsalted butter, melted
For the Creamy Cheesecake Filling
-
16
ounces
cream cheese, room temperature (2 packages, full-fat recommended) -
½
cup
granulated sugar -
1
tablespoon
all-purpose flour -
1
tablespoon
cornstarch -
1
teaspoon
vanilla extract -
2
large eggs, room temperature
For the Spiced Apple & Crumble Topping
-
2
cups
finely diced apples (Granny Smith, Honeycrisp, or Gala recommended, peeled or unpeeled) -
3
tablespoons
granulated sugar -
1
tablespoon
vanilla extract -
2
teaspoons
cornstarch -
1
teaspoon
ground cinnamon -
½
cup
all-purpose flour (for crumble) -
½
cup
light brown sugar (packed, for crumble) -
½
cup
rolled oats (old-fashioned, not instant) -
2
tablespoons
butter, melted (for crumble)
Step-by-Step Instructions
Part 1: Preparing the Graham Cracker Crust
-
Begin by preheating your oven to 350°F (175°C). Next, carefully line a standard 12-cup muffin pan with paper cupcake liners. This will ensure easy removal of your mini cheesecakes later.
-
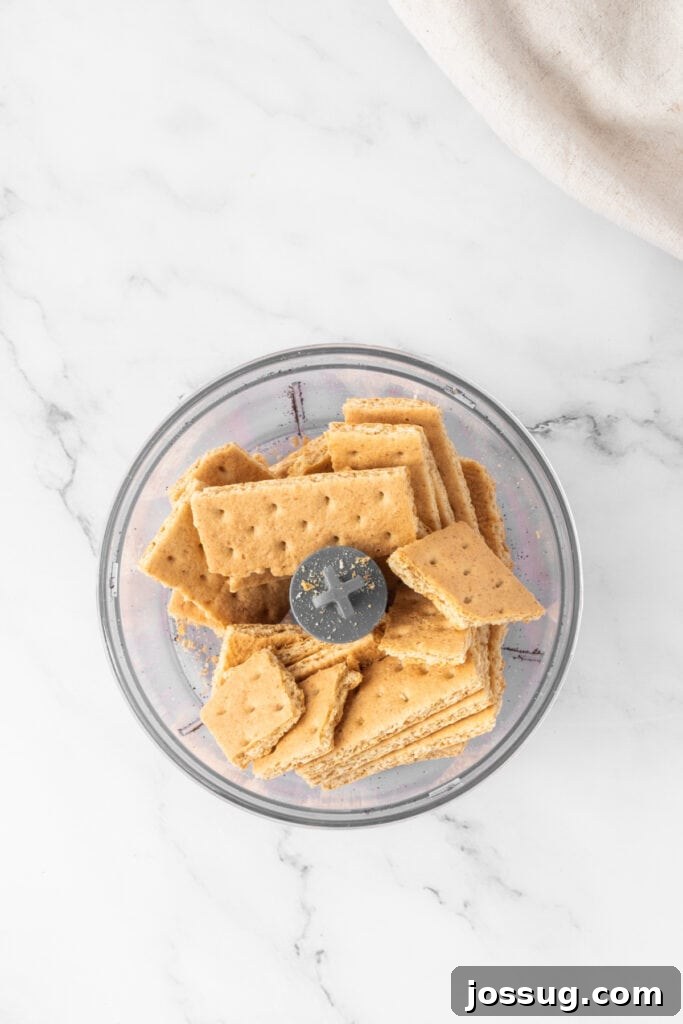
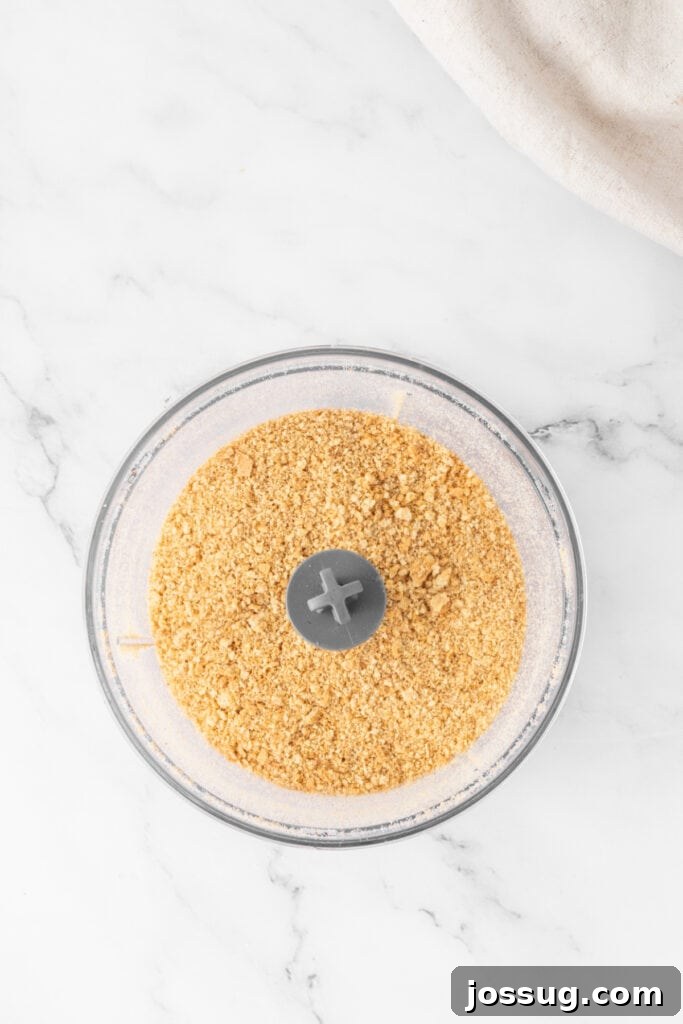
In a food processor, pulse the graham crackers until they form very fine, uniform crumbs. If you don’t have a food processor, you can place the graham crackers in a large zip-top bag and crush them thoroughly using a rolling pin until uniformly fine.1 cup graham cracker crumbs
-
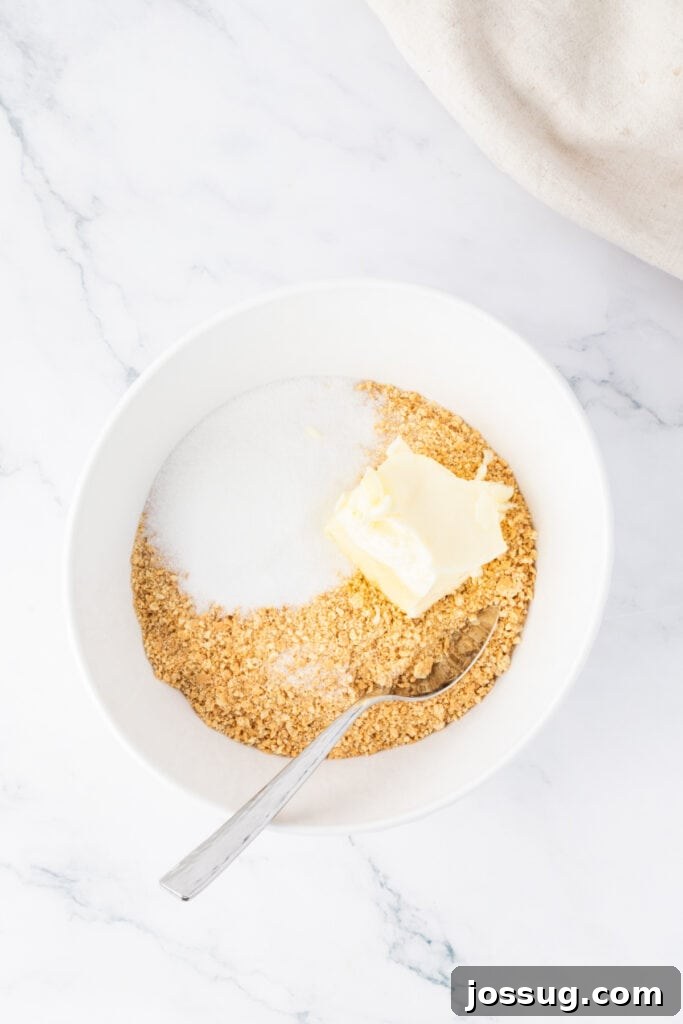
Transfer the graham cracker crumbs to a small mixing bowl. Stir in the granulated sugar and the melted unsalted butter until all the crumbs are moistened and thoroughly combined. The mixture should resemble wet sand.2 tablespoons granulated sugar,
4 tablespoons unsalted butter -
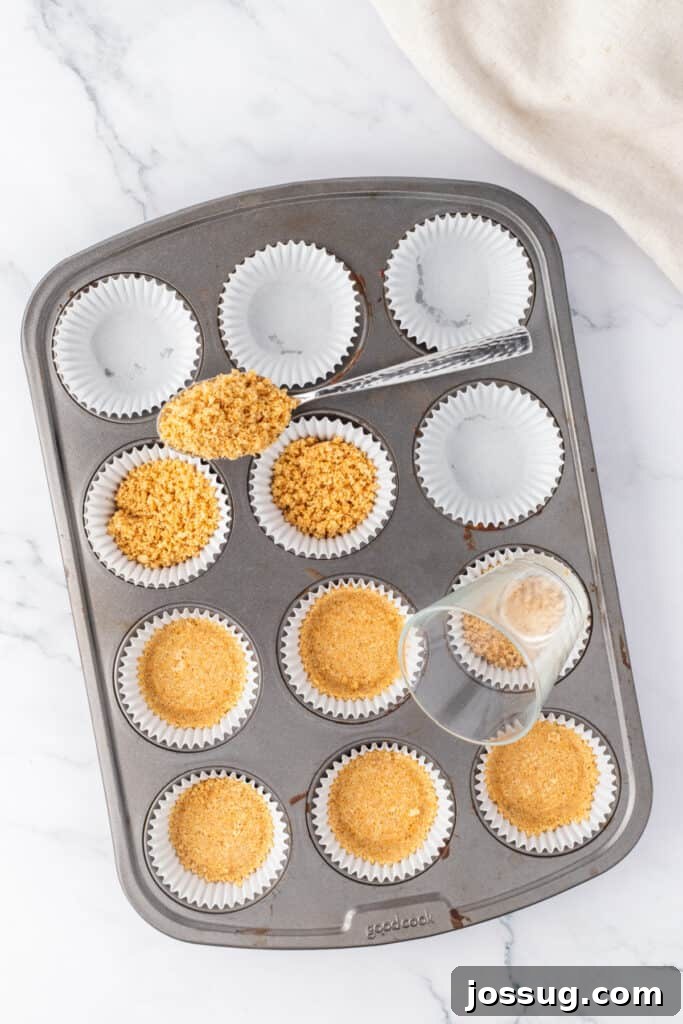
Divide the crumb mixture evenly among the 12 prepared cupcake liners, placing roughly 1 to 1.5 tablespoons in each. Use the bottom of a small glass or a measuring cup to firmly press the crumbs into an even, compact layer at the bottom of each liner.
-
Bake the crusts in the preheated oven for 5 minutes. This quick bake helps to set them, making them sturdy and preventing sogginess. Once baked, remove the muffin pan from the oven and set it aside to cool slightly while you prepare the cheesecake filling.
Part 2: Crafting the Creamy Cheesecake Filling
-
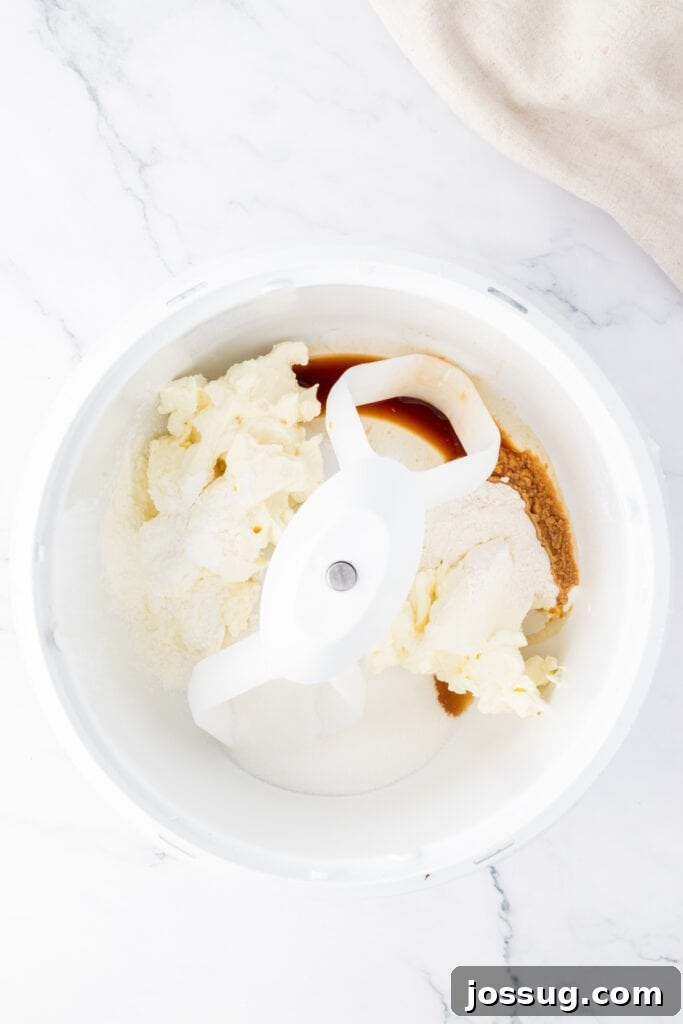
In a large mixing bowl (or the bowl of a stand mixer fitted with the paddle attachment), combine the softened cream cheese and granulated sugar. Beat them together on low speed until the mixture is completely smooth and creamy, ensuring there are no lumps remaining. Scrape down the sides of the bowl as needed.16 ounces cream cheese,
1/2 cup granulated sugar -
Next, add the all-purpose flour, cornstarch, and vanilla extract to the cream cheese mixture. Mix on low speed, just until these dry ingredients are fully incorporated and the batter is smooth. It’s important not to overmix at this stage, as too much air can cause cracks later.1 tablespoon all-purpose flour,
1 tablespoon cornstarch,
1 teaspoon vanilla extract -
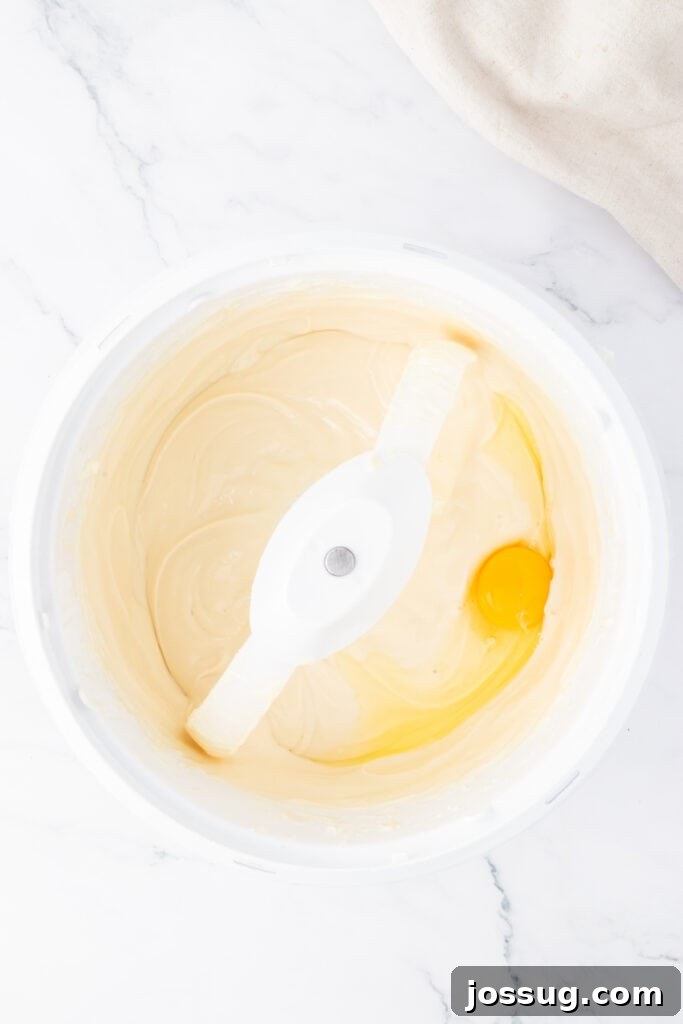
Add the large eggs, one at a time. Mix on very low speed only until each egg is just combined with the batter. After each egg, stop and scrape down the sides of the bowl with a rubber spatula to ensure everything is evenly mixed. Stop mixing as soon as the last egg is incorporated; minimal mixing after the eggs are in is crucial for a smooth, crack-free cheesecake.2 large eggs
-
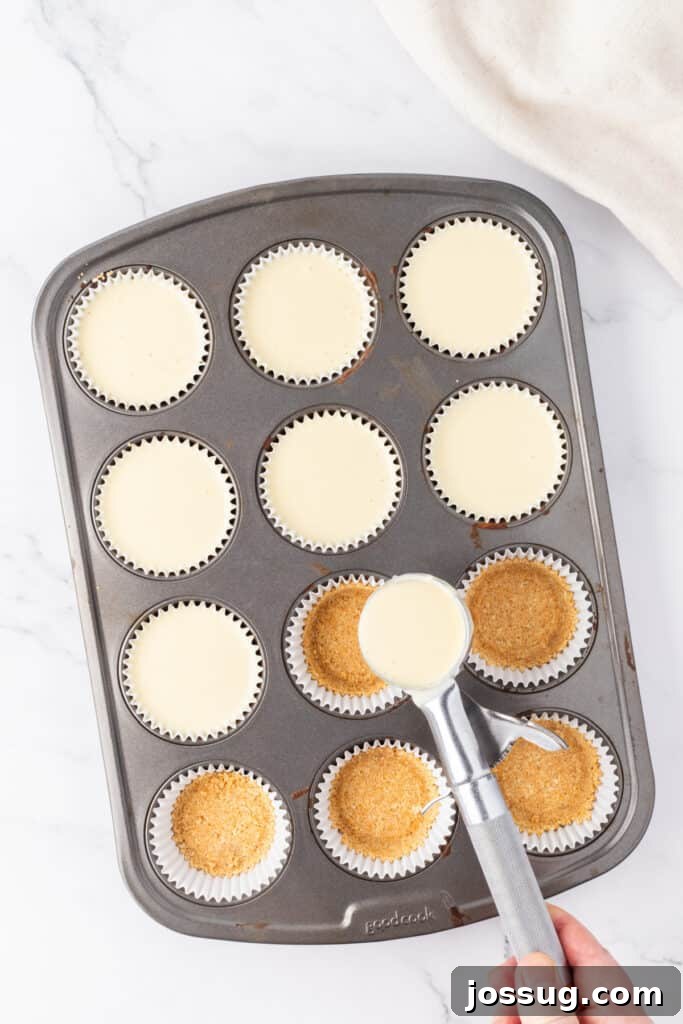
Carefully divide the cheesecake mixture evenly among the 12 prepared cupcake liners with the cooled graham cracker crusts, filling each about three-quarters full.
Part 3: Assembling and Baking the Apple Crumble Cheesecakes
-
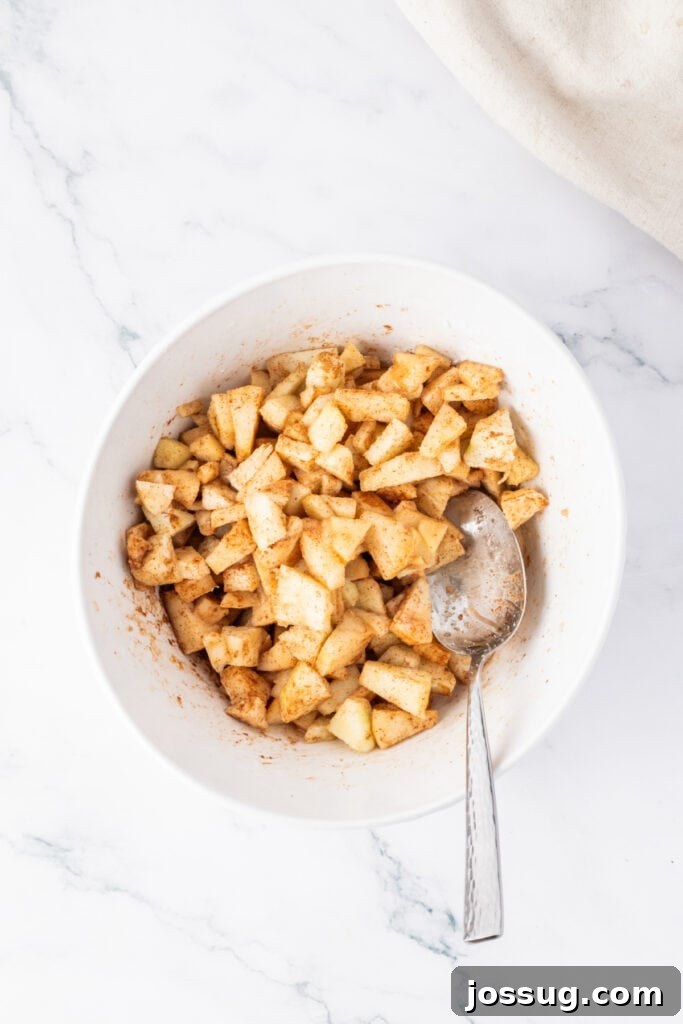
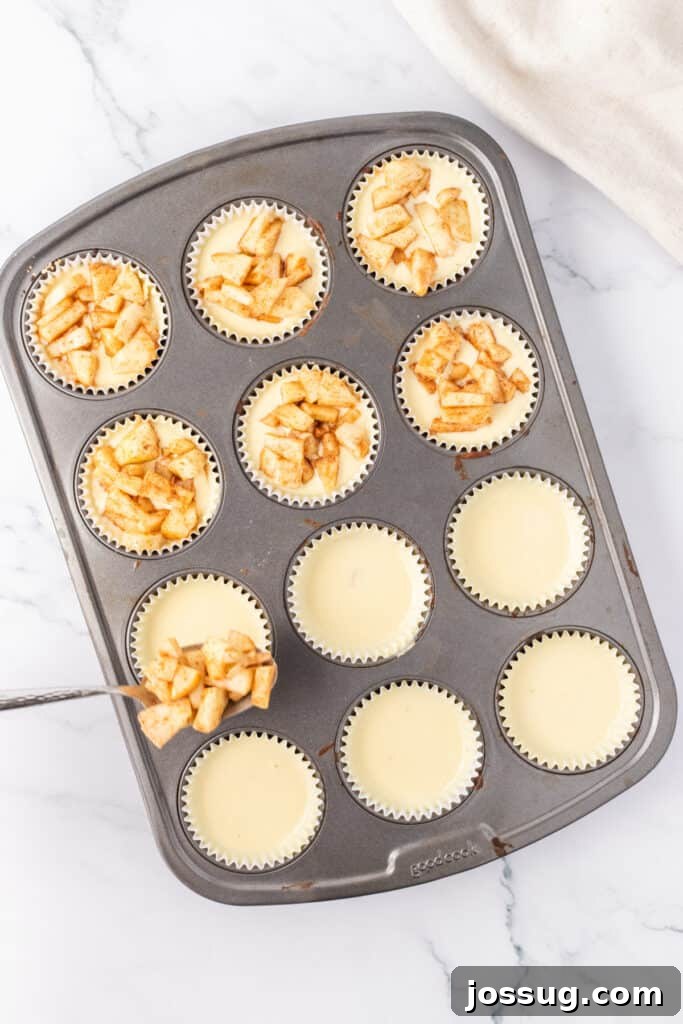
In a medium bowl, combine the finely diced apples with the granulated sugar, vanilla extract, cornstarch, and ground cinnamon. Stir well until all the apple pieces are thoroughly coated with the aromatic spice mixture.2 cups finely diced apples,
3 tablespoons granulated sugar,
1 tablespoon vanilla extract,
2 teaspoons cornstarch,
1 teaspoon ground cinnamon -
Spoon approximately 1 heaping tablespoon of the spiced apple mixture over the top of each cheesecake filling layer in the muffin pan. Distribute it evenly over the surface.
-
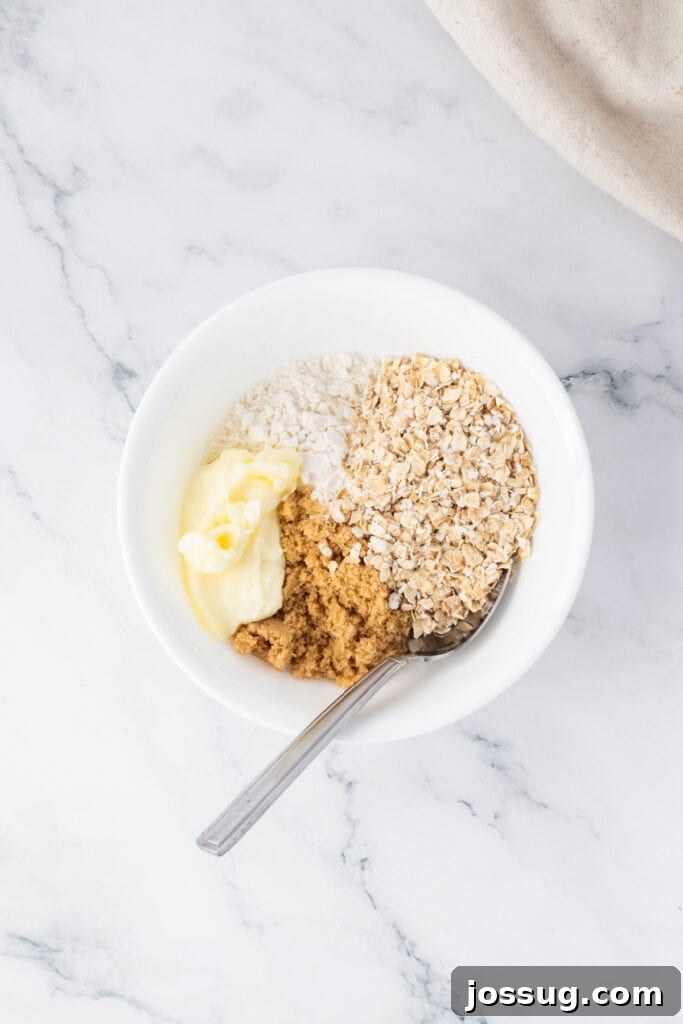
In a separate small bowl, prepare the crumble topping. Combine the all-purpose flour, light brown sugar, and rolled oats. Pour in the melted butter and mix with a fork or your fingertips until the mixture is crumbly and resembles coarse, wet sand.1/2 cup all-purpose flour,
1/2 cup light brown sugar,
1/2 cup rolled oats,
2 tablespoons butter -
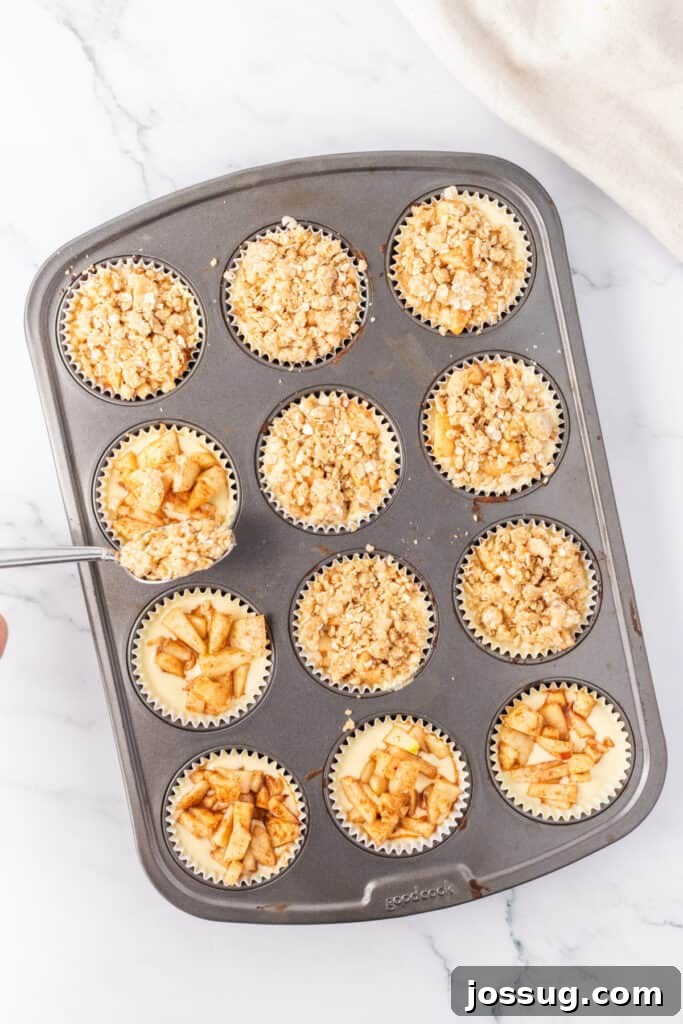
Generously sprinkle about 2 teaspoons of the prepared crumble topping over each cheesecake, ensuring a nice, even layer that covers the apples and cheesecake filling.
-
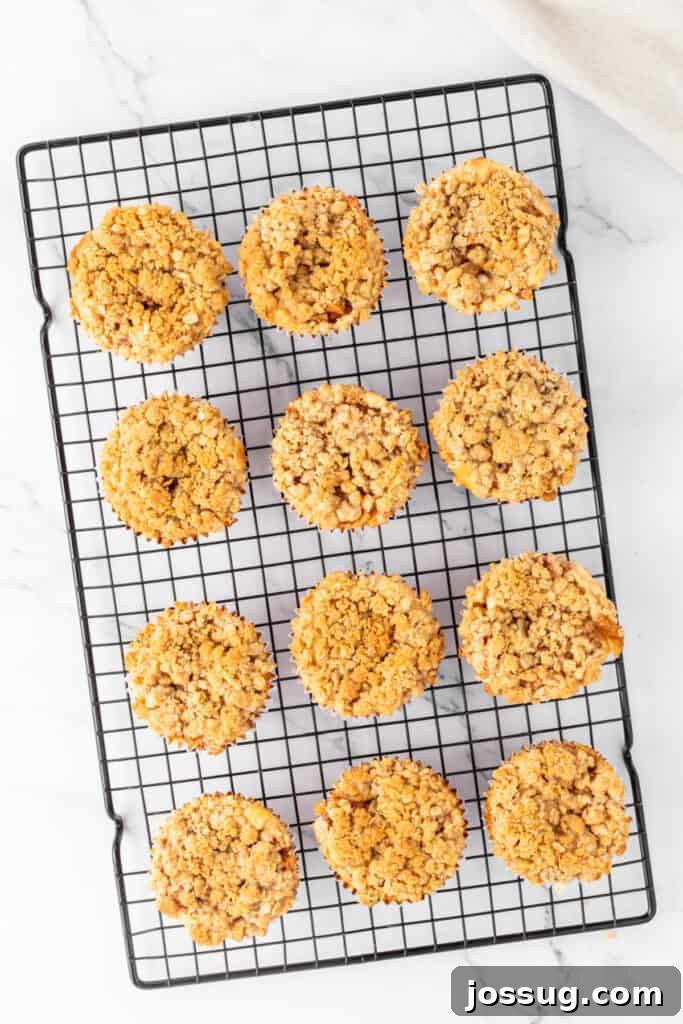
Bake the mini apple crumble cheesecakes in the preheated oven for 23-28 minutes, or until the tops are golden brown, the crumble is crisp, and the edges of the cheesecake appear set with just a slight jiggle in the center.
-
Remove the muffin pan from the oven and allow the cheesecakes to cool completely in the pan at room temperature. This gradual cooling process is absolutely essential to prevent cracks and maintain their delicate structure. Once fully cooled, transfer the muffin pan to the refrigerator and chill for at least 2 hours, or preferably overnight, before serving.
-
Once thoroughly chilled, carefully remove the mini cheesecakes from their liners. Garnish with your favorite toppings, such as a luscious drizzle of warm caramel sauce, a dollop of freshly whipped cream, or an extra sprinkle of cinnamon. Serve and enjoy these delightful autumn treats!
Important Notes & Storage Tips
🥡 Storage Instructions
- Store your baked Mini Apple Crumble Cheesecakes in an airtight container or under a cake dome in the refrigerator for up to 5 days. Ensuring they are well covered is crucial to prevent them from drying out or absorbing other food odors.
- For the best taste and texture, you can either enjoy them chilled directly from the fridge, or allow them to come closer to room temperature for about 15-20 minutes before serving, depending on your preference.
♨️ Reheating & Serving Suggestions
- These cheesecakes are absolutely delicious served cold, straight from the refrigerator, or allowed to come to a slightly cooler room temperature.
- If you desire a warm dessert experience, you can gently microwave an individual cheesecake for 10-15 seconds. Be cautious not to overheat, as this can negatively alter the delicate texture of the cheesecake.
❄️ Freezing for Future Enjoyment
- These mini cheesecakes freeze beautifully, making them excellent for longer storage! Once completely cooled, you can freeze them individually on a baking sheet until solid (this prevents them from sticking together), then transfer them to an airtight freezer-safe container or bag. They will keep well for up to 2 months.
- To thaw, simply place the frozen cheesecakes in the refrigerator overnight. Avoid thawing them at room temperature for extended periods to maintain their optimal structure and freshness.
💡 Additional Baking Tips for Best Results
- Room Temperature is Key: Always ensure all your dairy ingredients, especially cream cheese and eggs, are at room temperature before you begin mixing. This is absolutely crucial for a smooth, lump-free batter that bakes evenly without cracks.
- Avoid Overmixing: Do not overmix the cheesecake batter, particularly after adding the eggs. Overmixing incorporates too much air, which can cause the cheesecake to rise excessively during baking and then dramatically crack upon cooling. Mix just until combined.
- Don’t Overbake: Bake just until the edges are set and the center has a slight jiggle. The cheesecakes will continue to cook slightly and firm up as they cool. Overbaking is a common culprit for dry textures and cracks.
- Enhance Apple Flavor: For an extra layer of flavor and slightly softer apples, you can lightly sauté the diced apples with the spices and a tablespoon of butter in a small pan for 5-7 minutes before spooning them onto the cheesecake. This intensifies the apple flavor and ensures they are perfectly tender.
🍳 Alternate Cooking Methods
- Air Fryer: If you prefer using an air fryer, you can bake these mini cheesecakes at 300°F (150°C) for approximately 15-17 minutes. Keep a close eye on them, as air fryers can vary significantly in temperature and cook times. Ensure the crumble is golden and the cheesecake is set, checking frequently towards the end of the cooking time.
- Toaster Oven: A toaster oven can also be used, following the regular baking directions (350°F / 175°C). However, be aware that toaster ovens often have hot spots and can brown items much faster than a conventional oven. Monitor your cheesecakes very closely and adjust baking time as needed to prevent burning.
♻️ Creative Ways to Enjoy Leftovers
- Leftover mini cheesecakes are truly fantastic as an afternoon snack, a light dessert, or a delightful treat at any time of day.
- For a unique and quick treat, crumble any remaining cheesecakes over a scoop of vanilla ice cream, a bowl of plain Greek yogurt, or even warm oatmeal for a surprisingly delicious and comforting breakfast or snack.
Estimated Nutrition Information
Serving:
1 cheesecake
,
Calories:
362 kcal
,
Carbohydrates:
41 g
,
Protein:
5 g
,
Fat:
20 g
,
Saturated Fat:
12 g
,
Polyunsaturated Fat:
1 g
,
Monounsaturated Fat:
5 g
,
Trans Fat:
0.2 g
,
Cholesterol:
81 mg
,
Sodium:
194 mg
,
Potassium:
130 mg
,
Fiber:
1 g
,
Sugar:
28 g
,
Vitamin A:
734 IU
,
Vitamin C:
1 mg
,
Calcium:
61 mg
,
Iron:
1 mg
Nutrition information is automatically calculated and is an approximation only. Values may vary significantly based on specific ingredients, portion sizes, and preparation methods.
Enjoyed this recipe? Leave a comment below!
Your feedback helps us create more delicious content for you and other home bakers.