
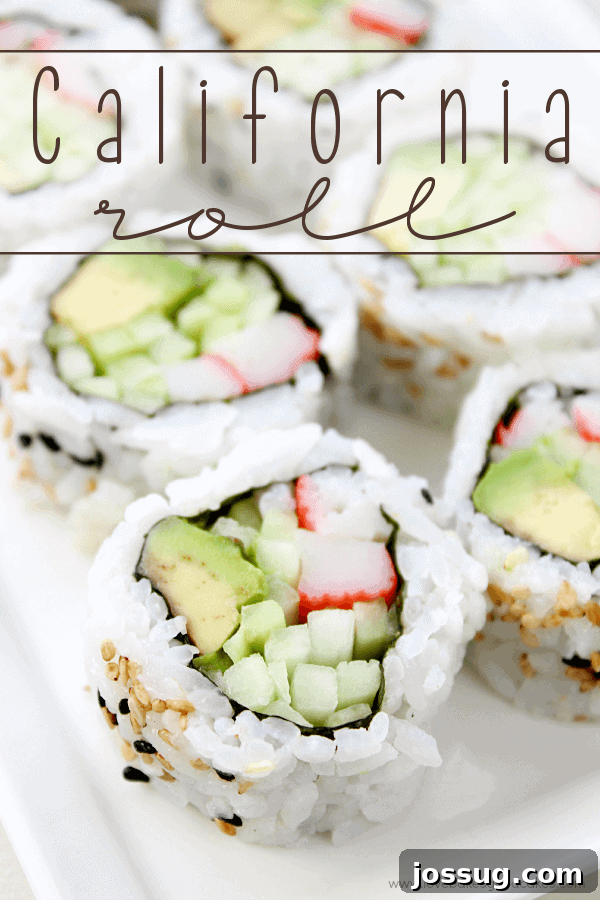
Craving the fresh, delicate flavors of sushi but feeling intimidated by the thought of making it yourself? It’s time to banish those fears! Crafting your own California Rolls at home is not only achievable but incredibly rewarding. This iconic roll, a delightful medley of succulent imitation crab, creamy avocado, and crisp cucumber, offers a perfect balance of taste and texture, making it an ideal choice for a light meal, a satisfying snack, or an impressive appetizer for guests. Skip the costly takeout and embark on a culinary adventure that brings the joy of sushi straight into your kitchen.
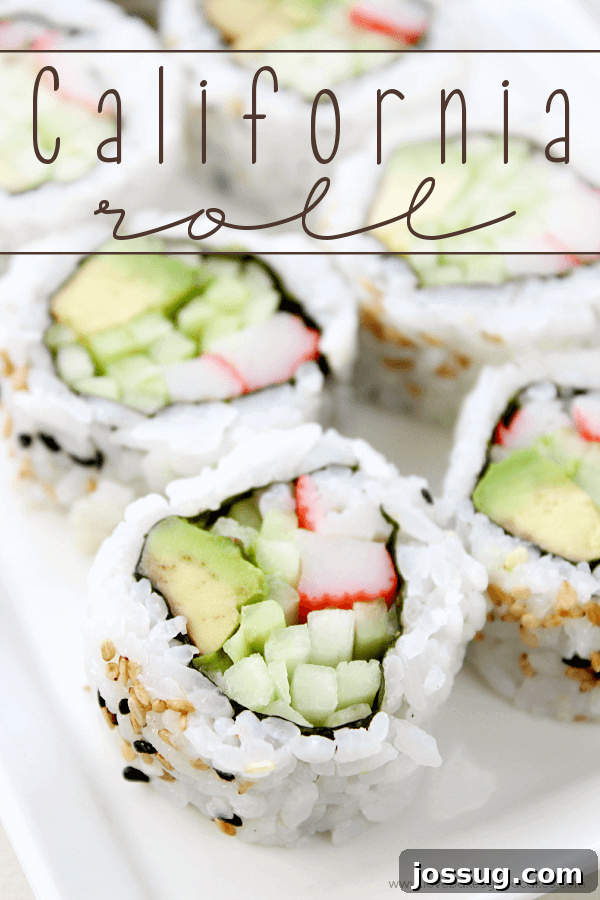
The journey to homemade sushi often begins with a touch of skepticism. For many, including myself, the intricate art of sushi rolling seems like a skill reserved for seasoned culinary professionals. My initial apprehension stemmed from two main concerns: the perceived complexity of the process and a personal preference for cooked ingredients over raw fish, which is a common misconception about all sushi. However, the California Roll stands out as a fantastic entry point for aspiring sushi makers. It’s an “inside-out” roll (rice on the outside) and typically features cooked imitation crab, making it accessible and appealing to a wider audience, including those new to sushi or with dietary preferences.
My entire outlook on preparing sushi at home underwent a dramatic shift with the discovery of an ingenious little helper: the Sushiquik kit. This innovative sushi-making tool completely revolutionized my kitchen experience. It not only demystified the rolling process but also ignited a spark of creativity, leading to a host of new recipe ideas. What once seemed like a daunting task transformed into an engaging and fun family activity. These homemade California Rolls, made with surprising ease, are merely the tip of the iceberg of what’s possible in your home sushi bar.
The Enduring Appeal of the California Roll: A Beginner’s Delight
The California Roll holds a revered status in the global sushi landscape. It’s often the gateway roll for newcomers to Japanese cuisine, quickly becoming a beloved staple thanks to its mild, harmonious flavors and universally appealing ingredients. Believed to have originated in the United States, this roll played a pivotal role in popularizing sushi in Western cultures, offering a familiar and comforting taste profile that eased many into the broader world of sushi. Its lasting popularity is a testament to its delightful interplay of textures: the soft, yielding sushi rice, the buttery creaminess of ripe avocado, the refreshing crunch of cucumber, and the delicate sweetness of imitation crab, all held together by a thin, savory sheet of nori.
For my family, particularly my children, the California Roll is an absolute favorite. A visit to our cherished local Asian restaurant invariably includes an order of these rolls, often devoured as an appetizer. While my youngest are still exploring new tastes, my older sons are quite adventurous eaters, always eager to sample diverse sushi varieties. For them, a restaurant sushi outing feels like a special indulgence, a culinary treat that Mom doesn’t usually prepare at home. This perspective, however, has delightfully shifted since we began making our own rolls, turning a restaurant luxury into an exciting and hands-on kitchen project everyone can enjoy.
Simplifying Sushi Making with the Sushiquik Advantage
The true catalyst for my successful foray into homemade sushi was the incredibly user-friendly Sushiquik sushi making kit. Engineered for maximum ease, it promises to be the most straightforward and effective method for creating sushi in your own kitchen, transforming a potentially intimidating or messy endeavor into a genuinely enjoyable experience for the whole family. The kit thoughtfully includes all the essential components required for rolling flawless sushi, ensuring consistent and beautiful results even for absolute beginners. Gone are the days of wrestling with traditional bamboo mats or ending up with lopsided rolls; the Sushiquik system provides clear guidance, making each step of the rolling process virtually foolproof.
I must confess, our initial attempts at rolling were somewhat charmingly “rustic.” The first couple of rolls possessed a unique character, let’s say. Yet, with each subsequent roll, our confidence soared, and our technique rapidly improved. By the third and fourth attempts, we were genuinely hitting our stride, producing perfectly formed, aesthetically pleasing rolls that tasted just as wonderful as they looked. My son, Isaac, even became an adept “hand model,” proudly demonstrating his newfound rolling prowess with the Sushiquik. The learning curve was astonishingly quick, transforming us from hesitant sushi novices into enthusiastic home sushi artisans in just one afternoon. This remarkable accessibility truly democratizes the sushi-making experience, allowing anyone to partake in this delightful culinary craft, regardless of their prior kitchen skills.

Crafting Your Perfect California Roll: A Detailed Guide
There’s a special joy in gathering loved ones in the kitchen, especially on a sweltering Phoenix summer day, to create something as refreshingly cool and delicious as California Rolls. The crisp, fresh ingredients provide a welcome escape from the heat, and the hands-on nature of sushi making proves to be an engaging and fun activity for all ages. My younger children, Gabriel and Abby, enthusiastically pitched in, carefully spreading the perfectly sticky sushi rice and meticulously arranging their chosen fillings. It’s a culinary journey that captivates everyone involved, from the careful preparation of each component to the exciting final roll.
The Cornerstone: Flawless Sushi Rice
Before you even think about rolling, mastering the art of sushi rice is absolutely essential. It is the very foundation of any exceptional sushi roll, and perfecting its texture and flavor is paramount. A properly prepared batch ensures the ideal sticky consistency and a subtle, balanced seasoning that elevates all the other ingredients. Prior to this adventure, I had never attempted to prepare sushi rice from scratch. A quick, targeted online search led me to an outstanding Sushi Rice recipe on No Recipes, which offered wonderfully clear, step-by-step instructions complemented by helpful photographic visuals. I wholeheartedly recommend consulting this resource if you’re new to making sushi rice, as it truly demystifies what can seem like a complex process, transforming it into a straightforward and achievable task. Remember, the ideal sushi rice should be slightly firm yet sticky, perfectly seasoned with a blend of rice vinegar, sugar, and salt, and cooled to room temperature before it’s used in your rolls.
Key Ingredients for Your Signature California Roll
The inherent beauty of the California Roll lies in its delightful simplicity and the harmonious blend of its core ingredients. Here’s a detailed look at what you’ll need to assemble this fresh and utterly satisfying creation:
- Prepared Sushi Rice: This is the heart of your roll. Ensure it’s cooked, seasoned, and cooled to room temperature according to a trusted recipe. Its slightly sticky texture is crucial for holding the roll together.
- Nori Sheets: These dried seaweed sheets provide the essential wrapper and a subtle, savory oceanic note. Half-sheets are typically used for individual rolls to achieve a manageable size.
- Imitation Crab Meat: Often referred to as “surimi,” this tender, slightly sweet, and savory seafood stick is a signature ingredient. Choose high-quality strips for the best flavor and texture.
- Cucumber Strips: Opt for crisp varieties like Persian or English cucumbers. Slice them into thin, uniform matchsticks to ensure a refreshing crunch in every bite without overpowering the other flavors.
- Avocado Strips: Select a perfectly ripe yet firm avocado. Its rich, creamy texture provides a luxurious mouthfeel and healthy fats that complement the other ingredients beautifully. Slice it into even strips to distribute its creaminess throughout the roll.
- Sesame Seeds (optional): Toasted white or black sesame seeds are often sprinkled over the rice layer. They add an attractive visual appeal and a delightful nutty flavor and aroma.
When serving, consider enhancing your homemade rolls with classic Japanese condiments. A dab of spicy wasabi, a splash of savory soy sauce, and a few slices of tangy pickled ginger can elevate the experience, offering contrasting flavors and palate cleansers.
4
servings
California Roll Recipe
Jamie Sherman
30
30
Print Recipe
Ingredients
- Prepared Sushi Rice (sufficient for 4-6 rolls)
- 4-6 Nori Sheets (cut in half lengthwise)
- Imitation Crab Meat strips (approximately 1 pack, shredded or in stick form)
- Cucumber strips (from 1 small cucumber, thinly sliced into matchsticks)
- Avocado strips (from 1 large ripe avocado, sliced)
- Sesame Seeds, optional, toasted white or black, for garnish
- Small bowl of water mixed with a splash of rice vinegar (for dampening hands and knife)
Optional serving accompaniments:
- Wasabi, Soy Sauce, Pickled Ginger
- Sriracha Mayonnaise (for a creamy, spicy drizzle)
Instructions
-
Prepare Your Workspace: Lay out your sushi rolling mat (or the Sushiquik white mat) on a clean, dry surface. Have your small bowl of vinegared water ready nearby to keep your hands moist and prevent the sticky rice from clinging.
-
Place the Nori: Take one half-sheet of nori and place it rough-side up onto the center of your rolling mat. If you are using the Sushiquik kit, align the nori according to its specific guides for optimal rolling.
-
Spread the Sushi Rice: Dip your hands in the vinegared water to prevent sticking. Take a portion of prepared sushi rice (about 3/4 to 1 cup for a half sheet of nori) and gently spread it evenly over the entire surface of the nori. Aim for a thin, consistent layer that extends to all four edges, forming a solid and even base.
-
Add Sesame Seeds: If desired, gently sprinkle toasted sesame seeds evenly over the rice layer. This not only enhances the visual appeal but also introduces a pleasant, subtle nutty flavor and aroma.
-
Flip the Nori: Very carefully, flip the nori sheet over so that the rice layer is now facing down onto the mat, and the smooth, shiny side of the nori is facing up. This is the crucial step for creating the “inside-out” style of a California Roll.
-
Arrange Fillings: Along the edge of the nori that is closest to you, begin to neatly arrange your chosen fillings. Lay 2-3 imitation crab meat strips, followed by an even line of cucumber matchsticks and then the avocado slices. Be mindful not to overfill the roll, as this can make it exceedingly difficult to roll tightly and keep its shape.
-
Begin the Roll: Using the rolling mat, gently lift the edge closest to you and begin to roll it tightly over the fillings. As you roll, tuck the edge of the nori underneath, aiming to meet the other side of the fillings. Apply firm but gentle pressure to create a compact, sturdy cylinder.
-
Complete the Roll: Continue rolling forward, maintaining consistent, even pressure until the entire roll is formed. Use the mat to help shape it into a neat, uniform cylinder. For the best structural integrity, give the roll a final gentle squeeze along its length to ensure all ingredients are tightly bound.
-
Slice the Roll: Carefully transfer the completed roll to a clean cutting board. For clean, precise cuts, moisten a very sharp knife with vinegared water before each slice. If using the Sushiquik, take advantage of its convenient cutting guide to achieve perfectly uniform pieces. Slice the roll into 6-8 equal segments.
-
Serve Immediately: Arrange your beautifully crafted California Rolls on a serving plate. Present them with your favorite accompaniments, such as soy sauce, wasabi, and pickled ginger, and savor the fresh, homemade flavors.
Notes
- Serve with traditional Japanese condiments such as wasabi (for a spicy kick), low-sodium soy sauce (for umami depth), and tangy pickled ginger (to cleanse the palate between bites).
- For an extra layer of flavor and a creamy texture, consider drizzling a thin line of Sriracha mayonnaise over your finished rolls or sprinkling them with Japanese Togarashi seasoning.
- Feel free to experiment with other non-traditional fillings like thinly sliced mango for a sweet counterpoint, or a small amount of cream cheese for added richness and a unique twist.
Nutrition Information (per serving, approximate)
Calories: 152kcal
,
Carbohydrates: 19g
,
Protein: 4g
,
Fat: 7g
,
Saturated Fat: 1g
,
Polyunsaturated Fat: 1g
,
Monounsaturated Fat: 5g
,
Cholesterol: 3mg
,
Sodium: 166mg
,
Potassium: 257mg
,
Fiber: 4g
,
Sugar: 1g
,
Vitamin A: 203IU
,
Vitamin C: 6mg
,
Calcium: 9mg
,
Iron: 0.4mg
Nutrition information is automatically calculated and should only be used as an approximation. Actual values may vary significantly based on specific ingredients, portion sizes, and preparation methods.
Elevate Your Sushi Game: Essential Tips for Success
Creating beautiful and delicious sushi at home is an art that becomes easier with practice and a few key techniques. Here are some invaluable tips to ensure your sushi-making endeavors are always a triumph:
- Maintain Moisture: Always keep a small bowl of water, ideally mixed with a splash of rice vinegar (this is often called Tesu or “hand dipping liquid”), within arm’s reach. Regularly dip your fingers and the blade of your knife into this liquid to prevent the sticky sushi rice from adhering. This simple trick makes a significant difference in handling the rice cleanly.
- Avoid Overfilling: It’s a common temptation to load your rolls with an abundance of delicious fillings. However, remember that less is often more in sushi making. Overfilling can make the roll challenging to close neatly and securely, often leading to rolls that fall apart when sliced or handled. Aim for a balanced amount that allows for a tight, cohesive roll.
- Apply Firm, Even Pressure: When you roll the sushi, it’s crucial to apply consistent, firm pressure. This ensures that all the ingredients are tightly packed together within the rice and nori. A well-packed roll maintains its structural integrity, making it much easier to slice and enjoy without messy crumbling.
- Use a Very Sharp, Damp Knife: A sharp knife is your best friend when it comes to slicing sushi. Before each cut, wipe the blade clean and moisten it with your vinegared water. This technique prevents the knife from tearing the delicate nori or squishing the soft rice and fillings, resulting in perfectly clean, restaurant-quality slices.
- Embrace Practice: Don’t be disheartened if your first few rolls don’t look like they came straight from a sushi bar. Sushi making is a skill that improves with repetition. Each attempt provides valuable learning, building your confidence and refining your technique. The most important thing is to enjoy the process and the delicious outcome!
- Ingredient Quality Matters: While the California Roll uses imitation crab, sourcing fresh, high-quality cucumber and perfectly ripe avocado will significantly impact the flavor and texture of your final product.
Expand Your Culinary Horizons with Sushi Creations
Once you’ve confidently mastered the basics of the California Roll, an entire universe of homemade sushi possibilities opens up before you! The fundamental principles and techniques you’ve acquired can be seamlessly applied to an endless array of other delectable variations. Feel empowered to experiment with different cooked proteins, such as succulent shrimp tempura, grilled chicken seasoned with teriyaki, or even smoked salmon. Introduce a wider spectrum of crunchy, colorful vegetables like thinly sliced bell peppers, shredded carrots, or blanched asparagus. Don’t shy away from exploring unique sauces and creative seasonings to personalize your rolls even further. Whether it’s the versatile Sushiquik kit or a traditional bamboo rolling mat, your chosen tool will remain a reliable companion as you venture into more elaborate and inventive sushi combinations. The potential for customization is truly boundless, and the immense satisfaction of crafting rolls that perfectly cater to your exact preferences is an unparalleled culinary delight.
Other Fresh and Easy Recipes You Might Love
- California Chicken Wrap
- California Chicken Salad
- Deli-Style Crab Salad
- Asian Cucumber Salad
- Zesty Cucumber Tomato Salad
Did you enjoy making this recipe? Share your experience below!
Your feedback helps us create more delicious content and inspires other home cooks.