
Deliciously Easy Brownie Trifle: The Ultimate Layered Chocolate Dessert
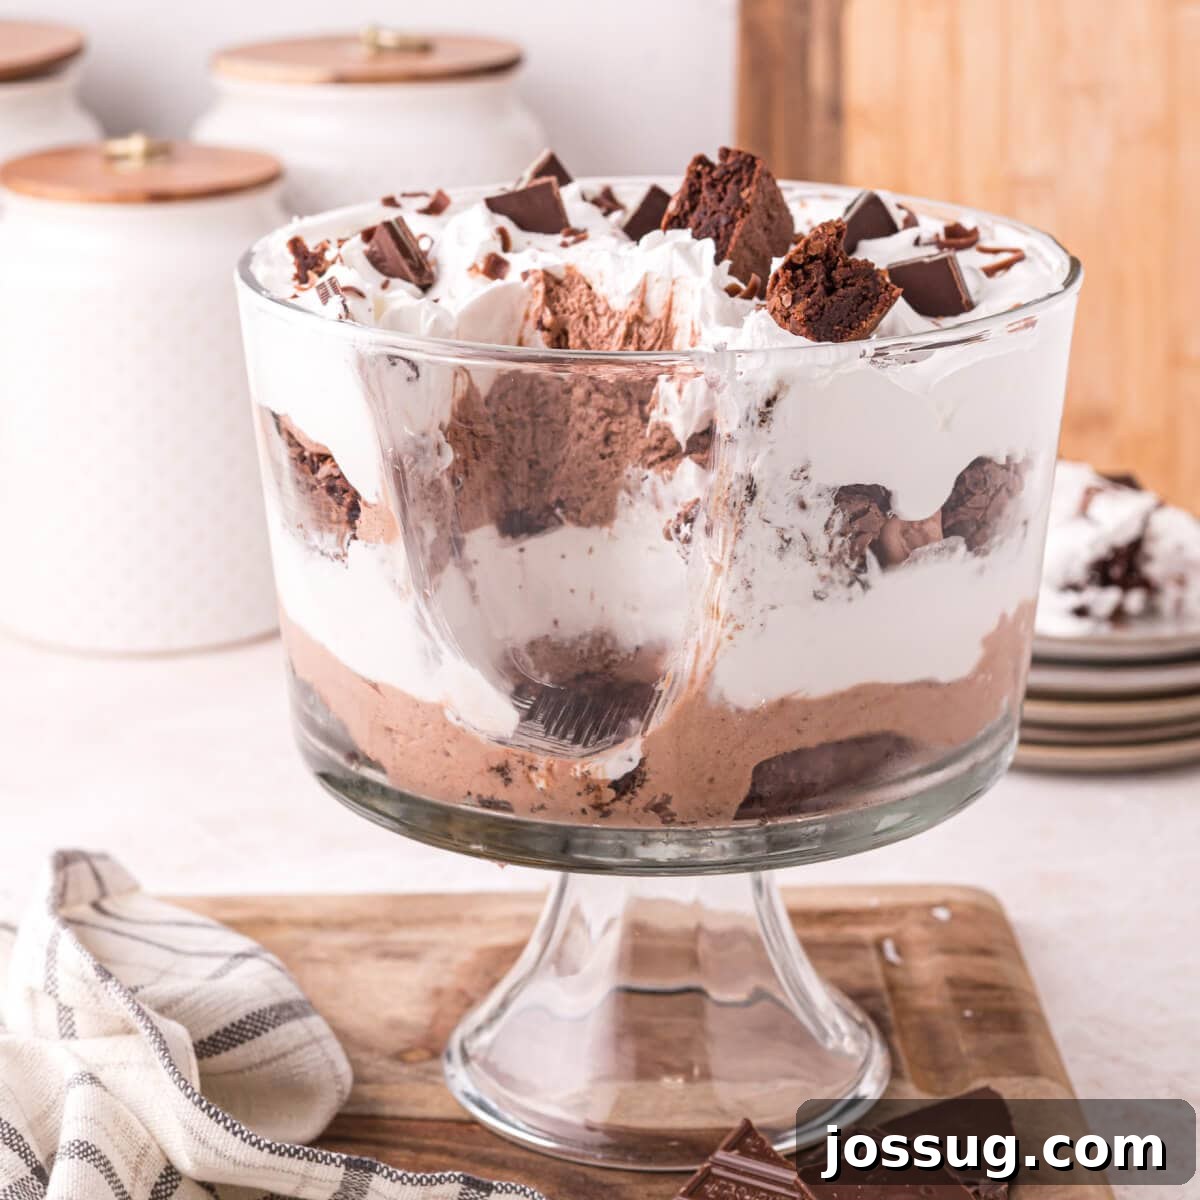
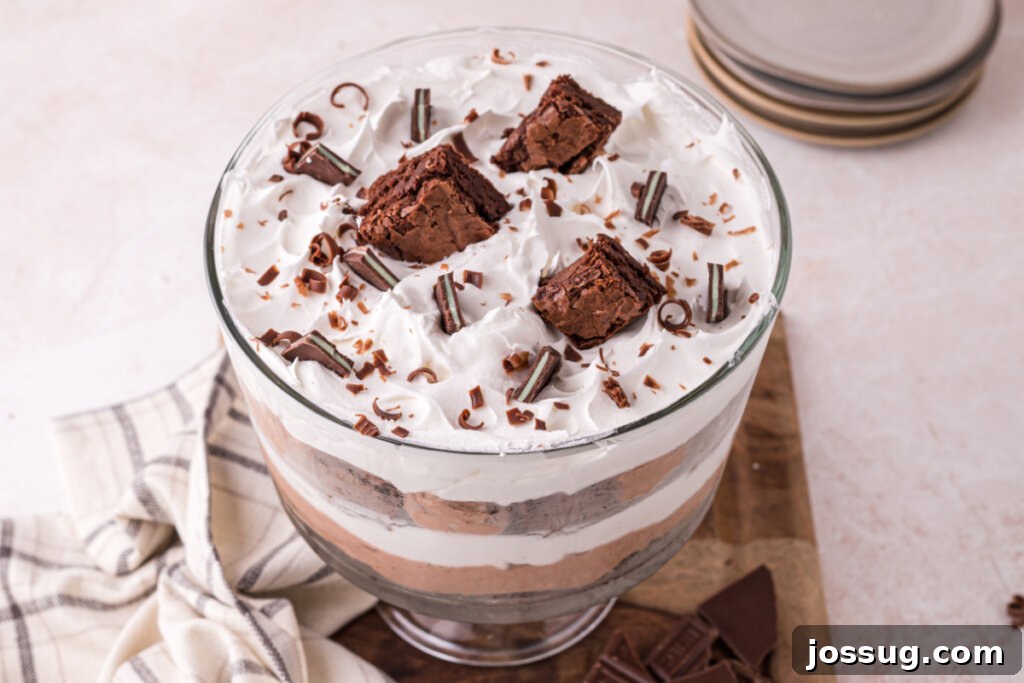
Prepare to fall in love with the most irresistible and effortlessly elegant dessert: the Brownie Trifle! This show-stopping creation takes humble brownies and elevates them into a magnificent, layered masterpiece. Perfect for chocolate enthusiasts, it combines tender brownie chunks, silken chocolate pudding, and clouds of whipped topping, all beautifully arranged in a trifle bowl. It’s surprisingly simple to make, yet delivers an impressive “wow” factor that will delight your family and guests. Get ready to transform your dessert game with this unbelievably decadent and easy-to-prepare chocolate trifle!
What is a Trifle? A Classic Dessert with a Modern Twist
A trifle is a celebrated dessert that hails from England, renowned for its beautiful layers and delightful textures. Traditionally, it features a harmonious blend of sponge cake, fresh or stewed fruit, rich custard, jelly (gelatin), and a generous crown of whipped cream. Each spoonful offers a different experience, a symphony of flavors and consistencies that has made trifles a beloved centerpiece at gatherings for centuries.
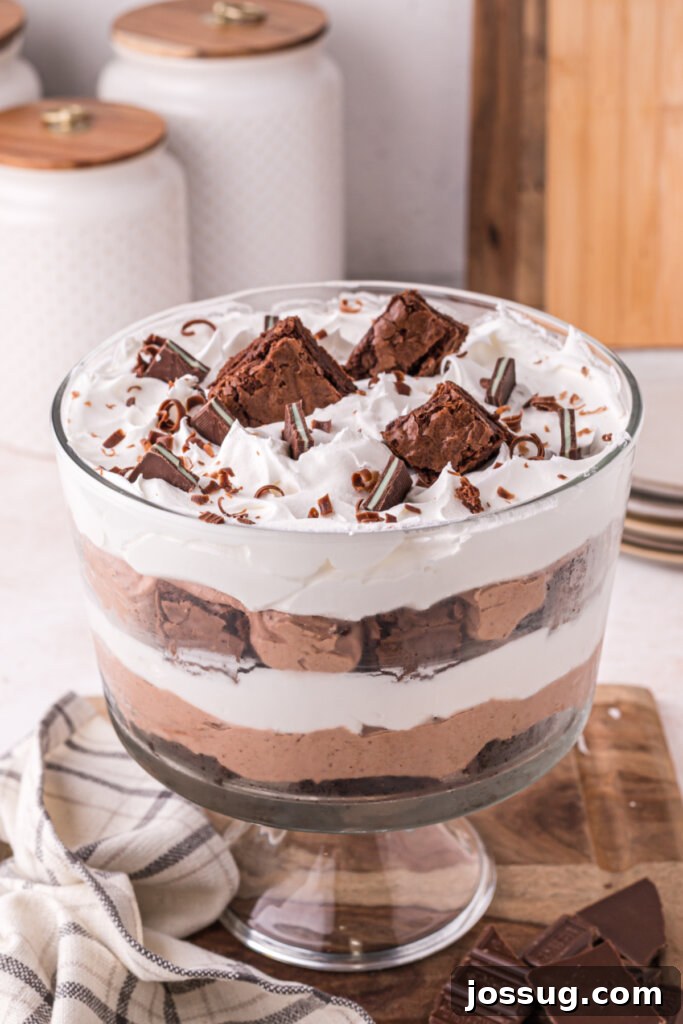
While classic trifles hold a special place, today we’re putting an exciting chocolatey spin on this timeless treat. Our Brownie Trifle takes the traditional concept and infuses it with deep chocolate decadence. Instead of sponge cake, we use rich, fudgy brownies. We swap out traditional custard for creamy chocolate pudding and layer it with luscious whipped topping, all culminating in a sprinkling of shaved chocolate. It’s a modern interpretation that keeps the spirit of the trifle alive while catering to every chocolate lover’s dream.
If you’re new to making trifles, don’t worry – this recipe is designed for simplicity and success! In many ways, it’s even easier than baking a traditional cake from scratch, especially since it leverages convenient store-bought mixes for the brownies and pudding. If you can follow simple box mix instructions, you’re more than capable of assembling this stunning dessert. It’s so straightforward, you can even invite the kids to help with the layering, making it a fun culinary project for the whole family!
Speaking of kids, this is an utterly kid-friendly recipe. It’s a triple threat of chocolate: chocolate brownies, chocolate pudding, and chocolate garnish, with no hint of bitterness (unless you opt for a dark chocolate bar for shaving, which can add a lovely sophisticated contrast). Because a trifle needs time to chill and allow the flavors to meld and the layers to set, it’s an ideal make-ahead dessert. I love preparing this the day before parties, holidays, or any event where I know there will be plenty of little ones (and adults!) eagerly awaiting a sweet treat. The anticipation makes it even better!
If the thought of layers of moist brownie, smooth pudding, and light whipped topping has your mouth watering, then keep reading. Your ultimate brownie trifle adventure awaits!
Why You’ll Love This Easy Brownie Trifle Recipe
Beyond its undeniable deliciousness, this Brownie Trifle offers a host of reasons to make it your new go-to dessert:
- Effortless Elegance: Despite its grand appearance, this dessert is surprisingly easy to assemble. The layering does all the work, creating a visually stunning treat that looks like it took hours of effort.
- Chocolate Lover’s Dream: With rich brownies, creamy chocolate pudding, and chocolate shavings, this trifle is a cocoa celebration. It delivers intense chocolate flavor in every spoonful, satisfying even the most ardent chocoholics.
- Crowd-Pleasing Perfection: Whether it’s a birthday party, holiday feast, family dinner, or a casual get-together, this brownie trifle is always a hit. Its familiar flavors and appealing presentation make it universally loved.
- Kid-Friendly Fun: This recipe is a fantastic way to get children involved in the kitchen. They can help bake the brownies, prepare the pudding, and enthusiastically assist with the layering. It’s a sweet project that yields delicious results everyone can enjoy.
- Make-Ahead Marvel: The beauty of a trifle is that it needs time to chill, allowing the flavors to deepen and the layers to set beautifully. This makes it a perfect dessert to prepare the day before your event, freeing up precious time on the day of your gathering.
- Versatile & Customizable: While delicious as is, this trifle is a blank canvas for customization. Add fruits, different toppings, or vary the brownie and pudding flavors to suit any occasion or preference.
Essential Ingredients for Your Decadent Brownie Trifle
One of the best aspects of this recipe is its reliance on readily available ingredients, making it accessible for any home baker. We’ll be using some clever shortcuts to ensure maximum flavor with minimal effort.
Pantry Staples You’ll Need
- Brownie Mix (1 package, 18.3 oz) + required ingredients: This is your foundational layer. Feel free to grab your absolute favorite brand of brownie mix – whether you prefer fudgy, chewy, or cake-like brownies, any variety will work wonderfully. Ensure you have the additional ingredients specified on the box, such as eggs, oil, and water. For the best results, consider enhancing your box mix brownies by adding a splash of vanilla extract or a handful of chocolate chips to the batter before baking.
- Instant Chocolate Pudding Mix (1 package, 3.9 oz): For the creamy, dreamy pudding layer, instant pudding mix is your best friend. It sets quickly and creates a smooth, luscious texture without any fuss. Choose a good quality brand for optimal chocolate flavor.
- Water (½ cup): Essential for preparing the instant pudding and helping it reach its perfect consistency when combined with the condensed milk.
- Sweetened Condensed Milk (1 can, 14 oz): This is the secret ingredient that transforms regular pudding into an incredibly rich and velvety dessert filling. It adds a depth of sweetness and creaminess that is simply irresistible and helps the pudding set beautifully firm yet spoonable.
- Frozen Whipped Topping (1 container, 8 oz, thawed + 1 container, 12 oz, thawed): You’ll need two containers of frozen whipped topping, ensuring they are completely thawed before use. The smaller container will be folded into the pudding for extra fluffiness, while the larger one provides generous layers of light, airy topping throughout the trifle and for the final flourish. For a homemade touch, you could substitute with freshly whipped heavy cream, but for ease, thawed frozen whipped topping is perfect.
- Chocolate Candy Bar (1 bar, 1.55 oz): This is solely for garnishing your magnificent creation. A classic Hershey’s bar works perfectly for creating elegant chocolate shavings, but feel free to use your preferred type of chocolate. A semi-sweet, dark chocolate, or even a milk chocolate bar will do the trick and add a beautiful visual and textural contrast to the top.
Pro Tip: While this recipe is designed for a large trifle bowl (typically 3-4 quart capacity), you can easily adapt it to make individual servings! Simply layer the ingredients in smaller dessert cups, mason jars, or even wine glasses for a chic presentation. This is particularly convenient when serving at events, as guests can grab their own perfectly portioned dessert.
How to Assemble Your Show-Stopping Brownie Trifle
Assembling this brownie trifle is as fun as it is easy! The key is preparing each component and then layering them carefully to create that iconic, impressive look. Follow these steps for a dessert that’s guaranteed to impress.
Equipment You’ll Need:
- Footed Trifle Bowl with Stand, Crystal, Set of 1 (or a large glass bowl)
- Rubber spatula or wooden spoon
- Whisk
- Hand mixer (optional, but helpful for brownie batter)
- Large mixing bowl
- Non-Stick 13 x 9-Inch Covered Oblong Baking Pan with Lids, Pack of 2
Detailed Instructions:
- Prepare and Cool the Brownies: Begin by preparing your favorite brownie mix according to the package directions. Bake them in a 13×9-inch pan until cooked through but still delightfully fudgy. Once baked, it’s crucial to let the brownies cool completely. This step is essential to prevent them from melting the pudding and whipped topping layers. Once cooled, cut the brownies into uniform 1-inch squares.
- Craft the Creamy Chocolate Pudding Mixture: In a large mixing bowl, combine the instant chocolate pudding mix, ½ cup of water, and the entire can of sweetened condensed milk. Using a whisk, mix these ingredients together until the mixture is completely smooth and thickened, with no lumps of pudding mix remaining. This should only take a few minutes. Next, gently fold in the 8-ounce container of thawed whipped topping. Use a rubber spatula for this, incorporating it until it’s well combined and no streaks of plain whipped topping are visible. The mixture should be light, airy, and uniformly chocolatey.
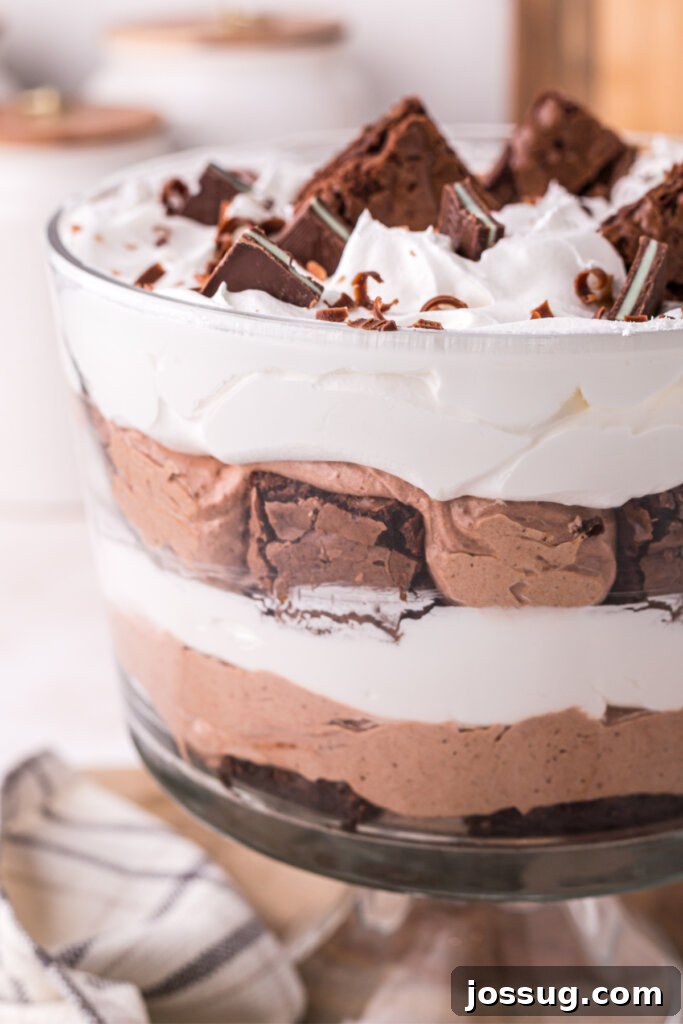
- Assemble the Layers of Decadence: Now for the fun part – layering! Take your trifle bowl (or large glass bowl) and create the first layer by evenly distributing half of your brownie squares across the bottom. Next, carefully spread half of the rich chocolate pudding mixture over the brownie layer, ensuring it reaches the edges. Finally, dollop and gently spread half of the 12-ounce container of thawed whipped topping over the pudding. Repeat these layers one more time: add the remaining brownie squares, then the remaining pudding mixture, and finally, the rest of the whipped topping.
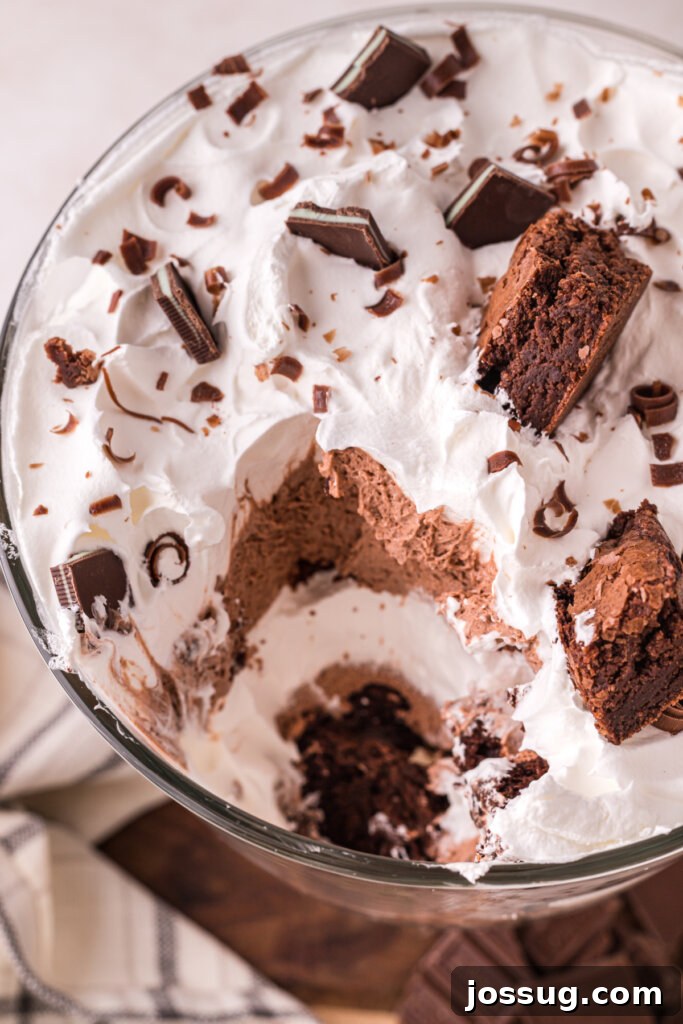
- Garnish and Chill: For a beautiful finish, take your chocolate candy bar and shave curls or finely grate chocolate over the very top layer of whipped topping. You can use a vegetable peeler or a fine grater for this. This adds a touch of elegance and an extra chocolatey burst. Once garnished, cover the trifle tightly with plastic wrap and refrigerate it for at least 8 hours, or ideally, overnight. This chilling time allows all the flavors to meld together perfectly and ensures the layers set firm, making for easy and clean serving.
Expert Tips for the Perfect Brownie Trifle
Achieving brownie trifle perfection is simple with these helpful tips:
- Don’t Overbake Your Brownies: For the best trifle texture, aim for slightly underbaked, fudgy brownies. Overbaked brownies can become dry and crumbly, which won’t absorb the pudding as nicely.
- Ensure Brownies are Completely Cool: This cannot be stressed enough! Warm brownies will melt your pudding and whipped topping, turning your beautiful layers into a chocolatey mess. Patience is key.
- Thaw Whipped Topping Properly: Allow your frozen whipped topping to thaw in the refrigerator for several hours or overnight. If it’s still partially frozen, it won’t incorporate smoothly and can create a watery consistency.
- Gently Fold the Whipped Topping into Pudding: When combining the whipped topping with the pudding, use a gentle folding motion. This preserves the airiness of the whipped topping, resulting in a lighter, creamier pudding layer.
- Chill Time is Non-Negotiable: The 8-hour refrigeration period is crucial. It allows the brownies to soften from the pudding, the flavors to meld, and the entire trifle to set firmly. This ensures neat, defined layers when serving.
- Even Layers for Visual Appeal: When assembling, try to spread each layer as evenly as possible. This creates that stunning, professional-looking presentation that trifles are known for.
- Garnish Just Before Serving: While the trifle needs to chill, add the shaved chocolate garnish closer to serving time for the freshest look. This prevents the chocolate from absorbing moisture and losing its crispness.
Brownie Trifle Variations: Endless Possibilities!
While the classic chocolate brownie trifle is magnificent on its own, its simple base makes it incredibly versatile for creative customizations. Don’t hesitate to experiment and make this recipe your own!
- Fruity Twists: Introduce a burst of freshness by adding a layer of fruit. Spoon cherry, strawberry, or raspberry pie filling between the brownie and pudding layers for an extra treat. Fresh berries like sliced strawberries, raspberries, or blueberries also make a fantastic addition, either within layers or as a vibrant top garnish. Cherry and strawberry pie filling, in particular, are ah-maze-ing!
- Minty Fresh: For a refreshing mint chocolate experience, shave Andes mints on top of the trifle instead of a regular chocolate bar. You can also mix some crushed mint candies into the whipped topping.
- Caramel Drizzle: Elevate the richness with a decadent caramel sauce. Drizzle a homemade or store-bought caramel sauce over the whipped topping layers or directly onto the brownies. A sprinkle of sea salt can turn it into a salted caramel brownie trifle!
- Seasonal Delights:
- Autumn Treat: Transform this into a fall favorite by using pumpkin brownies (bake a pumpkin-flavored brownie mix or add pumpkin puree and spices to a regular mix) and/or substituting the chocolate pudding with a delicious pumpkin pudding. The warm spices pair wonderfully with chocolate.
- Winter Wonderland: For the holidays, consider using peppermint extract in your whipped topping or crumbling peppermint candies (like candy canes) on top for a festive touch.
- Nutty Additions: Sprinkle chopped toasted pecans, walnuts, or almonds between the layers for added crunch and flavor. They complement the chocolate beautifully.
- Coffee Kick: For those who love the mocha flavor profile, consider adding a tablespoon of instant coffee or espresso powder to your brownie mix (if homemade) or to the pudding mixture. A splash of Kahlua or coffee liqueur can also be brushed onto the brownie layers for an adult version.
- Different Brownie Bases: Experiment with different types of brownies. Use a dark chocolate brownie mix for a more intense flavor, or even a blondie mix for a vanilla and chocolate contrast.
- Topping Extravaganza: Go beyond simple shaved chocolate! Add mini chocolate chips, colorful sprinkles, a dusting of cocoa powder, or even chopped candy bar pieces on top.
Serving & Storage Tips for Your Decadent Dessert
Ensuring your brownie trifle is served at its best and stored correctly will keep it delicious for days.
- Best Served Chilled: This trifle is truly at its prime when thoroughly chilled. The cold enhances the flavors and provides a refreshing contrast to the richness of the chocolate.
- How Many Servings? This recipe is generous, yielding enough for approximately 12 people. It’s perfect for feeding a crowd, or for ensuring all your favorite loved ones can have seconds!
- Storage: To keep your trifle fresh, cover the trifle bowl tightly with plastic wrap. This prevents it from absorbing any refrigerator odors and keeps the whipped topping from drying out.
- Shelf Life: Stored properly in the refrigerator, your brownie trifle will remain delicious for 3-4 days. The brownies will continue to absorb moisture from the pudding, becoming even more tender over time.
Your Brownie Trifle Questions Answered
Here are some frequently asked questions to help you master your brownie trifle:
- How many servings does this recipe yield?
- This recipe is designed to serve approximately 12 people generously. It’s a fantastic choice for gatherings where you need a dessert that can feed a crowd or allow for delightful second helpings!
- How long does it take to prepare a brownie trifle?
- The active preparation time for this trifle is quite quick. You’ll spend about 30 minutes on prep (baking brownies, mixing pudding) and another 25-30 minutes for the brownies to cook. However, the most important part is the chilling time: you’ll want to refrigerate it for at least 8 hours before serving. This allows the layers to set and the flavors to fully develop. So, it’s definitely best made the day before your event – plan ahead for maximum enjoyment!
- Can I make this dessert ahead of time?
- Absolutely, and it’s highly recommended! As mentioned, the required chilling time makes it an ideal make-ahead dessert. Preparing it the day before your event will not only save you time on the day itself but will also result in a trifle with perfectly set layers and richer, more integrated flavors.
- What kind of trifle bowl should I use?
- A traditional footed trifle bowl (typically 3-4 quarts) is perfect, as its clear glass showcases the beautiful layers. However, any large glass bowl or even a deep glass serving dish will work just as well. If you’re making individual servings, small dessert cups or mason jars are excellent choices.
- Can I use homemade brownies, pudding, or whipped cream?
- Yes, certainly! While this recipe emphasizes convenience with box mixes, you can absolutely substitute any of the components with homemade versions. If using homemade brownies, ensure they are completely cooled. For homemade pudding, make sure it’s thick and chilled. If opting for homemade whipped cream, ensure it’s stiffly whipped to hold its shape within the layers.
There you have it – the ultimate guide to creating a Brownie Trifle that’s as easy to make as it is delightful to eat. This dessert is truly a celebration of chocolate, layered with love and designed for effortless entertaining. Whether you’re hosting a grand party or simply craving a rich, comforting treat, this recipe is sure to become a cherished favorite. So, gather your ingredients, follow these simple steps, and prepare to indulge in a dessert that tastes like pure joy.
We encourage you to try this recipe and share your experience. What variations will you create? We can’t wait to hear about your deliciously layered masterpieces!
More Sweet Treats to Explore
If you loved this delightful trifle, be sure to explore some of our other fantastic dessert recipes:
- Easy Pumpkin Spice Trifle
- Elvis Trifle with Bacon
- Piña Colada Cookie Trifle
- Waffle Cherry Brownie Poke Cake
- Brownie Parfaits
Brownie Trifle
By Jamie Sherman
This Brownie Trifle recipe is the best way to make brownies feel new again! It’s super easy, and it’s an excellent dessert for chocolate lovers everywhere.
- Prep Time: 30 mins
- Cook Time: 25 mins
- Additional Time (Chill): 8 hrs
- Total Time: 8 hrs 55 mins
Servings: 12 servings
Rating: 4.47 from 117 votes
Equipment
- Footed Trifle Bowl with Stand, Crystal, Set of 1
- Rubber spatula or wooden spoon
- Whisk
- Hand mixer
- Mixing bowl
- Non-Stick 13 x 9-Inch Covered Oblong Baking Pan with Lids, Pack of 2
Ingredients
- 1 package brownie mix, 18.3 oz.
- Ingredients to make brownies (as per package)
- 1 package instant chocolate pudding mix, 3.9 oz.
- ½ cup water
- 1 can sweetened condensed milk, 14 oz.
- 1 container frozen whipped topping, thawed, 8 oz.
- 1 container frozen whipped topping, thawed, 12 oz.
- 1 bar Hershey’s chocolate candy, 1.55 oz. (or similar chocolate for shaving)
Instructions
- Prepare brownie mix according to package directions and cool completely. Cut into 1-inch squares.
- In a large bowl, combine pudding mix, water, and sweetened condensed milk. Mix until smooth, then fold in the 8 ounces of whipped topping until well combined and no streaks remain.
- In a trifle bowl or large glass bowl, place half of the brownies, half of the pudding mixture, and half of the 12-oz. container of whipped topping. Repeat the layers. Shave chocolate onto the top layer for garnish.
- Refrigerate 8 hours before serving.
Notes
- Chocolate sprinkles are always welcome in/on a brownie trifle for extra fun.
- For mint flavors, shave Andes mints on top of the trifle instead of a regular chocolate bar.
- Chocolate sauce or caramel sauce both taste amazing as a topping, too.
- Want some fruit in your trifle? Add pie filling between the brownie and pudding layers for an extra treat. Cherry and strawberry pie filling in particular are ah-maze-ing!!
- Pumpkin flavors turn this trifle into an autumn treat. Try making pumpkin brownies, for instance, instead of the regular brownie mix … or splurging on some delicious pumpkin pudding. Or both!
Nutrition
Calories: 535kcal, Carbohydrates: 81g, Protein: 7g, Fat: 21g, Saturated Fat: 13g, Polyunsaturated Fat: 1g, Monounsaturated Fat: 5g, Cholesterol: 13mg, Sodium: 337mg, Potassium: 242mg, Fiber: 1g, Sugar: 67g, Vitamin A: 144IU, Vitamin C: 1mg, Calcium: 151mg, Iron: 2mg
Nutrition information is automatically calculated, so should only be used as an approximation.