
Easy Homemade Maple Granola: Your Guide to Delicious, Budget-Friendly Breakfasts and Snacks
Welcome to a culinary journey that will transform your pantry and delight your taste buds! Granola, a staple for many breakfast tables and snack cravings, often comes with a hefty price tag and a list of ingredients you can barely pronounce. But what if we told you that creating your own delicious, wholesome granola at home is not only simple and rewarding but also incredibly cost-effective?
Today, we’re diving into one of our all-time favorite recipes: a truly simple maple granola that promises to save you money while filling your home with an absolutely divine aroma. Forget those expensive store-bought bags; this homemade version offers unparalleled freshness, customizable ingredients, and a satisfying crunch that will make you wonder why you ever bought it pre-made.
The Undeniable Benefits of Making Granola at Home
Beyond the sheer joy of baking, opting for homemade granola offers a multitude of advantages that resonate with health-conscious individuals and budget-savvy families alike. Here’s why you should embrace the homemade granola movement:
-
Significant Cost Savings
Granola is notoriously expensive in supermarkets. Buying oats, maple syrup, and other staple ingredients in bulk can drastically reduce your per-serving cost, allowing you to enjoy this wholesome treat more often without breaking the bank. Think of the moolah you’ll save!
-
Full Control Over Ingredients
When you make granola yourself, you’re the boss of what goes into it. You can choose organic oats, select your favorite nuts and seeds, and decide on the exact amount and type of sweetener. This means no artificial preservatives, unwanted additives, or excessive sugars found in many commercial varieties. It’s a healthier choice tailored to your specific dietary needs and preferences.
-
Unbeatable Freshness and Aroma
There’s nothing quite like the smell of freshly baked granola wafting through your kitchen. The aroma alone is enough to lift spirits and whet appetites. And the taste? It’s simply superior. Homemade granola is crisper, more flavorful, and retains its freshness longer than store-bought options.
-
Endless Customization Options
This simple maple granola recipe serves as a perfect canvas for your culinary creativity. Whether you prefer it plain and classic, loaded with nuts and seeds, or bursting with dried fruits and exotic spices, the possibilities are limitless. You can adapt it to seasonal ingredients or simply to whatever you have on hand.
-
A Wholesome and Nourishing Choice
Packed with whole grains, fiber, and healthy fats (depending on your additions), homemade granola provides sustained energy. It’s a fantastic way to start your day or fuel your afternoon without the sugar crash associated with many processed snacks.
Your Go-To Recipe for Perfect Maple Granola
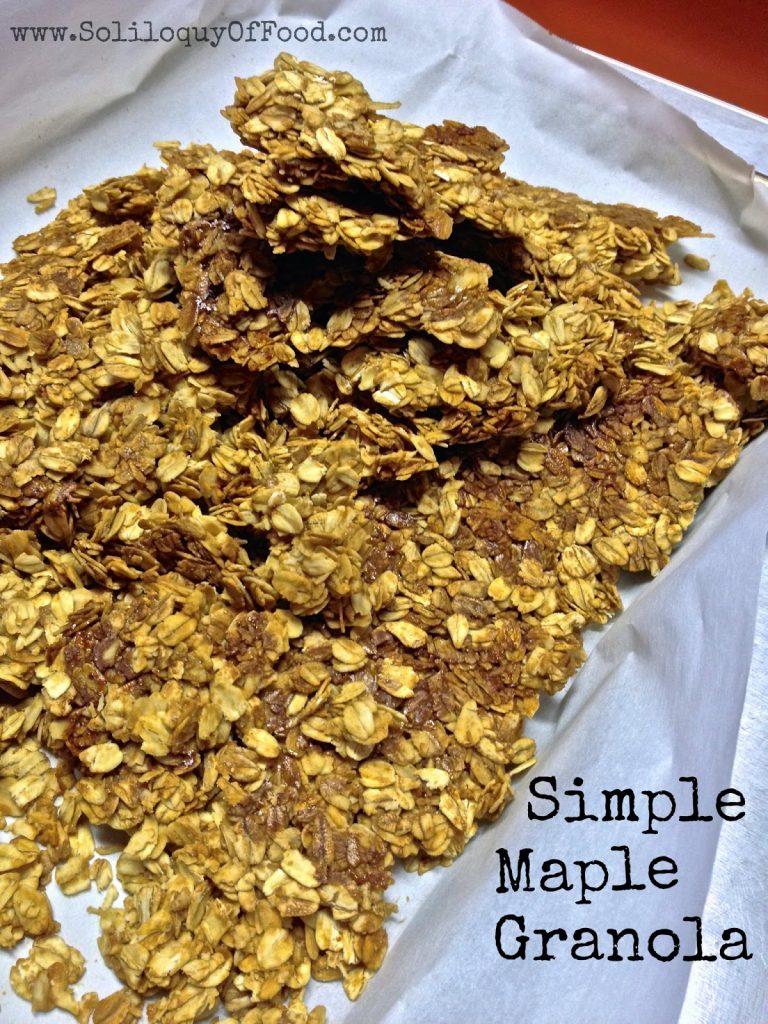
This recipe for Simple Maple Granola is designed for ease and deliciousness. It brings together the wholesome goodness of old-fashioned oats with the rich, natural sweetness of maple syrup and brown sugar, brightened by vanilla, and finished with a touch of salt to balance the flavors. It’s perfect for those who love their granola crunchy, with satisfying clusters.
24
servings
Simple Maple Granola
Jamie Sherman
15
45
1
Rate This Recipe
Print Recipe
Ingredients
- ⅓ cup pure maple syrup
- ⅓ cup packed brown sugar
- ½ cup vegetable oil
- 4 teaspoons vanilla extract
- ½ teaspoon salt
- 5 cups old fashioned rolled oats
- 2 cups chopped nuts, optional
- 2 cups dried fruit, optional
Instructions
-
Line a baking sheet with parchment paper and preheat oven to 325°F (160°C). This ensures easy removal and prevents sticking.
-
In a large mixing bowl, measure out the rolled oats and chopped nuts (if using). Give them a quick toss to combine, then set the bowl aside.
-
In a separate medium bowl, combine the pure maple syrup, packed brown sugar, vegetable oil, vanilla extract, and salt. Whisk these wet ingredients together until they are thoroughly blended and the sugar has largely dissolved.
-
Pour the wet maple syrup mixture over the dry oats and nuts. Using a sturdy spoon or spatula, toss to coat the oats evenly. Ensure every oat flake is glistening with the sweet coating for consistent flavor and crunch.
-
Transfer the dressed oats onto the prepared baking sheet. Using the back of your measuring cup or a spatula, press the mixture down firmly and evenly across the pan. This step is crucial for achieving those desirable granola clusters.
-
Bake for 40-45 minutes. Halfway through the baking time (around 20-22 minutes), rotate the pan 180 degrees to ensure even baking and browning. Avoid stirring the granola during baking if you want large clumps.
-
Once baked to a beautiful golden brown, remove the pan from the oven. Let the granola cool completely in the pan for at least 1 hour, or until it reaches room temperature. This cooling process is essential for the granola to crisp up and form solid clusters.
-
Once cooled, break the granola into chunks of your desired size – from small crumbles to large, satisfying clusters. If you are adding dried fruit, chop it into raisin-sized pieces for a more uniform texture, then gently mix it in.
-
Store your homemade maple granola in an airtight container at room temperature. It will keep fresh and crunchy for up to 2 weeks.
Notes
- This recipe yields approximately 8 cups of delicious homemade granola.
- For extra flavor depth, you can toast the oats and nuts lightly before mixing with wet ingredients.
- Ensure your maple syrup is pure, not pancake syrup, for the best flavor and texture.
Nutrition Information
Serving:
0.33
cup
,
Calories:
202
kcal
,
Carbohydrates:
21
g
,
Protein:
4
g
,
Fat:
12
g
,
Saturated Fat:
1
g
,
Polyunsaturated Fat:
8
g
,
Monounsaturated Fat:
2
g
,
Trans Fat:
0.03
g
,
Sodium:
51
mg
,
Potassium:
142
mg
,
Fiber:
3
g
,
Sugar:
8
g
,
Vitamin A:
2
IU
,
Vitamin C:
0.2
mg
,
Calcium:
31
mg
,
Iron:
1
mg
Nutrition information is automatically calculated and should only be used as an approximation.
Understanding Your Granola’s Core Ingredients
Each ingredient in this simple maple granola recipe plays a crucial role in achieving its perfect texture and flavor:
- Old-Fashioned Rolled Oats: These are the backbone of our granola. Rolled oats provide a chewy texture and hold up well during baking, forming those delightful clusters. Quick oats can become too mushy, and steel-cut oats are too hard for this recipe.
- Pure Maple Syrup: More than just a sweetener, pure maple syrup is essential for that signature maple flavor and acts as a natural binder, helping the oats clump together. It offers a more complex, nuanced sweetness compared to refined sugars.
- Packed Brown Sugar: This adds a deeper, caramel-like note to the granola, complementing the maple syrup beautifully. Its moist texture also contributes to the granola’s overall chewiness.
- Vegetable Oil: The oil is key for crispiness and helps the granola bake evenly without burning. You can substitute vegetable oil with other neutral-flavored oils like canola oil, or even melted coconut oil for a slightly different flavor profile and texture.
- Vanilla Extract: A touch of vanilla enhances all the other flavors, adding a warm and inviting aroma. Don’t skip it!
- Salt: Just a pinch of salt is vital to balance the sweetness and bring out the full depth of flavor in the granola. It prevents the granola from tasting overly sweet.
- Chopped Nuts (Optional): Nuts like pecans, walnuts, or almonds add healthy fats, protein, and a satisfying crunch. They also contribute to the granola’s overall texture and nutritional value.
- Dried Fruit (Optional): Adding dried fruits such as raisins, cranberries, chopped apricots, or cherries after baking provides bursts of sweetness and chewiness, making the granola even more appealing.
Achieve Golden, Crunchy Results Every Time: Tips for Granola Perfection
Making granola is straightforward, but a few simple tips can elevate your homemade batch from good to absolutely fantastic:
- Don’t Overcrowd the Pan: Ensure your granola mixture is spread in an even layer on the baking sheet. If the pan is too crowded, the oats will steam instead of toast, resulting in a softer, less crispy granola. Using two baking sheets if necessary is better than one overflowing one.
- Press Down Firmly: After spreading the granola on the baking sheet, use the back of a measuring cup or a spatula to press it down very firmly. This is the secret to achieving those desirable granola clusters. The more compactly you press it, the better it will clump together.
- Bake Low and Slow: A baking temperature of 325°F (160°C) is ideal for granola. This lower temperature allows the granola to toast slowly and evenly, developing a rich golden color and crisp texture without burning the edges. High heat can burn the sugar before the oats are fully toasted.
- Rotate the Pan: Ovens often have hot spots. Rotating the baking sheet halfway through the cooking time ensures that your granola bakes evenly on all sides, preventing some parts from being undercooked while others are overdone.
- Cool Completely in the Pan: This is arguably the most critical step for achieving maximum crispness and strong clusters. Resist the urge to break apart your granola as soon as it comes out of the oven. As it cools, the sugars will harden, binding the oats and other ingredients into firm, crunchy clumps. If you break it too soon, it will be crumbly.
- Parchment Paper is Your Friend: Lining your baking sheet with parchment paper makes cleanup a breeze and guarantees that your granola won’t stick to the pan, no matter how sticky the syrup mixture is.
- Adjust Sweetness to Your Liking: If you prefer less sweet granola, you can slightly reduce the amount of brown sugar or maple syrup, or increase the salt to balance. However, keep in mind that the sugars also contribute to the texture and binding.
Customizing Your Granola: Endless Possibilities for Flavor
This simple maple granola recipe is incredibly versatile, allowing you to easily adapt it to your preferences and pantry staples. Here are some fantastic ideas to get you started:
-
Nuts and Seeds Extravaganza
While the original recipe offers nuts as optional, they add a wonderful depth of flavor and texture. Try chopped almonds, pecans, walnuts, cashews, or even macadamia nuts. For seeds, pumpkin seeds (pepitas), sunflower seeds, flax seeds, or chia seeds can boost nutrition and crunch. For best results, add them with the oats before baking. If using delicate seeds like chia, you might add them in the last 15 minutes of baking or after it cools.
-
A Burst of Dried Fruit
Dried fruits add natural sweetness and a chewy contrast to the crunchy granola. Consider raisins, dried cranberries, chopped apricots, dried cherries, blueberries, or even finely diced dates. Always add dried fruit *after* the granola has cooled to prevent it from becoming hard or burning during baking.
-
Spice It Up!
Elevate your granola with warm spices. A teaspoon of ground cinnamon, a pinch of nutmeg, a dash of cardamom, or even a hint of ginger can transform the flavor profile. Add spices to the wet ingredient mixture.
-
Flavorful Extracts and Zests
Beyond vanilla, experiment with other extracts like almond extract for a marzipan note, or a few drops of orange or lemon zest for a bright, citrusy aroma. Add these with the wet ingredients.
-
Indulgent Add-ins (Post-Bake)
For an extra treat, once the granola is completely cool, you can stir in chocolate chips, cacao nibs, shredded coconut (toasted or untoasted), or even small pieces of candied ginger. Adding these after baking ensures they don’t burn or melt excessively.
-
Adjusting Sweetness:
If you prefer a less sweet granola, you can slightly reduce the brown sugar. For a richer maple flavor, you can increase the maple syrup slightly and reduce the oil, keeping the total wet ingredients similar for proper binding.
Enjoying Your Homemade Granola: Serving Suggestions
Your freshly made maple granola is incredibly versatile and can be enjoyed in countless ways:
- Classic Breakfast: Serve it with cold milk or your favorite yogurt (dairy or non-dairy), topped with fresh berries or sliced bananas.
- On-the-Go Snack: Grab a handful straight from the jar for a quick and energizing snack during the day.
- Parfaits: Layer granola with yogurt and fresh fruit in a glass for an elegant and satisfying treat.
- Smoothie Topping: Sprinkle a generous amount over your morning smoothie bowl for added crunch and texture.
- Dessert Topping: Use it as a crunchy topping for baked apples, fruit crumbles, or even a scoop of ice cream.
- Trail Mix Addition: Combine with other nuts, seeds, and dried fruits for a custom trail mix perfect for hiking or road trips.
Keeping Your Granola Fresh: Storage Tips
To ensure your homemade maple granola stays crunchy and delicious for as long as possible, proper storage is key:
- Airtight Container: Always store granola in a completely airtight container. This prevents moisture from getting in and making it soft, and also keeps it fresh by limiting exposure to air. Glass jars, plastic containers with tight-fitting lids, or even heavy-duty zip-top bags work well.
- Room Temperature: Keep your stored granola in a cool, dry place away from direct sunlight. A pantry or cupboard is ideal.
- Shelf Life: When stored correctly, your homemade maple granola will maintain its quality and crunch for up to two weeks. While it might still be safe to eat after this period, its freshness and crispness will start to diminish.
A Wholesome Treat for Any Occasion
Making your own Simple Maple Granola is a rewarding experience that offers delicious returns. You gain control over ingredients, save money, and get to enjoy a fresh, customizable, and incredibly aromatic treat whenever you desire. It’s a testament to how simple, wholesome ingredients can come together to create something truly special.
Whether you’re a seasoned baker or a kitchen novice, this recipe is designed for success. So, gather your ingredients, preheat your oven, and prepare to fill your home with the inviting scent of golden, crunchy maple granola. We encourage you to try this recipe and discover the joy of homemade goodness!
Enjoyed this recipe? Share your thoughts below!
We’d love to hear from you.