
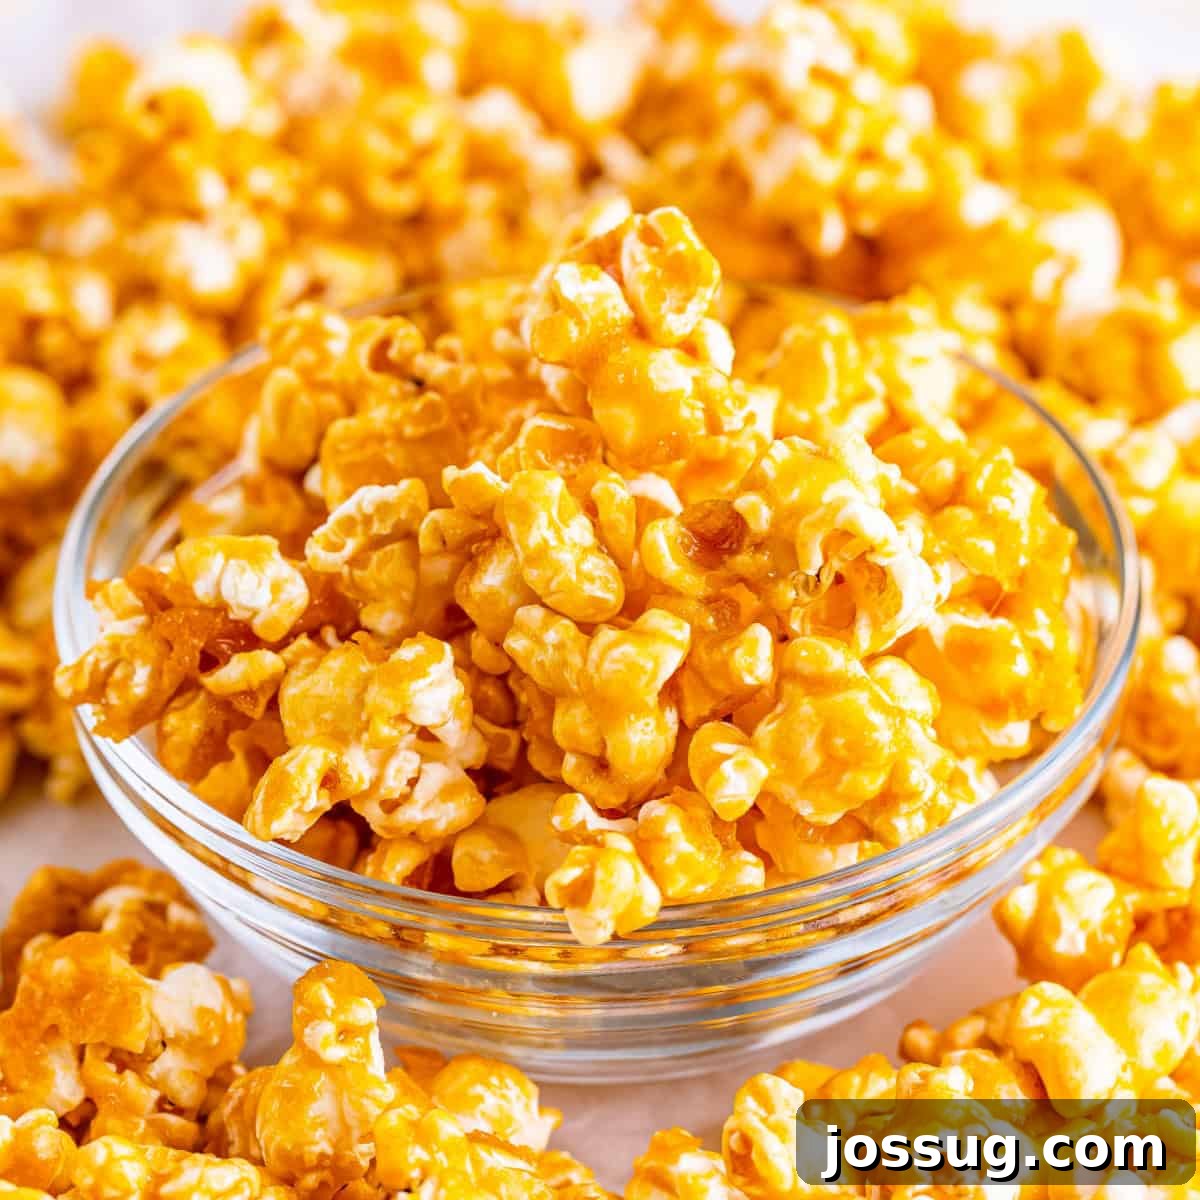
🍿 Dive into the delightful world of homemade caramel corn! Sweet, crunchy, and baked to golden perfection, this recipe is your ticket to an irresistible snack. Perfect for cozy movie nights, thoughtful holiday gifts, or simply satisfying that sweet craving anytime! 🎁✨
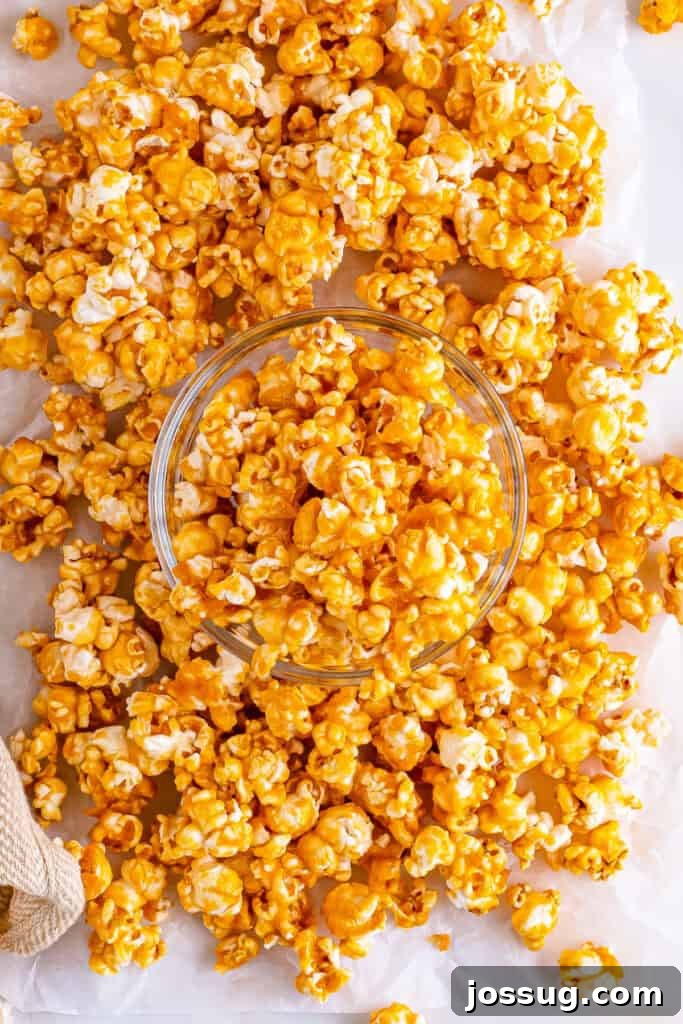
The Ultimate Homemade Caramel Corn Recipe: Sweet, Crunchy, and Irresistible
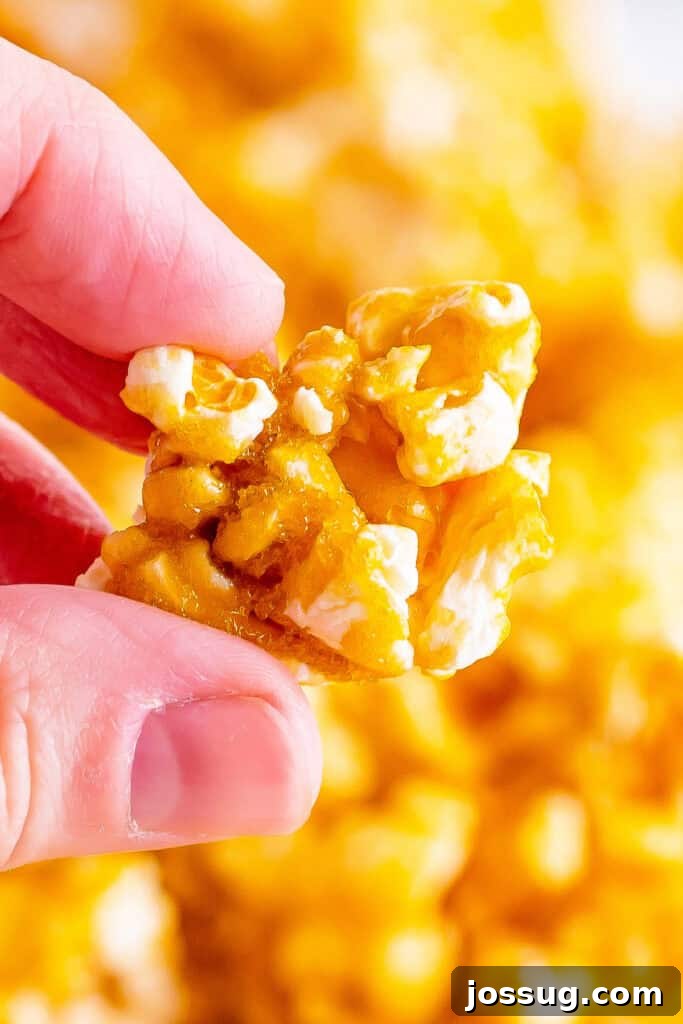
There’s an undeniable magic in the air when the sweet, buttery aroma of freshly baked caramel corn fills your home. It’s a scent that instantly evokes feelings of warmth, comfort, and pure indulgence. If you’ve ever yearned for that perfect balance of crispiness and rich sweetness, this homemade caramel corn recipe is an absolute must-have in your culinary repertoire. Forget about mass-produced, store-bought versions; learning how to make crunchy caramel corn from scratch is not only incredibly simple but yields a product far superior in taste and texture.
This classic treat transcends seasons and occasions, making it a versatile addition to any gathering. Whether you’re planning a fun-filled family movie night, preparing thoughtful edible gifts for friends and neighbors, or simply craving a delightful afternoon snack, homemade caramel corn is always a resounding success. Its satisfying crunch and deeply flavorful sweet glaze make it incredibly addictive – consider making a double batch, as this delightful snack tends to disappear remarkably fast! The joy of creating this sweet masterpiece and sharing it with loved ones is almost as gratifying as devouring it straight from the pan.
While countless caramel corn recipes exist, this particular method has been tried, tested, and consistently delivers exceptional results every time. It’s an approachable project for home cooks and bakers of all skill levels, transforming humble popcorn into a gourmet delight. With just a little time in the kitchen, you can whip up a fresh batch in the afternoon and have it ready to enjoy by evening, making every bite feel like a special celebration. Prepare to impress your taste buds and loved ones with what will surely become your go-to recipe for the best crunchy caramel corn you’ve ever tasted!
⭐ Why You’ll Love Making This Caramel Corn at Home
- **Effortless & Beginner-Friendly:** Our clear, step-by-step instructions ensure this recipe is incredibly easy to follow, making it perfect for even novice bakers.
- **Unbeatably Delicious Flavor & Texture:** Experience the perfect harmony of rich, buttery caramel with an irresistible crunch that store-bought varieties simply cannot replicate.
- **Generous Yield for Sharing:** This recipe produces a large batch, making it ideal for serving at parties, packaging as thoughtful homemade gifts, or simply ensuring you have plenty for extended snacking enjoyment.
- **Utilizes Simple Pantry Staples:** Crafted from basic ingredients you likely already have on hand, this recipe makes whipping up a gourmet snack convenient and economical.
- **Endlessly Adaptable to Your Taste:** Easily customize your caramel corn with exciting add-ins and creative flavor twists to perfectly suit any preference, dietary need, or celebratory occasion.
- **The Joy of Homemade:** There’s immense satisfaction and pride in creating such a beloved treat from scratch, making every batch feel truly special and personal.
- **Superior Freshness:** Enjoy the unparalleled taste and texture that only freshly baked caramel corn can offer, far surpassing pre-packaged options.
- **Budget-Friendly Indulgence:** Achieve a premium snack experience without the premium price tag often associated with gourmet popcorn shops.
🛒 Essential Ingredients & Smart Substitutions
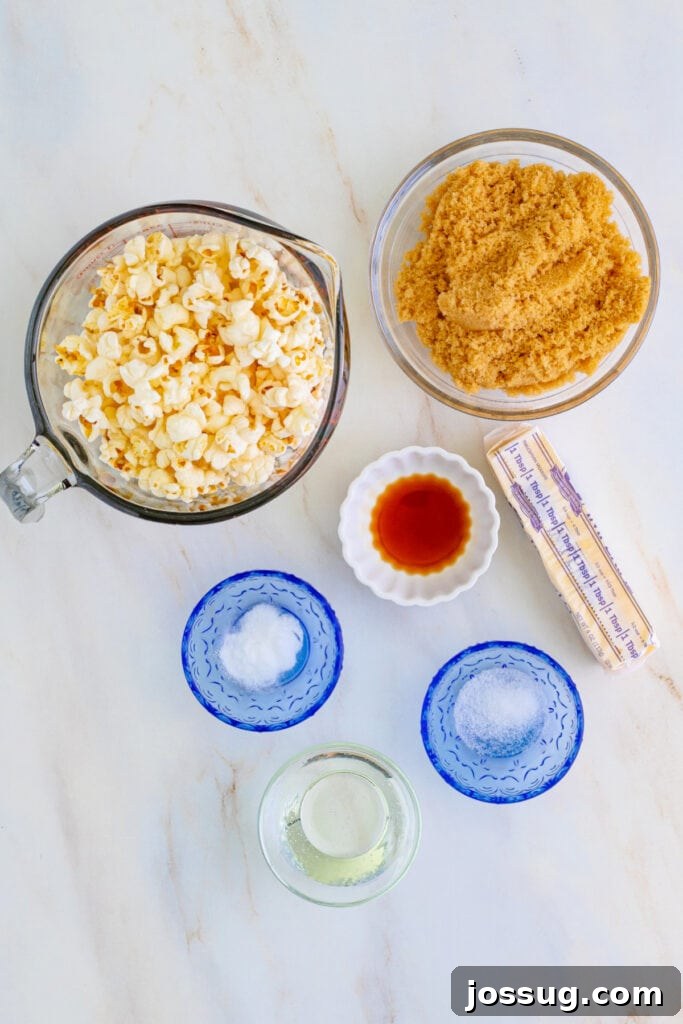
Crafting perfect caramel corn begins with a clear understanding of each ingredient’s role. Here’s a detailed look at what you’ll need and potential substitutions:
- Plain Popped Popcorn: This forms the essential base of our delectable snack. For the best results, we highly recommend using air-popped or stovetop popcorn. It’s crucial to avoid pre-buttered microwave popcorn, as the added butter, oil, and artificial seasonings can interfere with the caramel coating, making it overly greasy and preventing it from adhering properly. Approximately 4 quarts of popped popcorn usually translates to about 1 cup of unpopped kernels.
- Light Brown Sugar: This ingredient is key to developing the classic rich, moist, and molasses-like sweetness that defines caramel. If you desire an even deeper, more complex flavor profile, dark brown sugar can be substituted, which will also result in a slightly darker caramel.
- Light Corn Syrup: A vital component for achieving that desirable smooth and slightly chewy caramel texture. More importantly, corn syrup plays a crucial role in preventing sugar crystallization, ensuring your caramel remains silky and not grainy. For a deeper flavor, dark corn syrup or golden syrup can be used. While honey or maple syrup can serve as alternatives, be aware that they may subtly alter the final texture and impart their distinct flavors to the caramel.
- Butter (or Margarine): This ingredient contributes an incredible richness and a luscious, buttery depth to the caramel, enhancing its overall flavor. Unsalted butter is generally preferred as it allows you to precisely control the salt content in the recipe, but margarine works as a suitable substitute.
- Salt: Often underestimated, salt is absolutely essential! It brilliantly balances the intense sweetness of the caramel, preventing it from being cloyingly sweet, and actively enhances all the other flavors present. Fine sea salt is an excellent choice, but regular table salt will perform perfectly well. Do not omit this ingredient, as that touch of salt elevates the caramel from merely sweet to truly complex and utterly delicious.
- Vanilla Extract: A fragrant and aromatic enhancer, pure vanilla extract rounds out the caramel flavor profile, adding warm, subtle notes and a depth that makes the caramel taste even more sophisticated. Always opt for pure vanilla extract for the best possible taste.
- Baking Soda: This unassuming ingredient is surprisingly critical for achieving the signature light, airy, and wonderfully crunchy texture of authentic caramel corn. When added to the hot caramel, it reacts to create tiny air bubbles, which expand and prevent the caramel from becoming too hard, dense, and brittle. This chemical reaction is what makes the caramel shatter beautifully when you bite into it.
✨ Delicious Variations to Customize Your Caramel Corn
One of the most exciting aspects of making caramel corn at home is the endless possibilities for customization. Get creative and tailor your batch to your exact preferences or special occasions with these delightful variations:
- **Nutty Caramel Corn:** Elevate your snack by incorporating your favorite nuts. Add a generous cup of roasted peanuts, almonds, cashews, or pecans to the popped popcorn before it goes into the oven. The nuts will toast beautifully alongside the popcorn, adding an extra layer of crunch and rich, savory flavor that perfectly complements the sweet caramel.
- **Spiced Caramel Corn:** Introduce warm, inviting spices to your caramel mixture for an aromatic twist. A pinch of ground cinnamon, a teaspoon of fragrant pumpkin pie spice, or even a tiny dash of cayenne pepper for a subtle, unexpected kick can completely transform the flavor profile. Add these spices to the caramel sauce along with the vanilla extract for even distribution.
- **Decadent Chocolate Drizzle:** For the ultimate indulgence, once your caramel corn has completely cooled and set, melt your favorite type of chocolate (milk, dark, or white) and artfully drizzle it over the popcorn. Allow the chocolate to set at room temperature or chill briefly in the refrigerator before serving to ensure a neat, firm coating.
- **Festive Holiday & Seasonal Mixes:** Make your caramel corn celebration-ready! Stir in red and green M&Ms or festive sprinkles for Christmas, pastel candies for Easter, or even classic candy corn for a Halloween treat. This is a fantastic and easy way to tailor your snack to any specific holiday or themed party.
- **Gourmet Salted Caramel Corn:** For those who adore the irresistible sweet and salty combination, a final flourish of flaky sea salt (such as Maldon) is a game-changer. Sprinkle it over the caramel corn immediately after pouring the caramel and tossing, or right after it comes out of the oven, allowing the salt to adhere to the still-warm caramel.
- **Tropical Coconut Caramel Corn:** For a taste of the tropics, add about half a cup of shredded unsweetened coconut to the baking sheets during the last 15-20 minutes of baking. The coconut will toast lightly, imparting a delightful nutty flavor and aroma.
- **White Chocolate Cranberry Caramel Corn:** After the caramel corn cools, drizzle with melted white chocolate and sprinkle with dried cranberries for a festive and tangy addition.
🔥 Expert Tips for the Best Crunchy Caramel Corn
Follow these expert tips and tricks to ensure your homemade caramel corn turns out perfectly crispy, wonderfully crunchy, and utterly delicious every single time:
- **Preparation is Key:** Before you even start making the caramel, have all your popcorn popped, cooled, and ready to go. The caramel sets very quickly once it’s made, so you’ll need to work swiftly and efficiently when coating the popcorn.
- **Work Quickly with Warm Caramel:** As soon as the caramel mixture is ready and you’ve added the baking soda and vanilla, immediately pour it over the prepared popcorn. Stir vigorously and quickly to coat as many kernels as possible. The caramel will begin to thicken as it cools, making it more challenging to achieve an even coating if you hesitate.
- **Stir Regularly During Baking:** This is a crucial step for achieving that uniform, crunchy glaze! During the hour-long baking process, make sure to stir the caramel corn thoroughly every 15 minutes. This action helps to redistribute the caramel, ensures every kernel gets completely coated, and prevents the bottom layer from burning while promoting even crisping.
- **Use the Right Tools:** A large, sturdy, and heatproof silicone spatula or a robust wooden spoon is your best friend for this recipe. These tools are ideal for stirring both the bubbling caramel in the saucepan and the popcorn in the oven, preventing sticking and making the process much easier and safer.
- **Avoid Overcrowding Baking Pans:** If you’re doubling the recipe or simply have a larger volume of popcorn, utilize more baking sheets (at least four for a double batch) to avoid overcrowding. Spreading the popcorn thinly and evenly allows for optimal air circulation during baking, which is absolutely crucial for achieving that desired crispiness. Overcrowding can lead to steaming, resulting in soft or sticky caramel corn.
- **Cool Completely for Ultimate Crunch:** This step cannot be stressed enough! Allow your baked caramel corn to cool completely and thoroughly on parchment-lined baking sheets before transferring it to storage or serving. As it cools, the caramel hardens and becomes wonderfully brittle, resulting in that signature satisfying crunch. As it cools, periodically break up any large clumps to ensure individual, perfectly coated pieces.
- **Prevent Sticking to the Pan:** To minimize sticking and make cleanup a breeze, generously spray your baking sheets with cooking spray before dividing the popcorn. For even easier removal and less mess, consider lining your sheets with parchment paper in addition to spraying.
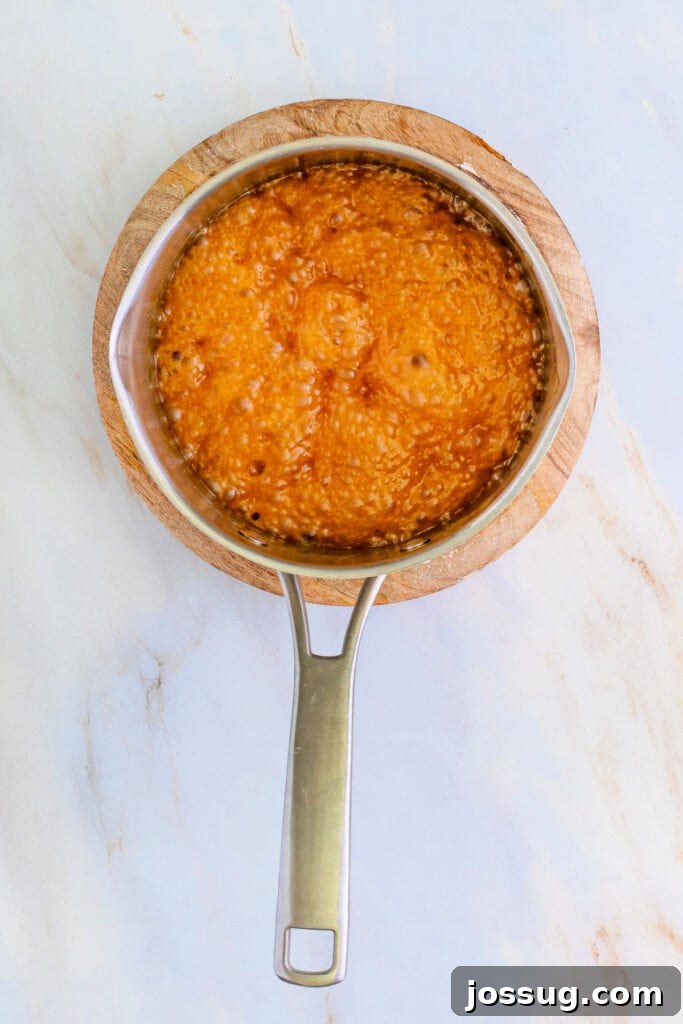
- **Watch the Caramel Closely:** When boiling the caramel mixture, stir constantly and keep a very close eye on it. Caramel can go from perfectly golden to burnt in a matter of seconds. Once it reaches a rolling boil, maintain the medium heat and continue stirring until it reaches the desired consistency, typically a rich amber color.
- **Baking Soda Magic:** Ensure you add the baking soda at the very end, just before pouring the caramel over the popcorn. This ingredient is responsible for aerating the caramel, creating tiny bubbles that make the final coating light, delicate, and wonderfully brittle, rather than hard and dense. Stir it in quickly and thoroughly.
- **Consider Humidity:** High humidity can be the enemy of crispy caramel corn. If it’s a very humid day, your caramel corn might have a tendency to become slightly sticky, even after proper cooling. Try to make it on a drier day if possible.
❓ Frequently Asked Questions About Caramel Corn
Yes, you can certainly skip the baking step for a softer, chewier caramel corn. However, it will not achieve the same level of deep crispiness and distinct crunch that the oven baking process provides. Baking helps to dry out and harden the caramel coating for that signature snap and less stickiness.
The primary difference lies in their preparation. Kettle corn is typically made by popping corn kernels directly with sugar, oil, and salt in a large pot, resulting in a lightly sweet and salty snack. Caramel corn, conversely, involves coating already popped corn with a separately cooked, rich, and often butter-heavy caramel sauce, which is then usually baked to create a crunchy, glossy glaze.
Absolutely! This recipe doubles very well. The most important consideration when doubling is to ensure you use enough baking trays (ideally four) to avoid overcrowding the popcorn in the oven. Overcrowding can lead to uneven caramel distribution and can cause the popcorn to steam rather than crisp, preventing it from achieving that desired crunch.
The key to preventing sticky caramel corn is two-fold: ensuring it bakes long enough to properly dry out and then allowing it to cool completely and thoroughly after baking. Once cooled and firm, store it immediately in an airtight container at room temperature. Humidity is the primary enemy of crispy caramel corn, so an airtight seal is crucial.
While you can use microwave popcorn, it’s best to choose plain or lightly salted varieties that do not contain added butter or artificial flavors. The extra butter and specific seasonings in many microwave popcorn brands can make the caramel corn overly greasy and potentially interfere with the caramel’s adhesion and overall flavor profile.
Yes, absolutely! For festive holiday themes or vibrant party snacks, you can add gel food coloring to the caramel mixture. Do this after you remove the saucepan from the heat, just before you stir in the vanilla extract and baking soda. Gel colors are highly concentrated and won’t thin out the caramel like liquid food colorings might.
Don’t despair if your caramel corn is a bit sticky! You can often remedy this. Simply spread the sticky caramel corn back onto baking sheets and return it to the oven. Bake at 250°F (120°C) for an additional 10-20 minutes, stirring every 5-10 minutes, until it feels dry and crisp. Remember to let it cool completely afterwards to allow it to harden.
For successful gifting, ensure the caramel corn is completely cooled, firm, and wonderfully crunchy. Package it in attractive clear cellophane bags tied with a festive ribbon, or use decorative airtight tins. Making sure the container is airtight is essential to maintain its freshness and crisp texture during transport and storage.
When stored properly in an airtight container at room temperature, homemade caramel corn will typically remain fresh, crunchy, and delicious for up to 2 weeks. Beyond this period, it may start to lose some of its desirable crispiness.
🍽️ Other Delicious Popcorn Recipes You May Enjoy
Holiday
Jello Popcorn
Dessert
Birthday Cake Popcorn Mix
Appetizers
Buffalo Ranch Popcorn
Dessert
White Chocolate Peppermint Popcorn

Classic Crunchy Homemade Caramel Corn
Experience the ultimate sweet and crunchy snack with this classic homemade caramel corn recipe. Made with rich, buttery caramel and baked to golden perfection, it’s ideal for snacking, gifting, or a delightful holiday treat that everyone will love!
Rate This Recipe
Print Recipe
Equipment
- Large, heavy-bottomed saucepan
- Measuring cups and spoons
- Heatproof rubber spatula or wooden spoon
- 2 large baking sheets (you may need more for doubling the recipe)
- Parchment paper
- Cooking spray
Ingredients
- 4 quarts plain popped popcorn (from about 1 cup unpopped kernels)
- 1 cup light brown sugar, packed
- ¼ cup light corn syrup
- ½ cup butter (1 stick), or margarine
- ½ teaspoon salt
- 1 teaspoon vanilla extract
- ½ teaspoon baking soda
Instructions
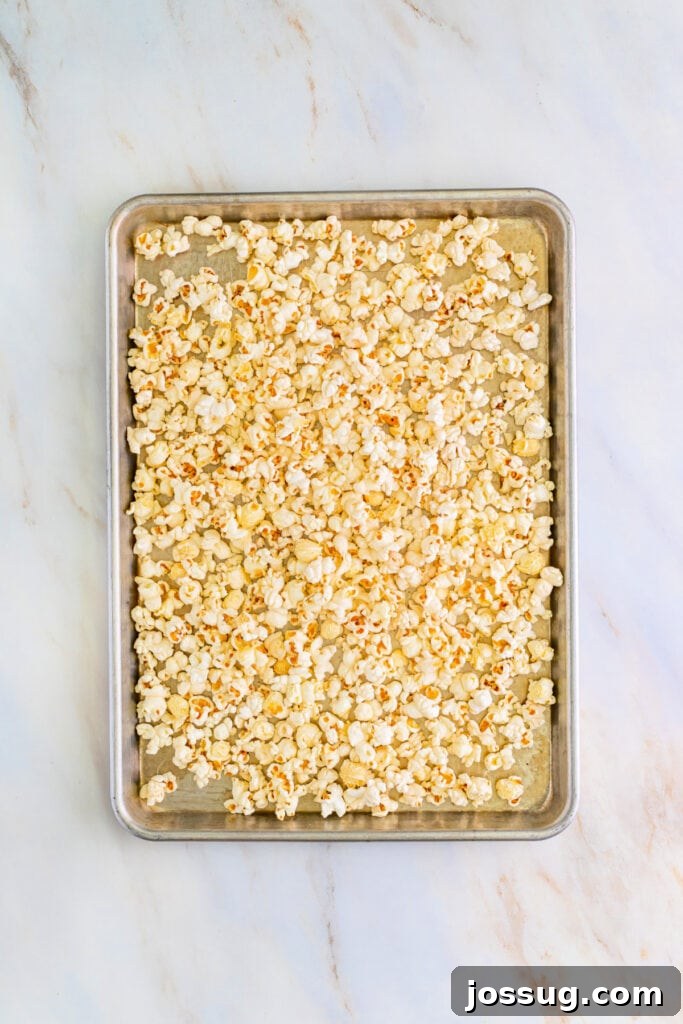
- Prepare Oven and Popcorn: Preheat your oven to 250°F (120°C). Generously spray two large baking sheets with cooking spray. Divide the plain popped popcorn evenly between these two prepared sheets, spreading it out as much as possible.
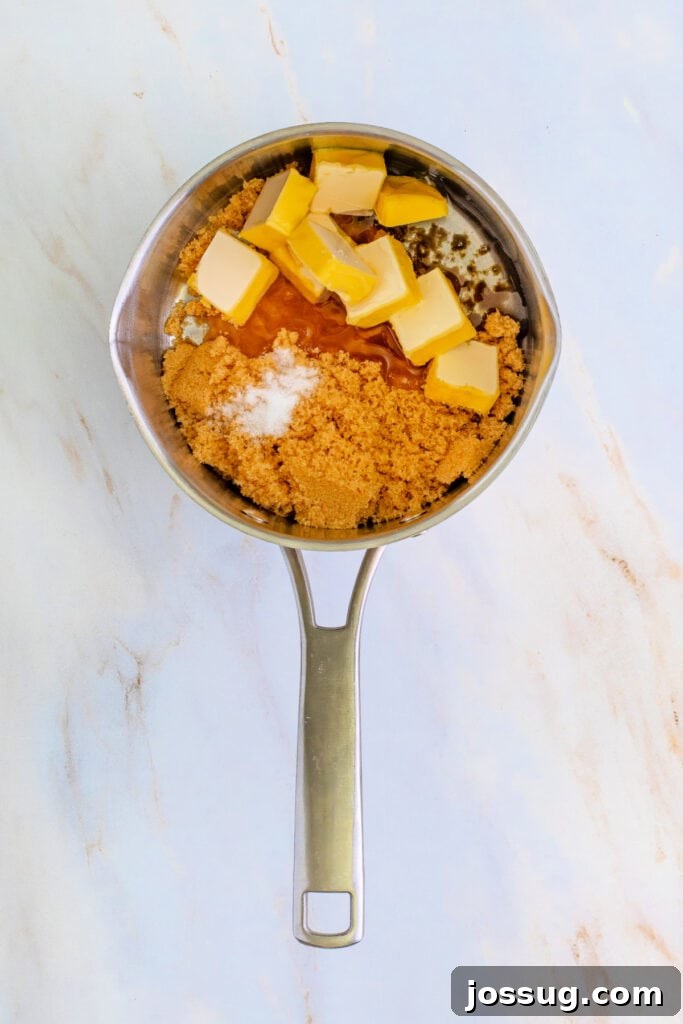
- Make the Caramel Base: In a large, heavy-bottomed saucepan, combine the light brown sugar, light corn syrup, butter (or margarine), and salt. Place the saucepan over medium heat. Stir constantly with a heatproof spatula or wooden spoon until the butter and sugar completely melt and the mixture begins to boil. This typically takes about 5 minutes. Continuous stirring is essential to prevent scorching.
- Boil the Caramel: Once the mixture reaches a full boil, continue to boil it for precisely 5 minutes, maintaining medium heat and stirring constantly. This step is crucial for the caramel to reach the correct consistency.
- Add Flavor & Aeration: Remove the saucepan from the heat. Quickly stir in the vanilla extract and then the baking soda. The mixture will instantly foam up and lighten in color – this is a normal and desired reaction, as the baking soda creates tiny air bubbles that contribute to the caramel’s light and crunchy texture.
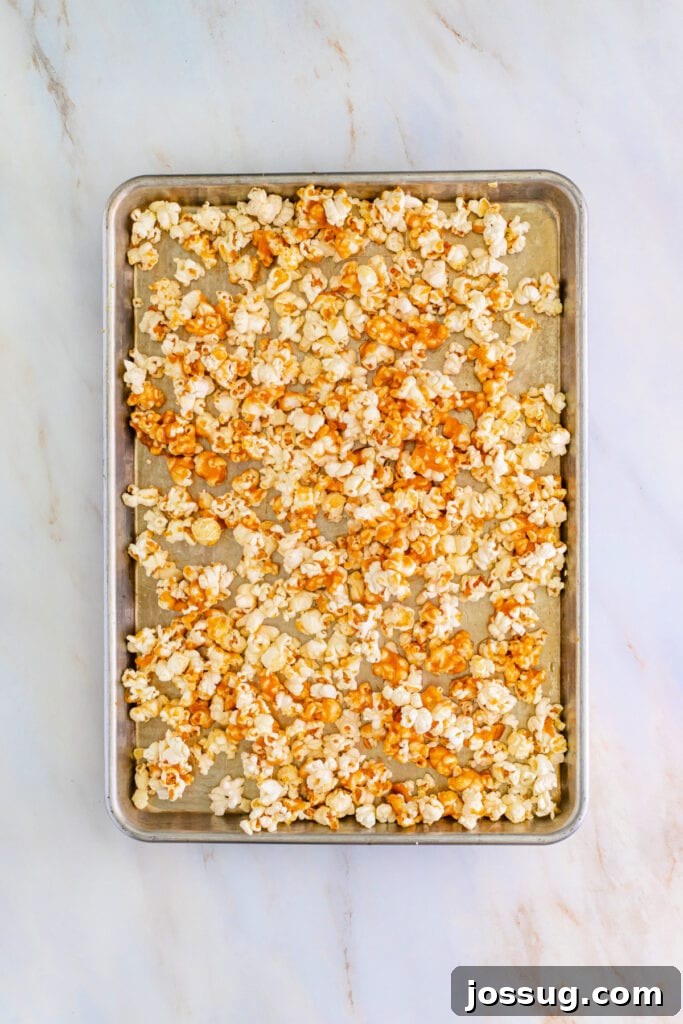
- Coat the Popcorn: Immediately and carefully pour half of the hot, foamy caramel mixture over the popcorn on each prepared baking sheet. Working very quickly, use your heatproof spatula to stir the popcorn, striving to coat as many kernels as possible. Don’t worry if the coating isn’t perfectly even at this stage; the baking process will help distribute the caramel further.
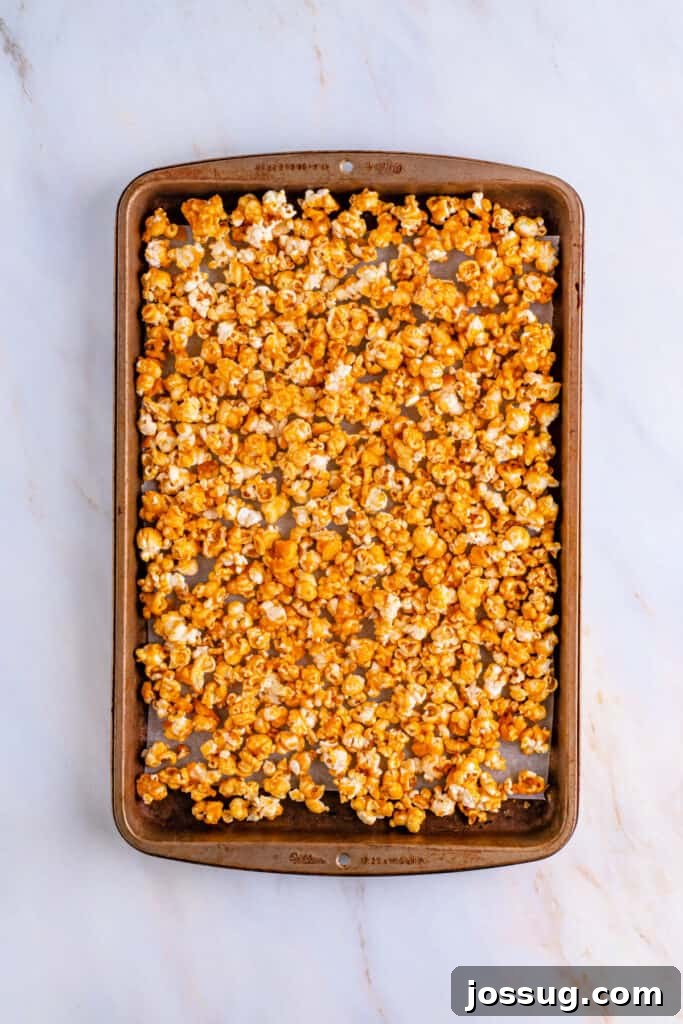
- Bake for Crunch: Place both baking sheets into the preheated oven. Bake for a total of 1 hour, making sure to stir the caramel corn thoroughly every 15 minutes. This regular stirring is absolutely essential for achieving an even, crispy coating and preventing any part of the caramel corn from burning while ensuring uniform crisping.
- Prepare for Cooling: During the last 15-20 minutes of baking, prepare two more clean baking sheets by lining them generously with parchment paper. These will be used for cooling the finished caramel corn.
- Cool and Serve: Once baked, remove the caramel corn from the oven. Immediately transfer it to the parchment-lined sheets to cool completely. As it cools, the caramel will harden and become wonderfully crunchy. As it cools, break up any large clumps with your hands (once cool enough to handle) before serving or storing.
Notes and Expert Tips
🥡 Storage Instructions
- Store your completely cooled and crunchy caramel corn in an airtight container at room temperature. It will remain fresh and delightfully crisp for up to 2 weeks.
♨️ Reheating (Optional)
- Caramel corn is typically enjoyed at room temperature, so reheating is usually not necessary. However, if you prefer a warm snack or need to re-crisp slightly softened caramel corn, spread it on a baking sheet and bake at 250°F (120°C) for 5-10 minutes.
❄️ Freezing Instructions
- For longer storage, caramel corn freezes beautifully! Place it in airtight containers or heavy-duty freezer bags. It can be frozen for up to 6 months. Thaw at room temperature for a few hours before serving to restore its texture.
💡 Key Tips for Best Results
- **Speed is Essential:** Work very quickly when pouring and mixing the caramel with the popcorn, as the caramel will begin to set rapidly once removed from heat.
- **Consistent Stirring:** Regular and thorough stirring during the entire baking process is absolutely critical for achieving an even caramel coating and maximum crunchiness.
- **Right Utensil:** Always use a heatproof silicone spatula or a sturdy wooden spoon for stirring to prevent sticking and for safe handling of hot caramel.
- **Patience in Cooling:** Allow the caramel corn to cool completely on parchment paper. This prolonged cooling step is the key to achieving its signature brittle and crunchy texture.
- **Mind the Humidity:** Try to avoid making caramel corn on very humid days, as excessive moisture in the air can cause the caramel to become sticky and lose its crispness.
🍳 Alternate Cooking Methods
- **Stovetop (No-Bake Version):** If you prefer a caramel corn with a slightly softer, chewier texture (rather than extra crunchy), you can opt to skip the oven baking step entirely. After coating the popcorn with caramel, simply spread it out on parchment paper and allow it to cool and harden at room temperature.
♻️ Creative Uses for Leftovers
- Enjoy any leftover caramel corn as a delightful standalone snack.
- Crumble it over scoops of vanilla or chocolate ice cream for an amazing topping.
- Package small portions in decorative bags as charming, homemade gifts for friends and family.
Nutrition Information (Approximate per serving)
Calories: 165 kcal,
Carbohydrates: 27.6 g,
Protein: 3.3 g,
Fat: 3.7 g,
Saturated Fat: 0.6 g,
Sodium: 2103 mg,
Potassium: 101 mg,
Fiber: 3.6 g,
Sugar: 7.5 g,
Calcium: 9 mg,
Iron: 1 mg
Please note: Nutrition information is an automatic calculation based on ingredients and standard portion sizes; it should be used as an approximation. Actual values may vary.
Enjoyed this delicious recipe? We’d love to hear from you!
Leave a comment and rate this recipe below to share your experience with other home cooks!