

Loaded Leprechaun Mint Bark: Your Ultimate St. Patrick’s Day Treat
Forget the search for a pot of gold at the end of the rainbow; we’ve found something even better – this incredibly fun and festive Loaded Leprechaun Mint Bark! Bursting with vibrant green and a cool, refreshing mint flavor, this delightful candy bark is the perfect way to infuse some Irish charm into your St. Patrick’s Day celebrations. But don’t limit its magic to just one holiday; it’s an irresistible, eye-catching treat that’s fantastic any time you’re craving a sweet, minty indulgence. Whether you’re planning a festive party, looking for a simple baking project with the kids, or simply want to brighten your day with a splash of color and flavor, this easy-to-make bark is your go-to recipe. Get ready to add a dash of luck and a whole lot of deliciousness to your day!

Embrace the Spirit of St. Patrick’s Day with a Delicious Mint Treat
While St. Patrick’s Day might not traditionally be a major holiday for everyone, it’s undeniably a wonderful excuse to embrace a bit of whimsy and enjoy festive treats. For years, as someone with red hair, I’ve heard my fair share of Irish jokes and assumptions – many people automatically assume red hair means Irish heritage. It was fun when I was little, being the center of attention on this green-themed day, but by the time I was about five, I was pretty much “over it” and the holiday’s emphasis on green beer and shamrocks for adults.
However, having young children in my life definitely changes your perspective and reignites the fun! Now, I find myself looking for enjoyable, family-friendly ways to mark the occasion. And let’s be honest, what better way to get into any holiday spirit than with delicious, themed food? Especially when that food is bright, colorful, and loaded with everyone’s favorite candies and cookies! Kids, in particular, are drawn to anything with a playful presentation and a hint of magic, and this Loaded Leprechaun Mint Bark ticks all those boxes with ease. It’s a fantastic way to create special holiday memories without needing elaborate preparations or complex recipes. Even as an adult, I can’t resist the allure of a simple, delicious, and visually appealing homemade candy that brings a smile to everyone’s face.
This recipe is specifically designed to bring joy without requiring extensive effort or a trip to the end of the rainbow. It features a rich, minty vanilla base generously topped with a medley of tasty, colorful treats. Each piece is a delightful surprise for your taste buds, offering a perfect balance of sweet, minty, and crunchy. Its vibrant green hue and festive toppings are enough to make anyone feel a little bit Irish and bring a touch of luck to their day. If you’re looking for an easy yet impressive St. Patrick’s Day dessert idea, something unique and homemade to share, this bark is your perfect answer. I can almost guarantee it won’t last long in your home – it certainly disappeared quickly with my family! So, skip the complex culinary endeavors and make this simple, enchanting Loaded Leprechaun Mint Bark instead. Enjoy every cool, refreshing, and utterly delicious bite!
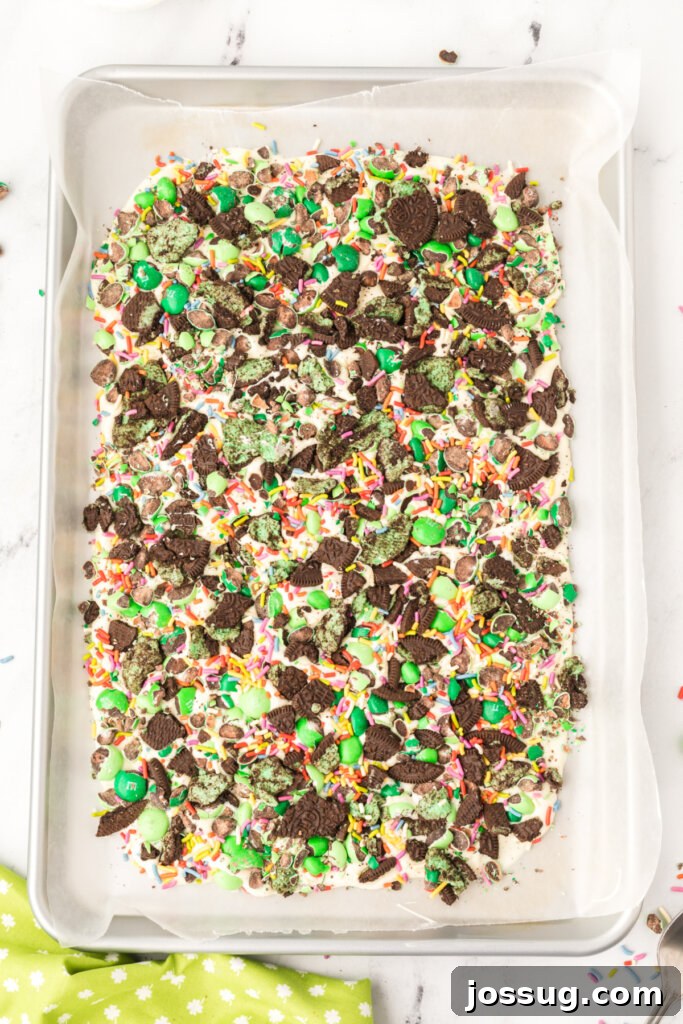
Crafting Your Loaded Leprechaun Mint Bark: Essential Ingredients & Savvy Substitutions
Creating this delightful Loaded Leprechaun Mint Bark requires just a few key ingredients, most of which are readily available at your local grocery store. The true beauty of this recipe lies not only in its simplicity but also in the fantastic flexibility to customize the toppings to your heart’s content. Here’s what you’ll need to gather to bring this festive minty magic to life, along with some helpful tips for substitutions:
Key Ingredients:
- Vanilla Candy Melts (e.g., CandiQuick, Ghirardelli Melting Wafers, or Wilton Candy Melts): This forms the creamy, melt-in-your-mouth foundation of our bark! CandiQuick is an excellent brand known for its ease of melting, smooth consistency, and reliable setting, making it perfect for home candy making. It provides a beautiful white base that can be easily colored to achieve that iconic leprechaun green. If CandiQuick isn’t available, any high-quality vanilla or white candy melt wafers will work wonderfully. These products are specifically designed for melting and coating, ensuring a smooth, non-temperamental experience. While white chocolate chips can be used as an alternative, be aware that pure white chocolate can be more temperamental to melt and may require a small amount (1-2 teaspoons) of coconut oil or vegetable shortening to achieve a smooth, pourable consistency without seizing. For best results and least fuss, stick with candy melts.
- Mint Extract (Crucial: NOT Peppermint Extract!): This is arguably the most important ingredient for achieving the characteristic “mint” flavor, which is distinct from the sharper, sometimes overpowering taste of peppermint. Mint extract offers a smoother, milder, and often greener flavor profile that perfectly complements the festive St. Patrick’s Day theme and pairs beautifully with the chocolate. Double-check your bottle to ensure you’re grabbing “mint” and not “peppermint” for that classic, refreshing taste that isn’t too strong. A little goes a long way, so start with the recommended amount and adjust to your preference after a quick taste test of the melted candy base.
- Green Food Coloring (Optional, but highly recommended for festive flair): While not explicitly listed in some original bark recipes, to truly achieve that signature “leprechaun” green, a few drops of gel-based green food coloring are highly recommended. Gel coloring offers vibrant color without thinning out the melted candy coating, which liquid food coloring can sometimes do. Add it gradually, stirring well after each addition, until you reach your desired shade of festive, bright green. Natural alternatives like spirulina powder can also be used for a lighter, more subtle green.
- Assorted Toppings (Mint M&M’s, Mint Oreos, and Rainbow Sprinkles): This is where the “loaded” part of our bark truly comes to life, adding incredible texture, flavor, and visual appeal!
- Mint M&M’s: These iconic candies add a delightful crunch, a burst of smooth milk chocolate, and an extra layer of refreshing minty goodness. Their vibrant green shells contribute beautifully to the St. Patrick’s Day aesthetic and make the bark pop. Coarsely chop them up so you get varying textures in each bite – some whole, some crushed.
- Mint OREO Cookies: Crushed mint Oreos introduce an irresistible chocolatey cookie crunch and another layer of refreshing mint flavor. The creamy mint filling of mint Oreos provides an irresistible softness that contrasts wonderfully with the firm candy bark. Roughly chop these as well, ensuring there are substantial chunks throughout the bark for maximum texture.
- Rainbow Sprinkles: To truly capture the magical “pot of gold at the end of the rainbow” theme, rainbow sprinkles are an absolute must! They add a playful pop of color, a delicate sugary crunch, and make the bark even more visually appealing and irresistible, especially for younger enthusiasts. They are the perfect finishing touch to elevate the festive look.
Remember, the beauty of bark recipes is their incredible adaptability. Feel free to experiment with other mint-themed or green-colored candies and treats for your toppings to make this recipe uniquely yours!
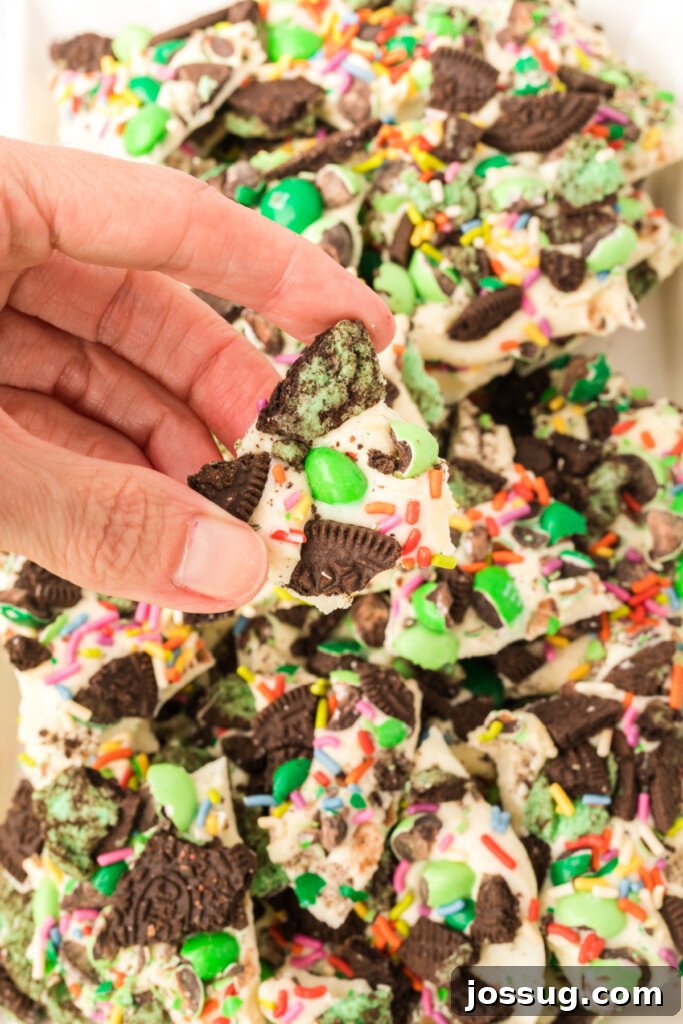
Simple Steps to Create Delicious Mint Bark Candy
Making homemade candy bark is surprisingly straightforward and an incredibly rewarding experience. This Loaded Leprechaun Mint Bark is no exception, allowing you to create a stunning and delicious treat that looks far more complicated than it actually is. With minimal active effort and just a little patience, you can have a batch of festive candy ready to delight friends and family. Follow these easy, step-by-step instructions for perfect results every time:
Step-by-Step Instructions:
- Prepare Your Workspace and Baking Sheet: Before you even think about melting your candy, ensure your kitchen counter is tidy and all the supplies you’ll need are within arm’s reach. This proactive step helps to make the process smooth and stress-free. Line a standard baking sheet (approximately 13×9 inches or larger, depending on how thin you prefer your bark) with either waxed paper or parchment paper. This non-stick surface is absolutely crucial for easy removal once the bark has set, preventing any sticking disasters. Set this prepared sheet aside.
- Melt the Vanilla Candy Melts: Place your vanilla candy melts (CandiQuick or your chosen alternative) into a microwave-safe bowl. Carefully follow the package directions precisely for melting, as different brands can vary slightly. Typically, this involves heating in short intervals (e.g., 30-60 seconds) at a reduced power setting (around 50%), stirring thoroughly after each interval, until the candy is completely smooth, shiny, and free of any lumps. Alternatively, for a more controlled and gentle melt, you can use a double boiler method, gently heating the candy over simmering water while stirring continuously. Be extra careful not to overheat the candy, as this can cause it to seize, become grainy, or burn, making it unusable.
- Infuse with Mint Flavor and Color: Once your candy coating is perfectly melted and gloriously smooth, stir in the mint extract. Mix thoroughly until the extract is fully incorporated, ensuring an even distribution of that refreshing mint flavor throughout the base. If you’re opting for a festive green color (which we highly recommend for a Leprechaun bark!), now is the time to add a few drops of gel-based green food coloring. Stir continuously until you achieve your desired shade of vibrant, celebratory green. Remember to add color sparingly and gradually, as gel colors are highly concentrated.
- Spread the Bark Base: Working quickly while the candy base is still warm and liquid, immediately pour the melted, flavored, and colored candy coating onto the prepared waxed or parchment paper on your baking sheet. Using an offset spatula or the back of a large spoon, carefully and evenly spread the melted candy into a thin layer. Aim for a consistent thickness of about 1/4 inch across the entire surface for optimal bark texture and easy breaking. Ensure the edges are somewhat even for a cleaner-looking final product.
- Generously Add Toppings: This is where the “loaded” magic truly happens! While the candy base is still wet and pliable, liberally scatter your coarsely chopped mint M&M’s, crushed mint Oreos, and vibrant rainbow sprinkles over the entire surface. Don’t be shy – the more “loaded” with colorful goodies, the better and more appealing your bark will be! You can even create patterns or simply scatter them randomly for a rustic charm.
- Gently Press Toppings: To ensure all those delicious toppings adhere firmly to the bark and don’t scatter when you break it, gently press them down into the melted candy. You can use the back of a clean spoon, a clean spatula, or even your clean hands. This crucial step prevents the toppings from falling off once the bark hardens and is essential for creating that satisfyingly “loaded” effect in every piece.
- Allow to Cool and Set Completely: Patience is truly a virtue in this step, as it’s the most important for achieving perfectly snappable bark. Allow the bark to cool and set completely at cool room temperature. This can take anywhere from 2 to 4 hours, depending on your room’s temperature and humidity. It’s vital not to rush this process by placing it in the refrigerator (more on why in the FAQs below). The candy will harden, become firm, and develop a beautiful snap when fully set.
- Break and Enjoy: Once the bark is completely cooled, hard, and firm to the touch, carefully lift the waxed or parchment paper from the baking sheet. You can then gently break the bark into irregular, rustic pieces with your hands, which adds to its charm, or use a sharp chef’s knife to carefully cut it into more uniform shapes. Serve immediately and prepare for it to disappear quickly!
With these simple and clear steps, you’re well on your way to enjoying a batch of homemade Loaded Leprechaun Mint Bark that’s as fun to make as it is to eat, leaving everyone feeling lucky!
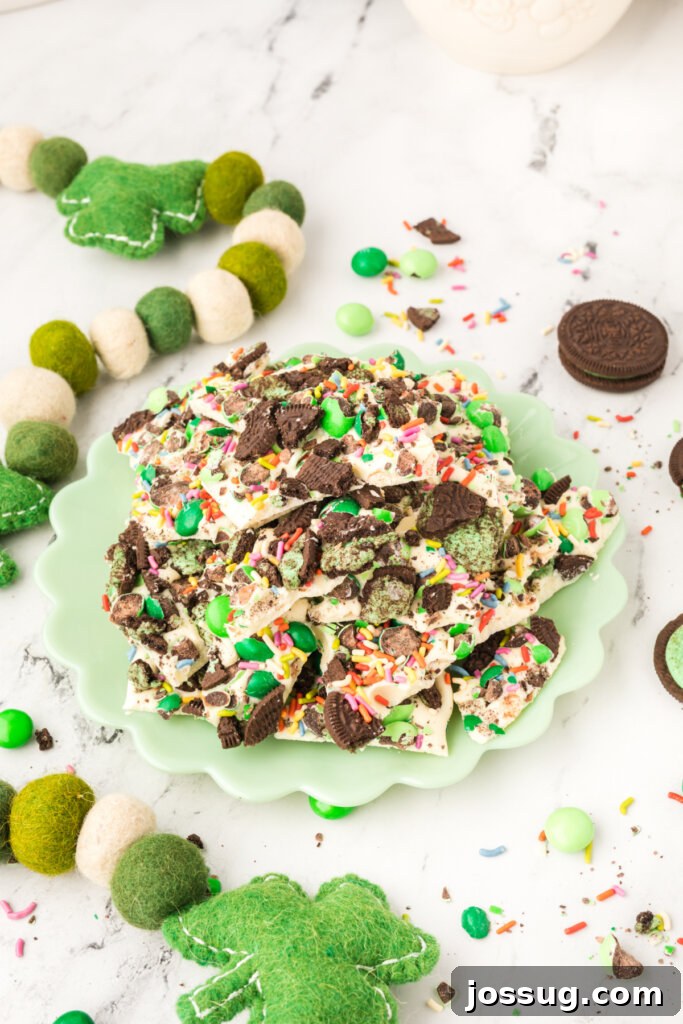
Frequently Asked Questions About Loaded Leprechaun Mint Bark
Here are some common questions about making and enjoying this festive mint bark, along with helpful answers and additional insights to ensure your success and enhance your candy-making experience:
This recipe is remarkably quick in terms of active preparation! You’ll need only about 10-15 minutes of hands-on time to melt the candy, stir in the mint extract and coloring, spread the base, and add all your delightful toppings. The majority of the time is spent waiting for the bark to cool and harden, which typically takes about 2 to 4 hours at cool room temperature. So, from the moment you start mixing to the point where you can break off a piece, you can expect to have a delicious batch of mint bark ready in just a few hours. This makes it an ideal last-minute treat for St. Patrick’s Day parties, unexpected guests, or a quick weekend project.
Following this recipe as written, you will yield a generous amount of candy bark, typically between 1 to 1.5 pounds. This quantity is generally sufficient to serve approximately 10-12 people, depending on how large you break or cut your pieces. It’s a perfect amount for sharing at a festive gathering, gifting to friends and neighbors, or simply enjoying with your family throughout the week. If you need a larger batch for a bigger crowd, simply double the recipe and use a larger baking sheet or two standard sheets to accommodate the increased volume.
While it might be incredibly tempting to speed up the cooling process by placing the bark in the refrigerator or freezer, I strongly advise against it for achieving optimal results. Rapid chilling can cause the candy coating to become overly brittle and dull, sometimes resulting in a phenomenon known as “bloom” – a white, chalky film that appears on the surface, affecting both its appealing texture and smooth appearance. More importantly, when bark cools too quickly, it often becomes much harder to break into clean, manageable pieces; it tends to splinter unevenly and create a mess. For the best snap, the smoothest texture, and the most satisfying break, allow your bark to set gradually at cool room temperature. If you’re genuinely in a hurry, a cool, dry pantry or even an air-conditioned room (away from direct vents) is preferable to the fridge or freezer for proper setting.
The possibilities for customizing your mint bark are truly endless, making each batch a unique creation! Beyond the delicious mint M&M’s and Oreos, consider these fantastic additions to make your bark even more “loaded” and personally tailored:
- Andes Mints: Crushed Andes mints are a classic and beloved choice for mint chocolate lovers. Their delicate layers of refreshing mint and rich chocolate blend seamlessly into the bark, adding another dimension of flavor.
- Finely Chopped Nuts: For a delightful textural contrast and a hint of earthy flavor, try adding finely chopped pistachios (their green color is a bonus!), pecans, or almonds.
- Other Mint-Flavored Cookies: Explore various mint-flavored cookies beyond Oreos, such as Girl Scout Thin Mints (especially if you can get them in season!), mint shortbread cookies, or chocolate wafers with mint cream.
- Dark Chocolate Drizzle or Chips: A beautiful drizzle of melted dark chocolate over the vibrant green mint base adds a sophisticated touch and a wonderful depth of flavor. Alternatively, sprinkle dark chocolate chips for extra richness and a varied chocolate experience.
- Gold Sprinkles or Edible Gold Dust: To truly lean into the magical “leprechaun” and “pot of gold” theme, a generous scattering of gold sprinkles or a light dusting of edible gold luster dust will give your bark a shimmering, magical finish that truly stands out.
- Mini Marshmallows: For a softer, chewier texture and a sweet pillowy contrast, miniature marshmallows can be a fun and playful addition, especially if you lightly toast them first for a hint of campfire flavor.
- Crushed Pretzels: If you enjoy a delightful sweet and salty combination, crushed pretzels can add a fantastic savory crunch and a surprising twist to your mint bark.
- Chocolate Covered Candy Bits: Think crushed chocolate-covered toffee bits or even other green-themed candies.
Let your creativity guide you and have fun experimenting with different combinations!
To keep your Loaded Leprechaun Mint Bark fresh, crisp, and delicious for as long as possible, store any leftovers in an airtight container at cool room temperature. It’s best to avoid direct sunlight or warm environments, as this can cause the chocolate to melt, soften, or develop bloom. Properly stored, your mint bark will retain its quality and vibrant flavor for up to 2-3 weeks. However, in most homes, it’s usually devoured much faster than that, thanks to its irresistible taste and festive appeal!
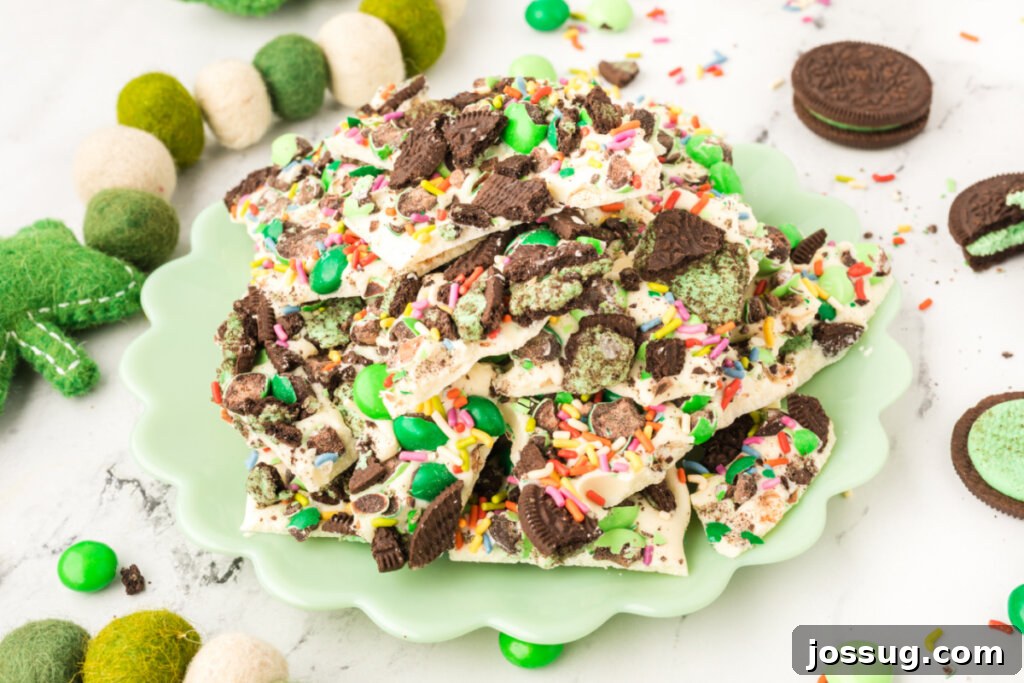
Other Festive & Minty Recipes You Might Enjoy
If you’ve fallen in love with the refreshing taste of mint and the joy of simple, homemade treats, be sure to explore these other fantastic recipes from our collection. They offer more delightful ways to incorporate mint, chocolate, and festive flair into your baking and dessert repertoire:
- Chocolate Mint Donuts
- No-Bake Mint Chocolate Chip Cheesecake
- Chocolate Covered Rainbow Strawberries
- No-Churn Peppermint Chip Ice Cream
- Dairy-Free Frozen Grasshopper
Loaded Leprechaun Mint Bark Recipe

Who needs a pot of gold when you have this fun Loaded Leprechaun Mint Bark? It’s perfect for St. Patrick’s Day or anytime you want a cool, minty treat!
Cook time: 10 minutes
Total time: 4 hours 20 minutes
Equipment
- Rubber spatula or wooden spoon
- Cut-Rite Wax Paper (or parchment paper)
- Baking sheet(s)
- Microwave-safe bowl or double boiler
Ingredients
- 1 package vanilla CandiQuick (16 oz.)
- ½ teaspoon mint extract (NOT peppermint)
- (Optional) A few drops of green gel food coloring
- 1 cup mint M&M’s, coarsely chopped
- 10 – 12 mint OREO’s, coarsely chopped
- Rainbow colored sprinkles, if desired
Instructions
- Line a baking sheet with waxed paper or parchment paper and set aside.
- Melt CandiQuick according to package directions in a microwave-safe bowl or double boiler until smooth.
- Add the mint extract (and green food coloring, if using) to the melted candy and stir until thoroughly combined and evenly colored.
- Spread the melted candy mixture evenly and thinly (about 1/4 inch thick) on the prepared waxed paper with a spatula.
- Immediately top with the coarsely chopped M&M’s, Oreos, and rainbow sprinkles. Gently press the toppings into the bark using the back of a spoon or your hand to ensure they adhere well.
- Allow the bark to cool completely at room temperature for 2-4 hours, until fully hardened. Do not refrigerate.
- Once cooled and re-hardened, break or cut the bark into desired pieces and serve.
Notes
- I do NOT recommend chilling your bark in the fridge to make it set up faster. It can make the bark brittle, dull, and harder to break cleanly.
- For additional add-ins, consider Andes mints, finely chopped nuts (like pistachios), other mint-flavored cookies, dark chocolate chips or a drizzle, or edible gold sprinkles for extra sparkle.
- Store any leftovers in an airtight container at cool room temperature for up to 2-3 weeks.
Nutrition
Calories: 348 kcal
Carbohydrates: 46g
Protein: 1g
Fat: 17g
Saturated Fat: 14g
Polyunsaturated Fat: 0.3g
Monounsaturated Fat: 1g
Trans Fat: 0.04g
Cholesterol: 3mg
Sodium: 60mg
Potassium: 23mg
Fiber: 1g
Sugar: 42g
Vitamin A: 39 IU
Vitamin C: 0.1mg
Calcium: 22mg
Iron: 1mg
Nutrition information is an approximation and may vary based on specific ingredients and brands used.
Originally published on March 6, 2014. Updated on January 30, 2023.