
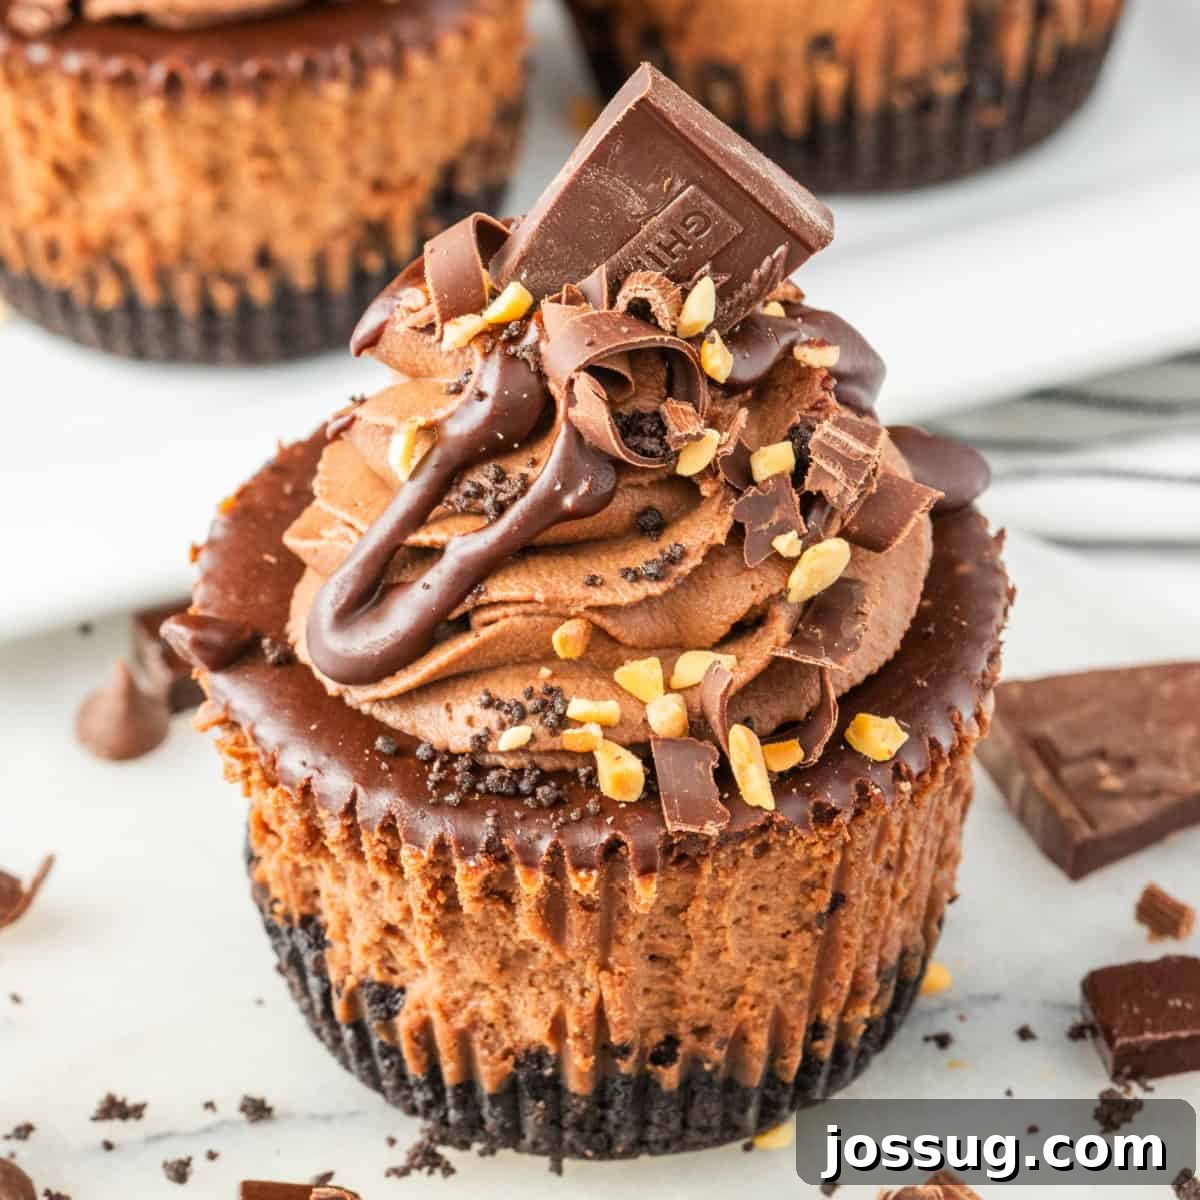
Prepare to be enchanted by these exquisite Mini Chocolate Cheesecakes! Imagine a perfectly crunchy Oreo crust cradling a velvety smooth, intensely chocolatey cream cheese filling, all crowned with a glistening chocolate ganache and a swirl of light, fluffy whipped cream. These bite-sized wonders are not only easy to make but also deliver a profound richness in flavor, making them absolutely ideal for parties, holidays, or any moment you crave a decadent treat. Get ready to elevate your dessert game with this irresistible recipe!
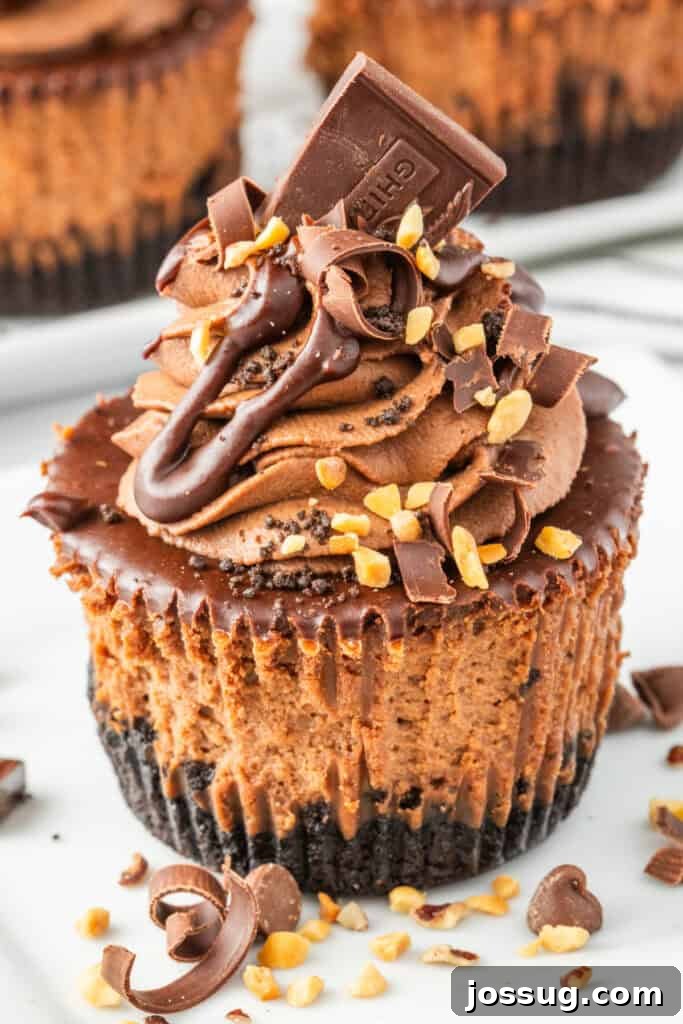
Mini Chocolate Cheesecakes: A Bite-Sized Indulgence
Are you searching for a dessert that’s truly a showstopper, yet surprisingly simple to create and guaranteed to leave a lasting impression? Look no further! This Mini Chocolate Cheesecakes recipe masterfully delivers grand flavor in a convenient, charming package. Each rich and creamy chocolate mini cheesecake boasts a classic, buttery Oreo cookie crust, a luxuriously smooth chocolate cream cheese filling, and is finished with a generous swirl of silky chocolate whipped cream and a drizzle of homemade chocolate ganache.
Whether you’re meticulously planning an elegant dinner party, assembling an impressive holiday dessert platter, or simply looking for fun and engaging mini cheesecake ideas to brighten your day, this particular recipe is one you’ll undoubtedly want to bookmark and revisit countless times. It’s perfect for those moments when you desire something extraordinary without the fuss of a full-sized cheesecake. The individual portions make serving a breeze, and their exquisite taste will have everyone asking for more. If you’re passionate about easy mini cheesecake ideas that promise to captivate and delight, this is truly a recipe worth saving and savoring.
⭐ Why These Mini Chocolate Cheesecakes Will Be Your New Favorite
- Unforgettably Rich & Creamy: Every bite is a journey into decadent chocolate bliss. The filling is perfectly smooth, balancing sweetness with a deep cocoa flavor that chocolate lovers will adore.
- Surprisingly Easy to Make: Don’t let their elegant appearance fool you. With straightforward steps and readily available ingredients, even novice bakers can achieve spectacular results. This recipe simplifies classic cheesecake techniques.
- Versatile for Any Occasion: From sophisticated holiday gatherings and festive birthday celebrations to casual weekend treats or thoughtful homemade gifts, these mini cheesecakes fit every scenario. Their individual size makes them perfect for entertaining.
- Kid-Approved & Freezer-Friendly: A hit with children and adults alike, these treats are also a fantastic make-ahead option. Prepare a batch, freeze them, and enjoy perfect cheesecakes whenever a craving strikes.
- Crowd-Pleasing Portion Control: The individual servings are ideal for parties, ensuring everyone gets their own delightful dessert. No cutting, no mess, just perfectly portioned indulgence. They’re easy to transport and display beautifully.
🛒 Essential Ingredients & Smart Substitutions
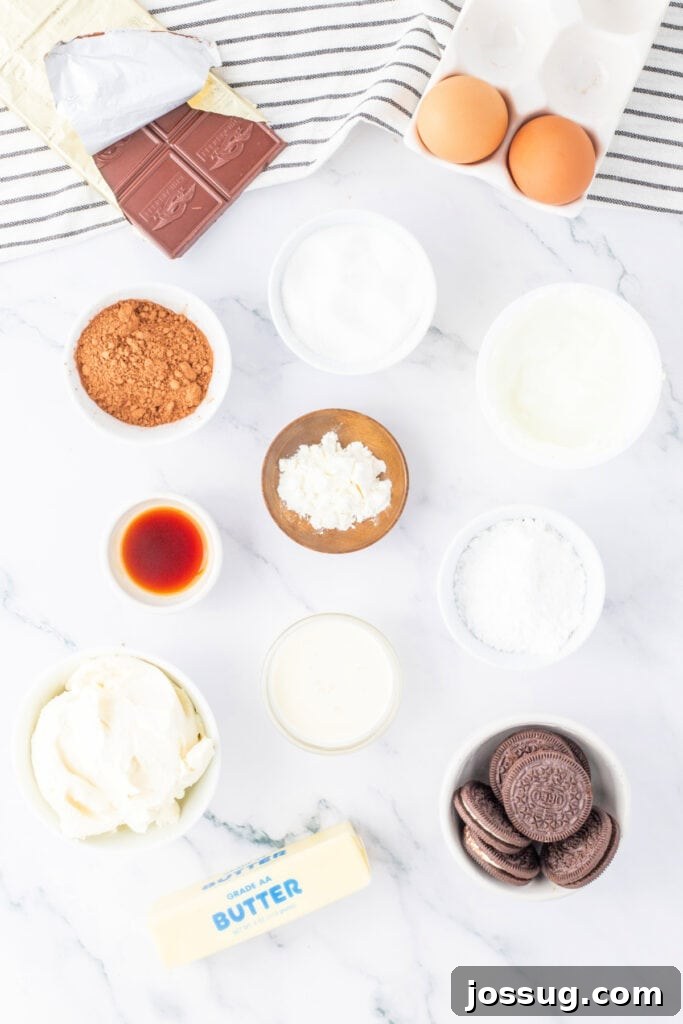
Crafting these delectable mini chocolate cheesecakes requires a few key ingredients. Here’s what you’ll need, along with some helpful substitution notes:
The Perfect Oreo Crust
- Oreo Cookie Crumbs: The foundation of our cheesecake. These iconic chocolate sandwich cookies provide a delightful crunch and deep chocolate flavor.
- Substitution: Feel free to use any brand of chocolate sandwich cookies. For a different flavor profile, consider graham cracker crumbs or shortbread cookies.
- Melted Butter: Binds the cookie crumbs together, creating a firm and flavorful crust.
- Substitution: Margarine can be used in a pinch, though butter offers superior flavor. Coconut oil (melted) can also work for a dairy-free option, but the flavor will be different.
Luxurious Cheesecake Filling
- Semi-Sweet Chocolate: The star of our filling, providing rich chocolate notes. Baker’s chocolate bars are recommended for their superior melting quality and flavor.
- Substitution: Dark chocolate can be used for a more intense, less sweet flavor profile. Chocolate chips will also work, but may require slightly longer melting.
- Cream Cheese (Room Temperature): The cornerstone of any cheesecake. Ensure it’s at room temperature for a lump-free, silky-smooth batter.
- Important: Full-fat cream cheese is highly recommended for the best texture and richness. Low-fat cream cheese may yield a less creamy result.
- Granulated Sugar: Sweetens the filling, balancing the richness of the chocolate and cream cheese.
- Greek Yogurt (Room Temperature): Adds a subtle tang and helps achieve that signature creamy texture.
- Substitution: Sour cream is an excellent alternative, offering a similar tang and richness.
- Cornstarch: Acts as a stabilizer, preventing cracks and ensuring the filling sets beautifully.
- Vanilla Extract: Enhances all the other flavors, adding a touch of warmth and aromatic depth.
- Large Eggs (Room Temperature): Bind the ingredients and provide structure to the cheesecake. Like cream cheese, room temperature eggs are crucial for a smooth batter.
- Tip: Never overmix after adding eggs, as this can introduce too much air, leading to cracks during baking.
Silky Chocolate Ganache Topping
- Semi-Sweet Chocolate: Used here to create a pourable, glossy ganache. Baker’s chocolate is preferred.
- Substitution: Dark chocolate will work for a richer ganache. Milk chocolate can be used for a sweeter, milder flavor.
- Heavy Cream: The essential partner to chocolate for a smooth, emulsified ganache.
Fluffy Chocolate Whipped Cream
- Heavy Whipping Cream: Forms the base of our airy, delightful topping. Ensure it’s very cold for best whipping results.
- Powdered Sugar: Sweetens the whipped cream and helps stabilize it.
- Cocoa Powder: Infuses the whipped cream with a lovely chocolate flavor.
- Substitution: Use dark cocoa powder for a deeper, more intense chocolate flavor and darker color.
✨ Creative Variations to Personalize Your Mini Cheesecakes
While these mini chocolate cheesecakes are perfect as-is, don’t hesitate to get creative! Here are a few ideas to customize them to your liking:
- Add Mini Chocolate Chips: Stir a handful of mini semi-sweet chocolate chips into the cheesecake batter just before baking for an extra burst of chocolate and delightful textural contrast.
- White Chocolate Wonderland: For a lighter, sweeter twist, use white chocolate instead of semi-sweet in both the filling and the ganache. This creates a beautifully elegant dessert with a milder chocolate essence.
- Diverse Toppings: Elevate your presentation and flavor!
- Fresh Berries: Garnish with vibrant raspberries, sliced strawberries, or blueberries for a fresh, fruity counterpoint to the rich chocolate.
- Chopped Nuts: Sprinkle with chopped pecans, walnuts, or almonds for added crunch.
- Chocolate Shavings or Curls: A classic and sophisticated topping that adds visual appeal.
- Sprinkles: Use colorful sprinkles for a festive look, especially for birthdays or holidays.
- Coconut Flakes: Toasted coconut flakes can add a tropical flair.
- Flavored Oreo Crusts: Experiment with different types of Oreo cookies for the crust.
- Mint Oreos: For a refreshing mint-chocolate combination.
- Peanut Butter Oreos: Perfect for peanut butter and chocolate enthusiasts.
- Golden Oreos: If you prefer a vanilla crust to complement the chocolate filling.
- Espresso Kick: Add 1-2 teaspoons of instant espresso powder to the cheesecake batter or ganache to deepen the chocolate flavor without making it taste like coffee.
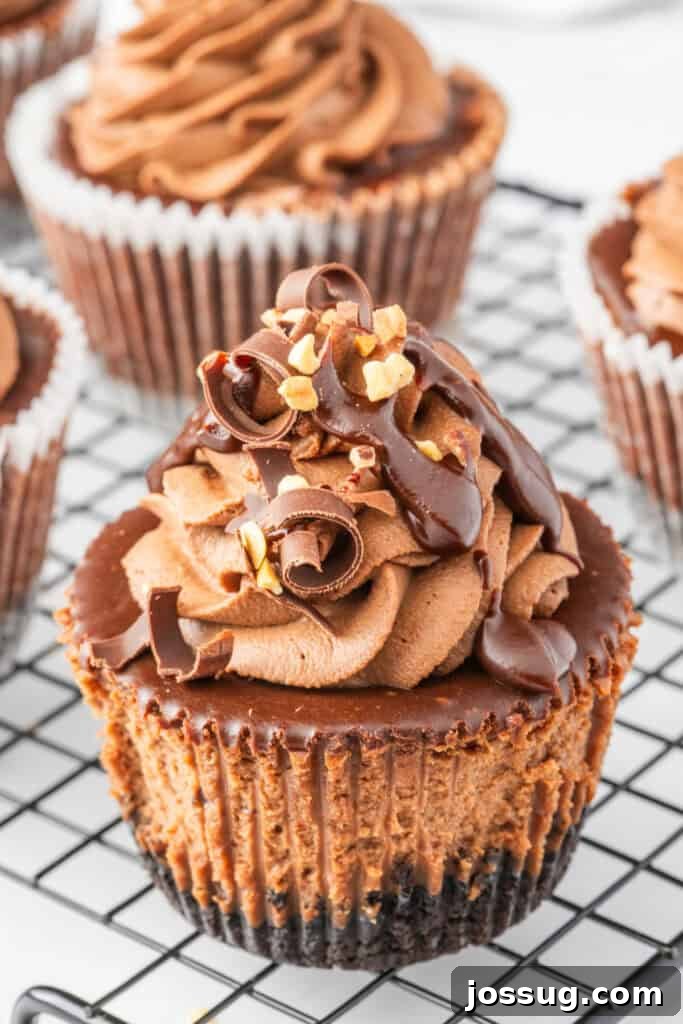
🔥 Expert Tips for Flawless Mini Chocolate Cheesecakes
- Achieve a Silky Filling with Room Temperature Ingredients: This is perhaps the most crucial tip! Ensure your cream cheese, Greek yogurt (or sour cream), and eggs are at room temperature. Cold ingredients will lead to a lumpy batter and can make overmixing more likely, resulting in a less smooth and potentially cracked cheesecake.
- Avoid Overmixing (Especially After Eggs): Once you add the eggs to your cheesecake batter, mix only until just combined on low speed. Overmixing incorporates too much air, which expands during baking and then collapses as the cheesecake cools, leading to unsightly cracks.
- The Art of Whipped Cream Swirls: For a professional, beautiful finish, transfer your chocolate whipped cream to a piping bag fitted with your favorite decorative tip (a star tip is always a winner). This allows for neat, elegant swirls that impress. If you don’t have a piping bag, a Ziploc bag with a corner snipped off works well, or simply dollop it on with a spoon for a rustic charm.
- Chill Fully for Optimal Texture: Patience is key! These cheesecakes need ample time to chill in the refrigerator—at least an hour, but preferably longer (2-4 hours or even overnight). This allows the filling to fully set, firm up, and develop its creamy, dense texture, and ensures the ganache sets perfectly.
- Smart Storage for Lasting Freshness: Store any leftover mini cheesecakes in an airtight container in the refrigerator to maintain their freshness and prevent them from absorbing other fridge odors. They will stay delicious for up to 5 days. For longer storage, see our freezing tips below.
❓ Frequently Asked Questions About Mini Chocolate Cheesecakes
Absolutely! This versatile recipe is designed to yield 12 standard-size mini cheesecakes when made in a regular cupcake pan. If you prefer larger portions, it will make 6 jumbo muffin-sized cheesecakes instead. Just ensure you adjust baking times accordingly.
No, you don’t! One of the beauties of this mini cheesecake recipe is that it bakes beautifully without the need for a water bath. This saves you time and effort, making the process much simpler while still achieving a perfectly smooth and creamy texture.
Yes, these mini chocolate cheesecakes are an excellent make-ahead dessert. You can prepare them 1-2 days in advance, store them in an airtight container in the refrigerator, and then simply add your final toppings just before serving for maximum freshness and appeal.
For smooth, perfectly melted chocolate, you have two great options. The easiest method is to use a microwave: break the chocolate into small pieces and microwave in 30-second intervals, stirring thoroughly after each interval until completely smooth. Alternatively, you can use a double boiler over simmering water for more controlled melting, stirring frequently.
While store-bought crusts are convenient for larger cheesecakes, they are not suitable for this specific recipe as each cheesecake is made in individual liners. The homemade Oreo crust is incredibly quick and easy to prepare, requiring just two ingredients and a few minutes of your time, and it truly enhances the overall flavor and texture.
No, there’s no need to grease the cupcake or muffin liners. Whether you use paper or foil liners, they are designed to work well and peel away cleanly from the baked and chilled cheesecakes, leaving you with perfectly intact individual desserts.
The edges of your mini cheesecakes should appear set and firm, but the center should still have a slight jiggle when you gently shake the pan. This slight movement indicates they are perfectly cooked. It’s crucial to avoid overbaking, as this can lead to a dry texture and, most commonly, cracks on the surface.
While the cheesecakes are undeniably delicious on their own, both the chocolate ganache and the whipped cream topping contribute significantly to the overall flavor and luxurious texture, adding layers of chocolatey goodness and a beautiful finish. You can skip them if desired, but for the full decadent experience, they are highly recommended!
For the best possible texture, flavor, and stability, these mini cheesecakes require at least 1 hour of chilling time after baking and cooling on a wire rack. However, longer chilling periods, ideally 2-4 hours or even overnight, will allow the flavors to meld and the filling to firm up perfectly, making them even more enjoyable.
🍽️ More Irresistible Mini Cheesecake Recipes You May Enjoy
Dessert
Mini Eggnog Cheesecakes
Dessert
Mini Key Lime Cheesecakes
Dessert
No Bake Mini Chocolate Peanut Butter Cheesecakes
Easter
Mini Easter Cheesecakes
12
servings
Mini Chocolate Cheesecakes
Jamie Sherman
15 minutes
20 minutes
1 hour
1 hour
35 minutes
Save
Saved
Pin
Rate
Equipment You’ll Need
-
12-cup muffin pan: Essential for baking individual mini cheesecakes.
-
Cupcake liners: To ensure easy removal and portioning.
-
Food processor: For finely crushing Oreo cookies. (Alternatively, a zip-top bag and a rolling pin work just as well.)
-
Mixing bowls: You’ll need both a medium and a large one for different components of the recipe.
-
Hand mixer: For achieving a smooth and creamy cheesecake batter and fluffy whipped cream. (A stand mixer can also be used.)
-
Rubber spatula or wooden spoon: For scraping down bowls and gentle mixing.
-
Shot glasses: Perfect for firmly pressing the crust into the liners.
-
Ice cream scoop: Helpful for evenly dividing the cheesecake batter into the liners. (Optional, but makes it easier.)
-
Microwave-safe bowl: For melting chocolate quickly and efficiently.
-
Piping bags: For artfully piping the chocolate whipped cream. (Optional, but great for presentation.)
-
Wire cooling rack: For cooling the cheesecakes evenly after baking.
Ingredients
Crust
-
2
cups
Oreo cookie crumbs, about 20 cookies -
4
tablespoons
butter, melted
Cheesecake Filling
-
6
ounces
semi-sweet chocolate, prefer baker’s chocolate bars -
16
ounces
cream cheese, room temperature -
⅔
cup
granulated sugar -
⅔
cup
Greek yogurt, or sour cream, room temperature -
1
tablespoon
cornstarch -
2
teaspoons
vanilla extract -
2
large eggs, room temperature
Chocolate Ganache
-
6
ounces
semi-sweet chocolate, prefer baker’s chocolate bars -
6
tablespoons
heavy cream
Chocolate Whipped Cream
-
1 ½
cups
heavy whipping cream -
¾
cup
powdered sugar -
3
tablespoons
cocoa powder, adjust to taste for desired chocolate intensity
Step-by-Step Instructions
Make the Irresistible Oreo Crust
-
Preheat your oven to 350 degrees F (175 C). Prepare your muffin pan by lining a 12-cup regular cupcake pan with paper liners, or a 6-cup jumbo muffin pan with liners for larger cheesecakes. This ensures easy removal.
-
In a food processor, pulse the entire Oreo cookies (filling included) until they transform into fine, even crumbs. If you don’t have a food processor, simply place the cookies in a sturdy zip-top bag and crush them thoroughly with a rolling pin or the bottom of a heavy glass.
-
Transfer the cookie crumbs to a small mixing bowl. Pour in the melted butter and mix thoroughly with a spoon or spatula until all the crumbs are moistened and evenly coated, resembling wet sand.
-
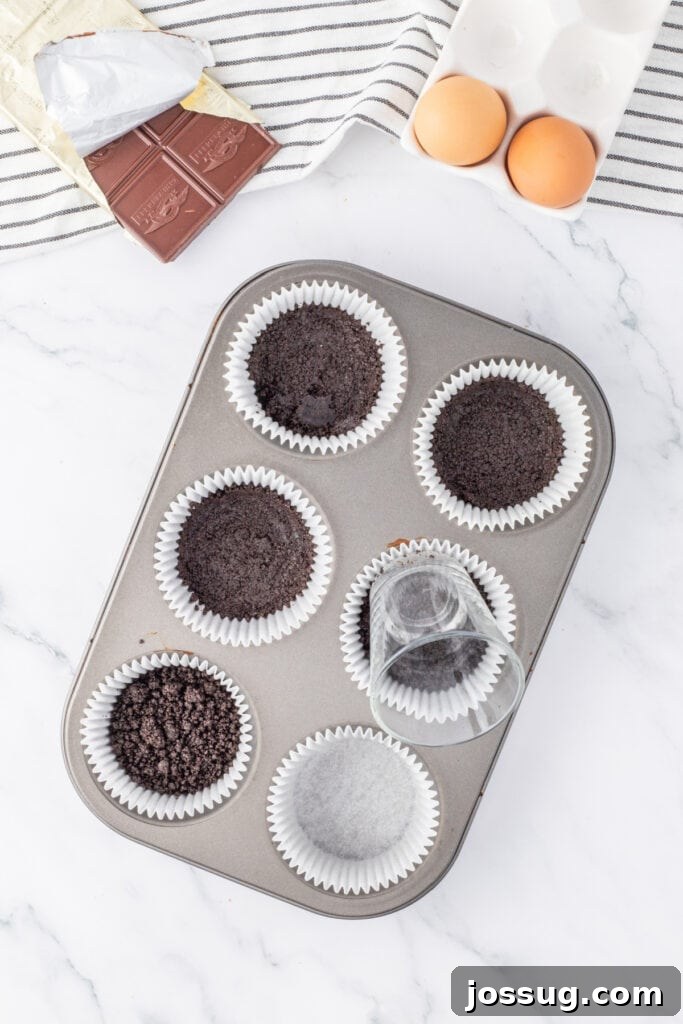
Divide the prepared crust mixture evenly among your lined muffin cups. For best results and a sturdy crust, use the back of a tablespoon or a small shot glass to firmly press the crumbs down into an even layer at the bottom of each liner.
-
Bake the crusts in the preheated oven for just 5 minutes. This light baking helps to set the crust and prevent it from becoming soggy. Remove from the oven and set aside on a wire rack to cool slightly while you prepare the filling.
Craft the Creamy Cheesecake Filling
-
Break the 6 ounces of semi-sweet chocolate into small pieces and place them in a microwave-safe bowl. Microwave in 30-second intervals, stirring well after each, until the chocolate is completely melted and smooth. Be careful not to overheat it.
-
In a medium mixing bowl, using an electric hand mixer (or stand mixer with paddle attachment), beat the room temperature cream cheese until smooth and free of lumps. Add the melted chocolate and granulated sugar, beating until the mixture is fully combined and creamy, scraping down the sides of the bowl as needed.
-
Incorporate the room temperature Greek yogurt (or sour cream), cornstarch, and vanilla extract into the cream cheese mixture. Mix on low speed until everything is just well combined and the batter is smooth.
-
Add the large eggs one at a time, mixing on the lowest speed only until each egg is just incorporated. It’s crucial not to overmix at this stage, as excessive air can cause cracks in your cheesecakes during baking. Scrape down the sides of the bowl between additions to ensure an even batter.
-
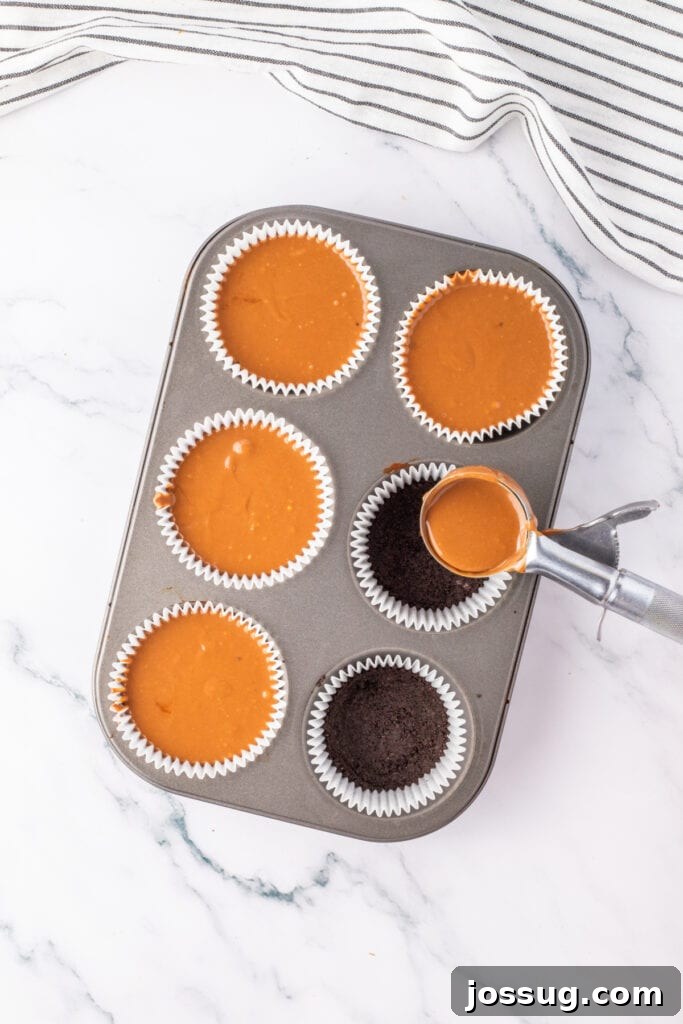
Carefully divide the smooth cheesecake batter evenly over the pre-baked Oreo crusts in your muffin pan. An ice cream scoop can be particularly useful here for precise and clean portioning.
Bake to Perfection & Chill
-
Bake the jumbo muffin-sized cheesecakes for approximately 30-35 minutes, or regular cupcake-sized ones for 18-22 minutes. The cheesecakes are done when the edges appear set and slightly firm, but the very center still shows a slight jiggle when gently shaken. This indicates a perfectly creamy texture.
-
Once baked, remove the muffin pan from the oven and allow the cheesecakes to cool completely on a wire rack at room temperature for about 20 minutes. After initial cooling, transfer the cheesecakes (still in their liners in the pan) to the refrigerator and chill for at least 40 minutes, or until they are fully cold to the touch. This step is essential for setting the cheesecake and preventing cracking.
Prepare the Luxurious Chocolate Ganache
-
In a microwave-safe bowl, combine the remaining 6 ounces of semi-sweet chocolate (broken into pieces) and 6 tablespoons of heavy cream. Microwave in 30-second intervals, stirring until the mixture is smooth, glossy, and fully emulsified into a rich ganache.
-
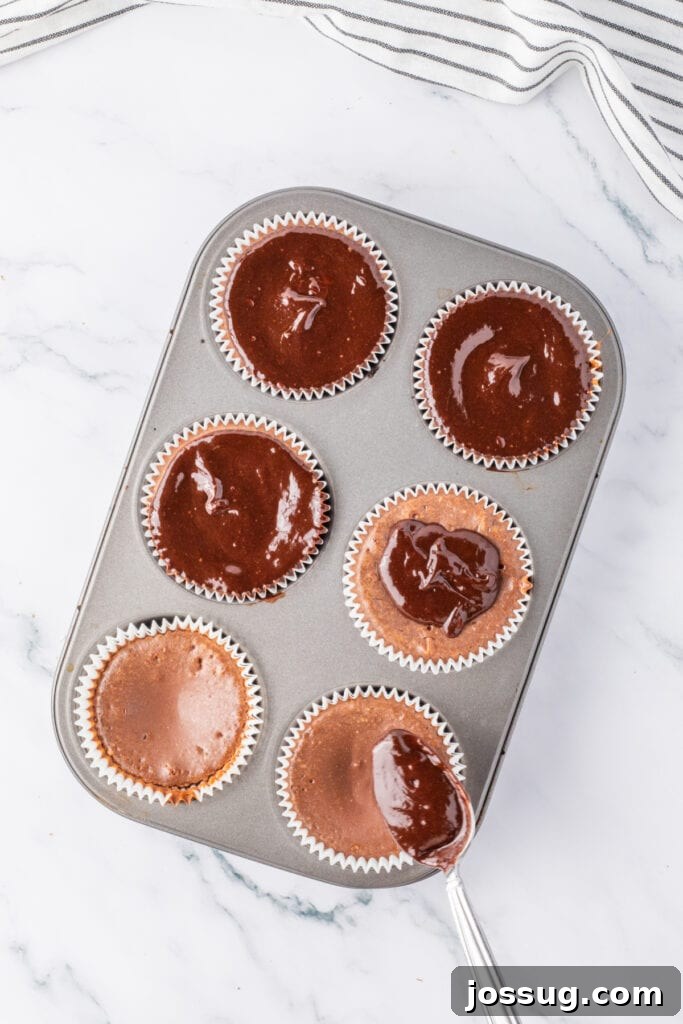
Pour a little more than half of the warm ganache evenly over the tops of the fully chilled cheesecakes. Gently spread it with the back of a spoon if needed to cover the surface. Reserve the remaining ganache for a decorative drizzle later. Place the cheesecakes back into the refrigerator to allow the ganache layer to set, which usually takes about 15-20 minutes.
Whip Up the Chocolate Whipped Cream
-
In a large, clean mixing bowl, pour the very cold heavy whipping cream. Using an electric hand mixer (or stand mixer with whisk attachment), whip on high speed for approximately 2 minutes, or until soft peaks begin to form.
-
Gradually add the powdered sugar and cocoa powder to the whipping cream. Continue to mix on high speed for another 30 seconds to 1 minute, until stiff peaks form and all ingredients are fully combined, creating a light and airy chocolate whipped cream.
Final Assembly & Enjoyment
-
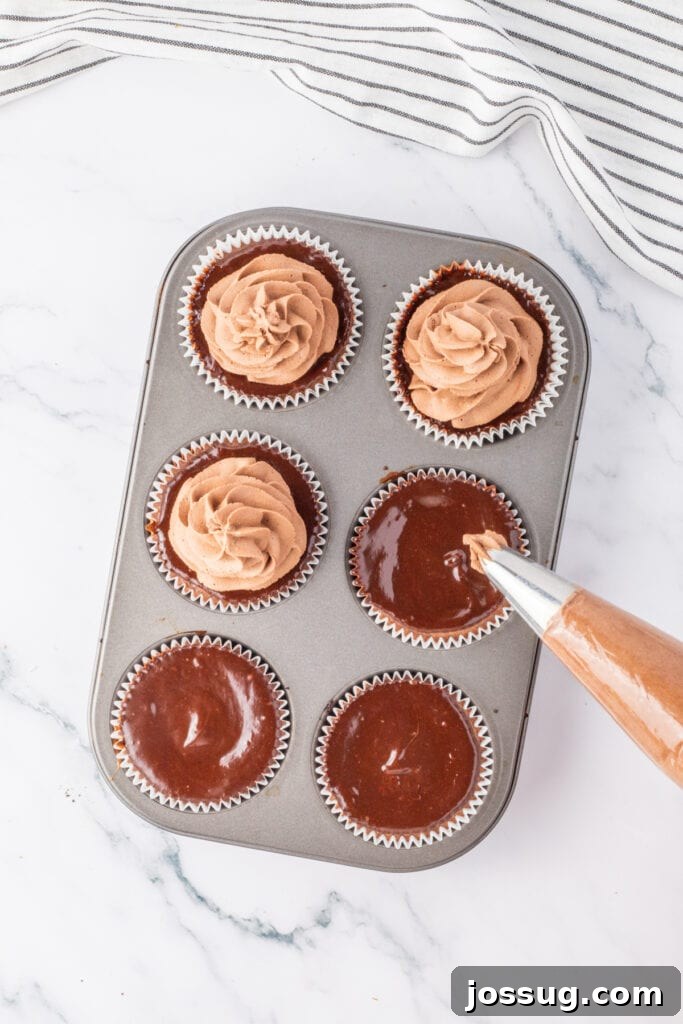
Once the ganache on your cheesecakes has set, transfer the chocolate whipped cream into a piping bag fitted with your desired tip (or use a spoon). Pipe generous swirls of the whipped cream onto the ganache-topped cheesecakes.
-
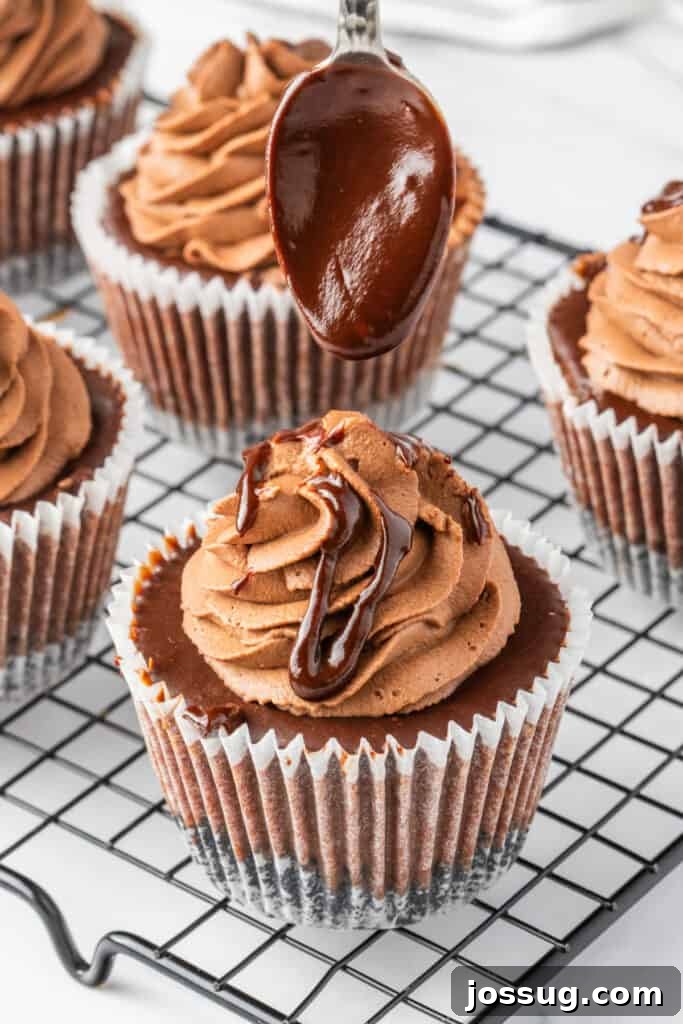
Take the reserved chocolate ganache (if it has thickened, gently warm it slightly until pourable again) and artfully drizzle it over the piped chocolate whipped cream. This adds an extra layer of chocolate flavor and a beautiful visual appeal.
-
Now for the fun part: decorate your mini chocolate cheesecakes as desired! Options include fresh berries, chocolate shavings, chopped nuts, or festive sprinkles. Serve immediately or return to the fridge for a quick chill before delighting your guests and yourself!
Notes for Perfect Mini Cheesecakes
🥡 Storage Best Practices
- To maintain their freshness and delicate flavor, store your finished mini chocolate cheesecakes in an airtight container in the refrigerator. They will remain wonderfully delicious for up to 5 days.
- When storing, ensure they are not placed near strong-smelling foods in your refrigerator, as cheesecakes can easily absorb other odors, compromising their taste.
♨️ Reheating & Serving Temperature
- These delectable mini cheesecakes are specifically designed to be enjoyed chilled. Do not attempt to reheat them, as this will alter their delicate texture and cause the ganache and whipped cream to melt.
- For those who prefer a slightly softer, creamier texture, allow the cheesecakes to sit at room temperature for 10-15 minutes before serving. This brief rest helps to enhance their melt-in-your-mouth quality.
❄️ Freezing for Future Enjoyment
- Mini chocolate cheesecakes freeze beautifully without their final toppings. To freeze, place the unfrosted (no ganache or whipped cream) baked and cooled cheesecakes on a baking sheet and freeze until solid. Once solid, transfer them to a freezer-safe, airtight container, separating layers with parchment paper. They can be frozen for up to 2 months.
- When ready to enjoy, thaw the frozen cheesecakes overnight in the refrigerator. Add the chocolate ganache, whipped cream, and any other desired toppings fresh just before serving for the best possible experience.
💡 Advanced Tips for Best Results
- Room Temperature is Key: Ensure all your dairy ingredients (cream cheese, yogurt/sour cream, eggs) are at true room temperature. This is essential for achieving a smooth, lump-free batter and prevents overmixing, which can lead to cracks.
- Gentle Mixing After Eggs: After adding the eggs, mix only until just combined on the lowest speed. Overmixing incorporates too much air, which will cause the cheesecake to puff up and then crack as it cools.
- Cooling Process is Critical: Allow cheesecakes to cool completely on a wire rack at room temperature before transferring them to the refrigerator. Moving a warm cheesecake directly into the cold fridge can cause rapid temperature changes, contributing to cracking and condensation.
- Thorough Chilling for Texture: The cheesecakes need sufficient time to chill. This allows the internal structure to fully set, resulting in that dense, creamy, and delightful cheesecake texture we all love, and also helps the flavors to fully meld.
🍳 Alternate Cooking Methods (Not Recommended)
- For these baked mini chocolate cheesecakes, the oven is the superior and only recommended method to achieve the desired texture and perfect bake.
- Methods such as air frying, microwaving, or stovetop cooking are not suitable for this recipe. They will not provide the even heat distribution or gentle baking environment needed to create the classic, creamy cheesecake consistency.
Nutrition Information
Serving:
1
cheesecake
,
Calories:
644
kcal
,
Carbohydrates:
50
g
,
Protein:
8
g
,
Fat:
47
g
,
Saturated Fat:
27
g
,
Polyunsaturated Fat:
3
g
,
Monounsaturated Fat:
12
g
,
Trans Fat:
0.2
g
,
Cholesterol:
120
mg
,
Sodium:
235
mg
,
Potassium:
292
mg
,
Fiber:
3
g
,
Sugar:
36
g
,
Vitamin A:
1248
IU
,
Vitamin C:
0.2
mg
,
Calcium:
101
mg
,
Iron:
3
mg
Nutrition information is automatically calculated and should only be used as an approximation. Individual results may vary based on specific ingredients and preparation methods.
Loved this recipe? Share your thoughts below!
Your feedback helps us create more delicious content!