

Few confections capture the essence of autumn quite like a perfectly crafted caramel apple. That delightful combination of a crisp, juicy apple enveloped in a rich, buttery caramel coating is a timeless classic. Forget the often-stale and overpriced versions you find in stores; making gourmet caramel apples at home is a surprisingly simple and immensely gratifying experience. This comprehensive guide will empower you to create stunning, delicious homemade caramel apples, ensuring they become a cherished part of your fall festivities, holiday celebrations, or any moment you crave a truly special sweet treat.
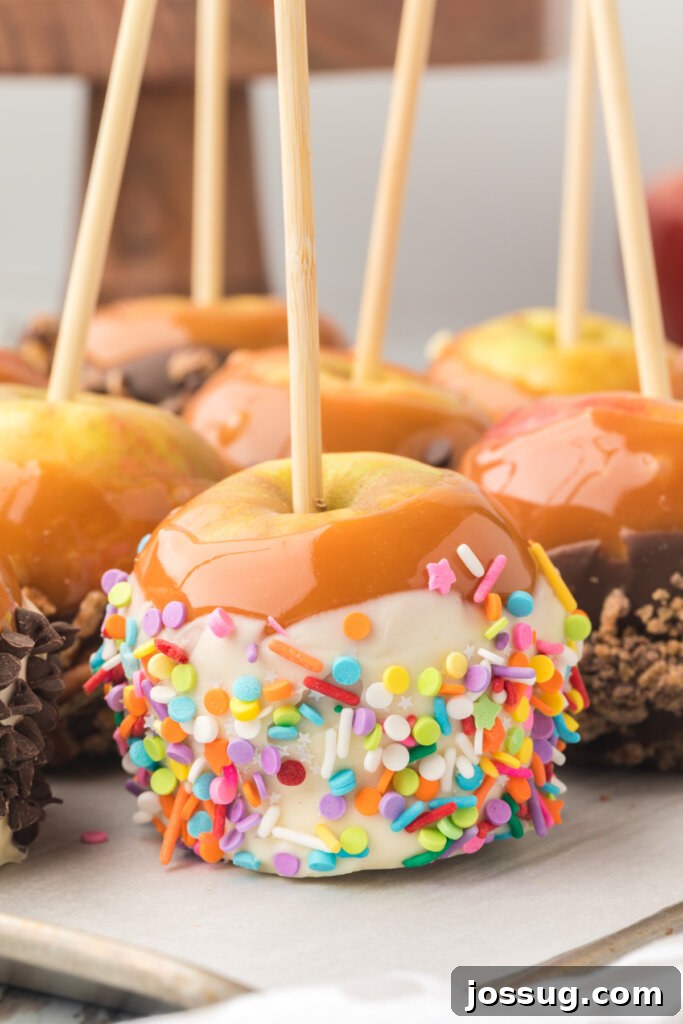
Homemade Caramel Apples: More Than Just a Recipe
As September rolls in and October paints the landscape with vibrant hues, our palates instinctively seek the comforting flavors of the season. Beyond the ubiquitous pumpkin spice, the caramel apple stands as an indispensable fall treat. This recipe promises to become a firm favorite, not just for its incredible taste, but for the sheer joy it brings to the creation process. It’s a fun, delicious endeavor, and the results are consistently beautiful, often evoking admiration and delight from all who partake.
There’s no need to rush to the store for pre-made caramel apples when a craving strikes. While convenient, these commercially produced apples often come with a hefty price tag and frequently lack the freshness and bespoke charm of a homemade creation. Imagine a package of three for almost $8 – a stark contrast to the affordability and abundance of making them yourself. This homemade recipe typically yields 8-10 gourmet apples, offering significant savings and, more importantly, a wonderful opportunity to gather loved ones for a lively afternoon of culinary creativity. It’s a fantastic way to bond, share stories, and create lasting memories.
Moreover, these delightful confections aren’t solely reserved for Halloween. Their universal appeal makes them a perfect snack year-round for anyone with a sweet tooth. They’re also an exceptional choice for thoughtful gifts or charming party favors. What better way to express gratitude or celebrate a special occasion than with a handcrafted, personalized caramel apple? It’s a gesture that speaks volumes.
Essential Ingredients for Gourmet Caramel Apples & Smart Substitutions
The foundation of any great recipe lies in its ingredients. For our homemade caramel apples, simplicity meets quality to create a truly irresistible treat. Here’s a breakdown of what you’ll need and some considerations for selection:
Key Ingredients
- Medium Apples: The star of the show! You simply can’t make caramel apples without them. The choice of apple profoundly impacts the final taste and texture. For a classic tangy counterpoint to the sweet caramel, Granny Smith apples are an excellent choice due due to their firm flesh and tart flavor profile, which prevents them from becoming mushy. Other popular choices include Honeycrisp for its exceptional crispness and balanced sweet-tart taste, or Fuji and Gala for those who prefer a sweeter, milder apple. Regardless of your preference, ensure your apples are thoroughly washed to remove any wax or residue, and, most critically, dried completely. Any moisture can act as a barrier, preventing the caramel from adhering properly.
- Individually Wrapped Caramel Candies and Liquid (Milk, Half-and-Half, or Heavy Cream): These two components combine to form the luscious, creamy caramel sauce that defines this dessert. Using individually wrapped caramels (like Kraft Caramels) drastically simplifies the process, making it accessible even for novice confectioners. The liquid component – milk, half-and-half, or heavy cream – is essential for achieving the perfect consistency. It thins the melted caramels, making them smooth and pliable for dipping, and contributes to a rich, velvety texture. Heavy cream will yield the most luxurious and thick caramel, while milk provides a slightly lighter consistency without sacrificing flavor.
- Desired Toppings (Optional, but Highly Recommended!): While the caramel and apple combination is delicious on its own, toppings transform a simple treat into a gourmet masterpiece. This is where you can truly unleash your creativity and personalize each apple. From crunchy nuts to decadent chocolates and festive sprinkles, toppings add layers of flavor, texture, and visual appeal.
Gourmet Topping Ideas to Inspire You
The beauty of homemade caramel apples lies in their customizable nature. Here are extensive ideas to make your apples truly gourmet:
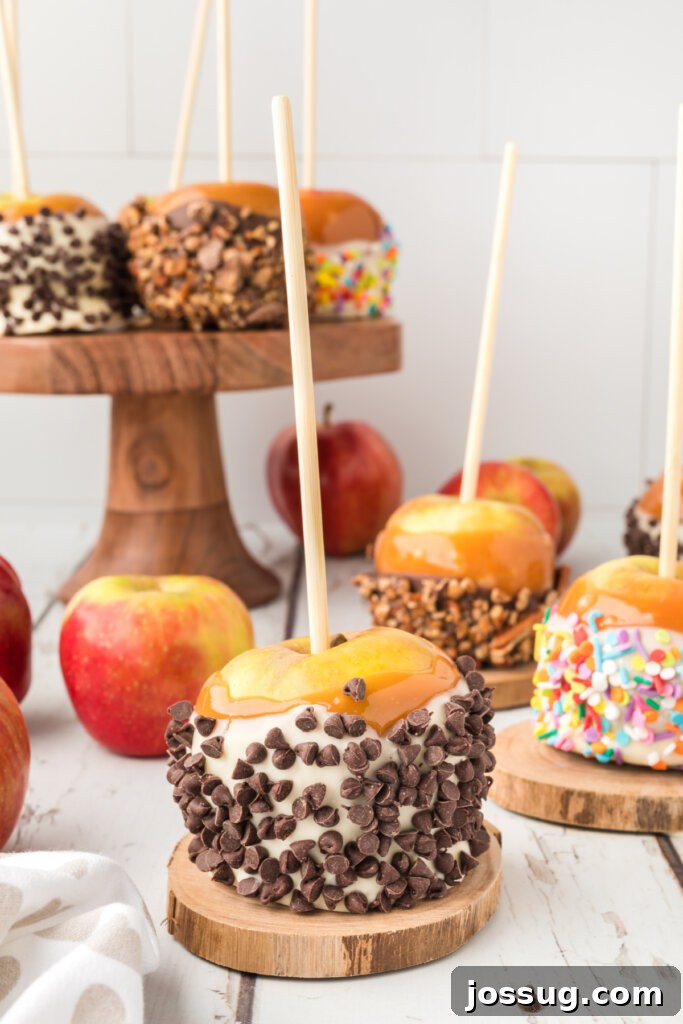
- Chocolates Galore: Melted dark, milk, or white chocolate drizzled artfully, mini chocolate chips, finely chopped chocolate bars (e.g., Ghirardelli, Lindt), or even chocolate curls.
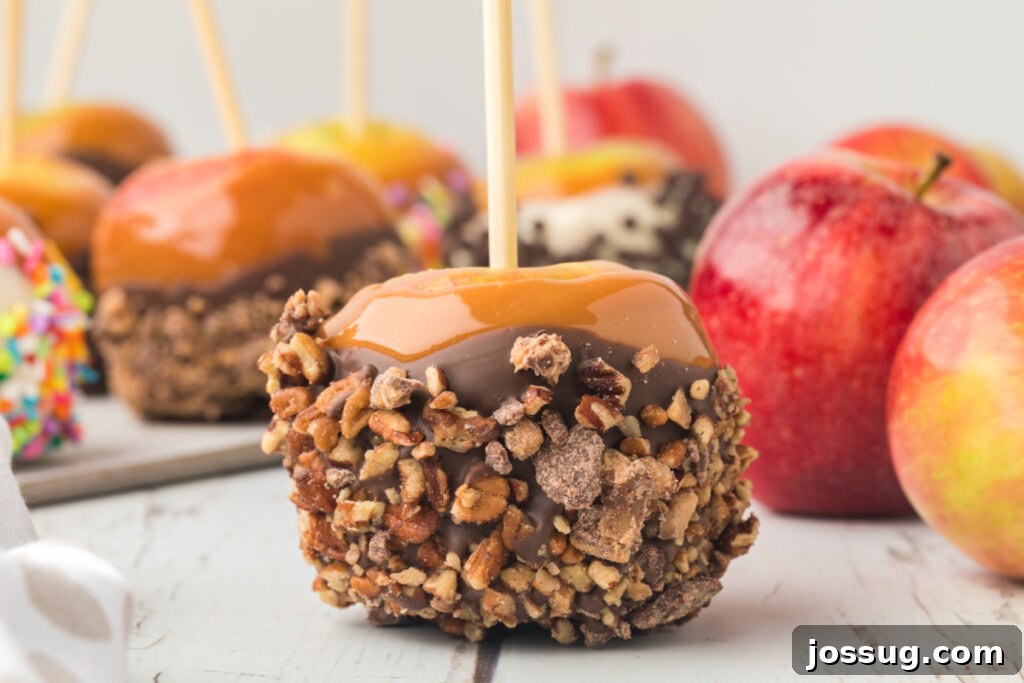
- Nutty Wonders: Finely chopped pecans, walnuts, peanuts, almonds, pistachios, or even candied nuts. Lightly toasting them enhances their flavor profile.
- Candy Crush: Crushed candy bars (Snickers, Heath Bar, Butterfinger, Kit Kat), mini M&M’s, chopped gummy candies, or even finely crushed hard candies.
- Cookie Crumble: Crushed sandwich cookies (Oreos), Biscoff cookies, graham crackers, shortbread, or even crumbled brownies for a truly indulgent treat.
- Salty & Sweet Harmony: A delicate sprinkle of sea salt flakes over a chocolate-drizzled apple, or crushed pretzels for a distinct salty crunch.
- Fruity & Tropical Notes: Shredded coconut (toasted or untoasted), finely diced dried cranberries, dried cherries, or mango pieces.
- Spice Sensations: A light dusting of cinnamon sugar, pumpkin pie spice, or even a touch of chili powder for an adventurous kick.
- Marshmallow Magic: Mini marshmallows, either left soft or lightly toasted with a kitchen torch for a s’mores-like experience.
Feel free to mix and match! A popular combination is a chocolate drizzle with chopped nuts and a sprinkle of sea salt, creating a perfect balance of sweet, salty, and crunchy textures.
How to Make Gourmet Caramel Apples: A Step-by-Step Guide
Creating these delightful gourmet caramel apples is a straightforward process when you follow these clear instructions. Attention to detail at each stage will ensure a flawless finish and an incredibly tasty result.
- Prepare Your Baking Sheet: Begin by lining a large cookie sheet or baking pan with parchment paper. This non-stick surface is absolutely crucial for preventing the caramel-coated apples from sticking as they cool and set. Set the prepared sheet aside within easy reach, as you’ll need to place the dipped apples on it immediately.
- Skewer the Apples and Chill: Firmly insert a sturdy, food-safe stick or skewer into the stem end of each apple, pushing it about halfway into the core. This provides a stable handle for dipping and eating. Once all your apples are skewered, place them directly into the freezer. Chilling the apples thoroughly while the caramel melts is a vital step; the cold surface helps the warm caramel adhere quickly and set much faster, significantly reducing the likelihood of it sliding off.
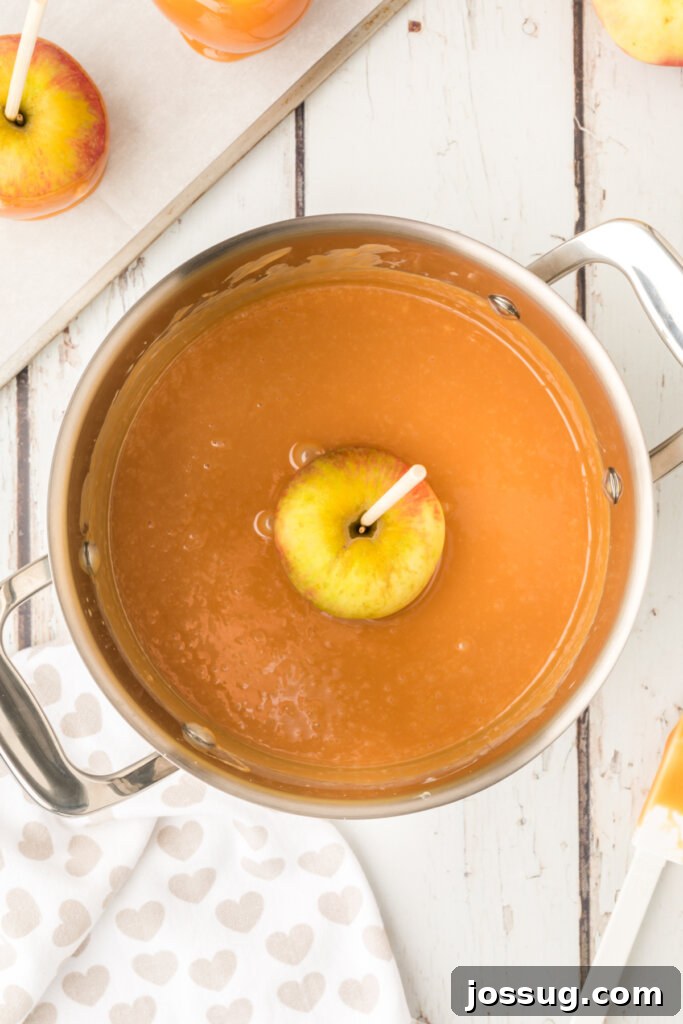
- Make the Luscious Caramel Sauce: In a heavy-bottomed saucepan, combine all the unwrapped caramel candies and your chosen liquid (milk, half-and-half, or heavy cream). Place the saucepan over medium-low heat. The key to a smooth, creamy caramel sauce is constant stirring. Using a rubber spatula or a wooden spoon, stir continuously until the caramels are completely melted and the mixture is perfectly smooth, free of any lumps or grainy textures. This process takes approximately 8-10 minutes. Do not rush it, and never leave the caramel unattended to prevent burning.
- Dip the Apples in Caramel: Once your caramel sauce is beautifully smooth and creamy, remove it from the heat. Working quickly but carefully, hold an apple by its stick and immerse it into the warm caramel, rotating and swirling it gently to ensure an even and complete coating. Lift the apple, allowing any excess caramel to drip back into the saucepan. You can gently scrape the bottom edge of the apple against the rim of the pot to remove larger drips. Immediately place the caramel-coated apple onto your prepared parchment-lined baking sheet. Repeat this dipping process for all remaining apples.
- Set the Caramel: As soon as all apples are dipped, swiftly transfer the entire baking sheet into the refrigerator. This immediate chilling is critical for the caramel to set quickly and firmly, preventing it from softening or becoming too sticky. Allow them to chill for about 15-20 minutes, or until the caramel is firm to the touch.
- Decorate the Apples (Optional, but Fun!): With the caramel fully set, it’s time for the creative part! If you wish to add toppings, this is the stage. If you’re drizzling with melted chocolate, using a small squeeze bottle offers excellent control. Drizzle chocolate in small sections over the caramel apple, and then immediately apply sprinkles, crushed nuts, or candy pieces to that section before the chocolate hardens. Work your way around the apple in sections to ensure all toppings adhere well. For larger toppings, gently roll the caramel apple in a shallow dish containing your chosen decorative elements.
- Refrigerate Until Ready to Serve: After decorating, return the apples to the refrigerator one final time. This allows any additional chocolate drizzles or applied toppings to set completely. Store your beautiful homemade gourmet caramel apples in an airtight container in the refrigerator until you are ready to enjoy or serve them.

Expert Tips and Tricks for Flawless Gourmet Caramel Apples
Crafting perfect caramel apples can sometimes be a nuanced process. To ensure your culinary adventure is a resounding success, I’ve compiled a comprehensive collection of tips and tricks designed to help you achieve perfectly fall-tastic and delicious results every single time.
Mastering the Caramel Apple Coating
- Choose the Right Apple Size: Opt for small to medium-sized apples for this recipe. Larger apples can be quite an undertaking to eat and store, and may result in an overwhelming caramel-to-apple ratio. Smaller apples are generally easier to handle, dip, and enjoy.
- The Secret to Sticking: Cold Apples: This is arguably the most crucial tip! While you are preparing and melting your caramel, make sure your skewered apples are chilling in the refrigerator or even the freezer. The colder the apple, the better the warm caramel will adhere and set quickly, preventing it from pooling at the bottom or sliding off. Remember to insert the skewers *before* chilling, as a frozen apple can be quite hard to skewer!
- Constant Stirring is Key: When I say “stir constantly” while melting the caramels, I truly mean it! Do not step away from your saucepan. Continuous stirring over medium-low heat is essential to prevent the caramel from burning on the bottom and to ensure all ingredients combine beautifully into a perfectly smooth, velvety sauce. It requires a little bit of dedicated effort, but the magnificent results are absolutely worth it.
- Troubleshooting Caramel Consistency: If your caramel becomes too thick during the dipping process, a quick 30-second burst in the microwave can restore it to a pliable, dippable consistency. If, conversely, it appears too thin, return it to the stovetop over low heat, stirring continuously for a minute or two, allowing some moisture to evaporate and thicken it slightly.
- Preventing Grainy Caramel: Crystallization, or a grainy texture, can occur if sugar granules cling to the sides of your saucepan and then fall back into the melting caramel, acting as seeds. To prevent this, use a clean pastry brush dipped in water to gently wipe down the inside edges of your saucepan as the caramel melts. This dissolves any rogue sugar crystals.
- Ensuring Even Coating: To achieve a smooth, even layer of caramel, twirl the apple slowly in the warm caramel, letting any excess drip off naturally. Gently tap the apple stick against the side of the saucepan a few times to encourage large drips to fall back into the pot, ensuring a neat finish.
Tips for Decorating and Serving Caramel Apples
- Precision Decorating: When adding melted chocolate drizzles or small toppings like sprinkles, work in sections. Drizzle one small area of the caramel apple with chocolate, immediately add your desired sprinkles or toppings, and allow that section to set for a few minutes before moving to the next. This ensures crisp lines and firm adherence of toppings.
- Party Hosting Hack: For a fun and interactive fall party, you can keep your caramel sauce warm and liquid in a slow cooker set to its lowest “warm” setting. This can maintain the ideal dipping consistency for up to 3 hours. Just be sure to stir it occasionally to prevent the ingredients from separating, which could make coating the apples difficult.
- Storing Leftover Caramel: Don’t let any delicious leftover caramel go to waste! Stir in a tablespoon or two of additional cream or milk to maintain a thin, pourable consistency, then transfer it to an airtight jar. Store it in the refrigerator, and you’ll have a fantastic topping for ice cream, cakes, waffles, or any other sweet treat you can imagine!
- Combatting the Sweat: If your caramel apples appear to “sweat” (develop condensation) after being removed from the refrigerator, it’s a natural reaction to the warmer room temperature. To minimize this, simply let them sit at room temperature for about 15-20 minutes before serving.
- Creative Gifting and Display: Once your decorated caramel apples are fully set, wrap each one individually in clear cellophane bags and tie them with a festive ribbon. For an impressive display, arrange them on a tiered platter or stand them upright in small decorative baking cups. Personalized tags add a lovely touch for gifts.
Important Safety Reminders
- Use Food-Safe Sticks: Always ensure you are using all-natural, food-safe sticks or skewers specifically designed for candy apples. While it might seem like an obvious or overly cautious reminder, it’s always better to prioritize food safety. Few people eat all the way down to the stick, but using appropriate materials is a best practice.
Caramel Apples: Frequently Asked Questions (FAQs)
➡️ How to store Homemade Caramel Apples?
Homemade caramel apples should be stored in an airtight container or individually wrapped in plastic wrap and kept in the refrigerator. This prevents them from drying out and keeps the caramel firm.
➡️ How long do Homemade Caramel Apples last?
When stored correctly in the refrigerator, caramel apples typically last for about 1 to 2 weeks. However, they are best enjoyed as fresh as possible, ideally within the first few days for optimal texture and flavor.
➡️ Can you freeze Homemade Caramel Apples?
No, freezing caramel apples is not recommended. The apple’s texture can become mushy, and the caramel may become watery, grainy, or separate upon thawing, significantly compromising the quality of the treat.
➡️ How do I eat a Caramel Apple?
You can bravely bite directly into it for a classic, sweet, and sticky challenge! Alternatively, for easier and cleaner eating, you can slice the apple into wedges while it is still cold. This method is especially practical for children or when serving at a party.
➡️ Why is my caramel grainy or crystallized?
Crystallization usually occurs if sugar granules stick to the sides of your saucepan and then fall into the melting caramel, initiating a chain reaction. To help prevent this, use a pastry brush dipped in water to wipe down the sides of the pan during the caramel-making process, dissolving any stray sugar crystals.
➡️ Why are my Caramel Apples sweating?
Sweating, or condensation, forms when cold apples are taken directly from the refrigerator into a warmer room environment. The moisture from the air condenses on the cold surface of the caramel. To reduce this effect, let the apples sit at room temperature for about 15-20 minutes before serving.
➡️ How do I ensure an even coating of caramel?
For an even coating, immerse the apple slowly into the caramel and twirl it gently. After lifting, allow the excess caramel to drip off thoroughly for a few seconds. A gentle tap of the stick against the edge of the pot can also help distribute the caramel evenly and remove excess. Using a slightly tilted bowl can assist in achieving better coverage.
➡️ Can I make Caramel Apples ahead of time for a party?
Yes, absolutely! Caramel apples are a great make-ahead treat. You can prepare them a day or two in advance. Just remember to store them properly in the refrigerator and take them out about 20-30 minutes before serving to allow the caramel to soften slightly and reach a pleasant eating temperature.
➡️ What should I do if air bubbles form on my dipped apples?
Tiny air bubbles can sometimes form on the surface of your caramel if the apple is dipped too quickly. To avoid this, dip the apple slowly and smoothly. If bubbles still appear, gently tap or lightly shake the apple stick to release any trapped air bubbles before the caramel sets.
➡️ How can I display or gift Caramel Apples creatively?
Once the caramel and any toppings have fully set, wrap each apple individually in clear cellophane bags and secure with a decorative ribbon for a charming presentation. For gifting, consider arranging them in a rustic box with parchment paper as cushioning, or place them in individual paper baking cups for an elegant touch.

Other Delicious Apple Recipes You May Enjoy
If you’ve fallen in love with these caramel apples, you’ll surely appreciate these other fantastic apple-based recipes:
- Classic Fried Apples
- S’mores Salted Caramel Apple Nachos
- Creamy Caramel Apple Snickers Salad
- Effortless 3-Ingredient Apple Cake
- Rustic Caramel Apple Galette
Homemade Caramel Apples Recipe Card

Rating: 4.58 out of 5 stars (based on 7 votes)
Caramel Apples
By Jamie Sherman
Homemade Gourmet Caramel Apples are the ultimate fall treat! This easy recipe provides all the tips and tricks you need to make delightful, customizable caramel apples that everyone will absolutely adore.
- Servings: 10 apples
- Prep Time: 20 minutes
- Cook Time: 10 minutes
- Additional Time (Chilling/Setting): 20 minutes
- Total Time: 50 minutes
Pin
Rate
Equipment
- Rubber spatula or wooden spoon
- Small Squeeze Bottles and Caps (for decorating)
- Apple Sticks (food-safe)
- Heavy-bottomed saucepan
- Parchment paper
- Baking sheets
Ingredients
Instructions
- Line a baking sheet with parchment paper. This non-stick surface is crucial for preventing your dipped apples from sticking as they set.
- Carefully insert sturdy sticks or skewers into the stem end of each apple. Place the skewered apples in the freezer while you are melting the caramels. Cold apples help the caramel adhere better.
- In a heavy-bottomed saucepan, combine the unwrapped caramels and your chosen liquid (milk, half-and-half, or heavy cream). Stirring constantly, melt the caramels over medium-low heat until the mixture is completely smooth and creamy. Do not stop stirring to prevent burning.
- Remove the caramel from heat. Hold an apple by its stick and dip it into the warm caramel, turning to coat evenly. Allow any excess caramel to drip back into the pot, gently scraping the bottom of the apple against the rim of the saucepan. Place the coated apple on the prepared parchment paper. Repeat with all remaining apples.
- Immediately place the baking sheet with the dipped apples in the refrigerator to allow the caramel to set firmly. This usually takes about 15-20 minutes.
- Once the caramel is fully set, you can decorate the caramel apples (this step is optional but adds a gourmet touch). Drizzle with melted chocolate, roll in crushed nuts, sprinkles, or other desired toppings. Work in sections if applying multiple toppings to ensure they adhere before setting.
- Store the finished, decorated caramel apples in a covered, airtight container in the refrigerator until ready to serve.
Notes
- For the best freshness and texture, always store your homemade caramel apples in an airtight container in the refrigerator until ready to serve.
- Some of our favorite toppings include melted chocolates (dark, milk, white), assorted crushed candies, various sprinkles, chopped nuts (pecans, walnuts, peanuts), crushed cookies (Oreos, graham crackers), crushed pretzels, and shredded coconut. Don’t hesitate to experiment with your own creative combinations!
- To add chocolate drizzles, use a small squeeze bottle for precise application. Apply chocolate to one section of the apple at a time, and immediately add sprinkles or other small toppings to that section before the chocolate sets. Continue this process around the apple until fully decorated.
- The nutritional values provided below are automatically calculated and are approximate. They will vary significantly based on your specific apple size, the type and amount of toppings chosen, and the thickness of the caramel coating.
Nutrition Information (Approximate)
Serving: 1 apple
Calories: 318kcal
Carbohydrates: 68g
Protein: 3g
Fat: 5g
Saturated Fat: 2g
Polyunsaturated Fat: 2g
Monounsaturated Fat: 1g
Cholesterol: 5mg
Sodium: 157mg
Potassium: 298mg
Fiber: 3g
Sugar: 56g
Vitamin A: 115IU
Vitamin C: 7mg
Calcium: 102mg
Iron: 0.3mg
Nutrition information is automatically calculated and should only be used as an approximation. It does not include any additional toppings added during decoration.
Loved This Recipe?
We’d be thrilled to hear about your experience! Please consider leaving a comment below and sharing your beautiful homemade gourmet caramel apple creations.
Originally published on October 17, 2013. Updated on September 13, 2020, and August 10, 2023.