
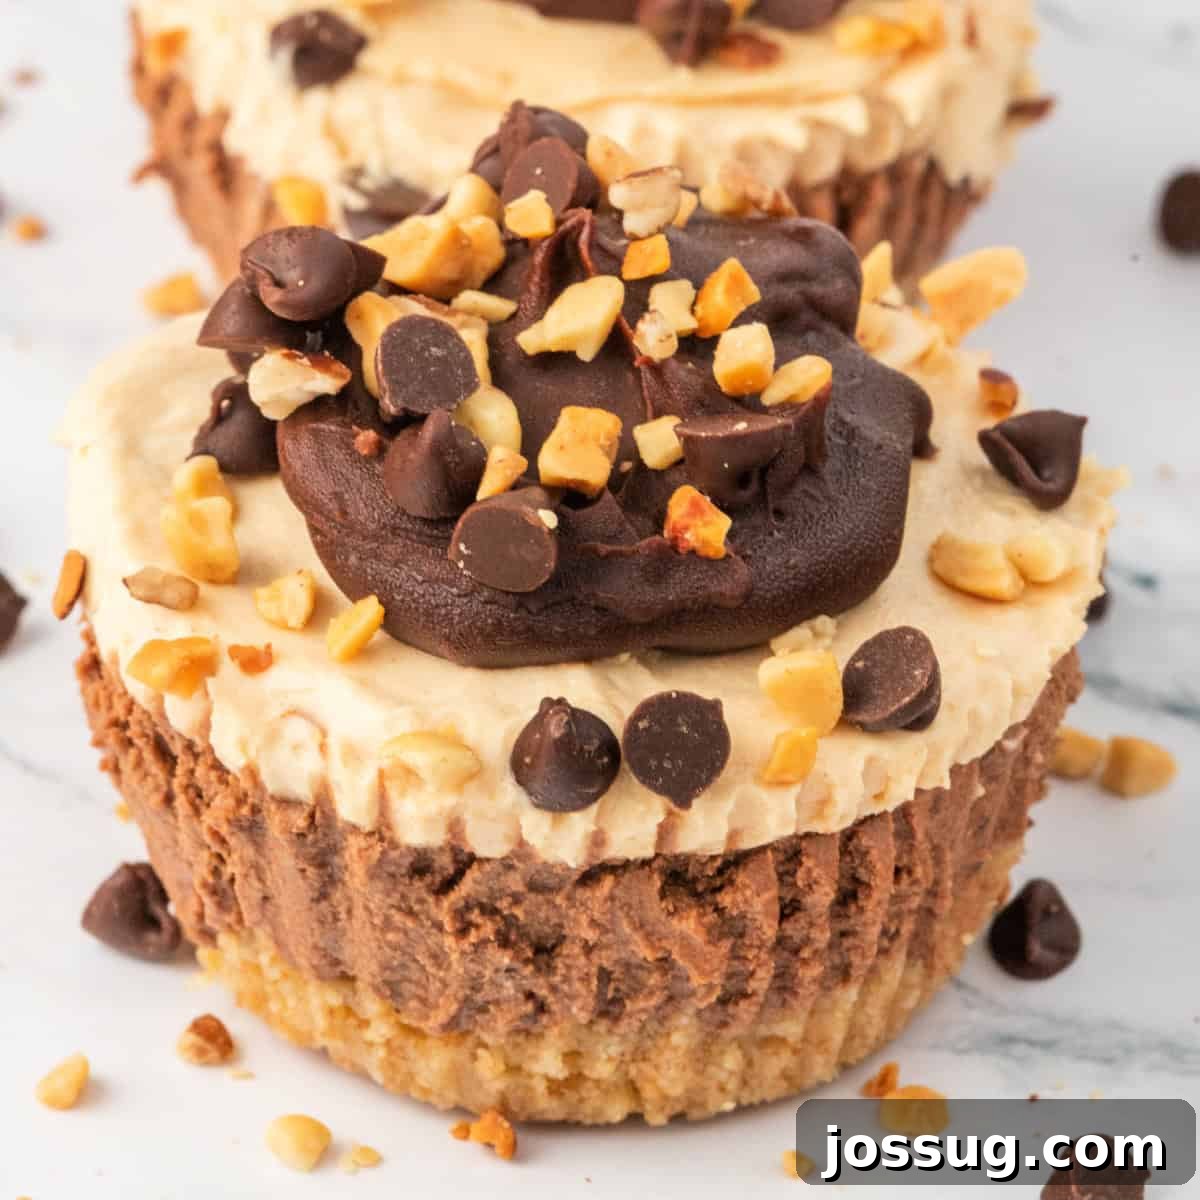
Prepare for an explosion of flavor with these incredibly easy No-Bake Mini Chocolate Peanut Butter Cheesecakes. This recipe combines two universally loved flavors into a dreamy, layered dessert that’s perfect for any occasion and loved by everyone! The best part? No oven is needed, making this a fantastic option for hot days or when you simply want a quick and impressive sweet treat.
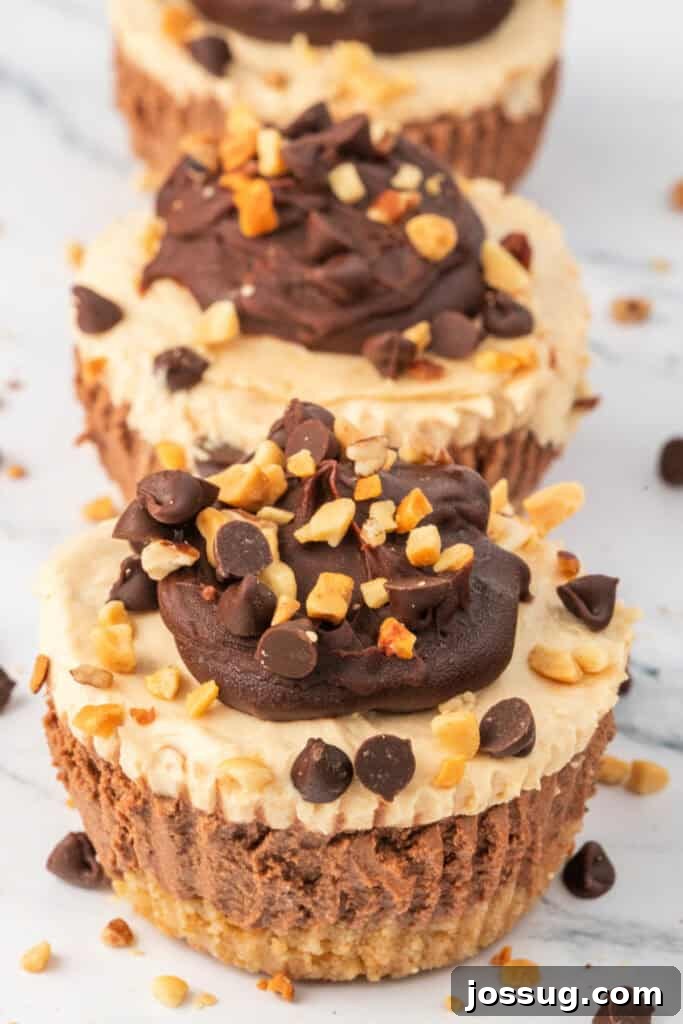
No-Bake Mini Chocolate Peanut Butter Cheesecakes: The Ultimate Easy Dessert
If you’re on the hunt for a dessert that’s rich, creamy, and surprisingly simple to prepare, your search ends here. These delightful mini cheesecakes are a celebration of the classic chocolate and peanut butter pairing, delivering a smooth, indulgent bite every time. This isn’t just an easy mini cheesecake recipe; it’s a game-changer for anyone who loves decadent desserts without the fuss of baking. Whether you’re hosting a party, celebrating a holiday, or simply craving a quick and satisfying sweet, these no-bake mini cheesecakes are guaranteed to be a hit!
The combination of a crunchy graham cracker crust, a velvety chocolate cheesecake layer, a smooth peanut butter cheesecake layer, and a glistening chocolate ganache topping creates a symphony of textures and tastes. Each miniature dessert is a perfect individual portion, making them ideal for gatherings where elegance meets convenience. Say goodbye to complicated baking steps and hello to a show-stopping dessert that practically makes itself!
⭐ Why You’ll Adore This No-Bake Recipe
These mini chocolate peanut butter cheesecakes aren’t just delicious; they offer a myriad of benefits that make them a go-to dessert for any home chef:
- No Oven Required: This is a major perk, especially during warmer months or when your oven is already occupied. Enjoy a rich, creamy dessert without heating up your kitchen. It’s also perfect for beginner bakers or those who prefer simpler methods.
- Quick and Easy: The preparation is straightforward, involving simple mixing and layering. Even novice cooks can achieve impressive results with minimal effort, making it ideal for busy schedules.
- Irresistible Flavor Combination: The timeless duo of rich chocolate and creamy peanut butter creates a harmonious blend that tantalizes the taste buds. Each bite offers a perfect balance of sweet, salty, and nutty notes.
- Perfect Portion Control: Served in individual cupcake liners, these cheesecakes are naturally portion-controlled, making them great for managing cravings or for elegant serving at parties and events. No need for messy slicing or uneven portions!
- Versatile and Customizable: Easily adapt the recipe to suit your taste or dietary needs. Experiment with different crusts, nut butters, or chocolate types for endless variations.
- Make-Ahead Friendly: These cheesecakes actually taste better after a good chill, making them an excellent dessert to prepare in advance for stress-free entertaining.
🛒 Essential Ingredients & Smart Substitutions
Creating these heavenly no-bake cheesecakes requires a few common ingredients. Here’s what you’ll need, along with some helpful substitution ideas to make this recipe your own:
The Crunchy Crust
- Graham Cracker Crumbs: These form the classic, buttery base for our cheesecakes.
- Substitution: For a richer, deeper chocolate flavor, try crushed chocolate sandwich cookies (like Oreos, with or without the cream filling). Alternatively, digestive biscuits or shortbread cookies can also create a delicious crust.
- Unsalted Butter (Melted): Binds the crumbs together to form a firm crust.
- Substitution: Salted butter can be used, just be mindful of the overall saltiness in the recipe. Margarine can also work in a pinch for a dairy-free option, though the flavor might be slightly different.
The Velvety Cheesecake Filling
- Semi-Sweet Chocolate: Provides the rich, melt-in-your-mouth chocolate layer. Ensure it’s good quality for the best flavor.
- Substitution: Dark chocolate can be used for a more intense, less sweet flavor, while milk chocolate will yield a sweeter, creamier result. Chocolate chips or finely chopped chocolate bars work equally well.
- Cream Cheese (Full-Fat, Room Temperature): The star of any cheesecake, providing that signature tangy creaminess. Room temperature is crucial for a smooth, lump-free filling.
- Powdered Sugar (Confectioners’ Sugar): Sweetens the filling and ensures a silky-smooth texture, dissolving easily without graininess.
- Vanilla Extract: Enhances all the other flavors, adding a warm, aromatic note.
- Substitution: A good quality vanilla bean paste can elevate the flavor even further.
- Heavy Cream (Cold): Whipped into the cream cheese mixture, it provides the light, airy, and stable body of the cheesecake. It should be very cold for optimal whipping.
- Creamy Peanut Butter: The essential ingredient for our distinctive peanut butter layer. Choose a smooth, well-stirred variety.
- Substitution: Almond butter or cashew butter can be fantastic alternatives for a different nutty flavor profile. If using natural peanut butter, make sure it’s well-mixed to prevent separation. Crunchy peanut butter can be used if you enjoy extra texture, but the filling won’t be as smooth.
The Decadent Chocolate Ganache & Garnishes
- Semi-Sweet Chocolate (Chopped): Forms the luscious, glossy ganache topping. Chopping helps it melt more evenly.
- Substitution: Milk or dark chocolate can also be used, depending on your preferred sweetness and intensity.
- Heavy Cream: Combined with chocolate to create the rich ganache.
- Chopped Peanuts: Add a delightful crunch and reinforce the peanut butter flavor.
- Substitution: Chopped almonds, cashews, or even sprinkles can be used for different textures and appearances.
- Mini Chocolate Chips: A classic garnish that adds an extra touch of chocolate and visual appeal.
- Substitution: Regular chocolate chips, chocolate shavings, or even a dusting of cocoa powder would work beautifully.
✨ Creative Variations to Try
While perfect as is, these cheesecakes are also incredibly adaptable. Here are some ideas to spark your culinary creativity:
- Sweet & Salty Perfection: For those who love a sophisticated contrast, sprinkle a pinch of flaky sea salt over the chocolate ganache before it sets. This enhances both the chocolate and peanut butter flavors beautifully.
- Shape Shifters: Instead of traditional cupcake liners, use mini silicone molds for different shapes like hearts, stars, or mini bundt cakes. This can add a fun, elegant touch, and they pop out easily.
- Nutella Dream: Swap the creamy peanut butter layer for smooth Nutella for a hazelnut chocolate twist that’s equally indulgent and delicious.
- Espresso Boost: Add a teaspoon of instant espresso powder to the chocolate cheesecake layer to deepen its flavor and provide a subtle coffee undertone.
- Different Crusts: Beyond the suggested substitutions, consider using crushed pretzels for a salty-sweet crust, or even shortbread cookies for a more buttery base.
- Fruity Twist: While a classic, for a less traditional approach, you could swirl a small amount of raspberry or strawberry jam into the peanut butter layer (after it’s spread) for a peanut butter and jelly inspired cheesecake.
🔥 Expert Tips for Perfect No-Bake Cheesecakes
Achieving flawless no-bake cheesecakes is simple with these essential tips:
- Room Temperature Ingredients are Key: Always ensure your cream cheese and heavy cream are at room temperature (or slightly chilled for the cream before whipping) to achieve a super smooth and lump-free filling. Cold cream cheese will result in a lumpy texture that’s difficult to smooth out.
- Chill Between Layers: This step is crucial for creating those distinct, clean, and beautiful layers. Chilling briefly allows each layer to set slightly, preventing them from bleeding into one another. Don’t rush this process!
- Quality Matters: Use high-quality chocolate and creamy peanut butter for the best possible flavor. The fewer ingredients in a recipe, the more each ingredient’s quality shines through.
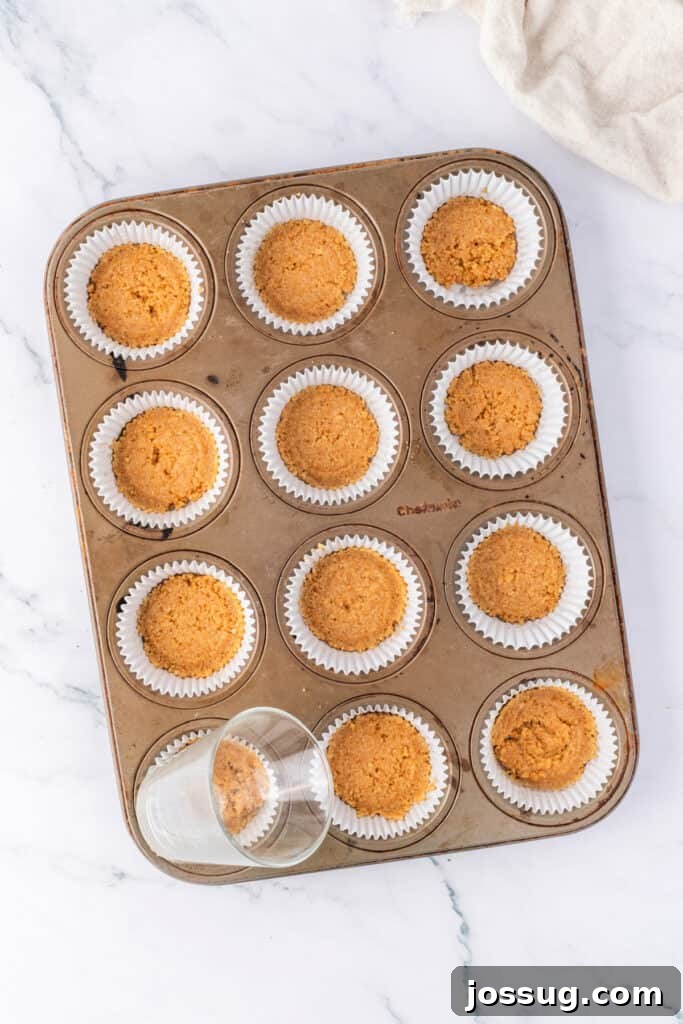
- Press the Crust Firmly: When creating the graham cracker crust, press it down very firmly into the cupcake liners. This ensures a stable base that won’t crumble when you bite into your cheesecake. A small glass or the bottom of a shot glass works perfectly.
- Don’t Overmix: Once you add the heavy cream to the cream cheese mixture, mix just until it thickens and is smooth. Overmixing can cause the cream to separate or become grainy.
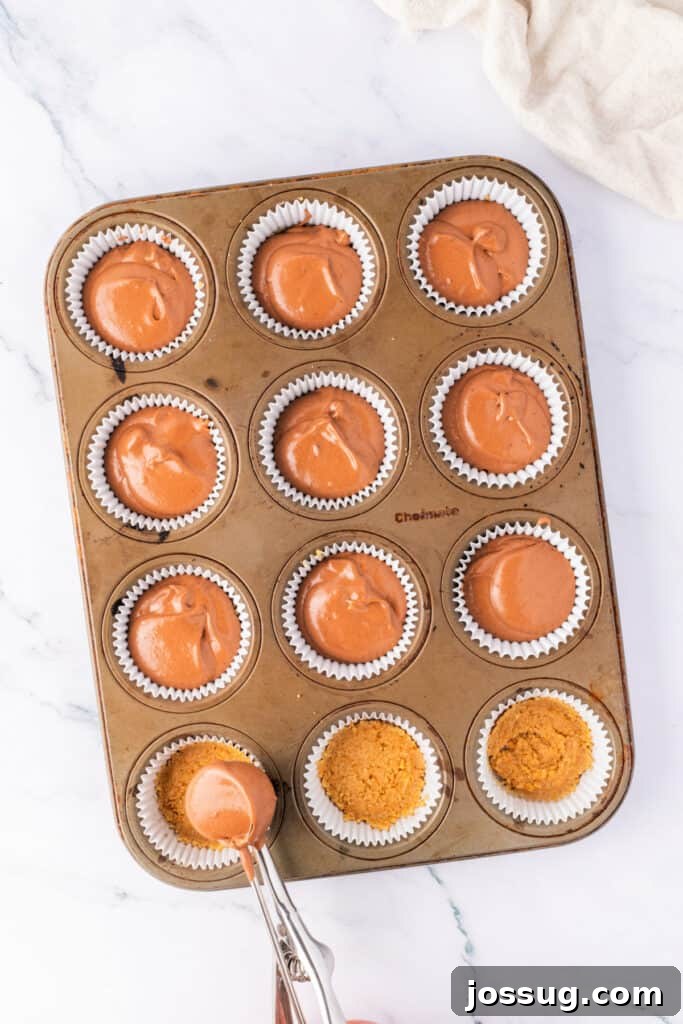
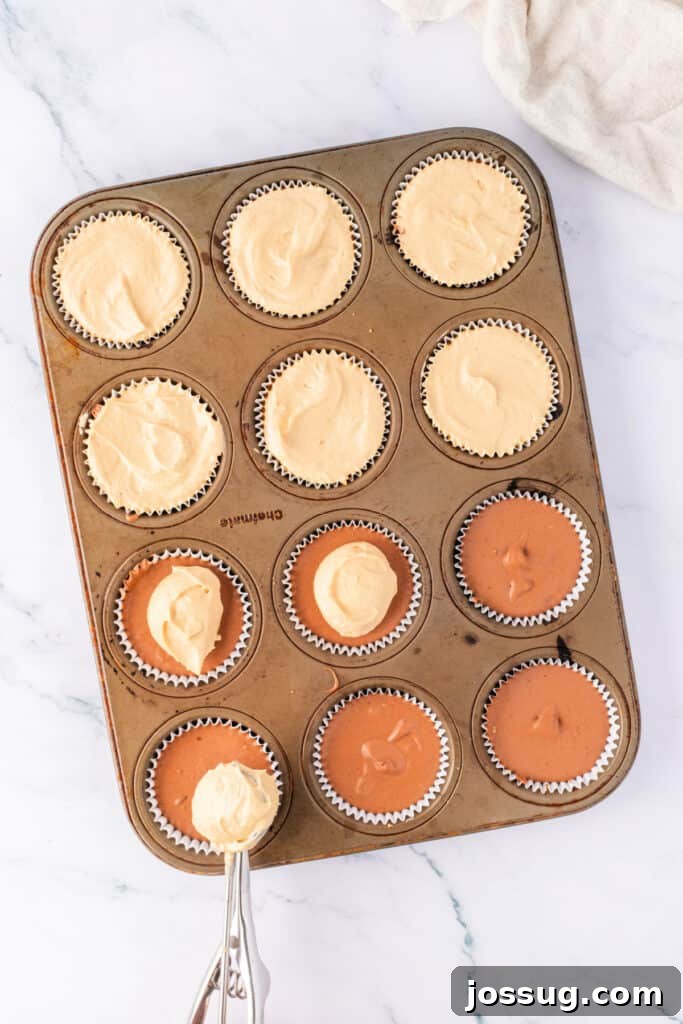
- Evenly Divide Fillings: Use a cookie scoop or two spoons to evenly divide the chocolate and peanut butter fillings among the crusts. This ensures consistent portion sizes and aesthetics.
- Gentle Ganache Application: Pour or spoon the ganache slowly and evenly over the chilled peanut butter layer. If your ganache is too thick, let it sit for a few minutes; if too thin, chill it slightly.
- Storage is Important: Keep these cheesecakes refrigerated until just before serving to maintain their firm texture and fresh taste.
❓ Frequently Asked Questions (FAQs)
Can I make these mini no-bake cheesecakes ahead of time?
Absolutely! This mini cheesecakes recipe is ideal for making in advance. You can prepare them a day or two before your event. Store them properly sealed in the refrigerator until you’re ready to serve. In fact, the flavors often meld and deepen with a little extra chilling time.
Can I freeze no-bake mini cheesecakes?
Yes, these mini no-bake cheesecakes freeze exceptionally well! For best results, freeze them *before* adding the chocolate ganache and any toppings. Once frozen solid, wrap each cheesecake tightly in plastic wrap and store them in an airtight freezer-safe container for up to 2 months. Thaw them overnight in the refrigerator before adding the ganache and garnishes.
Can I make this easy mini cheesecake recipe without peanut butter?
Certainly! If you’re not a fan of peanut butter or have an allergy, you can simply omit the peanut butter layer. This will result in delicious classic chocolate mini cheesecakes. You could also replace the peanut butter with another nut butter or even a fruit curd for a different flavor profile.
Can I use crunchy peanut butter instead of creamy?
While creamy peanut butter yields the smoothest filling, you can definitely use crunchy peanut butter if you prefer. Just be aware that the texture of that layer will be less smooth and will have small chunks of peanuts. If you enjoy a bit of extra crunch, it’s a fun and welcome variation!
How long should I chill the mini no-bake cheesecakes before serving?
For the best possible texture and to ensure all layers are properly set, a minimum of 2 to 3 hours of chilling is recommended. However, for truly optimal results and a firm, sliceable cheesecake, chilling them overnight (or at least 6 hours) is ideal. This allows the flavors to fully develop and the structure to solidify.
Do I need to use cupcake liners?
Cupcake liners are highly recommended as they make the removal of these No-Bake Mini Chocolate Peanut Butter Cheesecakes incredibly easy and mess-free. If you don’t have liners, you can use silicone muffin molds, which also allow for easy removal. Alternatively, grease the muffin tin very well, but liners provide the most stress-free experience.
🍽️ Other Delicious Recipes You May Enjoy
If you loved these no-bake mini cheesecakes, explore more of our easy and delightful dessert recipes:
Dessert
No Bake Peanut Butter Snowballs
Dessert
Easy No-Bake Cheesecake
Dessert
S’mores No-Bake Cheesecake Cups
Dessert
Chocolate Chip Cheesecake Bars
12 servings
No ratings yet
No Bake Mini Chocolate Peanut Butter Cheesecakes
Jamie Sherman
20 mins
1 hr
1 hr 20 mins
Rate This
Print Recipe
Equipment
-
12-cup muffin pan
-
cupcake liners
-
food processor (or zip-top bag and rolling pin)
-
mixing bowls (large and small)
-
hand mixer (or stand mixer)
-
rubber spatula or wooden spoon
-
shot glasses (for pressing crust)
-
microwave-safe bowl
Ingredients
Crust
- 1 cup graham cracker crumbs
- 4 tablespoons unsalted butter, melted
Cheesecake Filling
- 10 ounces semi-sweet chocolate, room temperature
- 16 ounces cream cheese, room temperature
- 1 cup powdered sugar
- 1 teaspoon vanilla extract
- 2 cups heavy whipping cream, very cold
- ⅔ cup creamy peanut butter
Chocolate Ganache & Garnish
- 6 ounces semi-sweet chocolate, chopped
- ¼ cup heavy whipping cream
- Chopped peanuts, for garnish
- Mini chocolate chips, for garnish
Instructions
Prepare the Crust
-
Line a 12-cup muffin pan with paper cupcake liners.
-
In a small bowl, combine the graham cracker crumbs and melted butter. Stir until the crumbs are evenly moistened.
-
Divide the mixture evenly among the 12 cupcake liners. Use the back of a small glass or your fingers to press the crumbs firmly and evenly into the bottom of each liner. Place the muffin pan in the refrigerator to chill while you prepare the filling.
Make the Cheesecake Filling
-
Melt the 10 ounces of semi-sweet chocolate in a microwave-safe bowl in 30-second intervals, stirring well after each interval, until completely smooth. Set aside to cool slightly to room temperature.
-
In a large mixing bowl, beat the room temperature cream cheese, powdered sugar, and vanilla extract with an electric mixer on medium speed until the mixture is smooth and creamy with no lumps.
-
Gradually add the cold heavy cream to the cream cheese mixture, continuing to beat until the mixture thickens and holds soft peaks. Be careful not to overmix.
-
Transfer about one-third of this cheesecake mixture to a separate medium-sized bowl. This will be for your peanut butter layer.
-
Into the remaining two-thirds of the cheesecake mixture (in the large bowl), gently fold in the slightly cooled melted chocolate until it’s fully incorporated and the mixture is smooth and uniformly chocolate in color.
-
Carefully divide the chocolate cheesecake mixture evenly among the chilled graham cracker crusts, filling each liner about two-thirds full. Return the muffin pan to the refrigerator and chill for at least 30 minutes to allow the chocolate layer to set.
-
While the chocolate layer chills, stir the creamy peanut butter into the reserved one-third of the plain cheesecake mixture until well combined.
-
Once the chocolate layer is set, spoon or pipe the peanut butter cheesecake mixture evenly over the chocolate layer in each liner. Smooth the tops gently with a small offset spatula or the back of a spoon. Chill the cheesecakes again for at least 1 hour, or preferably 2-3 hours, until fully set.
Finish with Ganache & Serve
-
To make the ganache, place the 6 ounces of chopped semi-sweet chocolate in a microwave-safe bowl. Heat the ¼ cup of heavy cream in a separate small bowl or microwave until just simmering (do not boil). Pour the hot cream over the chopped chocolate and let it sit for 5 minutes. Stir gently until the chocolate is completely melted and the ganache is smooth and glossy.
-
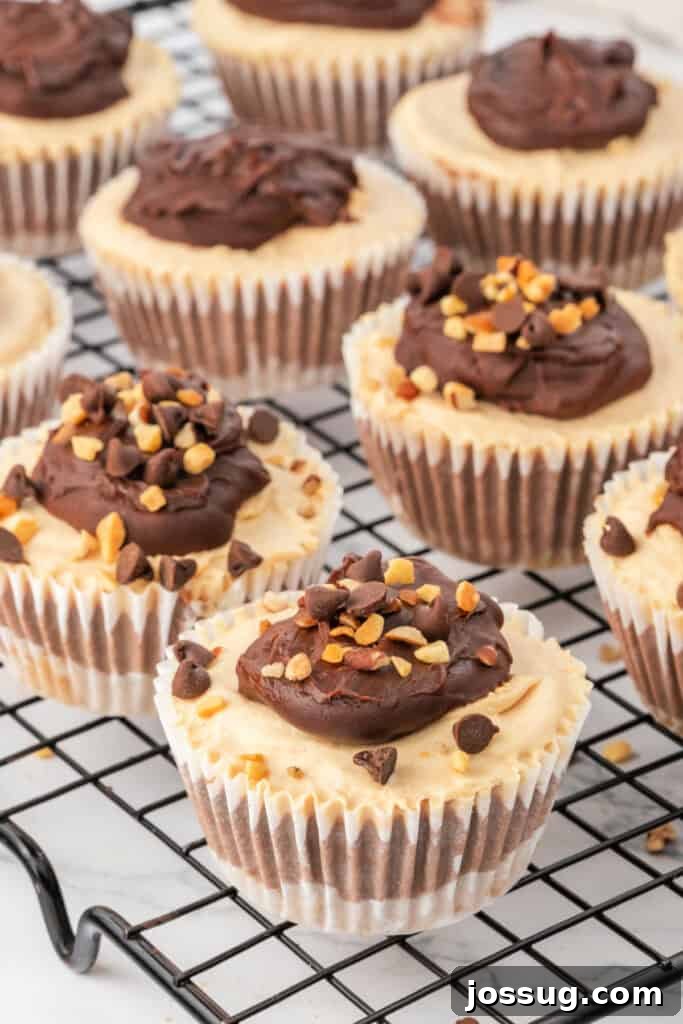
Allow the ganache to cool slightly to room temperature. Once cooled, spoon a small amount of ganache over the top of each chilled cheesecake, letting it slightly drizzle over the edges.
-
Immediately garnish each cheesecake with a sprinkle of chopped peanuts and mini chocolate chips before the ganache sets.
-
Store the finished No-Bake Mini Chocolate Peanut Butter Cheesecakes in an airtight container in the refrigerator until ready to serve. For the best texture and flavor, serve them chilled.
Notes
🥡 Storage Recommendations
- Store these mini cheesecakes in an airtight container in the refrigerator for up to 5 days. This will help maintain their freshness and prevent them from absorbing refrigerator odors.
- Always keep them chilled until just before serving to ensure the best texture and to prevent the cheesecake layers from softening too much.
♨️ Reheating (Not Applicable)
- These delightful desserts are meant to be served cold. No reheating is required or recommended, as it would alter their delicate texture.
❄️ Freezing Instructions
- To freeze, prepare the cheesecakes up to the point of adding the ganache and toppings.
- Wrap each individual cheesecake tightly in plastic wrap, then place them in a freezer-safe container or a heavy-duty freezer bag. They can be frozen for up to 2 months.
- To serve, thaw the cheesecakes overnight in the refrigerator. Once thawed, you can then add the chocolate ganache and desired toppings.
💡 Additional Tips for Best Results
- For the smoothest cheesecake filling, ensure all dairy ingredients (cream cheese and heavy cream) are at their optimal temperature as specified in the recipe.
- Patience with chilling is a virtue for no-bake desserts. Each chilling interval ensures firm, distinct layers that hold their shape beautifully.
- Using cupcake liners or silicone molds simplifies the removal process significantly, allowing you to present perfectly formed mini cheesecakes without any sticking.
- Opt for high-quality chocolate and your favorite creamy peanut butter to truly make the flavors sing in this recipe.
♻️ Leftovers Management
- Any leftover cheesecakes should be stored promptly in the refrigerator to maintain their quality and freshness. Enjoy them within a few days.
- Interestingly, leftovers can also be enjoyed straight from the freezer as a firmer, almost ice cream-like frozen treat, especially on a hot day!
Nutrition Information
Serving:
1cheesecake
,
Calories:
691kcal
,
Carbohydrates:
42g
,
Protein:
10g
,
Fat:
55g
,
Saturated Fat:
30g
,
Polyunsaturated Fat:
4g
,
Monounsaturated Fat:
17g
,
Trans Fat:
0.2g
,
Cholesterol:
101mg
,
Sodium:
243mg
,
Potassium:
402mg
,
Fiber:
4g
,
Sugar:
30g
,
Vitamin A:
1299IU
,
Vitamin C:
0.3mg
,
Calcium:
103mg
,
Iron:
3mg
Nutrition information is automatically calculated, so should only be used as an approximation.
Loved this recipe? Share your thoughts below!
Your feedback helps us create more delicious content.