
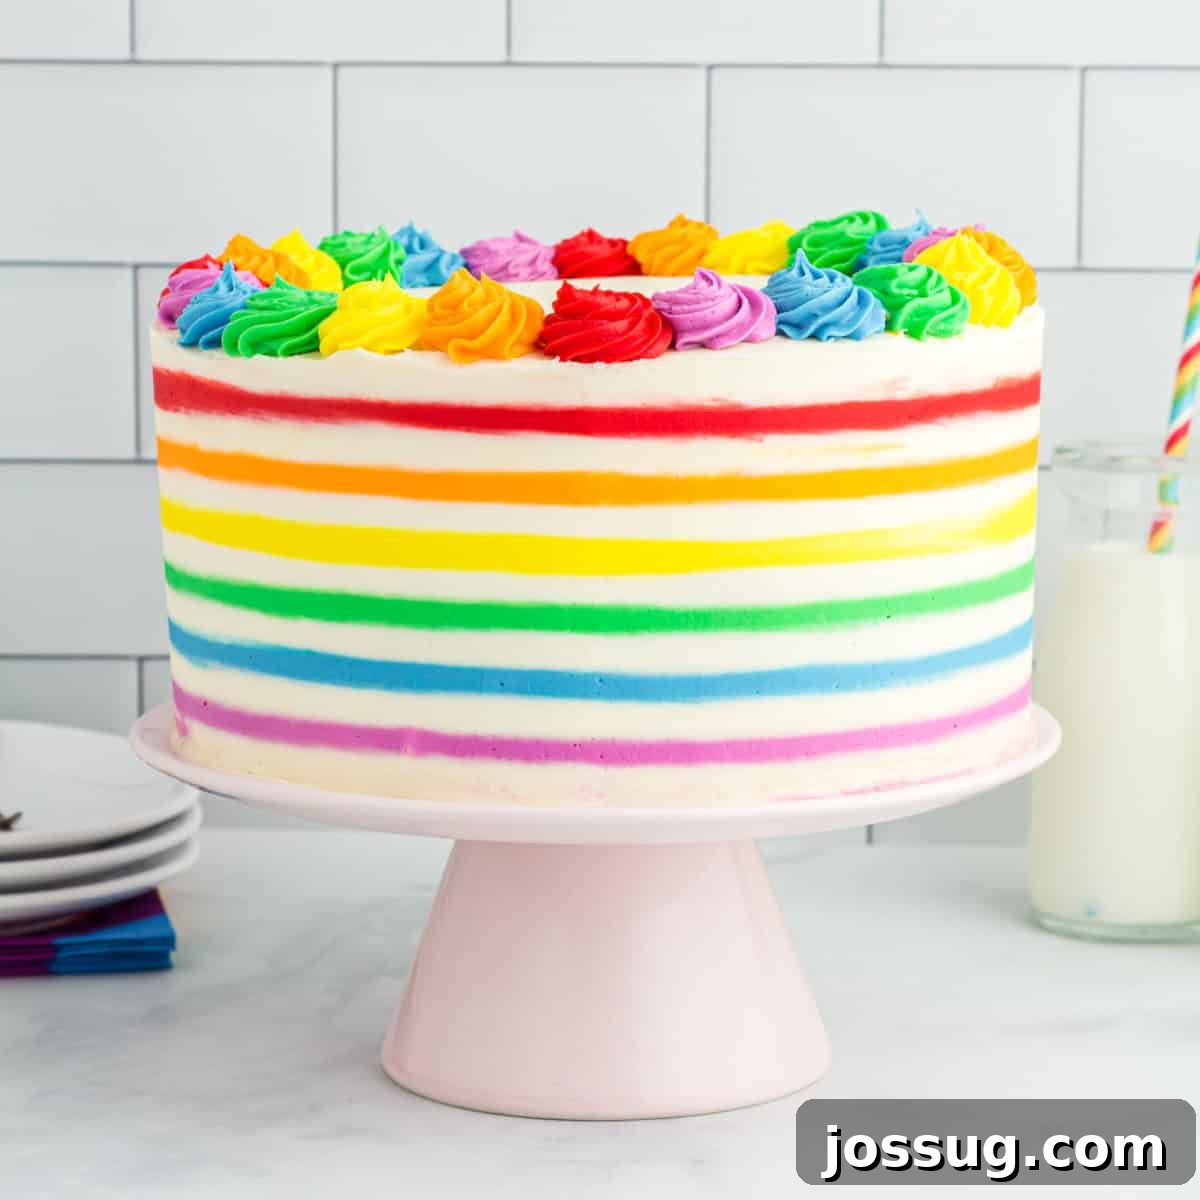
Ultimate Rainbow Striped Funfetti Cake: Your Guide to a Dazzling Celebration Dessert!
Get ready to bring a burst of color and joy to your next gathering with this incredible Rainbow Striped Funfetti Cake! Imagine soft, tender cake layers bursting with colorful sprinkles, beautifully contrasted by a vibrant, smooth rainbow frosting on the outside. This isn’t just a cake; it’s a showstopper, a conversation starter, and the ultimate centerpiece for any birthday, holiday, or special celebration. Prepare to impress everyone with this truly magical dessert! 🎂🌈
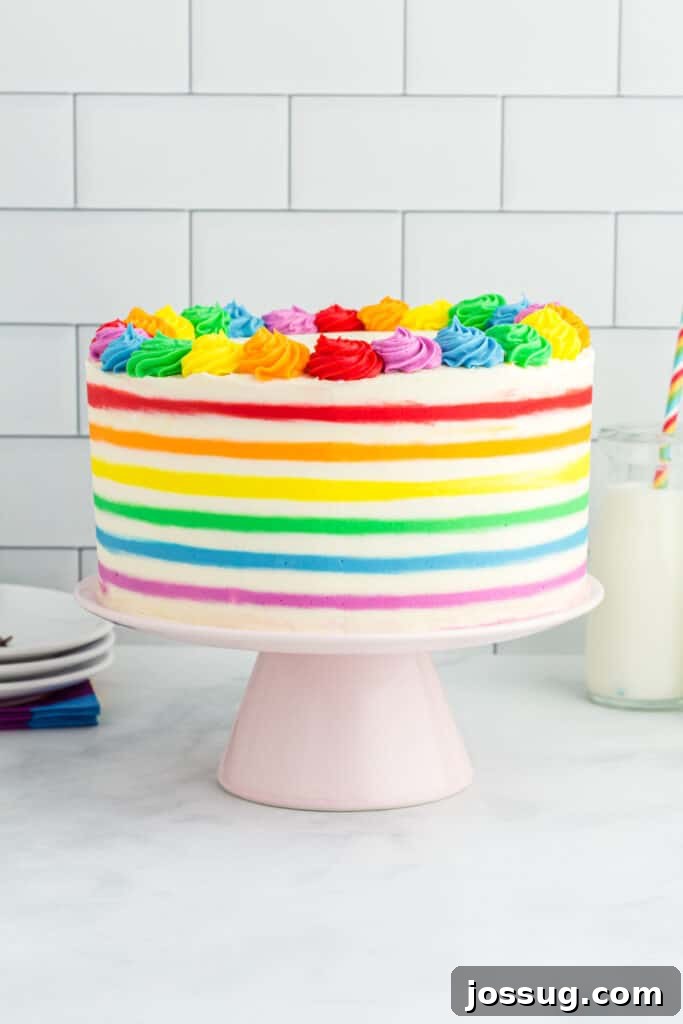
The Irresistible Allure of a Rainbow Striped Funfetti Cake
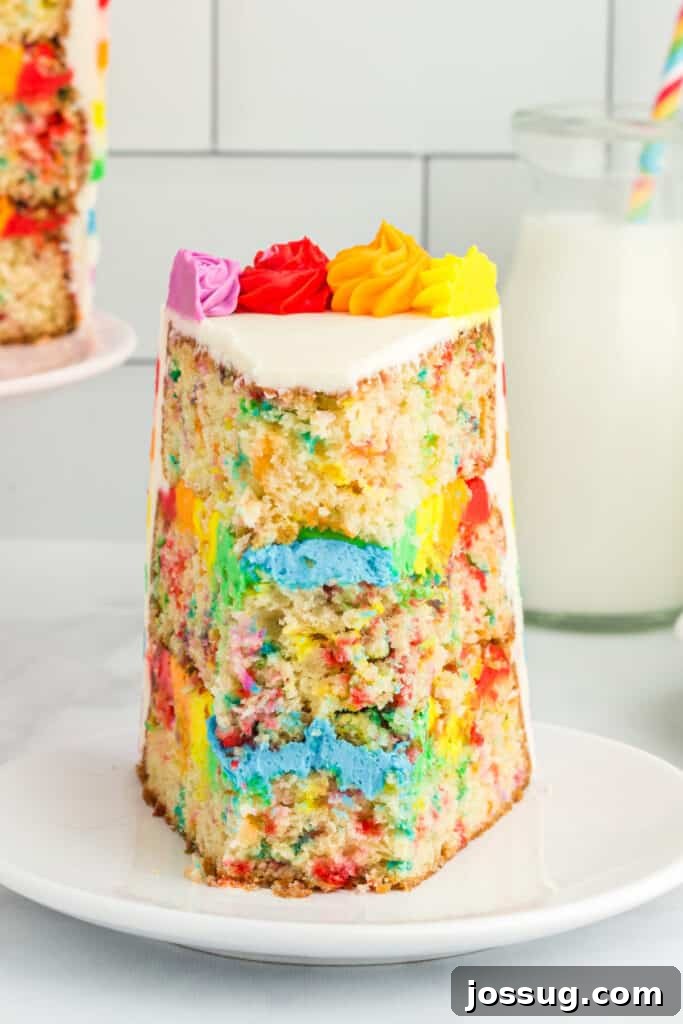
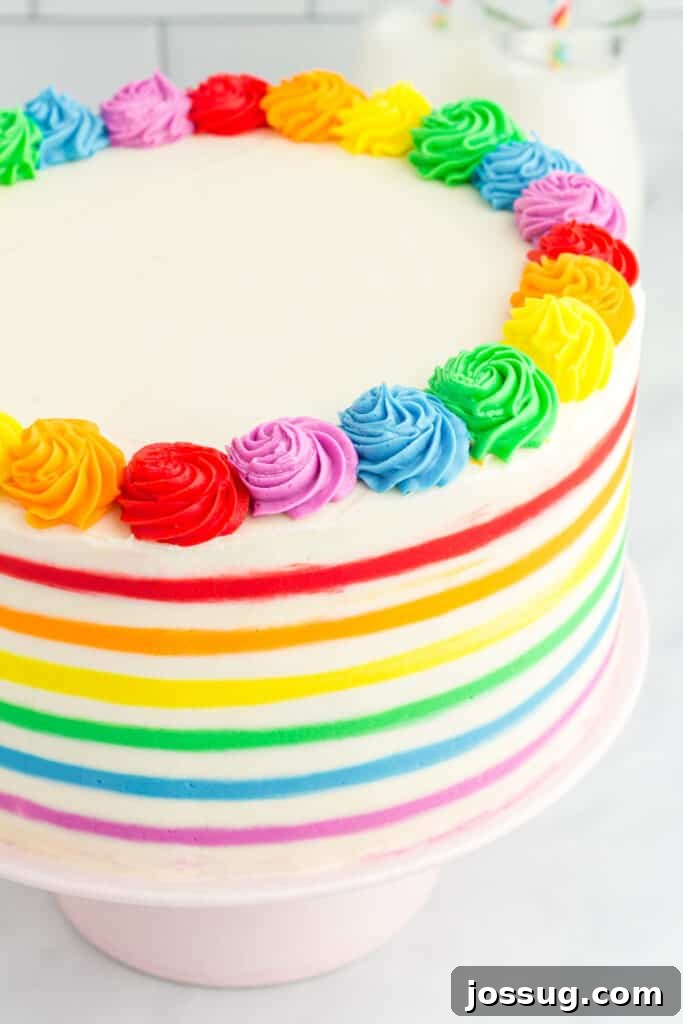
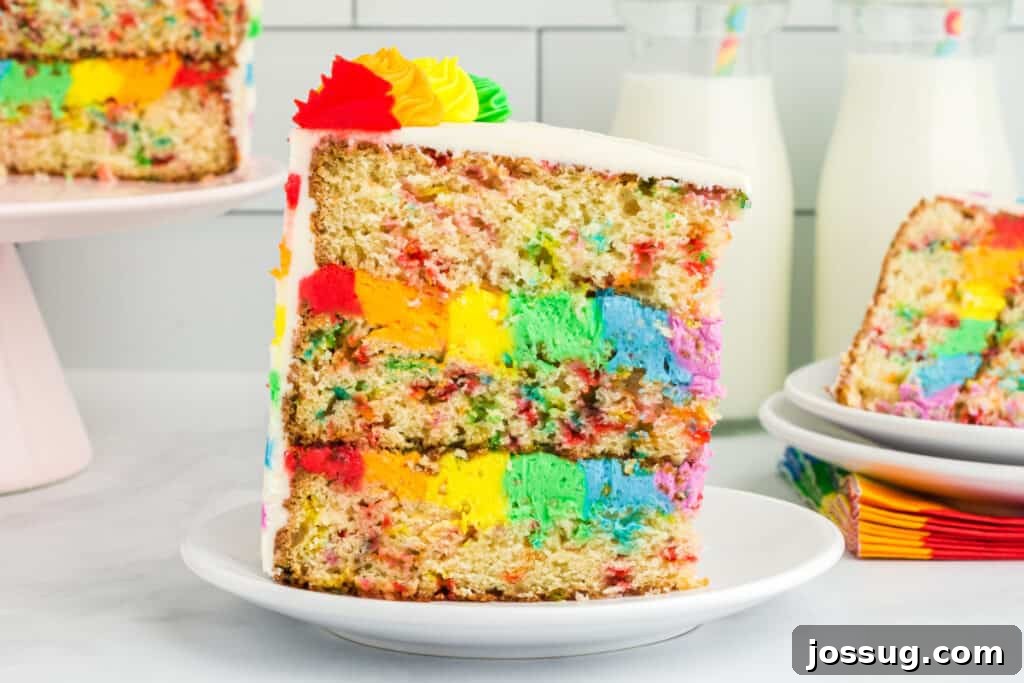
Few desserts capture the spirit of festivity quite like a show-stopping Rainbow Cake. Our rendition takes it a step further, combining the whimsical charm of a classic Funfetti Cake with breathtaking rainbow stripes. Each slice reveals tender, vanilla-flavored cake layers generously speckled with funfetti sprinkles, making every bite a delightful surprise. The exterior is a masterpiece of vibrant, colorful buttercream, meticulously arranged to form a striking rainbow pattern. This isn’t merely a dessert; it’s an edible work of art designed to bring smiles and create lasting memories. Perfect for a memorable Rainbow Birthday Cake or any special occasion, this recipe ensures your celebration will be truly unforgettable.
⭐ Why This Rainbow Funfetti Cake Will Be Your New Favorite
- Soft & Fluffy Perfection: This recipe delivers exceptionally moist and tender cake layers with a delicate crumb. We’ve fine-tuned the balance of ingredients to ensure every bite is a dream, not dry or dense, creating the ideal canvas for your colorful creation.
- Fun & Festive Celebration: From the moment you see the cheerful sprinkles baked into each layer to the reveal of the striking rainbow stripes on the outside, this cake is pure joy. It’s designed to be a centerpiece, sparking delight and wonder at any party or gathering.
- Endlessly Customizable: While we adore the classic rainbow, feel free to unleash your creativity! Adjust the colors to match a specific party theme, experiment with different sprinkle mixes, or even try unique flavor extracts in your cake batter or frosting for a personalized touch that makes it uniquely yours.
- Conveniently Make-Ahead Friendly: Planning a big event can be stressful, but your cake doesn’t have to be. Both the cake layers and the buttercream can be prepared in advance, allowing you to spread out the work and assemble this masterpiece closer to your event with ease, ensuring fresh taste without the last-minute rush.
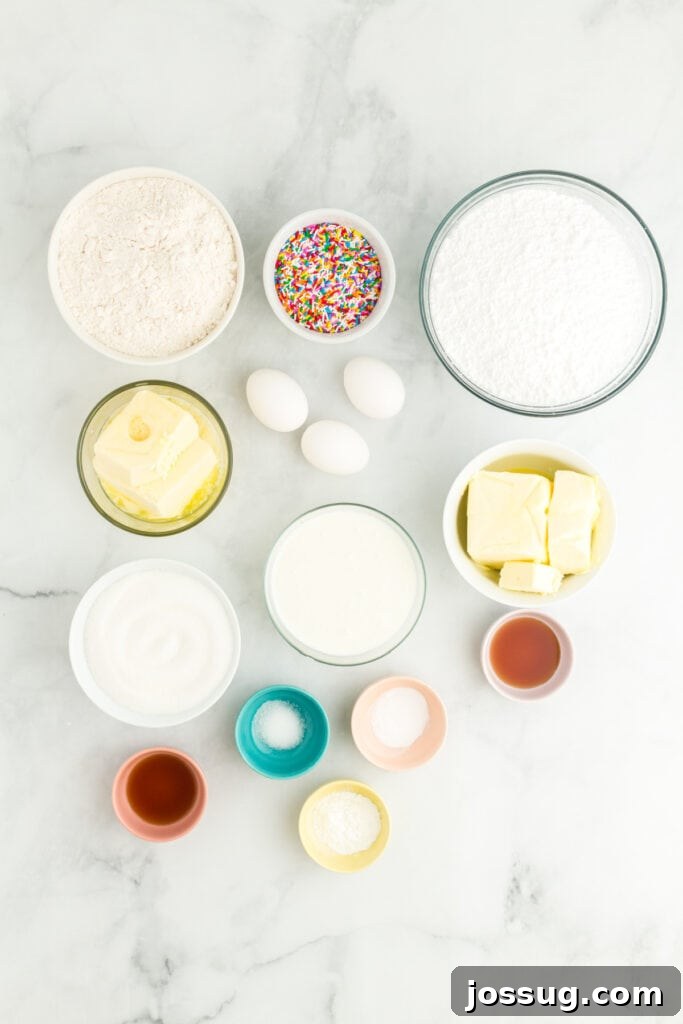
🛒 Essential Ingredients for Your Dazzling Rainbow Cake
Crafting this stunning Rainbow Striped Funfetti Cake requires a few key components. Here’s what you’ll need, along with some helpful tips and potential substitutions:
For the Fluffy Homemade Funfetti Cake Layers
- All-Purpose Flour: The foundation of our cake, providing structure. For a gluten-free option, simply swap with a high-quality 1:1 gluten-free baking blend that contains xanthan gum.
- Baking Powder & Baking Soda: These leavening agents work in harmony to give the cake its signature light and airy texture. Ensure they are fresh for optimal lift.
- Salt: A small but mighty ingredient that enhances all the other flavors and balances the sweetness.
- Unsalted Butter: Softened or slightly melted, butter contributes to the cake’s rich flavor and tender crumb. Using unsalted butter allows you to control the overall salt content of your recipe.
- Granulated Sugar: Sweetens the cake and helps create a moist texture.
- Large Eggs: At room temperature, eggs emulsify better with the butter and sugar, contributing to a smoother batter and a more uniform cake structure.
- Vanilla Extract: Pure vanilla extract provides that classic, comforting cake flavor that pairs perfectly with sprinkles.
- Buttermilk: The secret to an incredibly moist and slightly tangy cake! If you don’t have buttermilk on hand, you can easily make a homemade version by combining 1 cup of regular milk with 1 tablespoon of white vinegar or lemon juice, letting it sit for 5-10 minutes until it slightly curdles.
- Sprinkles: Crucial for “funfetti”! It is essential to use “jimmy-style” sprinkles (the long, cylindrical ones) rather than nonpareils (the tiny, round balls). Nonpareils are prone to bleeding their color into the batter, which can result in a muddy-looking cake rather than distinct colorful flecks.
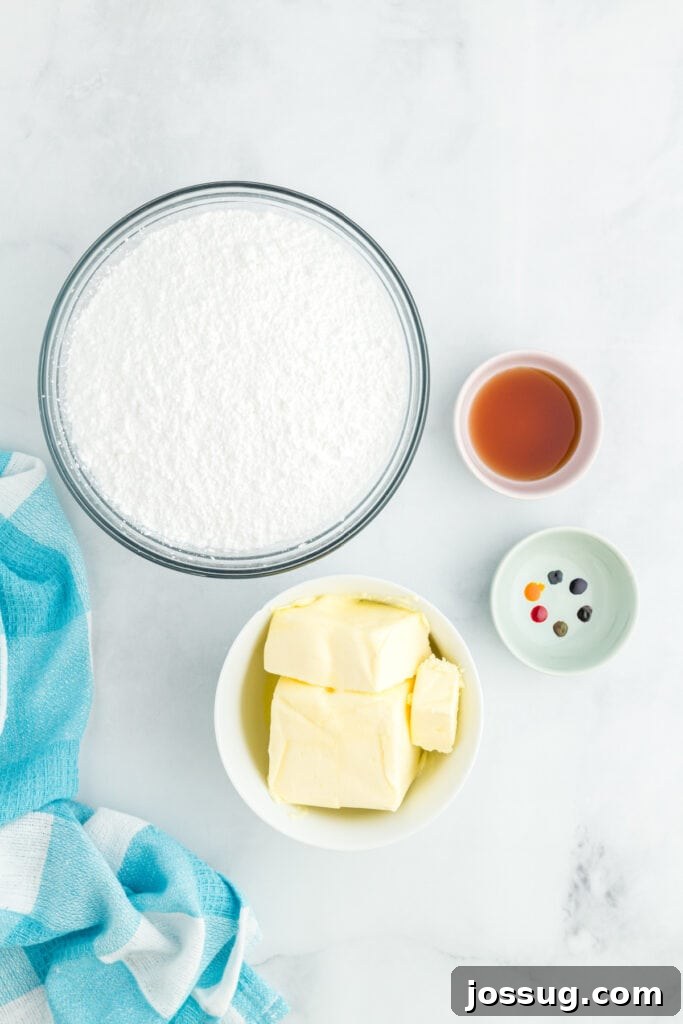
For the Vibrant Rainbow Buttercream Frosting
- Powdered Sugar: Also known as confectioners’ sugar, this provides the structure and sweetness for our smooth buttercream. Sift it to avoid lumps!
- Unsalted Butter: Softened but not melted, butter forms the creamy base of the frosting. Like with the cake, unsalted allows for better flavor control.
- Vanilla Extract: Adds a delicious depth of flavor to the buttercream, complementing the cake layers.
- Gel Food Coloring: For truly vibrant and bold rainbow stripes, gel food coloring is indispensable. Liquid food coloring can thin out your frosting and won’t achieve the same intensity of color. I specifically used red, orange, yellow, green, blue, and purple to create a classic rainbow spectrum.
🔥 Expert Tips For the Perfect Homemade Funfetti Cake
- Measure Flour Correctly: The most common baking mistake is adding too much flour, which leads to a dry, dense cake. Always use a kitchen scale for precise measurement. If you don’t have one, use the “spoon and level” method: gently spoon flour into your measuring cup until it overflows, then level it off with a straight edge (like the back of a knife) without packing it down.
- Don’t Overmix the Batter: Once you add the dry ingredients to the wet, mix only until just combined. Overmixing develops the gluten in the flour too much, resulting in a tough, chewy cake rather than a light and fluffy one. A few lumps are perfectly fine!
- Chill Before Frosting: This is a game-changer for a smooth finish! After baking and allowing your cake layers to cool completely, wrap them individually in plastic wrap and freeze them for 10-15 minutes (or even longer, up to a day). Chilled cakes are firmer and produce fewer crumbs, making it much easier to apply a neat, crumb-free layer of frosting.
- Utilize a Cake Scraper for Flawless Stripes: Achieving those crisp, defined rainbow stripes requires the right tool. A simple bench scraper or a specialized cake decorating comb is essential for smoothing the frosting and creating sharp edges and uniform grooves for your colorful bands. Practice makes perfect, but this tool makes it significantly easier.
❓ Frequently Asked Questions (FAQs) About Rainbow Funfetti Cake
Crumbly cake during frosting is a common issue! It’s usually due to your frosting being too thick, or the cake layers not being sufficiently chilled. To remedy this, try adding 1 tablespoon of heavy cream (or milk) to your buttercream and mix until it reaches a smoother, more spreadable consistency. Also, ensure your cake layers are thoroughly chilled—freezing them for 10-15 minutes before applying the crumb coat works wonders to firm them up and minimize crumbs.
Absolutely! This recipe is excellent for make-ahead preparation, saving you time and stress on the day of your event. The baked cake layers can be wrapped tightly in plastic wrap and stored in the refrigerator for up to 3 days, or frozen for up to 2 months. For the best flavor and texture, prepare the frosting and assemble the cake closer to when you plan to serve it.
Achieving that polished look is all about technique and tools. First, apply a thin “crumb coat” of frosting and chill the cake to lock in any loose crumbs. Then, apply your final layer of white frosting, using an offset spatula and a straight cake scraper to smooth the sides and top. For the stripes, gently press a cake decorating comb against the side of the cake and rotate it to create even grooves. Chill the cake again before piping the colored frosting into these grooves, and then smooth it once more with a clean scraper.
Proper storage is key to keeping your cake fresh:
- Room Temperature: An unfrosted cake can stay at room temperature for up to 2 days wrapped tightly. A frosted cake is best stored in an airtight container for up to 3 days.
- Refrigerator: Wrap the cake well or place it in an airtight cake carrier; it will keep for up to 6 days in the fridge.
- Freezer: For longer storage, freeze individual slices or the entire cake (unfrosted layers or fully frosted) tightly wrapped in plastic wrap and then foil for up to 2 months. Thaw in the refrigerator overnight before bringing to room temperature to serve.
While you can use liquid food coloring, gel food coloring is highly recommended for this recipe. Gel colors are much more concentrated, allowing you to achieve vibrant, bold rainbow hues with a small amount, without thinning out your buttercream frosting. Liquid food coloring often requires a larger quantity to reach the desired color intensity, which can affect the consistency of your frosting.
For beautiful, classic decorative swirls on top of your Rainbow Birthday Cake, a large open star tip like a Wilton 1M or Wilton 21 works wonderfully. If you prefer smaller, more intricate swirls, a Wilton 28 tip (a smaller star tip) is an excellent choice. Experiment with different tips to find the look you love!
Yes, you can adjust the pan sizes, but be sure to modify the baking time accordingly:
- Two 9-inch round pans: Bake for approximately 35–40 minutes.
- Four 6-inch round pans: Bake for about 28–32 minutes. This size will give you taller, narrower layers.
- Cupcakes: For individual funfetti cupcakes, bake for 18–22 minutes, filling liners about two-thirds full.
Always test for doneness with a toothpick inserted into the center; it should come out clean.
🍽️ More Delicious Recipes You May Enjoy
- Delightful Rainbow Cupcakes
- Festive Patriotic Funfetti Cake
- Colorful Rainbow Pancakes
- Easy No-Bake Funfetti Cheesecake
- Classic Funfetti Pound Cake
No ratings yet. Be the first to rate this recipe!
12
servings
Rainbow Striped Funfetti Cake
Jamie Sherman
30
mins
35
mins
1
hr
2
hrs
5
mins
Pin Recipe
Rate Recipe
Print Recipe
Ingredients
For the Cake
- 3 cups all-purpose flour
- 2 teaspoons baking powder
- 1 teaspoon baking soda
- ½ teaspoon salt
- 1 cup unsalted butter, slightly melted
- 1-3/4 cups granulated sugar
- 3 large eggs, room temperature
- 2 teaspoons vanilla extract
- 1 cup buttermilk, room temperature
- ¾ cup jimmy-style sprinkles (to prevent color bleeding)
For the Frosting
- 7 cups powdered sugar, sifted
- 2 cups unsalted butter, softened
- 2 tablespoons vanilla extract
- Gel food coloring (red, orange, yellow, green, blue, purple)
Instructions
For the Cake
-
Preheat & Prep: Preheat your oven to 350°F (175°C). Prepare three 8-inch round cake pans by lining the bottoms with parchment paper and lightly greasing the sides with non-stick spray. This ensures your cakes release cleanly.
-
Mix Dry Ingredients: In a large bowl, whisk together the all-purpose flour, baking powder, baking soda, and salt. Make sure these are thoroughly combined to ensure even leavening throughout the cake.
-
Cream Butter & Sugar: In a separate, larger bowl (or the bowl of a stand mixer), cream together the slightly melted unsalted butter and granulated sugar on high speed for 1–2 minutes until the mixture is light and fluffy.
-
Add Eggs & Vanilla: Beat in the large eggs one at a time, ensuring each is fully incorporated before adding the next. Stir in the vanilla extract. Continue beating for about 2 minutes until the mixture is visibly light and airy.
-
Combine Wet & Dry: Gradually add the dry ingredient mixture to the wet ingredients, alternating with the room temperature buttermilk. Begin and end with the dry ingredients. Mix on low speed just until everything is combined, taking care not to overmix. Overmixing can lead to a tough cake.
-
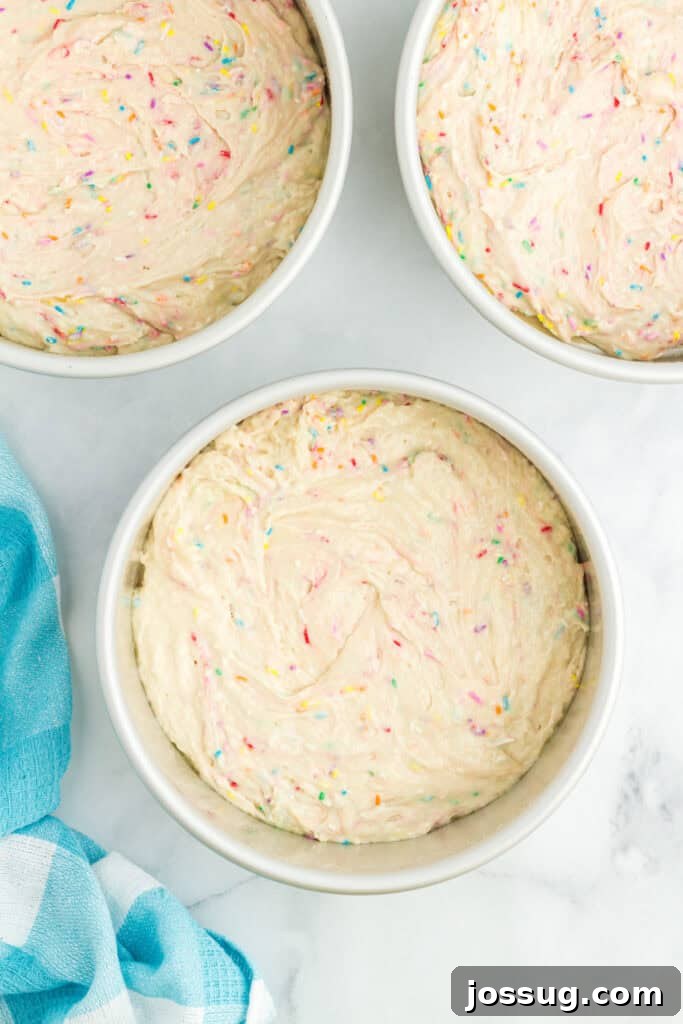
Add Sprinkles: Gently fold in the jimmy-style sprinkles using a spatula. Mix just enough to distribute them evenly without crushing them or causing color bleed.
-
Divide & Bake: Divide the cake batter evenly among the three prepared 8-inch cake pans. Each pan should hold approximately 500g of batter for uniform layers. Bake for 33–35 minutes, or until a wooden toothpick inserted into the center of a cake comes out clean.
-
Cool Cakes: Allow the cakes to cool in their pans on a wire rack for about 15 minutes. Then, carefully invert them onto the wire racks to cool completely. Once fully cooled, use a serrated knife to carefully level or trim any domed tops, creating flat surfaces for easier stacking. For best frosting results, freeze the cooled cake layers for 15 minutes before beginning the frosting process.
Frosting and Assembly
-
Make Frosting: In a large bowl with an electric mixer, beat the sifted powdered sugar, softened unsalted butter, and vanilla extract on high speed for at least 5 minutes. The mixture should become incredibly light, fluffy, and smooth, ensuring a perfect consistency for spreading and piping.
-
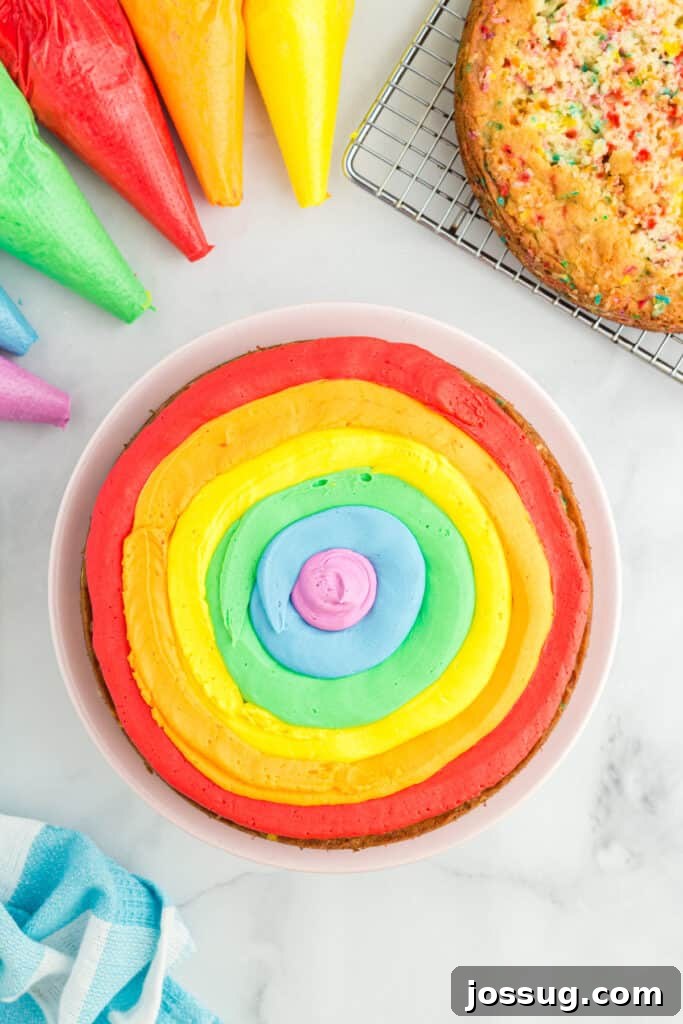
Color Frosting: Divide the prepared buttercream into seven separate bowls. Six of these bowls will be for the individual rainbow colors, and one larger bowl will be for the white frosting used for the crumb coat and outer layer. Using gel food coloring, tint the six portions red, orange, yellow, green, blue, and purple. Transfer each colored frosting into individual piping bags.
-
Layer & Frost: Place a thin layer of white frosting on your cake board or serving plate to act as an anchor. Center your first cake layer on top. Starting from the outer edge and working inwards, pipe concentric circles of rainbow frosting onto the layer, moving from red to purple. Repeat this process for the second cake layer. Place the third cake layer on top, preferably bottom-side up, to create a flat, even surface.
-
Crumb Coat: Apply a very thin, even layer of the plain white frosting all over the top and sides of the stacked cake. This “crumb coat” traps any loose crumbs, creating a smooth foundation for your final frosting layer. Chill the cake in the freezer for 10-15 minutes until this layer is firm.
-
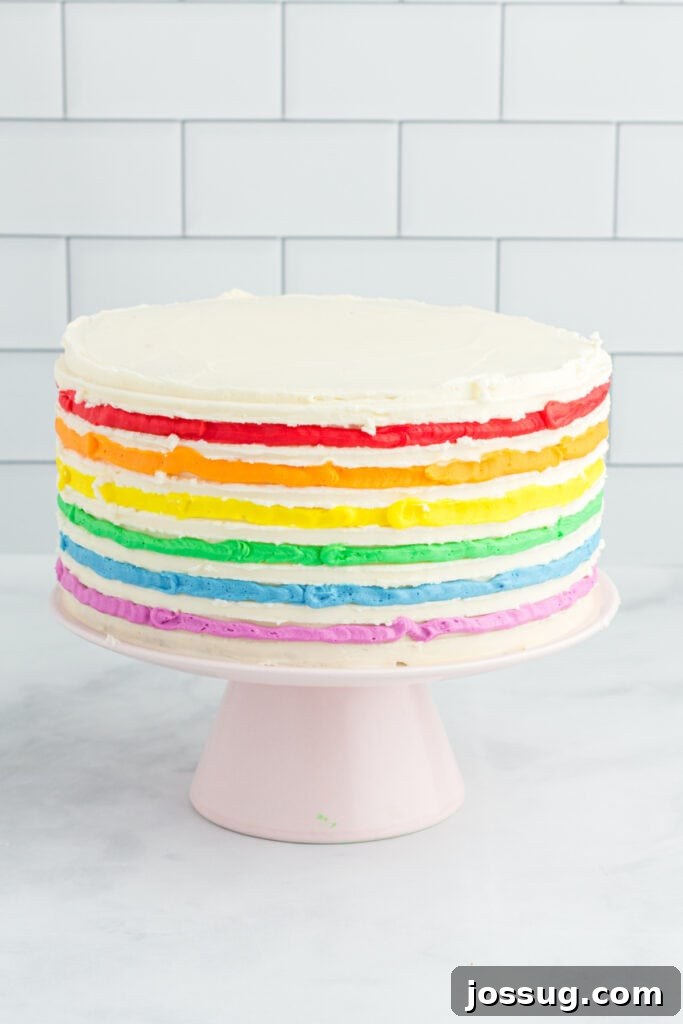
Final Frosting Layer: Once the crumb coat is firm, apply a thicker, smooth final layer of white frosting to the entire cake. Use an offset spatula and a straight bench scraper to get the sides and top as smooth and even as possible. If desired, use a cake comb to gently create shallow stripe grooves around the sides of the cake.
-
Add Rainbow Stripes: Carefully pipe the colored frosting into the grooves created by the cake comb, starting with purple at the bottom and working your way up to red at the top. Alternatively, pipe thin stripes directly onto the smooth white frosting. Once all colors are applied, gently use a clean cake scraper to smooth out the colored stripes, blending them slightly for a seamless rainbow effect. Clean your scraper often between passes for the sharpest lines.
-
Decorate: For a finishing touch, use a piping bag fitted with a Wilton 28 star tip (or a similar star tip) to pipe decorative swirls or borders along the top edge of the cake. Add a few extra sprinkles for a festive flourish if you like!
Notes
- For accurate flour measurement, always use a food scale. If you don’t have one, use the spoon-and-level method: spoon flour into your measuring cup and level it off with a straight edge, don’t pack it down.
- Use “jimmy” sprinkles (the long, cylindrical type) to prevent their colors from bleeding into your cake batter, which can happen with nonpareils (small, round sprinkles).
- If your buttercream frosting seems too thick to spread or pipe smoothly, add 1 tablespoon of heavy cream (or milk) at a time, mixing well until it reaches the desired consistency.
- Chilled cake layers are significantly easier to frost. If you find your cake is crumbly, firm it up by freezing it for 10-15 minutes before applying frosting.
Storage
- Room Temperature: An assembled and frosted cake can be stored in an airtight container for up to 3 days.
- Refrigerator: For extended freshness, wrap the cake well or place it in a specialized cake container and refrigerate for up to 6 days.
- Freezer: For longer storage, tightly wrap individual slices or the whole cake in plastic wrap and then aluminum foil. It will keep well for up to 2 months. Remember to bring it to room temperature before serving for the best taste and texture.
Nutrition
Calories: 888kcal,
Carbohydrates: 109g,
Protein: 6g,
Fat: 49g,
Saturated Fat: 30g,
Polyunsaturated Fat: 2g,
Monounsaturated Fat: 13g,
Trans Fat: 2g,
Cholesterol: 165mg,
Sodium: 304mg,
Potassium: 95mg,
Fiber: 1g,
Sugar: 83g,
Vitamin A: 1511IU,
Calcium: 88mg,
Iron: 2mg
Nutrition information is automatically calculated and should be used only as an approximation.
Loved this recipe? Share your thoughts below! We’d love to hear about your Rainbow Striped Funfetti Cake creations and how they brightened your celebrations!