
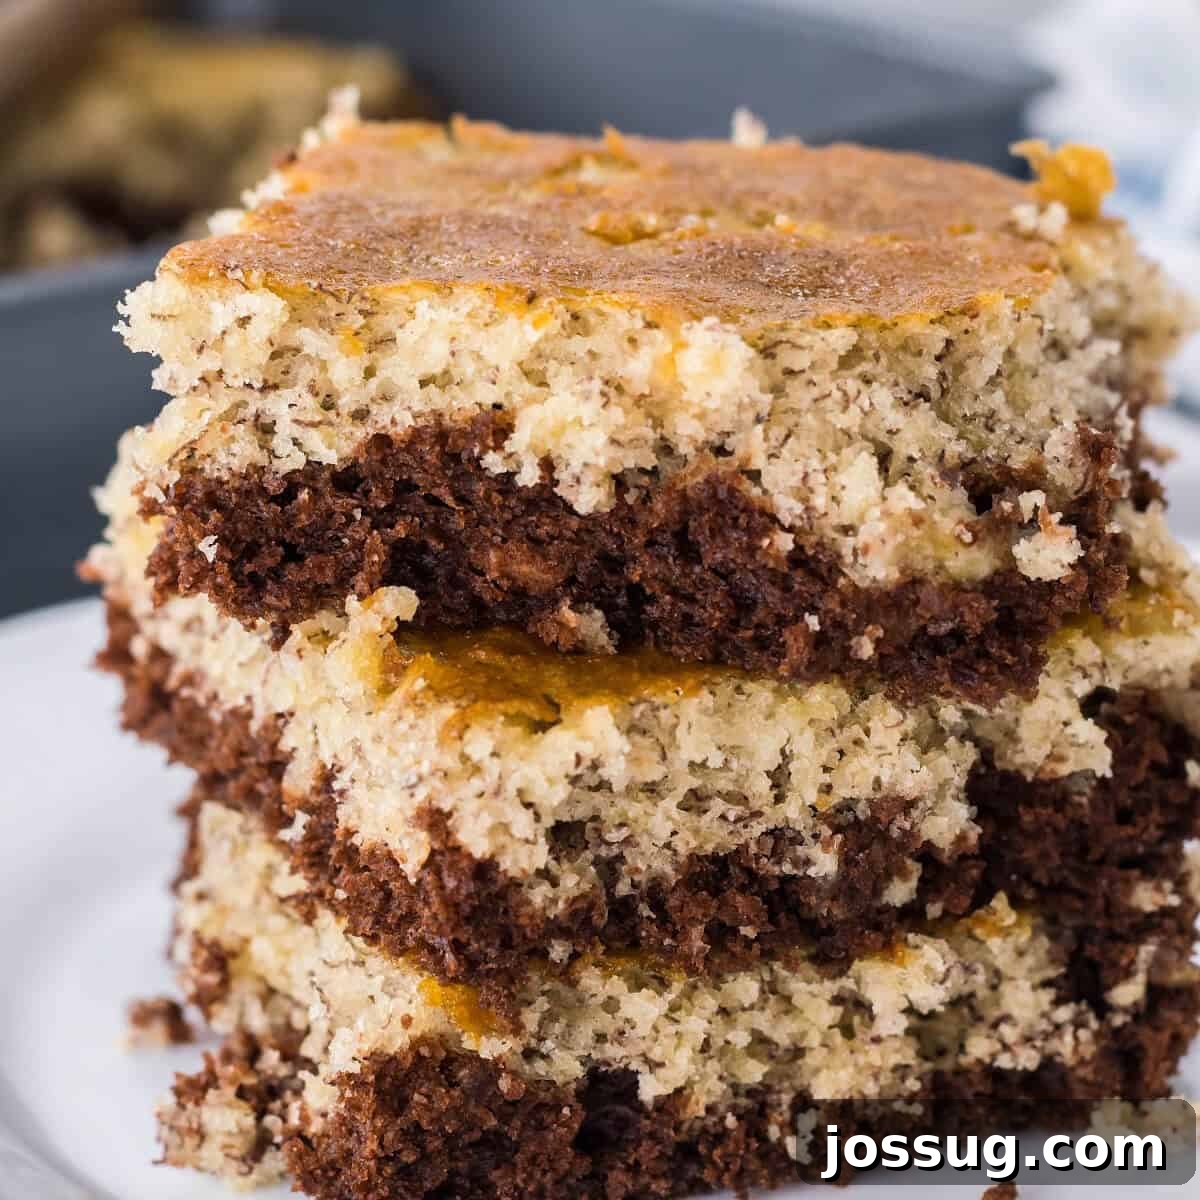
Ultimate Chocolate Banana Bars: A Delicious Way to Use Overripe Bananas
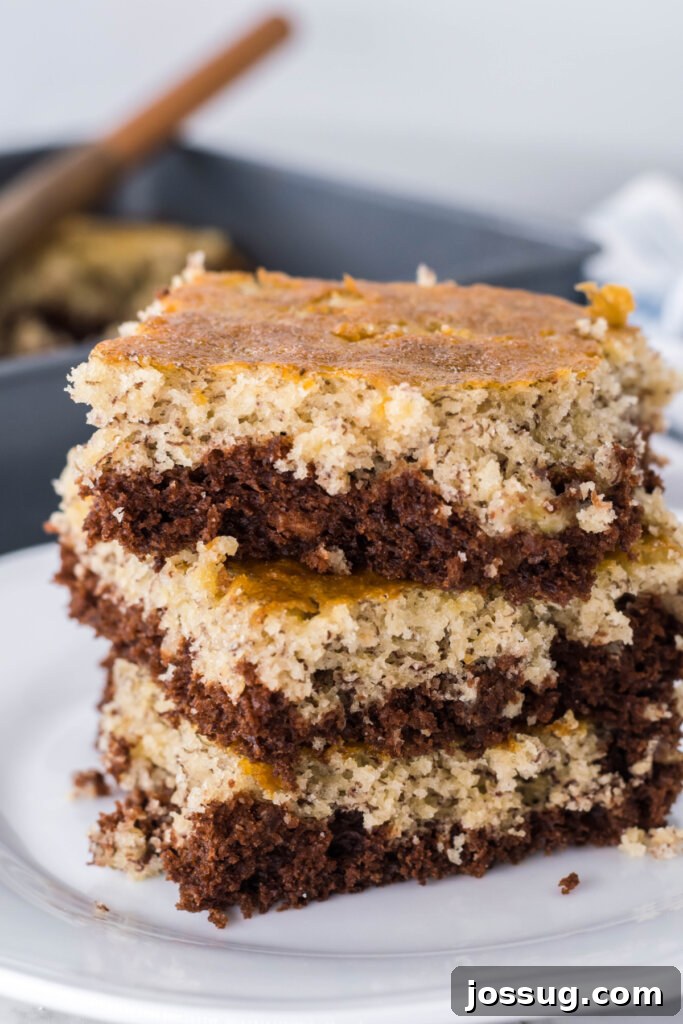
Are your bananas looking a little too spotty for your morning smoothie? Don’t even think about tossing them out! Those humble, overripe bananas are culinary gold, packed with natural sweetness and moisture, making them perfect for baking. While classic banana bread is always a winner, sometimes you crave something a little different, something with an extra layer of indulgence. Enter our incredible **Chocolate Banana Bars** – a quick, easy, and utterly delicious treat that the whole family will adore!
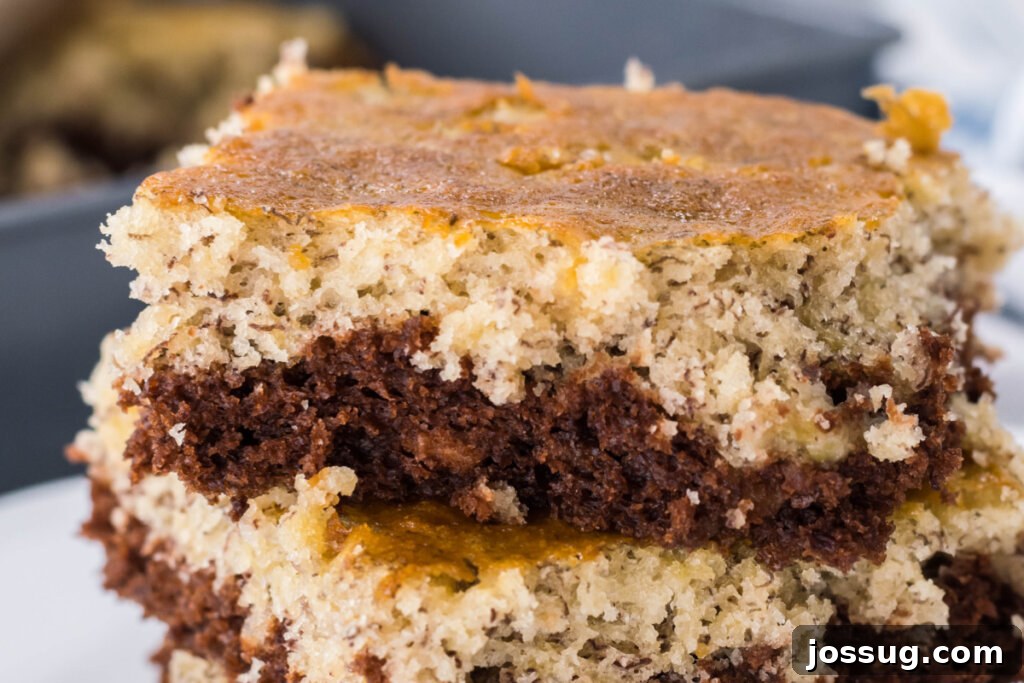
This recipe takes the beloved flavors of banana and chocolate and combines them into moist, tender bars, perfect for snacking, lunchboxes, or a comforting dessert. The beauty of these bars lies in their simplicity and their delightful two-tone appearance, with a rich chocolate base beautifully contrasted by a sweet, plain banana layer. They’re incredibly satisfying, incredibly versatile, and the absolute best way to give those forgotten bananas a delicious second life.
Why You’ll Love These Chocolate Banana Bars
If you’re tired of the same old banana bread routine, these Chocolate Banana Bars are your new go-to. They offer a refreshing twist on traditional banana baked goods, providing a unique flavor and texture experience. Here’s why this recipe will quickly become a household favorite:
- Irresistible Flavor Combination: The natural sweetness of ripe bananas pairs perfectly with the rich, slightly bitter notes of cocoa, creating a harmonious and comforting taste. Each bite offers a balance of fruit and chocolate.
- Supremely Moist and Tender: Thanks to the very ripe bananas, these bars are incredibly moist, ensuring a delightful texture that practically melts in your mouth. You won’t find any dry, crumbly baked goods here!
- Simple and Straightforward: Made from scratch with common pantry ingredients, this recipe is surprisingly easy to follow. Even novice bakers can achieve fantastic results. The steps are clear, and the process is enjoyable.
- Perfect for Any Occasion: Whether you need a quick after-school snack, a delightful addition to a brunch spread, a potluck dessert, or a comforting treat with your evening tea, these bars fit the bill. They’re easy to transport and share.
- Kid-Friendly (and Mother-Approved!): Kids love the sweet taste and the surprise of the chocolate layer. It’s a fantastic way to get them to enjoy a treat that incorporates fruit, making it a win-win for everyone.
- Smart Way to Use Overripe Bananas: This recipe is a hero in preventing food waste. Those black-spotted bananas, often overlooked, are precisely what you need for maximum flavor and moisture.
- Versatile for Customization: While delicious on their own, these bars are a blank canvas for your creativity. Add nuts, chocolate chips, or a simple frosting to make them uniquely yours.
Our unique approach involves dividing the homemade banana batter, infusing half with cocoa powder to create a beautiful two-tone effect. The chocolate batter forms the luscious base, while the plain banana batter delicately spreads on top, baking together into a visually appealing and incredibly tasty treat. Prepare yourself for rave reviews!
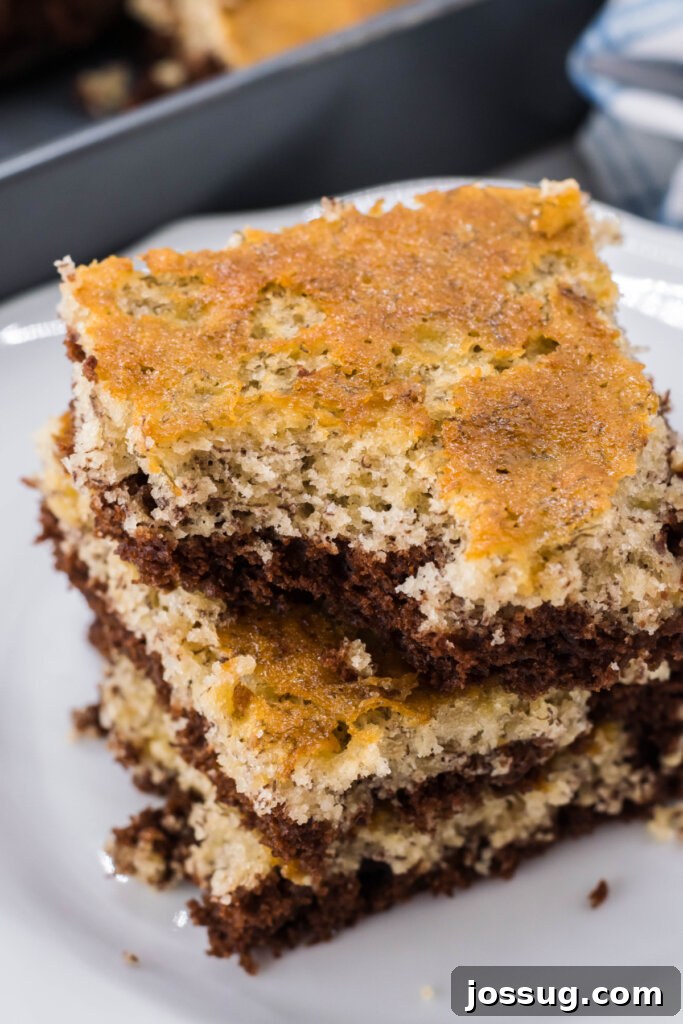
The Magic of Overripe Bananas in Baking
Why do so many banana recipes specifically call for “overripe” bananas? It’s not just a suggestion; it’s a fundamental key to achieving the best flavor and texture in baked goods like our Chocolate Banana Bars. As bananas ripen, a fascinating transformation occurs:
- Enhanced Sweetness: The starches within the banana convert into sugars during the ripening process. This natural sugar concentration means you’ll need less added sugar in your recipe, and the banana flavor itself becomes much more pronounced and sweet. Green or firm yellow bananas, while healthy, simply won’t deliver the same depth of sweetness.
- Increased Moisture: Overripe bananas become softer and more watery, releasing more liquid into your batter. This extra moisture is crucial for creating incredibly moist and tender baked goods, preventing them from drying out. They act as a natural humectant, keeping your bars delightful for longer.
- Intensified Flavor: Beyond sweetness, the complex aromatic compounds in bananas develop fully as they ripen. This results in a deeper, richer, and more fragrant banana flavor that truly shines through in your final product. You’ll notice a significant difference compared to using less ripe fruit.
- Easier to Mash: Very ripe bananas are incredibly soft and mushy, making them effortless to mash into a smooth consistency with just a fork. This ensures an even distribution of banana throughout the batter, leading to consistent flavor and texture in every bar.
So, the next time you see those brown spots appearing, rejoice! Your bananas are not past their prime; they’re perfectly poised to become the star ingredient in your next baking masterpiece.
How to Ripen Bananas Faster
Sometimes, the craving for Chocolate Banana Bars hits, but your bananas aren’t quite ready for their baking debut. Don’t worry, there are a couple of clever tricks to speed up the ripening process so you can get baking sooner:
- MICROWAVE METHOD: This is the quickest way for immediate use. Take your unpeeled bananas and poke them all over with a fork or a knife. Place them on a microwave-safe plate and microwave on HIGH power for 30-second intervals. Continue until the bananas are as soft as you desire (the peels will likely turn dark). The bananas will be hot, so allow them to cool completely before peeling and mashing them for your recipe. This method softens them quickly but won’t develop the deep sweetness as much as natural ripening.
- OVEN METHOD: For a slightly more developed flavor than the microwave, use your oven. Preheat your oven to 300°F (150°C). Place the unpeeled bananas on a rimmed baking sheet. Bake for about 15-30 minutes, or until their peels turn completely black and the bananas are soft when squeezed. This process caramelizes some of the sugars, intensifying their flavor. Again, ensure they cool down completely before peeling and incorporating them into your batter.
These methods are fantastic for those spontaneous baking moments, but remember, naturally ripened bananas often yield the richest flavor. However, for quick fixes, these tricks are invaluable!
Crafting the Perfect Chocolate Banana Bars: A Step-by-Step Guide
Making these Chocolate Banana Bars is a rewarding process, resulting in a treat that looks as good as it tastes. The key to their unique appearance and balanced flavor lies in the careful preparation and layering. Follow these detailed steps to ensure your bars turn out perfectly every time:
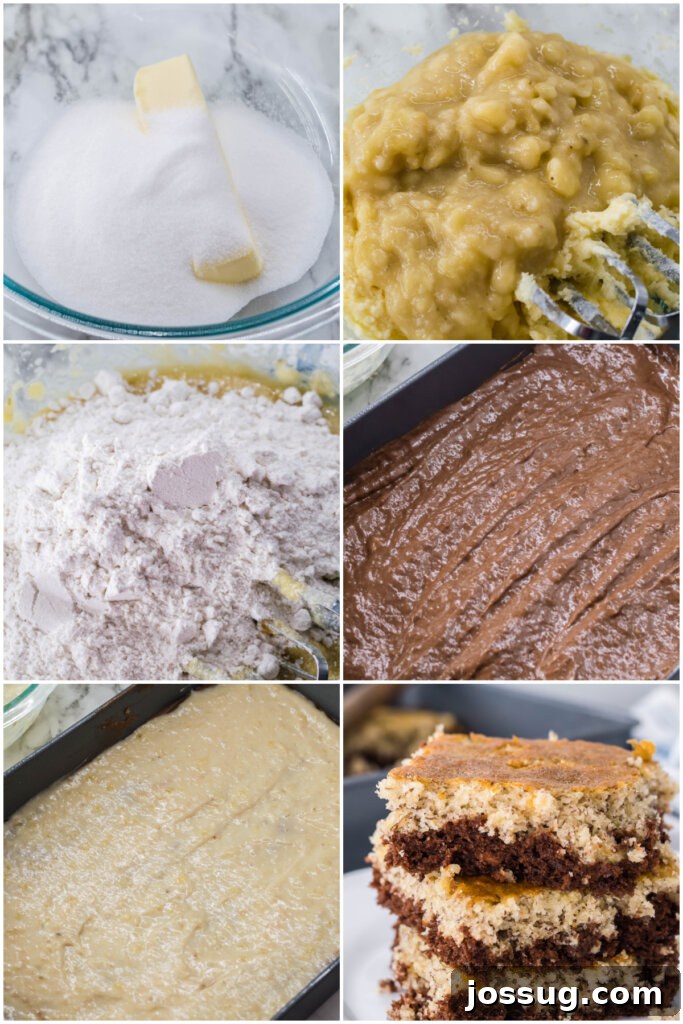
- Prepare Your Pan and Oven: Begin by preheating your oven to 350°F (175°C). This ensures the oven is at the correct temperature for even baking as soon as your batter is ready. Thoroughly grease a 9×13-inch baking pan. You can use butter, baking spray, or line it with parchment paper for easy removal. Set the prepared pan aside.
- Cream Wet Ingredients: In a large mixing bowl, combine the softened unsalted butter and granulated sugar. Using an electric mixer on low speed, cream them together until light and fluffy. This process incorporates air, contributing to the bars’ tender texture. Next, beat in the large egg and vanilla extract. Continue mixing on medium speed until all ingredients are thoroughly combined and the mixture is smooth. Finally, blend in your mashed, very ripe bananas. Scrape down the sides of the bowl with a rubber spatula to ensure everything is incorporated, then mix for one minute more to fully combine all the wet ingredients.
- Combine Dry Ingredients: In a separate, medium-sized bowl, whisk together the all-purpose flour, baking powder, baking soda, and salt. Sifting these ingredients together can help prevent lumps, though whisking thoroughly is often sufficient.
- Combine Wet and Dry Mixtures: Gradually add the dry flour mixture to the banana mixture in the large bowl. Mix well on low speed until just combined. Be careful not to overmix, as this can lead to tough bars. Once the flour streaks are mostly gone, give the sides of the bowl one final scrape with your rubber spatula to catch any unmixed ingredients, then mix briefly.
- Create the Two-Tone Effect: This is where the magic happens! Divide the prepared batter into two equal halves. To one half, add the cocoa powder. Mix this portion thoroughly until the cocoa is fully incorporated and you have a smooth, rich chocolate batter. Spread this chocolate mixture evenly into the bottom of your greased 9×13-inch baking pan.
- Layer the Plain Batter: Carefully spoon the plain banana batter on top of the chocolate layer. Use the back of a spoon or an offset spatula to gently spread it out, covering the chocolate layer completely. The goal is to spread it without disturbing or mixing the two distinct layers, preserving the beautiful marbled or two-tone effect. Take your time with this step.
- Bake to Perfection: Place the pan in the preheated oven and bake for approximately 25 minutes. To check for doneness, insert a toothpick into the center of the bars. If it comes out clean or with a few moist crumbs attached, the bars are ready. Avoid overbaking, as this can dry them out.
- Cool and Serve: Once baked, remove the pan from the oven and transfer it to a wire rack. Allow the bars to cool completely in the pan. Cooling fully is important for them to set properly and for easier cutting. Once cooled, cut into individual bars and serve.
These simple yet effective steps will guide you to creating perfectly delicious and visually appealing Chocolate Banana Bars that everyone will love!
Essential Equipment for Banana Bar Success
Having the right tools can make your baking experience smoother and more enjoyable. For these Chocolate Banana Bars, you’ll need a few common kitchen essentials:
-
Wire Cooling Rack: Essential for allowing your baked bars to cool evenly and prevent sogginess on the bottom.
-
Measuring Cups and Spoons: Accurate measurements are crucial for baking consistency. Ensure you have a full set for both dry and liquid ingredients.
-
Rubber Spatula or Wooden Spoon: Perfect for scraping down the sides of your mixing bowl, ensuring all ingredients are fully incorporated without overmixing.
-
Hand Mixer (Electric): While you can mix by hand, an electric hand mixer makes creaming butter and sugar much faster and more efficient, yielding a lighter, fluffier batter.
-
Large Mixing Bowls (at least two): You’ll need one for wet ingredients and one for dry, plus another for dividing the batter. Having a good set of various sizes is always handy.
-
Non-Stick 13 x 9-Inch Baking Pan: The standard size for this recipe, ensuring appropriate thickness and baking time for your bars. A non-stick pan helps with easy release.
With these tools in hand, you’re well-equipped to bake up a batch of these delightful chocolate banana bars!
Key Ingredients and Their Role
Every ingredient in this recipe plays a crucial role in achieving the perfect texture, flavor, and rise. Understanding their functions can help you become a more confident baker:
- Unsalted Butter (Softened): Provides richness, moisture, and flavor, while helping to create a tender crumb. Softened butter creams well with sugar, incorporating air for a lighter texture.
- Granulated Sugar: Adds sweetness and contributes to the moistness and tender crumb of the bars. It also helps with browning.
- Large Egg: Acts as a binder, holding the ingredients together and providing structure. It also adds richness and a touch of moisture.
- Vanilla Extract: A flavor enhancer that complements the banana and chocolate beautifully, adding warmth and depth to the overall taste.
- Very Ripe Bananas (Medium): The star of the show! As discussed, they provide intense natural sweetness, essential moisture, and that unmistakable banana flavor.
- All-Purpose Flour: Forms the structural base of the bars. Using all-purpose flour provides a good balance of protein for structure without making the bars tough.
- Baking Powder & Baking Soda: These are leavening agents. Baking powder provides lift, while baking soda reacts with the acidic components (like banana) to create carbon dioxide, resulting in a light and airy texture.
- Salt: Balances and enhances all the other flavors, especially the sweetness of the bananas and the richness of the chocolate.
- Baking Cocoa Powder: Adds the distinct chocolate flavor and color to one half of the batter, creating the delicious two-tone effect. Use unsweetened cocoa for best results.
With these carefully selected ingredients, you’re on your way to baking truly exceptional Chocolate Banana Bars!
Chocolate Banana Bars FAQs
These bars will stay delightfully fresh in an airtight container at room temperature for up to 2-3 days. For extended freshness, store them in an airtight container in the refrigerator for up to 5-7 days. Bring to room temperature before serving for the best flavor and texture.
Absolutely! These bars freeze exceptionally well. Once completely cooled, wrap individual bars tightly in plastic wrap, then place them in a freezer-safe container or ziptop bag. They can be frozen for up to three months. Thaw at room temperature or gently warm in the microwave for a quick treat.
Yes, you can! Substitute the all-purpose flour with a 1:1 gluten-free baking flour blend that contains xanthan gum. The rest of the ingredients should typically be naturally gluten-free. Always check labels for specific dietary needs.
Unsweetened natural cocoa powder is recommended for this recipe. It provides a rich chocolate flavor without adding extra sweetness, allowing the natural sugars from the bananas to shine through. Dutch-processed cocoa can also work, giving a darker color and milder flavor, but the leavening might need slight adjustment if you’re an experienced baker.
Customizing Your Banana Bars: Delicious Variations & Pro Tips
While these Chocolate Banana Bars are fantastic as is, they’re also incredibly adaptable. Feel free to get creative and personalize them to your liking with these recipe tips and variations:
- Add a Crunch: Enhance the texture by folding in chocolate chips (milk, semi-sweet, or dark), white chocolate chips, chopped nuts (walnuts or pecans are classic choices), or even shredded coconut into the batter. This adds another layer of flavor and delightful chewiness.
- No Frosting Needed: One of the best qualities of these bars is their inherent moistness and perfect sweetness. They truly don’t require frosting, making them an ideal fuss-free treat. Their natural flavors are robust enough to stand on their own.
- Pure Banana Bliss: If you’re craving a purely banana-flavored bar, simply omit the cocoa powder entirely. You’ll get a batch of wonderfully moist and flavorful plain banana bars, perfect for a lighter snack.
- Double the Chocolate Fun: For the ultimate chocolate lover, double the cocoa powder amount and incorporate it into the entire batch of batter. This creates decadent, rich chocolate banana bars throughout, offering an intense cocoa experience.
- Spice it Up: A pinch of cinnamon or nutmeg can beautifully complement the banana flavor. Add about ½ teaspoon of ground cinnamon to the dry ingredients for a warm, comforting twist.
- Citrus Zest: A little orange or lemon zest can brighten the flavors in the banana batter, adding a fresh, aromatic note that contrasts nicely with the sweetness.
- Glaze or Frosting (Optional): While not strictly necessary, a simple powdered sugar glaze (powdered sugar, milk, and a touch of vanilla) or a cream cheese frosting would elevate these bars into a more dessert-like offering, perfect for special occasions.
Experiment with these suggestions to find your favorite iteration of these versatile Chocolate Banana Bars!
Other Banana-Inspired Delights to Explore
If you’ve fallen in love with baking with bananas, here are some more fantastic recipes to try:
- Chocolate Wasted Poke Cake
- Classic Banana Bread
- More than 100 Banana Recipes!
- Banana Bread Smoothie
- Sugar Cookie Bars
18
servings
Chocolate Banana Bars
Jamie Sherman
20
25
45
Rate
Would you like to save this recipe?
We’ll email this post to you, so you can come back to it later!
Equipment
-
Wire cooling rack
-
Measuring cups and spoons
-
Rubber spatula or wooden spoon
-
Hand mixer
-
Mixing bowl
-
Non-Stick 13 x 9-Inch Covered Oblong Baking Pan with Lids, Pack of 2
Ingredients
- ½ cup unsalted butter, softened
- 1 cup granulated sugar
- 1 large egg
- 1 teaspoon vanilla extract
- 3 medium very ripe bananas
- 1 ½ cups all-purpose flour
- 1 teaspoon baking powder
- 1 teaspoon baking soda
- ½ teaspoon salt
- ¼ cup baking cocoa powder
Instructions
-
Preheat oven to 350° F. Grease a 9×13-inch baking pan and set aside.
-
In a large mixing bowl, cream the butter and granulated sugar with an electric mixer on low speed. Add the egg and vanilla. Continue to mix on medium speed until thoroughly combined. Blend in the bananas. Scrape down the sides of the bowl with a rubber spatula and mix for one minute more.
-
In a separate bowl, combine the flour, baking powder, baking soda, and salt. Add the flour mixture to the banana mixture and mix well, scraping down the sides of the bowl once with a rubber spatula.
-
Divide the batter in half. Add cocoa powder to half of the batter and mix well. Spread the cocoa mixture into the prepared pan. Carefully spoon the plain batter on top of the cocoa batter and carefully spread it out, trying not to mix the two layers.
-
Bake for 25 minutes or until a toothpick inserted near the center tests clean. Remove to a wire rack to cool completely.
-
To serve, cut into bars.
Notes
- Mix things up by adding chocolate chips or nuts to the batter!
- This recipe doesn’t need a frosting – it’s perfectly moist and sweet on its own.
- Want only banana bars without the chocolate? Omit the cocoa powder.
- Want all chocolate banana bars? Double the cocoa powder and add it to the whole batch!
Nutrition
Serving: 1bar
Calories: 151kcal
Carbohydrates: 24g
Protein: 2g
Fat: 6g
Saturated Fat: 3g
Polyunsaturated Fat: 0.3g
Monounsaturated Fat: 1g
Trans Fat: 0.2g
Cholesterol: 24mg
Sodium: 154mg
Potassium: 106mg
Fiber: 1g
Sugar: 14g
Vitamin A: 185IU
Vitamin C: 2mg
Calcium: 20mg
Iron: 1mg
Nutrition information is automatically calculated, so should only be used as an approximation.
Like this? Leave a comment below!
Originally published on October 28, 2012. Updated on September 27, 2021.