
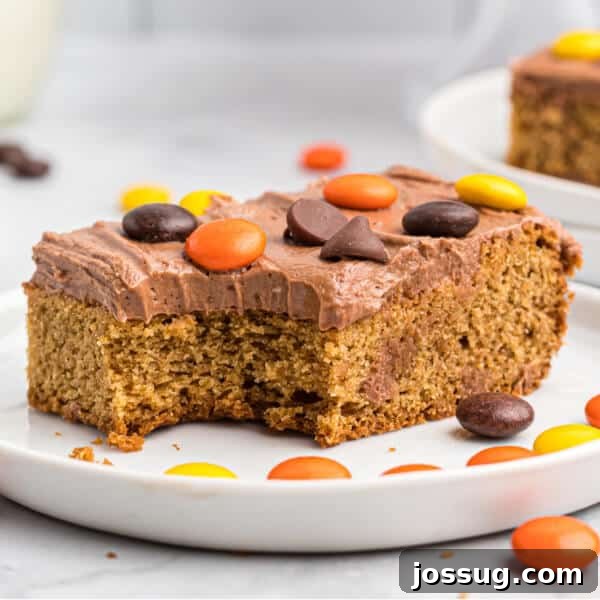
These Peanut Butter Cookie Bars are perfectly thick, soft, and chewy! Make plenty – they disappear fast! This quick and easy recipe will become an instant favorite.
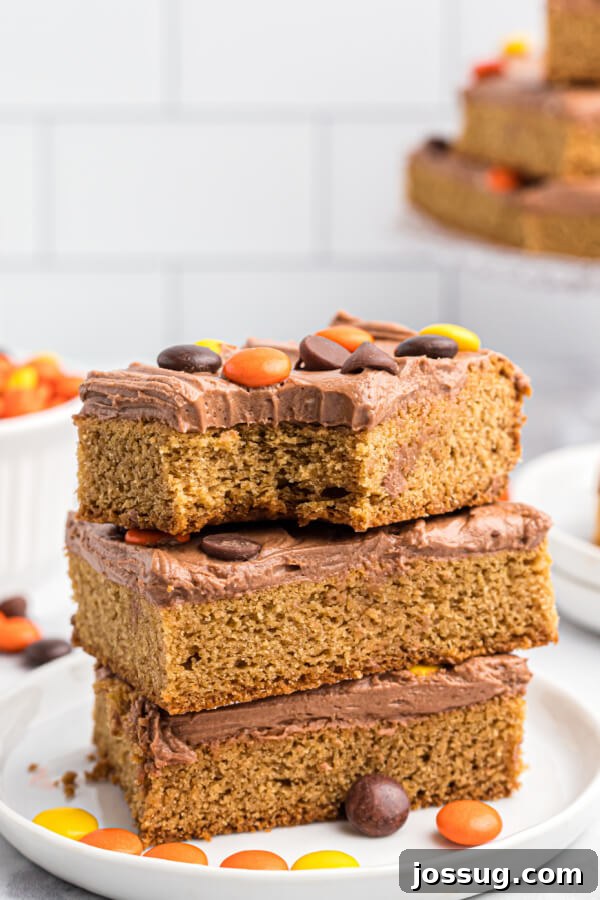
The Ultimate Peanut Butter Cookie Bars: Thick, Chewy, and Irresistibly Easy!
Craving a delightful sweet treat that’s both incredibly satisfying and surprisingly simple to whip up? Look no further than these glorious Peanut Butter Cookie Bars! Imagine all the rich, nutty flavor of your favorite peanut butter cookies, but elevated to a whole new level of convenience and chewiness. This recipe for homemade peanut butter cookie bars is designed to be perfectly thick, wonderfully soft, and delightfully chewy – a triple threat that ensures they vanish from the plate almost as quickly as they emerge from the oven. If you’re searching for an easy peanut butter bars recipe, your quest ends here. It promises a quick and easy baking experience, delivering a generous batch of pure peanut butter bliss that’s ideal for sharing… or indulging all by yourself!
Why These Peanut Butter Cookie Bars Will Become Your New Favorite
If the thought of meticulously scooping individual cookie dough balls and babysitting multiple batches through the oven feels like too much effort (and trust us, we’ve been there!), then this specific recipe for chewy peanut butter cookie bars is truly for you. Peanut Butter Cookie Bars offer all the comforting appeal of classic peanut butter cookies without any of the fuss. Instead of tedious individual shaping, you simply press the decadent dough into a single pan, bake, cool, and slice. It’s a genius shortcut that saves time and energy, making homemade deliciousness accessible even on the busiest days. These chocolate peanut butter bars are not just a dessert; they’re a statement of effortless indulgence, perfect for potlucks, family gatherings, or simply satisfying that sudden sweet tooth. Their ease of preparation and universally loved flavor profile make them a prime candidate for your permanent recipe rotation.
As much as we adore a good, traditional cookie, the intricate process of shaping and baking can sometimes deter even the most enthusiastic home baker. That’s precisely where cookie bars shine! They completely remove the “babysitting” element, allowing you to enjoy the entire baking process without constant vigilance. This recipe is a testament to that philosophy – maximum flavor with minimum fuss. You can prepare the dough in a single bowl, spread it out, and then let your oven do the rest of the work. So, go ahead and embrace the ease. Leave the individual cookie shaping to the dedicated (or perhaps the kids, who often love to help with simpler tasks!). For everyone else, give us all the cookie bars recipes, especially ones as simple and delicious as these!
Essential Ingredients for Your Delectable Peanut Butter Cookie Bars
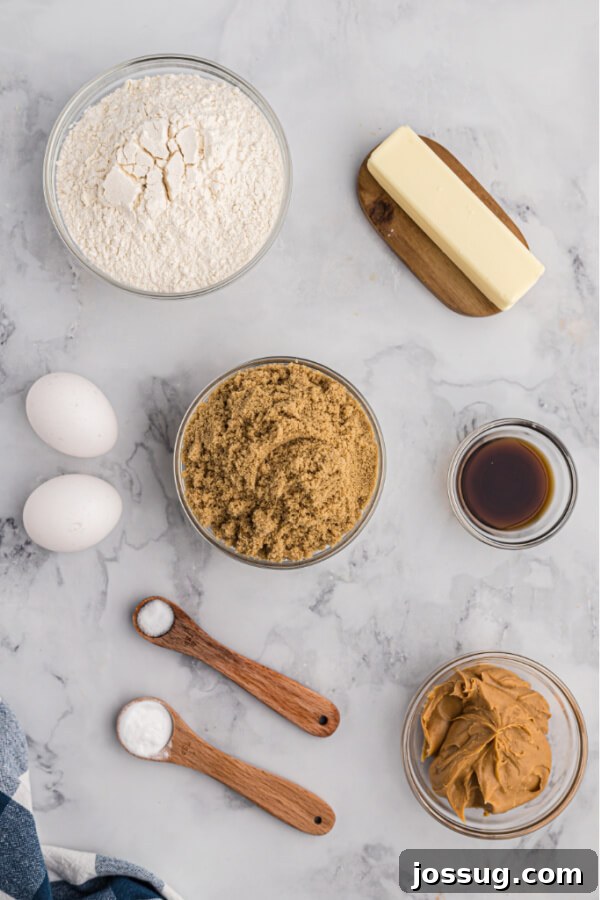
Crafting these delectable cookie bars requires a few simple, everyday ingredients you likely already have in your pantry. The magic truly happens when these basic components come together to create a rich, flavorful, and perfectly textured treat. For the best peanut butter cookie bars, quality ingredients matter. We’ll divide our ingredient list into two main parts: what you’ll need for the incredibly moist and chewy peanut butter base, and then the delightful components for the optional (but highly recommended!) creamy chocolate frosting. Using high-quality ingredients, especially your chosen peanut butter, will elevate the flavor of your bars considerably, ensuring a truly gourmet experience from your kitchen.
Ingredients for the Perfectly Chewy Cookie Bars:
- Unsalted Butter (softened): Using unsalted butter allows you to control the total salt content. Ensure it’s softened to room temperature for seamless creaming, which is crucial for a tender crumb.
- Light Brown Sugar (packed): This is key for the bars’ signature chewy texture and contributes a wonderful, deep molasses flavor that complements the peanut butter. Make sure to pack it firmly when measuring.
- Large Eggs: Act as a vital binder, adding moisture and helping to create the desirable structure and richness in the cookie bars.
- Vanilla Extract: A crucial flavor enhancer that brightens the overall taste and pairs exquisitely with the rich peanut butter.
- Salt: Essential for balancing the sweetness and truly bringing out the depth of flavor in the peanut butter.
- All-Purpose Flour: The primary dry ingredient, providing the necessary structure and body for these robust bars.
- Baking Powder: Our chosen leavening agent, which gives the bars a slight, desirable lift and contributes to their wonderfully soft texture.
- Peanut Butter: The undeniable star! Creamy peanut butter is typically recommended for a smoother bar, but crunchy varieties can also be used if you desire added textural intrigue (refer to our FAQs for more details).
Ingredients for the Rich Chocolate Frosting:
- Powdered Sugar: The essential base for our smooth, creamy frosting. It dissolves effortlessly, ensuring a lump-free, silky finish.
- Unsweetened Cocoa Powder: Delivers that irresistible deep chocolate flavor, which is a classic and beloved pairing with peanut butter.
- Butter (softened): When softened, it creates a rich, luxurious, and perfectly spreadable frosting texture that melts in your mouth.
- Vanilla Extract: Works to enhance the chocolate flavor and infuses the frosting with a warm, inviting aroma.
- Water: Used to achieve the ideal consistency for your frosting. You may need to adjust the amount slightly, adding a teaspoon at a time, to reach your desired thickness and spreadability.
Step-by-Step Guide: How to Make Irresistible Peanut Butter Cookie Bars
Making these peanut butter cookie bars is a straightforward process that even novice bakers can master with ease. Follow these simple steps meticulously to create a batch of perfectly baked, delightfully frosted treats that will impress everyone with their rich flavor and tender texture. From mixing the dough to applying the final touch of frosting, each step is designed for simplicity and delicious results.
-
Preheat the Oven and Prepare Your Pan:
Begin by preheating your oven to 350°F (175°C). This ensures the oven is at the correct, consistent temperature for even baking from the moment your pan goes in. While the oven preheats, lightly spray a 13×9-inch baking pan with non-stick cooking spray, or for easier removal, line it with parchment paper, leaving an overhang on the sides.
-
Prepare the Cookie Dough Base:
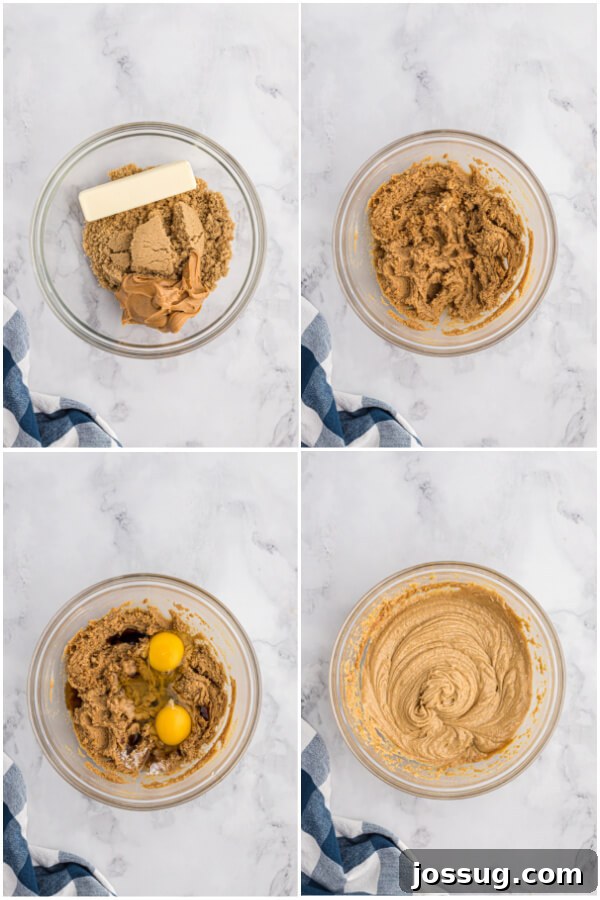
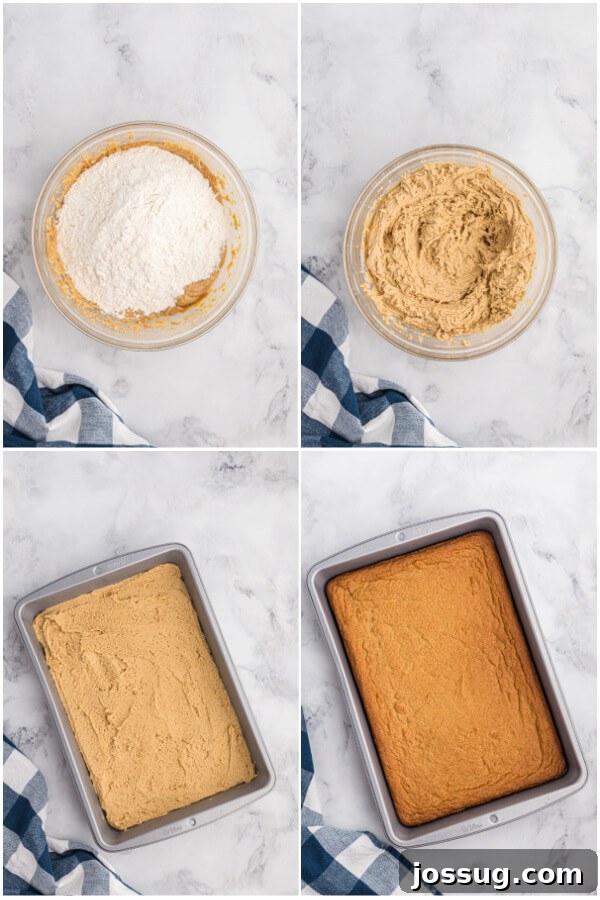
In a large mixing bowl, using either a stand mixer with the paddle attachment or a hand mixer, cream together the softened unsalted butter, light brown sugar (packed), and peanut butter until the mixture is light, fluffy, and creamy. This initial creaming step is vital for incorporating air and achieving a tender texture in your finished bars. Next, beat in the large eggs one at a time, followed by the vanilla extract and salt, mixing until all ingredients are well combined and smooth.
-
Incorporate Dry Ingredients:
In a separate bowl, whisk together the all-purpose flour and baking powder to ensure they are evenly distributed. Gradually add these dry ingredients to the wet mixture, mixing on low speed until just combined. Be careful not to overmix the dough once the flour is added, as this can develop the gluten too much, leading to tough or dry bars. Mix only until no streaks of flour remain, usually about 30 seconds after the dry ingredients are fully incorporated.
-
Press Dough into Pan and Bake:
Using a rubber spatula or your hands, evenly spread the prepared cookie dough mixture into the lightly prepared 13×9-inch baking pan. Press the dough firmly and uniformly into all corners of the pan for an even thickness, which promotes consistent baking. Place the baking pan in the preheated oven and bake for 18-20 minutes, or until the edges are lightly golden brown and the dough sets. The center might still look slightly soft, but it will firm up as it cools. Overbaking is the quickest way to dry, crumbly bars, so err on the side of slightly underbaked for ultimate chewiness.
-
Cool Completely:
Once baked, remove the pan from the oven and immediately place it on a wire rack to cool completely. This step is absolutely crucial for the success of your bars. Attempting to frost warm bars will cause the frosting to melt, slide off, and create a messy situation. Allow the bars to cool for at least 1-2 hours, or until they are completely at room temperature, before proceeding to the frosting step. Patience truly is a virtue here!
-
Prepare and Apply the Chocolate Frosting:
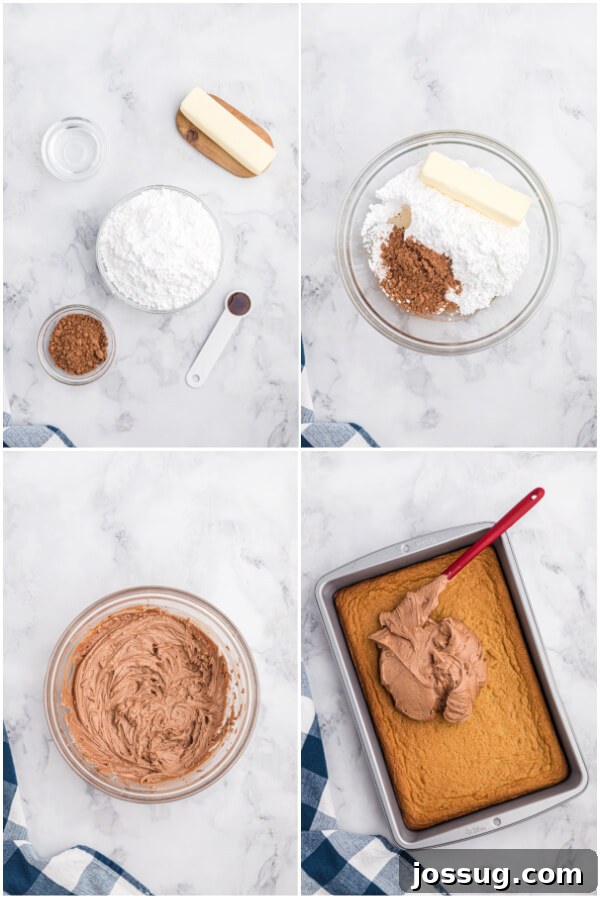
While the bars are cooling, prepare your decadent chocolate frosting. In a medium bowl, cream together the powdered sugar, unsweetened cocoa powder, and softened butter until the mixture is smooth and well combined. Stir in the vanilla extract and water, mixing thoroughly until all ingredients are incorporated and the frosting achieves a smooth, creamy consistency. If the frosting appears too thick, add an additional teaspoon of water at a time until it reaches your desired spreadable texture. Once the bars are completely cool, use a rubber spatula or offset spatula to evenly spread the chocolate frosting over the entire top surface.
-
Cut and Serve Your Delightful Bars:
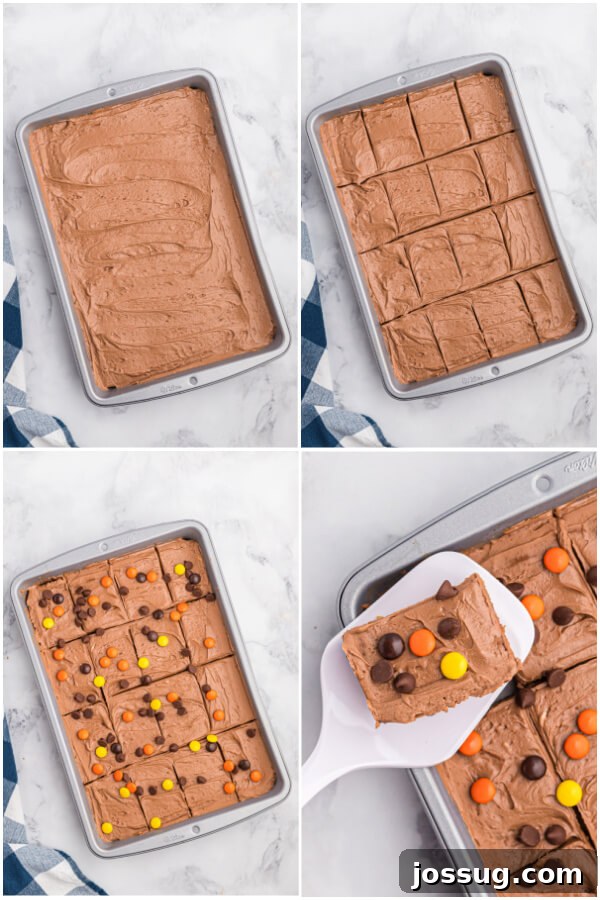
Finally, cut the frosted bars into desired squares. For neat, clean slices, you can chill the frosted bars in the refrigerator for about 15-20 minutes to allow the frosting to set slightly before cutting. This helps prevent sticking and ensures beautiful presentation. Serve these delightful Peanut Butter Cookie Bars and watch them disappear!
Peanut Butter Cookie Bars: Frequently Asked Questions (FAQs)
Got questions about making, storing, or customizing your peanut butter cookie bars? We’ve got answers! Here are some common queries to help you master this delicious recipe and enjoy perfect results every time.
➡️ What is the best way to store these bars?
For short-term storage (a few days), you can conveniently keep the bar cookies directly in their baking pan, tightly covered with aluminum foil or plastic wrap to maintain freshness. For longer preservation or if you’ve already cut them, transfer the bars to an airtight container. Storing them at room temperature is generally perfectly fine for unfrosted bars, but for frosted versions or in warmer climates, refrigeration can extend their shelf life and prevent the frosting from becoming too soft.
➡️ How long will these peanut butter cookie bars last?
These peanut butter cookie bars are at their absolute best when enjoyed within 5-7 days after baking. Proper storage in an airtight container is truly key to maintaining their deliciousness, characteristic chewy texture, and overall freshness. Beyond a week, while still edible, their quality and desirable texture may start to diminish, so it’s best to enjoy them promptly!
➡️ Can I freeze these cookie bars?
Absolutely! Freezing is an excellent way to preserve these delightful bars for future enjoyment. First, ensure the bars are completely cooled, especially if they are frosted (allow frosting to set fully). For optimal flavor and to meticulously prevent freezer burn, wrap them tightly individually or as a slab in heavy-duty aluminum foil or dedicated freezer wrap. Alternatively, you can pack them snugly in freezer bags or plastic freezer containers with tight-fitting lids. For added convenience and to prevent sticking, separate layers of bars with waxed paper or parchment paper. Remove as much air as possible before sealing the container. They will maintain their quality in the freezer for up to three months. To serve, simply thaw at room temperature for a few hours or overnight in the refrigerator, or gently warm if preferred.
➡️ What are your top topping suggestions for these bars?
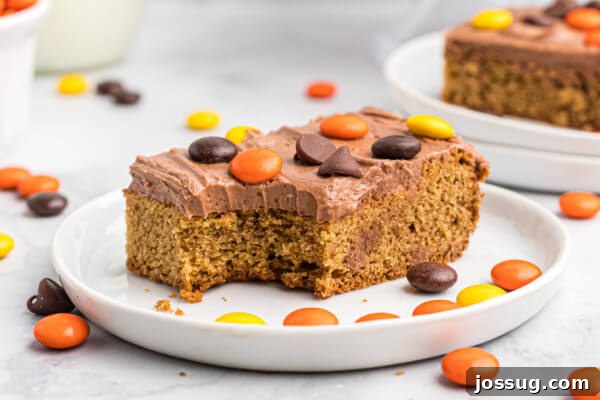
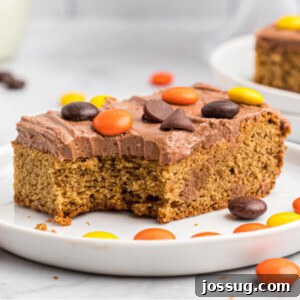
While the rich chocolate frosting is fantastic on its own, you can elevate your cookie bars with various toppings for added flair and flavor! Consider scattering Reese’s Pieces, finely chopped peanut butter cups, colorful M&M’s candies, or additional chocolate chips over the wet frosting for an added textural and flavor dimension that’s sure to delight. A delicate drizzle of melted white chocolate or a sprinkle of flaky sea salt can also provide a gourmet touch, enhancing both visual appeal and taste.
➡️ Do these peanut butter cookie bars need to be frosted?
Not at all! The peanut butter cookie bars are incredibly delicious and satisfying entirely on their own, even without any frosting or extra toppings. The rich, chewy base has plenty of inherent flavor to stand alone as a perfect treat. The chocolate frosting simply adds an extra layer of indulgence and a classic flavor combination, but feel free to omit it if you prefer a simpler treat, are short on time, or simply want to appreciate the pure peanut butter flavor.
➡️ Can I use salted butter in this recipe?
Yes, you can certainly use salted butter in a pinch. However, since the recipe already calls for a specific amount of salt, you would want to adjust that quantity. If using salted butter, you could omit the added salt from the cookie bar recipe entirely, or reduce it significantly to just a small pinch (about ⅛ teaspoon) to avoid making the bars excessively salty. Unsalted butter generally provides more precise control over the overall salt content in your baked goods.
➡️ Can I use crunchy peanut butter for the cookie bars?
While this recipe is typically crafted with creamy peanut butter for a consistently smooth cookie bar texture, using crunchy peanut butter should absolutely work beautifully! It will introduce wonderful little bits of roasted peanut throughout the bars, adding an exciting extra layer of texture and a more intense, satisfying roasted peanut flavor. If your family prefers the classic smooth experience, stick with creamy, but if you enjoy a delightful crunch and enhanced nutty flavor, don’t hesitate to go for it!
Expert Tips for Perfect Peanut Butter Cookie Bars Every Time
Achieving the perfect peanut butter cookie bars is easy with a few insider tricks. Here’s how to ensure your bars are always moist, chewy, and bursting with flavor, transforming a good recipe into a truly great one:
- Use Room Temperature Ingredients: This is fundamental for baking success. Ensure both your butter and eggs are at room temperature. This allows the butter and sugar to cream together more smoothly, creating a uniform batter that incorporates air effectively, leading to a more tender and consistent final product. Cold ingredients don’t emulsify as well, often resulting in a denser texture.
- Do Not Overbake: This is perhaps the most crucial tip for achieving wonderfully chewy bars. The edges should be lightly golden brown, and the center might still look a little soft and slightly underdone when you pull them from the oven. Don’t worry, they will continue to set and firm up as they cool on the wire rack. Overbaking is the quickest way to end up with dry, crumbly bars, so err on the side of caution.
- Measure Flour Correctly: For the most accurate results and to prevent dry bars, always spoon your flour into the measuring cup and then level it off with a straight edge (like the back of a knife). Scooping directly from the bag can compact the flour, leading you to inadvertently add too much, which will result in a dry, dense bar.
- Cool Completely Before Frosting: Patience is an absolute virtue here! Frosting warm bars will inevitably result in a melty, runny, and frustrating mess as the heat from the bars will cause the butter in the frosting to melt. Allow the bars to cool completely on a wire rack for at least an hour, or even longer depending on your kitchen’s temperature, before applying any frosting. You can speed this up slightly by placing the cooled (but not warm) pan in the refrigerator for about 20-30 minutes.
- Choose Your Peanut Butter Wisely: For consistent and predictable results, it’s generally best to stick to classic, creamy peanut butter brands (like Jif or Skippy) that don’t separate. Natural peanut butters (the kind that require stirring) can sometimes alter the texture of baked goods due to their varying oil content and consistency. If you do opt for natural peanut butter, ensure it’s thoroughly stirred and as homogenized as possible.
- Line Your Pan for Easy Removal: For incredibly easy removal and hassle-free clean-up, we highly recommend lining your baking pan with parchment paper. Leave a generous overhang on the sides so that once the bars are completely cooled, you can simply lift the entire slab of cookie bars cleanly out of the pan before cutting them into squares.
- Chill for Cleaner Slices: If you desire perfectly neat, sharp-edged squares for a professional presentation, place the frosted bars in the refrigerator for an additional 15-30 minutes before cutting. This chilling period allows the frosting to firm up, resulting in clean, crisp edges when you slice through them with a sharp knife.
Serving Suggestions and Delicious Flavor Enhancements
These Peanut Butter Cookie Bars are incredibly versatile and can be enjoyed in a multitude of ways, making them perfect for any occasion. While they are a showstopper on their own, consider these ideas to make them even more special and tailored to your preferences or event:
- A Classic Pairing: Serve them with a tall, frosty glass of cold milk for a timeless treat that appeals to all ages. The coolness of the milk perfectly complements the rich sweetness of the bars.
- Dessert Platter Star: Elevate your entertaining by arranging these bars artfully on a dessert platter alongside other beloved treats like fudgy brownies, classic chocolate chip cookies, or festive sugar cookies. They add variety and a guaranteed crowd-pleaser to any spread at parties or potlucks.
- Warm with Ice Cream: For an extra indulgent and comforting dessert experience, warm a bar slightly in the microwave for 10-15 seconds and serve it with a generous scoop of vanilla bean, chocolate, or even coffee-flavored ice cream. A luxurious drizzle of hot fudge or rich caramel sauce would make this truly decadent.
- Coffee Break Companion: Transform your ordinary coffee break into a delightful ritual by pairing a peanut butter cookie bar with your morning coffee, afternoon tea, or even a rich espresso. The flavors are a perfect match for a comforting pick-me-up.
- Melted Chocolate Drizzle: Beyond the creamy chocolate frosting, a simple and elegant drizzle of melted white, milk, or dark chocolate can add a sophisticated touch and extra visual appeal. You can use a piping bag or simply a fork for a rustic look.
- Nutty Additions: For those who love extra crunch and a deeper nutty flavor, consider gently folding in about ½ cup of chopped peanuts, pecans, or walnuts into the cookie dough just before spreading it into the pan. This adds another layer of texture and taste.
- Sprinkle of Sea Salt: A tiny sprinkle of flaky sea salt over the wet chocolate frosting or even directly on the baked bars can beautifully enhance and contrast the sweetness, bringing out the complex flavors of the peanut butter and chocolate.
Peanut Butter Cookie Bars
By Jamie Sherman
These Peanut Butter Cookie Bars are perfectly thick, soft, and chewy! You better make plenty – they disappear fast!
Prep: 15 mins
Cook: 20 mins
Cooling Time: 25 mins
Total: 1 hr
Servings: 24 bars
Print Recipe
Equipment
- Measuring Cups and Spoons
- Rubber Spatula or Wooden Spoon
- Hand Mixer
- Mixing Bowl
- Non-Stick 13 x 9-Inch Covered Oblong Baking Pan with Lids
Ingredients
For the cookie bars:
- ½ cup unsalted butter, softened
- 1 ¼ cups light brown sugar, packed
- 2 large eggs
- 2 teaspoons vanilla extract
- ½ teaspoon salt
- 2 cups all-purpose flour
- 1 teaspoon baking powder
- ½ cup peanut butter (creamy recommended)
For the chocolate frosting:
- 2 ½ cups powdered sugar
- ¼ cup unsweetened cocoa powder
- ¼ cup butter, softened
- 1 teaspoon vanilla extract
- 3 tablespoons water (adjust as needed for consistency)
Instructions
For the cookie bars:
- Preheat oven to 350°F (175°C). Lightly spray a 13×9-inch baking pan or line with parchment paper.
- In a large bowl, cream together the softened butter, brown sugar, and peanut butter until creamy. Add in eggs, vanilla, and salt, mixing until well combined. Gradually add the flour and baking powder, mixing for about 30 seconds until the dry ingredients are just incorporated into the dough. Using a rubber spatula, spread the dough mixture evenly into the prepared baking pan.
- Bake for 18-20 minutes, or until the edges are lightly golden brown and the dough is set. (The center may still appear slightly soft).
- Remove from the oven and allow to cool completely on a wire rack before frosting.
For the frosting and topping:
- In a medium bowl, cream together powdered sugar, cocoa powder, and softened butter. Add in vanilla and water, mixing until all ingredients are well combined and the frosting is smooth and creamy. If the frosting is too thick, add an additional teaspoon of water at a time until desired consistency is reached. Use a rubber spatula to evenly frost the cooled bars.
- Once frosted, cut the bars into squares. For cleaner cuts, you can chill the frosted bars for a short period before slicing. Serve and enjoy!
Notes
- If desired, enhance your bars by topping them with Reese’s Pieces, chopped peanut butter cups, M&M’s candies, or additional chocolate chips.
- The chocolate frosting is optional; these bars are deliciously satisfying even without it.
- If using salted butter, you may omit the salt from the cookie bar recipe, or reduce it to a small pinch (⅛ teaspoon) to control the sodium level.
- While creamy peanut butter is standard for a smooth texture, crunchy peanut butter can be used for added texture and a more robust peanut flavor.
Nutrition Information (Approximate)
Nutrition information is automatically calculated and should only be used as an approximation. Values may vary based on specific ingredients and preparation.
- Serving: 1 bar
- Calories: 223 kcal
- Carbohydrates: 34g
- Protein: 3g
- Fat: 9g
- Saturated Fat: 4g
- Polyunsaturated Fat: 1g
- Monounsaturated Fat: 3g
- Trans Fat: 0.2g
- Cholesterol: 31mg
- Sodium: 115mg
- Potassium: 79mg
- Fiber: 1g
- Sugar: 24g
- Vitamin A: 200 IU
- Calcium: 29mg
- Iron: 1mg
Other Delectable Recipes You Might Enjoy
If you’ve loved the simplicity and deliciousness of these Peanut Butter Cookie Bars, you’re in for a treat! We have a collection of other fantastic recipes that offer similar comfort and ease. Whether you’re a fan of classic cookies, crave more bar-style desserts, or are looking to explore new flavors, these selections are sure to become new family favorites from your kitchen:
- Soft Sugar Cookies – A timeless classic, perfect for decorating or enjoying plain for their tender, melt-in-your-mouth texture.
- Giant Peanut Butter Cookie with Chocolate Chunks – For when you need a truly satisfying, extra-large cookie experience that’s loaded with flavor.
- Sugar Cookie Bars – Another pan-based delight, offering all the joy of sugar cookies without the individual rolling and cutting, making them incredibly quick.
- Monster Cookies – Packed with oats, peanut butter, chocolate chips, and M&M’s, these are a fun and flavorful explosion that everyone loves.
- Snickerdoodle Cream Cheese Cookies – A delightful twist on a classic, with added richness and a wonderfully soft texture from cream cheese.
We absolutely love hearing from you! If you’ve given this fantastic Peanut Butter Cookie Bars recipe a try, please don’t hesitate to share your experience by dropping a comment below. Tell us if your family devoured them, if you made any fun customizations or added unique toppings, or if you encountered any questions during your baking adventure. Your feedback is invaluable to us, helping others and enriching our community, and we’re always here to help if you run into any problems. Happy baking and enjoy every delicious bite!