
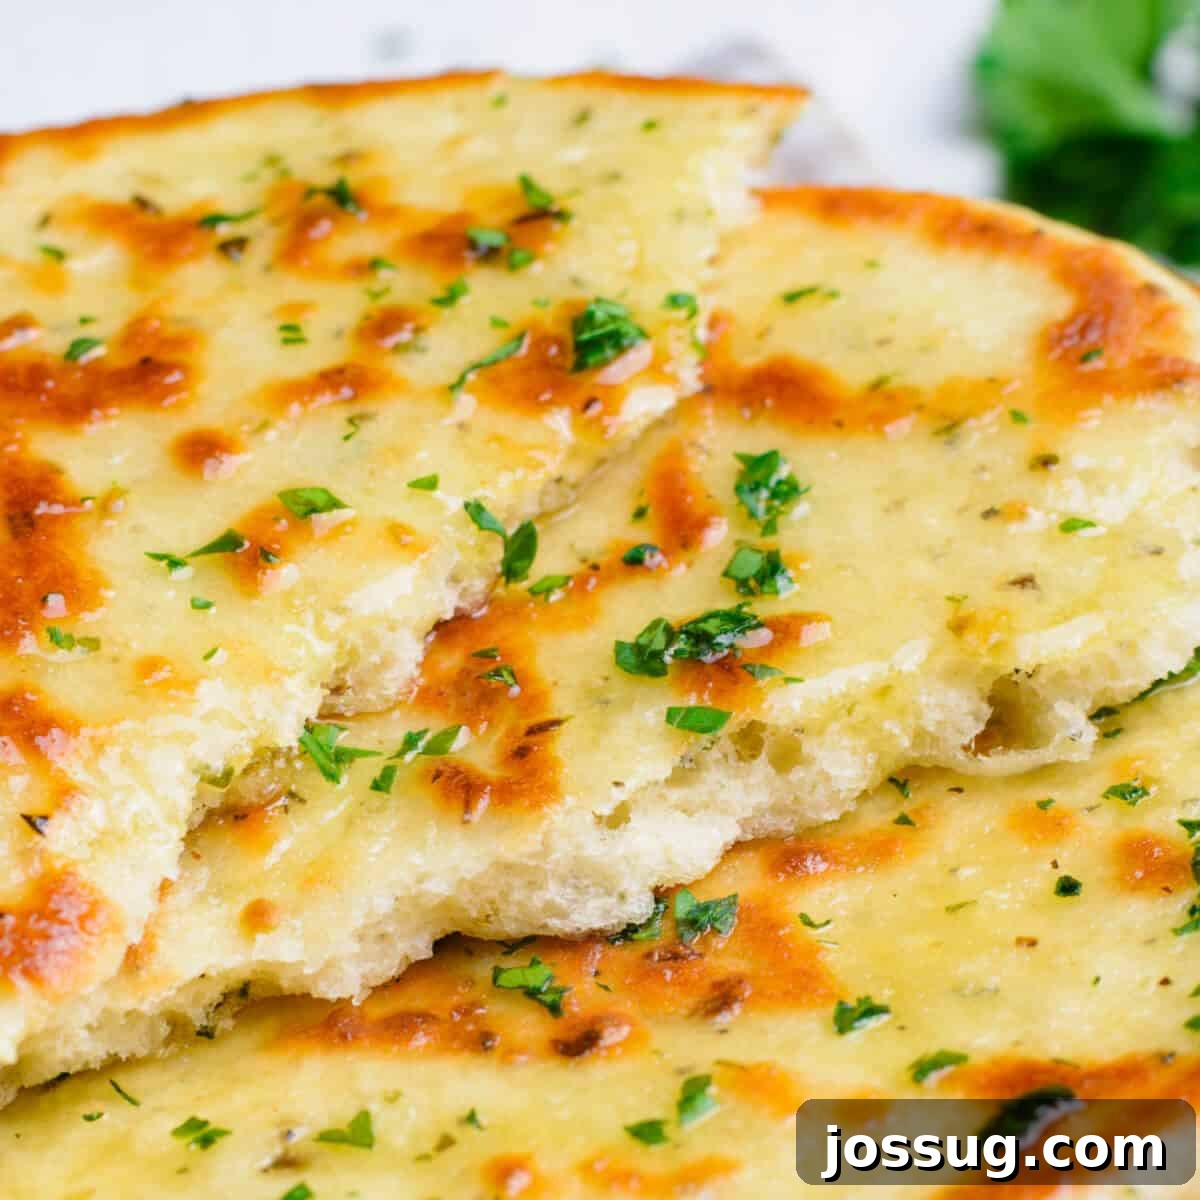
Homemade Flatbread: Your Guide to Soft, Fluffy, and Flavorful Perfection
Imagine the comforting aroma of freshly baked bread filling your kitchen – that irresistible scent of homemade goodness. Now, picture achieving that joy with a recipe so simple, so versatile, it will quickly become a cherished staple in your home. Making flatbread from scratch is not only significantly easier than you might think, but it also yields a profoundly satisfying result. Our definitive homemade flatbread recipe promises bread that is incredibly soft, wonderfully fluffy, and bursting with the aromatic essence of dried herbs alongside vibrant fresh parsley. Forget rigid, store-bought alternatives; once you experience the warmth and pillowy texture of this flatbread, you’ll be hooked.
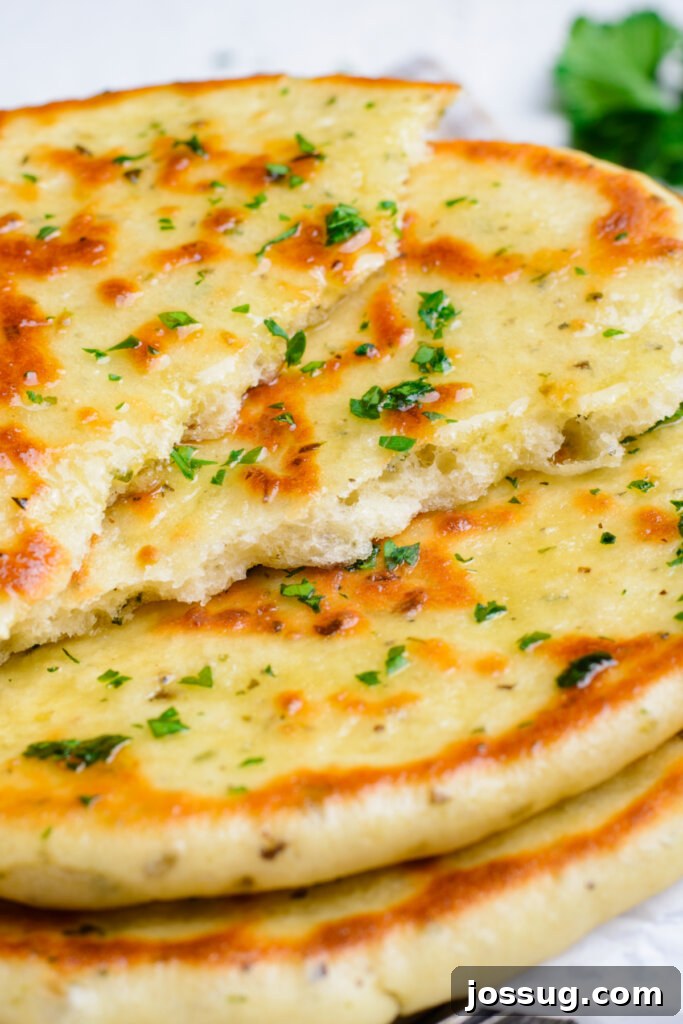
Why Bake Flatbread at Home? The Simple Joys of Homemade Bread
There’s a unique therapeutic quality to baking bread, a transformative process that turns basic ingredients into something truly magical and deeply comforting. This flatbread recipe perfectly embodies that magic with its straightforward approach and delightfully impressive outcome. It serves as an excellent entry point for anyone venturing into the world of bread making, offering fantastic results with minimal fuss. Yet, its appeal extends far beyond its simplicity.
One of the greatest advantages of this homemade flatbread is its unparalleled versatility. It performs beautifully as an elegant side dish to almost any meal, a sturdy yet tender base for homemade pizzas, or a flexible foundation for creative sandwiches and wraps. Its subtly herbaceous and neutral flavor profile makes it an ideal canvas for countless culinary explorations. Beyond its utility, baking flatbread at home allows you to control the ingredients, ensuring a fresh, wholesome product free from preservatives. The sheer freshness and superior taste of homemade flatbread are simply unmatched by anything you can buy. If you’ve been on the hunt for an easy bread recipe that delivers on flavor, texture, and adaptability, this flatbread is an absolute must-try for your kitchen repertoire.
The Secret to Success: Why Yogurt Makes the Best Flatbread
You might initially be surprised to find plain yogurt listed among the ingredients for a traditional flatbread recipe, but it is, in fact, a culinary secret weapon that elevates this bread from good to truly outstanding. Yogurt plays several crucial roles in achieving the perfect flatbread texture and flavor profile.
Firstly, yogurt contributes significant and much-needed moisture to the dough. This hydration is absolutely essential for producing a flatbread that is consistently soft, tender, and pliable, preventing it from becoming dry or crumbly. Beyond just moisture, the natural acidity present in yogurt works wonders by gently relaxing the gluten development within the flour. This action results in a dough that is not only more manageable and easier to knead and roll out, but also produces a wonderfully tender and almost melt-in-your-mouth crumb in the finished bread. Furthermore, yogurt introduces healthy fats into the recipe without the necessity of excessive oil or butter, lending a subtle richness and depth of flavor that is both unique and incredibly appealing. As an added benefit, the inclusion of yogurt provides a modest protein boost, making your homemade flatbread a slightly more nutritious accompaniment to your meals. This simple addition transforms the entire baking experience and the final product, creating a flatbread that is moist, flavorful, and exquisitely soft.
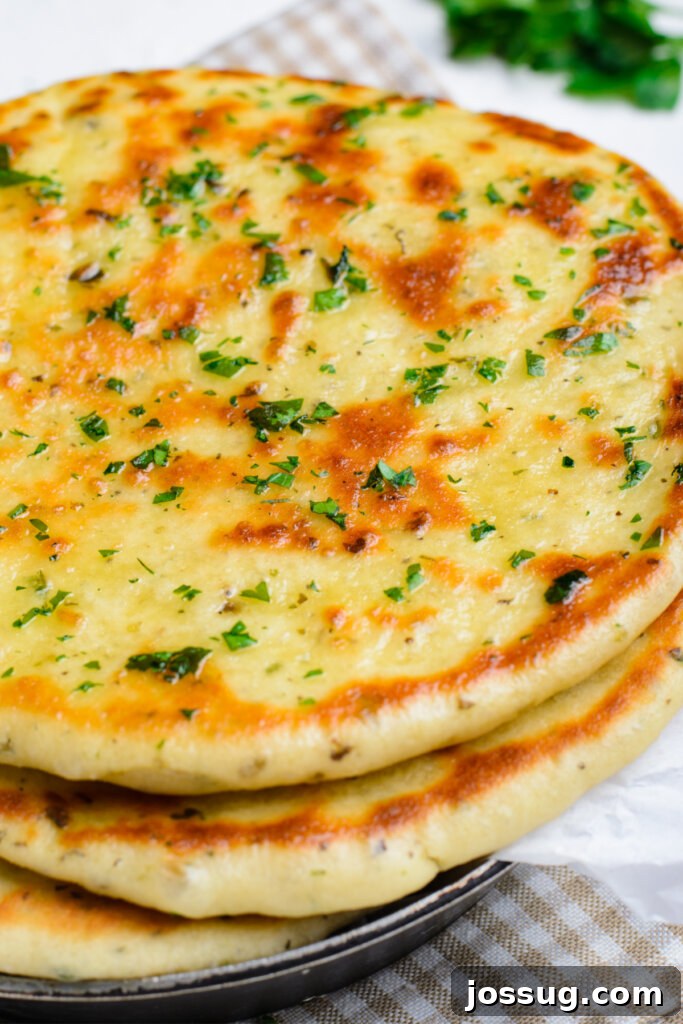
How to Make Perfect Homemade Flatbread: A Detailed Step-by-Step Guide
Crafting these delectable flatbreads at home is a truly rewarding experience, promising fresh, warm bread with minimal effort. Follow these detailed instructions carefully to ensure a perfect batch every single time. The keys to success lie in proper yeast activation and gentle handling of the dough.
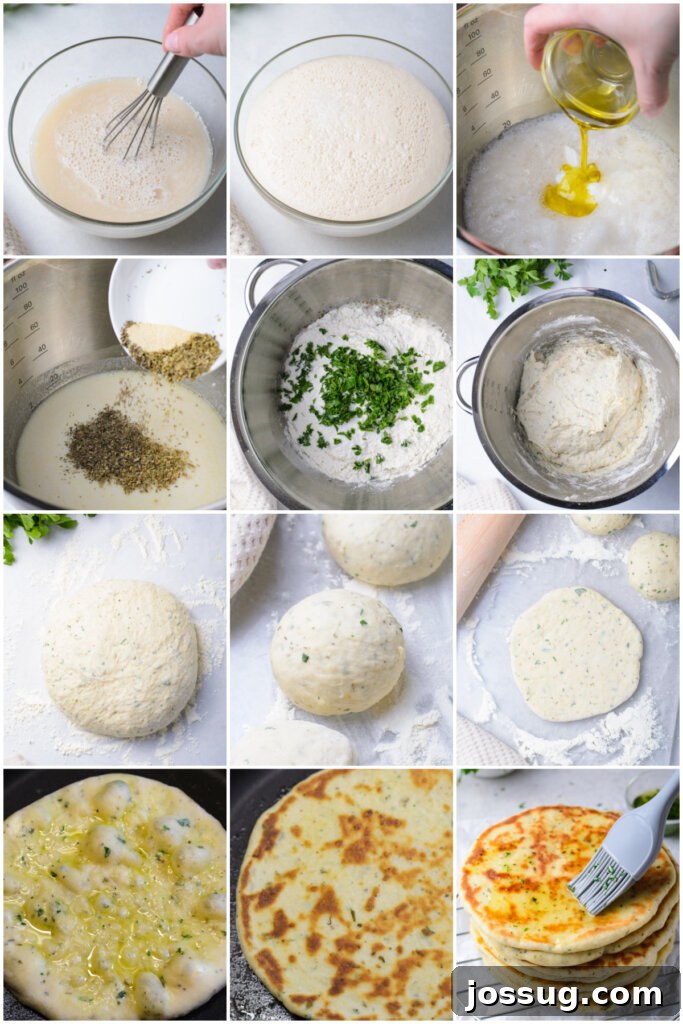
- **Activate the Yeast:** In a medium-sized bowl, combine 1 cup of lukewarm water. The ideal temperature for activating yeast is between 100-110°F (38-43°C) – it should feel comfortably warm to the touch, not hot. Add 1 tablespoon of granulated sugar and 2 ½ teaspoons of active dry yeast. Whisk these ingredients gently until the sugar and yeast appear to be fully dissolved. Allow this mixture to sit undisturbed for 5-10 minutes. You’ll know your yeast is healthy and active when a distinct foamy layer forms on the surface, resembling a light beer head. If no foam appears, your yeast may be old or the water temperature was incorrect; it’s essential to discard and start over with fresh yeast to ensure proper dough rise.
- **Combine Wet Ingredients:** Transfer the activated yeast mixture to a large mixing bowl. If using a stand mixer, attach the dough hook. Whisk in ¾ cup of plain yogurt and 2 tablespoons of olive oil until all the wet ingredients are thoroughly combined and smooth.
- **Add Dry Ingredients and Knead the Dough:** Incorporate 1 tablespoon of salt, 1 tablespoon of dried basil, 1 tablespoon of dried oregano, and 1 teaspoon of garlic powder into the wet mixture, mixing until evenly distributed. Gradually add 4 cups of all-purpose flour, stirring initially with a sturdy spoon or on low speed with your stand mixer until a shaggy, somewhat crumbly dough forms. Once partially mixed, add 2 tablespoons of finely chopped fresh parsley. Continue to knead the dough; if kneading by hand, turn the dough out onto a lightly floured surface and knead for 8-10 minutes. If using a stand mixer, knead on medium-low speed for 5-7 minutes. The dough is properly kneaded when it becomes smooth, elastic, and is no longer excessively sticky to the touch. If it feels too sticky, add a tiny bit more flour, one tablespoon at a time, until the desired consistency is achieved, being careful not to add too much.
- **First Rise (Resting Period):** Once the dough is beautifully kneaded, shape it into a neat ball and place it back into the mixing bowl. Cover the bowl tightly with plastic wrap or a clean, damp kitchen towel. Let the dough rest at room temperature for approximately 15 minutes. This relatively short resting period is crucial as it allows the gluten to relax after kneading, making the dough much easier to roll out evenly in the next step.
- **Portion and Prepare for Cooking:** Gently transfer the rested dough to a lightly floured work surface. Using a sharp knife or a dough scraper, divide the dough into 10 equal pieces. For convenience and easier handling, you can gently roll each piece into a small, uniform ball. Immediately cover these individual dough balls with plastic wrap or a kitchen towel to prevent them from drying out while you prepare your cooking surface. Meanwhile, place a large, heavy-bottomed skillet (a cast iron skillet works exceptionally well) over medium-high heat and allow it to preheat thoroughly.
- **Roll Out and Oil the Flatbreads:** Once your skillet is hot, take one dough ball at a time and, on a lightly floured surface, use a rolling pin to roll it out into a thin circle, approximately 6 inches (15 cm) in diameter and about ⅛ to ¼ inch (3-6 mm) thick. Don’t worry if your circles aren’t perfectly round; rustic shapes add to the charm of homemade flatbread. Lightly and evenly brush one side of the rolled-out dough with olive oil.
- **Cook the Flatbreads in the Skillet:** Carefully pick up the rolled and oiled dough and place it directly into the hot skillet, with the oiled side facing down. Cook the flatbread for 2-3 minutes, or until you observe numerous bubbles forming on the top surface and the bottom has turned a beautiful, lightly golden brown. While the first side is cooking, take this opportunity to brush the uncooked top side with a little more olive oil. Once the bottom is golden, flip the flatbread over and cook for an additional 1-2 minutes, or until the second side is also cooked through and golden brown.
- **Keep Warm and Soft:** As each flatbread finishes cooking, immediately remove it from the skillet and place it on a clean serving plate. Crucially, cover the cooked flatbreads with a clean kitchen towel. This simple step traps the steam, which helps to keep the flatbreads wonderfully warm, soft, and pliable while you continue cooking the remaining dough pieces.
- **Garnish and Serve:** Once all the flatbreads are cooked, you can enhance their appeal and flavor by brushing them with a final touch of olive oil for a subtle sheen and sprinkling generously with additional fresh chopped parsley. This adds an extra burst of vibrant color and fresh herbaceousness. Serve your homemade flatbreads warm and prepare to impress everyone with your culinary skills!
Creative Ways to Enjoy Your Homemade Flatbread
The true brilliance of this herb-infused flatbread lies in its incredible versatility. It’s far more than just a simple side dish; it’s a culinary chameleon that seamlessly adapts to almost any meal or occasion. Here are some inspiring and delicious ideas to help you make the absolute most of your freshly baked creation:
- **The Ultimate Accompaniment:** This flatbread is a dream come true for pairing with rich, flavorful stews, hearty curries, and savory dips. Its soft, absorbent texture is ideal for soaking up every last drop of sauce from comforting dishes like Slow Cooker Chicken Tikka Masala, Instant Pot Butter Chicken, or even a robust lentil soup. The delicate herbaceous notes within the bread perfectly complement and elevate these robust flavors, creating a harmonious dining experience.
- **Gourmet Sandwiches and Wraps:** Elevate your lunch or dinner by ditching traditional sliced bread. This flatbread makes an exceptional, tender, and flavorful base for elevated sandwiches, vibrant wraps, and even succulent gyros. Fill it with succulent grilled meats such as Chicken Skewers or Hawaiian Chicken Kebabs, crisp fresh vegetables, creamy hummus, tangy feta, and your favorite dressings or sauces for a truly satisfying and portable meal.
- **Quick & Easy Pizza Crust:** Transform your homemade flatbread into a personalized pizza masterpiece in mere minutes. Simply spread a thin, even layer of your favorite marinara sauce, generously sprinkle with a blend of cheeses, and pile high with your preferred toppings. Bake in a hot oven (around 400°F or 200°C) for 8-12 minutes, or until the cheese is bubbly and golden brown. It’s a fantastic, lighter alternative to heavier traditional pizza dough, creating a delightfully crispy yet tender crust, much like our popular Chicken Bacon Ranch Naan Bread Pizza.
- **Delicious Dipping Platter:** Serve warm, torn pieces of flatbread alongside an array of your favorite dips and spreads. Think creamy hummus, smoky baba ghanoush, refreshing tzatziki, a vibrant pesto, or a classic olive oil and balsamic vinegar blend. The inherent herbs in the bread add an extra layer of gourmet flavor to every dip, making it perfect for entertaining or a casual snack.
- **Savory Snacks and Appetizers:** Get creative with savory snacks. Cut the flatbread into wedges, brush lightly with a little extra olive oil, sprinkle with flaky sea salt, black pepper, or a pinch of red pepper flakes, and bake until slightly crisp. For an extra treat, add a dusting of grated Parmesan cheese before baking. These crispy flatbread chips are incredibly addictive and make a wonderful appetizer.
- **Unique Breakfast or Brunch Treat:** Don’t limit flatbread to lunch or dinner! Lightly toast a piece of flatbread and spread it with cream cheese, sliced avocado, or even top it with a perfectly fried or poached egg for a unique and incredibly satisfying breakfast or brunch experience.
Flatbread FAQs: Your Questions Answered
To preserve its optimal freshness and delightful softness, ensure your homemade flatbread is completely cooled before storing. Place it in an airtight container or a heavy-duty zip-top bag at room temperature. When stored properly, it will remain delicious and pliable for up to 2-3 days. For slightly longer storage, you can refrigerate it for up to a week, though for the very best texture, it’s always recommended to enjoy it as fresh as possible.
Yes, absolutely! Homemade flatbread freezes exceptionally well, making it a perfect candidate for meal prepping. Once your flatbreads have cooled completely to room temperature, stack them with a piece of parchment paper or wax paper placed between each one. This prevents them from sticking together. Transfer the stacked flatbreads to an airtight freezer-safe container or a heavy-duty freezer-safe zip-top bag, ensuring as much air is removed as possible. They can be stored in the freezer for up to one month without significant loss of quality. When ready to use, thaw them at room temperature or reheat directly from frozen.
To bring your flatbread back to its freshly baked glory, gentle reheating is key to maintaining its soft texture. For stovetop reheating, simply place a flatbread in a dry skillet over medium heat for 30-60 seconds per side, until warmed through. Alternatively, in the microwave, wrap an individual flatbread in a slightly damp paper towel or clean kitchen towel and microwave for 15-30 seconds. The damp towel helps to reintroduce moisture, ensuring the bread remains wonderfully soft and pliable. You can also warm it briefly in a toaster oven or a conventional oven (wrapped in aluminum foil to prevent drying) until heated through.
While all-purpose flour is ideal for achieving the soft, fluffy texture described in this recipe, you can certainly experiment with other flour types. For example, a blend of all-purpose flour and whole wheat flour (e.g., 3 cups all-purpose, 1 cup whole wheat) can introduce a lovely nutty flavor and increase the fiber content, though it might result in a slightly denser flatbread. We recommend avoiding using only whole wheat flour, as its higher protein content and coarser texture can lead to a tougher, less tender flatbread.
No stand mixer? No problem at all! This flatbread dough is quite forgiving and can be easily kneaded by hand. After combining all the ingredients, simply turn the shaggy dough out onto a lightly floured surface. Knead the dough vigorously for approximately 8-10 minutes, using a push-and-fold motion, until it transforms into a smooth, elastic, and consistent ball. Hand kneading is not only effective but also a wonderfully satisfying way to connect with your baking process!
Essential Flatbread Recipe Tips & Troubleshooting for Success
Achieving perfectly soft and fluffy flatbread is a breeze, especially when armed with these expert tips and solutions to common baking challenges:
- **Yeast Activation Temperature is Paramount:** The temperature of the water used to activate your yeast is the single most critical factor for success. It must be lukewarm, ideally falling within the range of 100-110°F (38-43°C). Water that is too hot will damage or completely kill the yeast, preventing your dough from rising. Conversely, water that is too cold will inhibit the yeast from activating properly, leading to a sluggish or non-existent rise. If you lack a kitchen thermometer, you can test the water on your wrist; it should feel pleasantly warm, similar to bathwater, but never burning hot.
- **Observe for Foamy Yeast:** After combining the yeast, sugar, and lukewarm water, it is crucial to allow the mixture to sit undisturbed for 5-10 minutes. During this time, the yeast should become visibly foamy and bubbly on the surface. This foamy layer is your undeniable sign that the yeast is active and alive, ready to work its magic. If, after the allotted time, your mixture shows no signs of foam or bubbles, it’s a clear indication that your yeast is either old and inactive or the water temperature was incorrect. In this scenario, it is absolutely essential to discard the mixture and start anew with fresh yeast and carefully tempered water; otherwise, your dough will not rise.
- **Avoid Over-Flouring:** During the kneading process, it’s common for dough to feel a bit sticky. If your dough is excessively sticky, add flour very sparingly, just a tablespoon at a time, until it becomes manageable. The goal is a dough that is soft and slightly tacky, but not sticking stubbornly to your hands or the bowl. Adding too much flour is a common mistake that will result in a dense, dry, and tough flatbread, far from the desired fluffy texture.
- **Ensure Consistent Rolling for Even Cooking:** When rolling out each individual flatbread, strive for a consistent thickness across the entire circle. An even thickness is vital for ensuring that all your flatbreads cook uniformly. This prevents some parts from being undercooked or doughy while other areas become overly crisp or burnt, guaranteeing that desirable golden-brown finish and fluffy interior every time.
- **Hot Skillet, Quick Perfection:** Always ensure your skillet is thoroughly preheated over medium-high heat before placing the dough in it. A properly hot pan is key to cooking the flatbread quickly and efficiently. Rapid cooking helps create that beautiful golden-brown exterior with characteristic bubbles, while simultaneously ensuring the interior remains wonderfully fluffy and moist, without drying out. Avoid overcrowding the pan; cook one or two flatbreads at a time, depending on the size of your skillet, to maintain consistent heat.
- **Cover Immediately to Maintain Softness:** As soon as each flatbread finishes cooking and is removed from the skillet, transfer it to a plate and immediately cover it with a clean kitchen towel. This simple yet crucial step traps the residual steam, which in turn keeps the flatbreads wonderfully soft, pliable, and warm as they cool slightly. Skipping this step can lead to tougher, drier flatbreads.
Other Delightful Bread Recipes to Explore
If you’ve thoroughly enjoyed the satisfying process of making this homemade flatbread and are keen to continue your baking adventures, you’ll love exploring other delightful bread creations from our kitchen:
- BBQ Bacon Cheeseburger Flat Bread Melts – A fantastic and creative way to utilize any leftover flatbread, or a brilliant new variation to try!
- Soft Italian Breadsticks – Perfect for dipping into rich marinara sauce or serving alongside your favorite Italian meals.
- No-Knead Bread – Discover the secret to effortless artisan bread with minimal active work, yielding a perfectly crusty loaf.
- Amish Cinnamon Bread – A sweet, comforting, and wonderfully aromatic treat that’s perfect for breakfast, brunch, or a delightful dessert.
- Cheesy Garlic Bread “Cinnamon” Rolls – A savory and incredibly indulgent twist on a classic, these rolls are an absolute dream for any garlic lover.
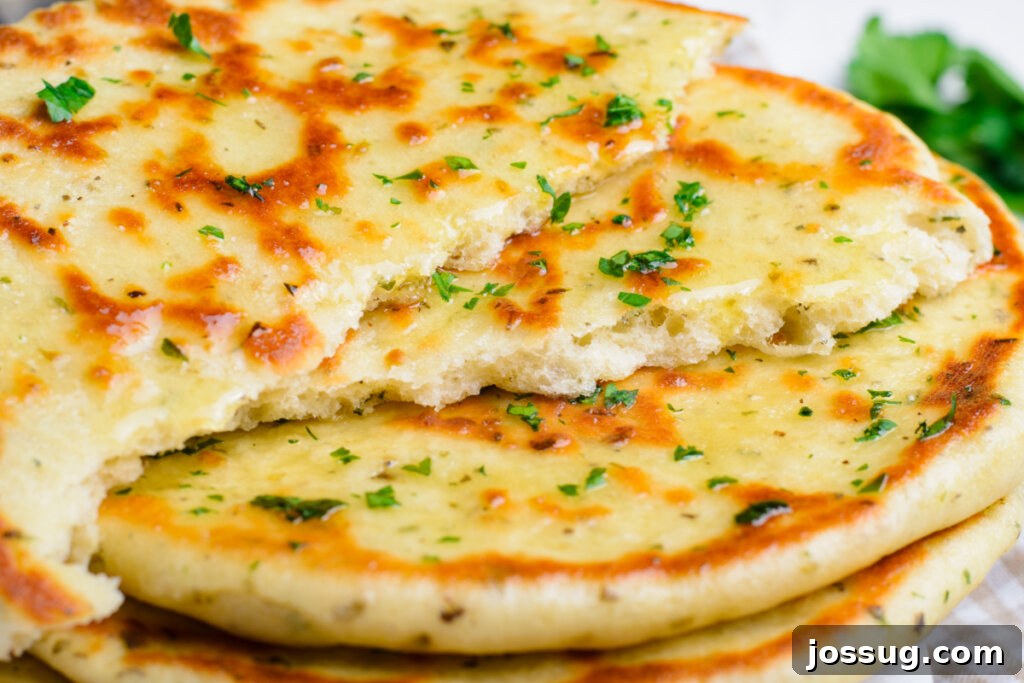
Fluffy Herb Flatbread
By Jamie Sherman
This easy homemade flatbread recipe yields incredibly soft, fluffy bread, packed with savory dried herbs and fresh parsley – perfect for any meal!
Rating: 5 out of 5 stars (based on 1 vote)
Servings: 10 servings
Prep Time: 30 mins
Cook Time: 30 mins
Total Time: 1 hr
Rate This Recipe
Print Recipe
Equipment
- Mixing bowl
- Stand mixer (optional, can knead by hand)
- Rolling pin
- 10.25 Inch Cast Iron Skillet (or other heavy-bottomed skillet)
- Plastic wrap or kitchen towel
- Kitchen towel
- Measuring cups and spoons
Ingredients
- 1 cup water, lukewarm (100-110°F / 38-43°C)
- 1 tablespoon granulated sugar
- 2 ½ teaspoons active dry yeast
- ¾ cups plain yogurt
- 2 tablespoons olive oil, plus more for brushing
- 1 tablespoon salt
- 1 tablespoon dried basil
- 1 tablespoon dried oregano
- 1 teaspoon garlic powder
- 4 cups all-purpose flour, plus more for dusting
- 2 tablespoons fresh parsley, finely chopped, plus more for garnish
Instructions
- Combine the lukewarm water, 1 tablespoon of sugar, and yeast in a medium bowl. Whisk to dissolve, then let stand for 5-10 minutes until foamy.
- In a large bowl or stand mixer, whisk together the activated yeast mixture, yogurt, and 2 tablespoons of olive oil. Add salt, basil, oregano, and garlic powder, mixing well.
- Gradually add the flour and 2 tablespoons of fresh parsley. Stir until a shaggy dough forms. Knead with a dough hook (5-8 minutes) or by hand (8-10 minutes) until the dough is smooth and elastic. Add a little more flour if too sticky.
- Cover the dough with plastic wrap or a kitchen towel and let it rest for 15 minutes at room temperature.
- Divide the dough into 10 equal pieces and roll each into a small ball. Cover them to prevent drying while you preheat a heavy skillet over medium-high heat.
- On a lightly floured surface, roll out one dough ball into a 6-inch (15 cm) circle. Brush one side with olive oil.
- Place the oiled side down in the hot skillet. Cook for 2-3 minutes until bubbles appear on top and the bottom is lightly browned. Brush the uncooked side with olive oil. Flip and cook for another 1-2 minutes until golden.
- Remove cooked flatbread to a plate and cover with a kitchen towel to keep warm and soft. Repeat with remaining dough.
- Brush the finished flatbreads with additional olive oil and sprinkle with fresh chopped parsley before serving.
Notes
- Yeast Temperature: Ensure water is between 100-110°F (38-43°C) for yeast activation. Too hot will kill it, too cold won’t activate it.
- Check Yeast Activity: If your yeast mixture doesn’t get foamy after 5-10 minutes, the yeast is likely inactive. Discard and start over with fresh yeast.
- Don’t Over-Flour: Add flour gradually during kneading. The dough should be soft and slightly tacky, not dry and stiff, to ensure a fluffy flatbread.
Nutrition (per serving)
Serving: 1 flatbread
Calories: 229 kcal
Carbohydrates: 41g
Protein: 6g
Fat: 4g
Saturated Fat: 1g
Polyunsaturated Fat: 1g
Monounsaturated Fat: 2g
Cholesterol: 2mg
Sodium: 710mg
Potassium: 114mg
Fiber: 2g
Sugar: 2g
Vitamin A: 98 IU
Vitamin C: 1mg
Calcium: 49mg
Iron: 3mg
Nutrition information is automatically calculated and should be used as an approximation.