
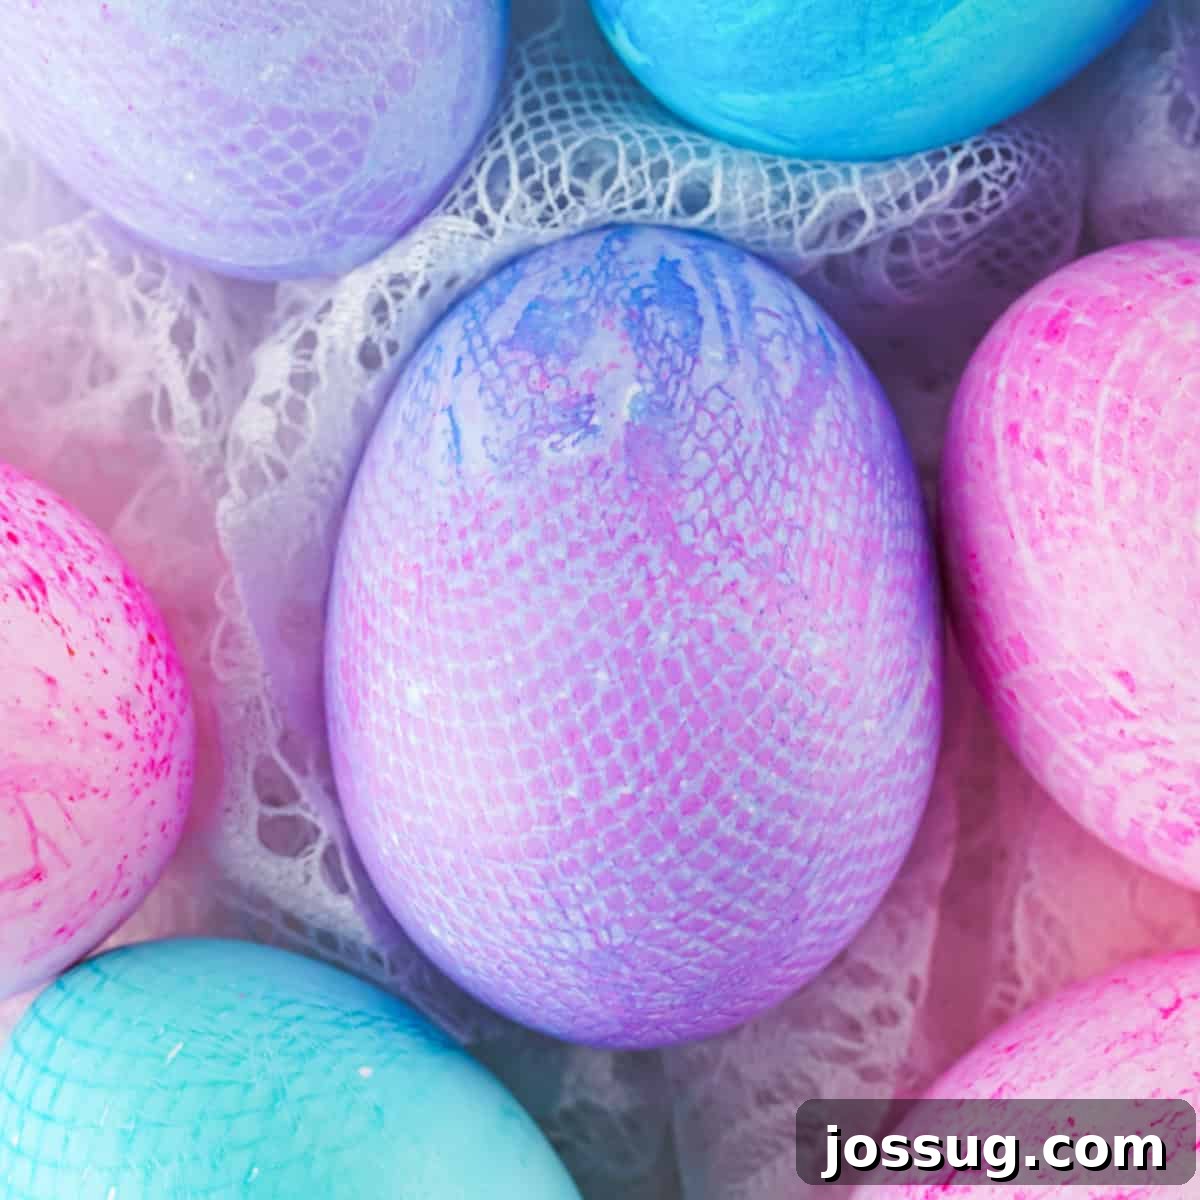
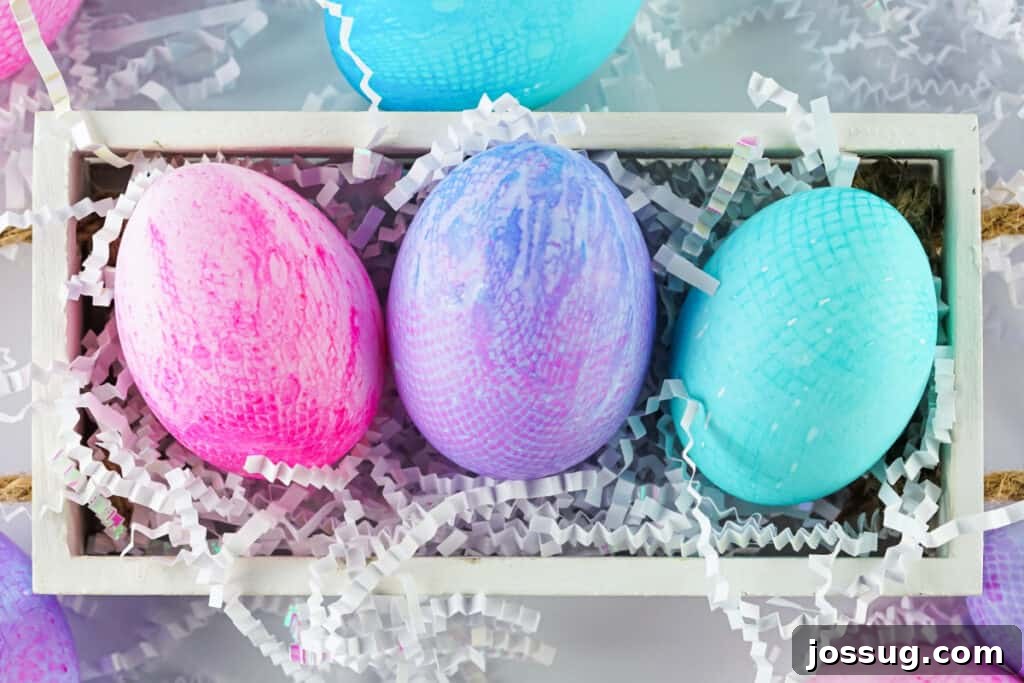
Elevate your Easter decorations this year with a truly unique and charming craft: Fabric-Textured Easter Eggs! Forget plain dyed eggs; this fun and easy DIY project uses everyday materials like lace, mesh, or burlap to create intricate patterns and beautiful textures. The result? Eye-catching, one-of-a-kind Easter eggs that will add a touch of elegance and whimsy to your spring festivities. Get ready to transform ordinary hard-boiled eggs into stunning works of art with simple steps and creative flair. 🐣✨
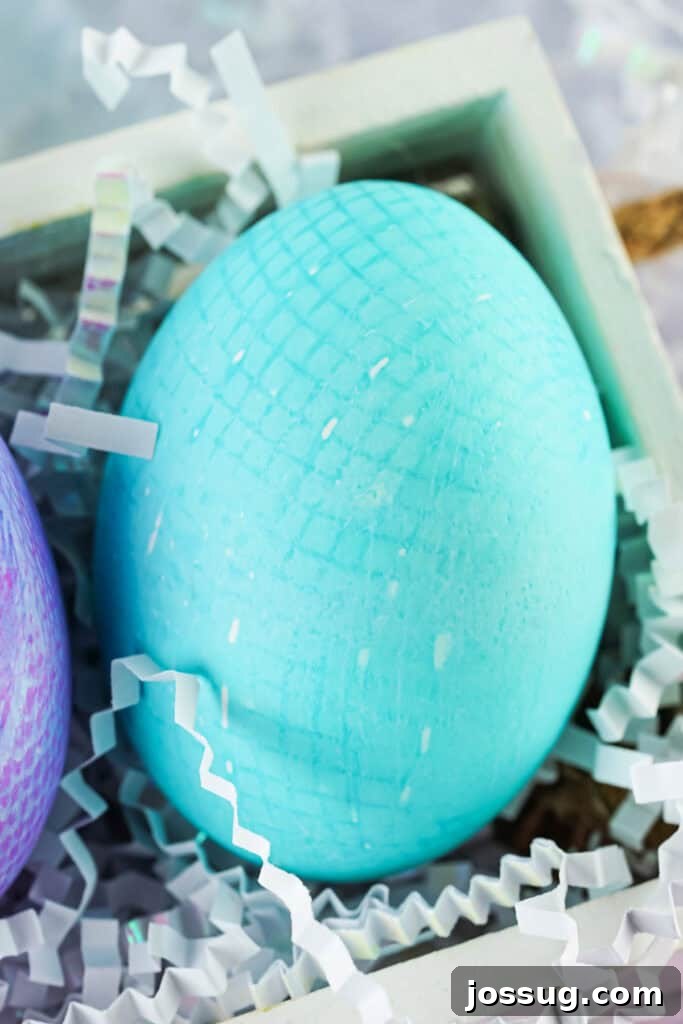
How to Create Stunning Fabric-Textured Easter Eggs
Are you searching for an exciting and artistic approach to traditional Easter egg dyeing? Our Fabric-Textured Easter Eggs project offers a refreshing twist, transforming simple eggs into captivating decorative pieces. This beautiful and surprisingly easy DIY technique allows you to infuse ordinary hard-boiled eggs with intricate patterns and vibrant colors, ensuring that no two eggs are ever truly alike. By utilizing textured fabrics like delicate lace, open mesh, or rustic burlap, you can achieve sophisticated designs that will impress both family and guests. It’s a wonderful way to personalize your Easter celebration and unleash your inner crafter, making memories with every beautifully textured egg.
Unleashing Creativity with Everyday Materials
The magic of this craft lies in its simplicity and accessibility. You don’t need expensive or specialized tools; instead, you’ll be repurposing common household items and fabric scraps. This method leverages the physical barrier of fabric to resist the dye, creating crisp, intriguing patterns where the dye can’t penetrate. Imagine delicate floral motifs from an old lace doily, geometric lines from a mesh produce bag, or earthy textures from a piece of burlap – the possibilities are endless and limited only by your imagination. This technique is not only eco-friendly by giving new life to forgotten fabrics but also incredibly rewarding as you unveil each unique creation.
⭐ Why You’ll Adore This Easter Egg Project
- **Incredibly Easy & Minimal Mess:** This dyeing method is straightforward, making it perfect for crafters of all skill levels. With a few simple steps, you can create impressive results without the extensive cleanup often associated with more intricate dyeing techniques.
- **Utilizes Common Household Items:** There’s no need for a special shopping trip! You’ll likely find most of the required materials, such as fabric scraps and food coloring, right in your home. This makes it an affordable and convenient craft for everyone.
- **Perfectly Kid-Friendly Fun:** Children will delight in the process of wrapping eggs and discovering the unique patterns. With a little adult supervision for tasks like cutting fabric, this project offers a fantastic opportunity for family bonding and creative play during the Easter season.
- **Each Egg is a Unique Masterpiece:** The beauty of fabric texturing means that every single egg you create will have its own distinct pattern and charm. This ensures a diverse and captivating collection of decorated eggs, truly making your Easter display stand out.
- **Versatile for Any Aesthetic:** Whether your style is rustic, elegant, modern, or whimsical, you can tailor your fabric choices and dye colors to match any aesthetic. This adaptability makes it a perennial favorite for Easter decor.
🛒 Essential Materials & Creative Substitutions
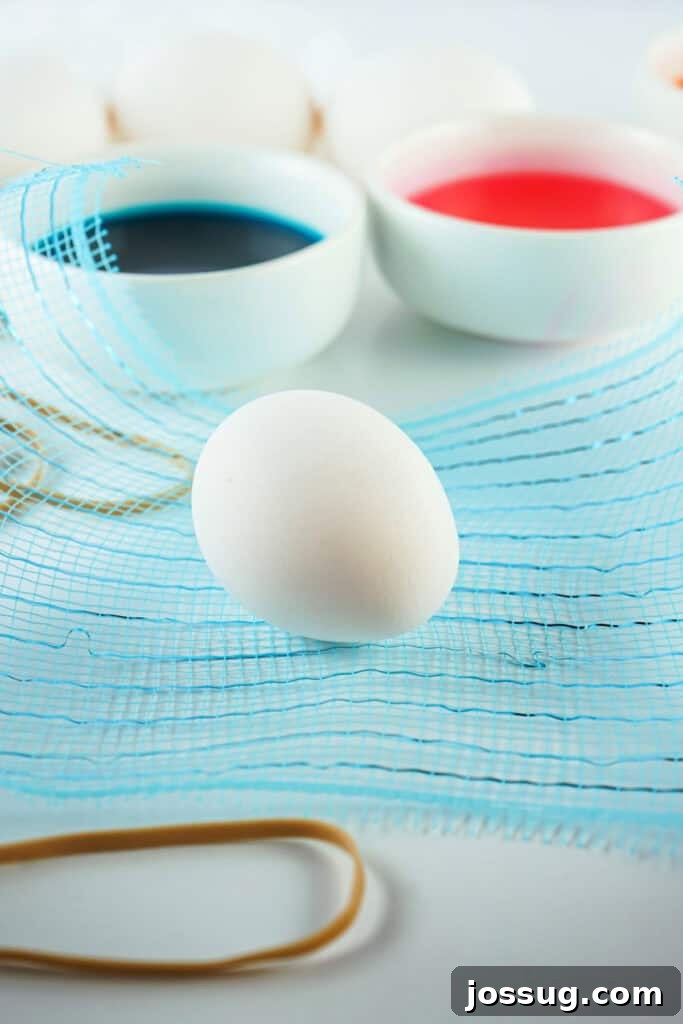
- **Textured Fabric Pieces (Lace, Burlap, Netting, or Poly Mesh Ribbon):** The star of this project! Look for fabrics with an open weave or distinct patterns.
- **Why it works:** The open spaces in the fabric allow the dye to reach the egg, while the threads block it, creating the pattern.
- **Creative Substitutions:** Don’t limit yourself! Old lace doilies, mesh produce bags (from onions or avocados), remnants of lace curtains, tulle, cheesecloth, or even textured bandages can yield surprising and beautiful results. Experiment with different textures to see what unique designs you can achieve.
- **Hard-Boiled Eggs:** Your canvas for these lovely designs.
- **White Eggs:** These are ideal for achieving the brightest, most vibrant colors and crispest patterns, as their shells are a neutral base.
- **Farm Fresh or Brown Eggs:** While the colors may appear softer and more subdued, brown eggs can produce gorgeous, earthy, and moody tones, adding a different kind of natural beauty to your collection. Just be aware that the final shade will be darker than on white eggs.
- **Egg Dye (Store-Bought or Homemade):** The source of your vibrant hues.
- **Store-Bought Kits:** Convenient and offer a wide range of colors.
- **Homemade Dyes:** You can easily create your own dyes using food coloring, which often yields very potent and bright results. Alternatively, natural dyes from fruits, vegetables, and spices can produce beautiful, organic shades.
- **Rubber Bands:** Essential for securing the fabric tightly around the egg.
- **Tip:** Thicker, more durable rubber bands work best to ensure a snug fit, preventing dye from bleeding under the fabric.
- **Paper Towels:** For gently drying the eggs and protecting your workspace.
- **Importance:** Patting the egg dry *before* removing the fabric is a crucial step for a crisp pattern.
- **Scissors:** For cutting fabric pieces to size.
- **Recommendation:** Sharp scissors will make precise cuts, especially for delicate lace.
✨ Creative Variations to Explore
Once you’ve mastered the basic technique, feel free to experiment and make these fabric-textured eggs truly your own. Here are some ideas to spark your creativity:
- **Vary Your Color Palette:**
- **Neon Hues:** For a modern and electrifying display, opt for bright, bold neon dyes that pop.
- **Soft Pastels:** For a more traditional and delicate spring look, choose gentle pastel shades like baby blue, mint green, or soft lavender.
- **Ombre Effect:** Try dipping only part of the fabric-wrapped egg into the dye for a gradient effect, or dip into one color, dry, then dip a different part into another color.
- **Layered Fabric Textures:**
- **Double the Design:** Wrap your egg with one layer of fine mesh, then add a second layer of wider lace. This can create complex, multi-dimensional patterns.
- **Contrasting Textures:** Combine a soft, delicate lace with a rougher burlap for an intriguing tactile and visual contrast.
- **Add Metallic Embellishments:**
- **Glamorous Finish:** After the eggs are completely dry and unwrapped, use a food-safe metallic paint (gold, silver, copper) to carefully paint over certain raised areas of the design. This adds a sophisticated shimmer and highlights the texture.
- **Sparkle Effect:** Apply a thin layer of edible glitter glue over parts of the pattern for an extra touch of magic and sparkle.
- **Marbling Technique:**
- **Swirls of Color:** Before wrapping, you can lightly marble your eggs with a different, lighter color. Once dry, wrap and dye with a contrasting darker color for a stunning depth effect.
- **Embellish with Ribbons and Bows:**
- **Decorative Touches:** Once dry, tie small satin ribbons or miniature bows around the eggs for an added charming detail, perfect for display.
🔥 Expert Tips & Tricks for Perfect Patterns
- **Choose Your Fabric Wisely:** The type of fabric significantly impacts your results.
- I found a thick lace table runner from Amazon worked wonderfully for crisp, clear designs.
- My absolute favorite was a poly mesh ribbon sourced from a dollar store – it delivered consistently sharp patterns.
- **Avoid thin, delicate lace:** While beautiful, it tends to yield blurry or less defined designs because the fine threads can sag or shift, allowing dye to seep underneath. Opt for fabrics with a more rigid structure and distinct open spaces.
- **Achieve a Tight Wrap:** This is perhaps the most crucial step.
- Due to the egg’s inherent curved shape, achieving full, perfectly flat coverage can be tricky. However, strive to adjust and secure the fabric as tightly as possible around the egg. The snugger the fit, the less dye can bleed, and the crisper your pattern will be.
- Don’t be afraid to use a couple of rubber bands if needed to hold the fabric firmly in place, especially around the wider parts of the egg.
- **Monitor Dyeing Time Closely:** Less is often more with strong dyes.
- If using potent food coloring-based dyes, some eggs may only require a brief 15-30 second dip to achieve a vibrant color and clear pattern.
- **Over-dyeing can lead to blurriness:** Leaving the egg in the dye for too long can cause the color to seep under the fabric, blurring your intended design.
- **Always test one egg first:** Before committing your entire batch, dye a single test egg to determine the optimal dip time for your specific fabric and dye strength. This small step can save you from an entire batch of blurry patterns.
- **Pat Dry BEFORE Unwrapping:** This is a golden rule for crisp results.
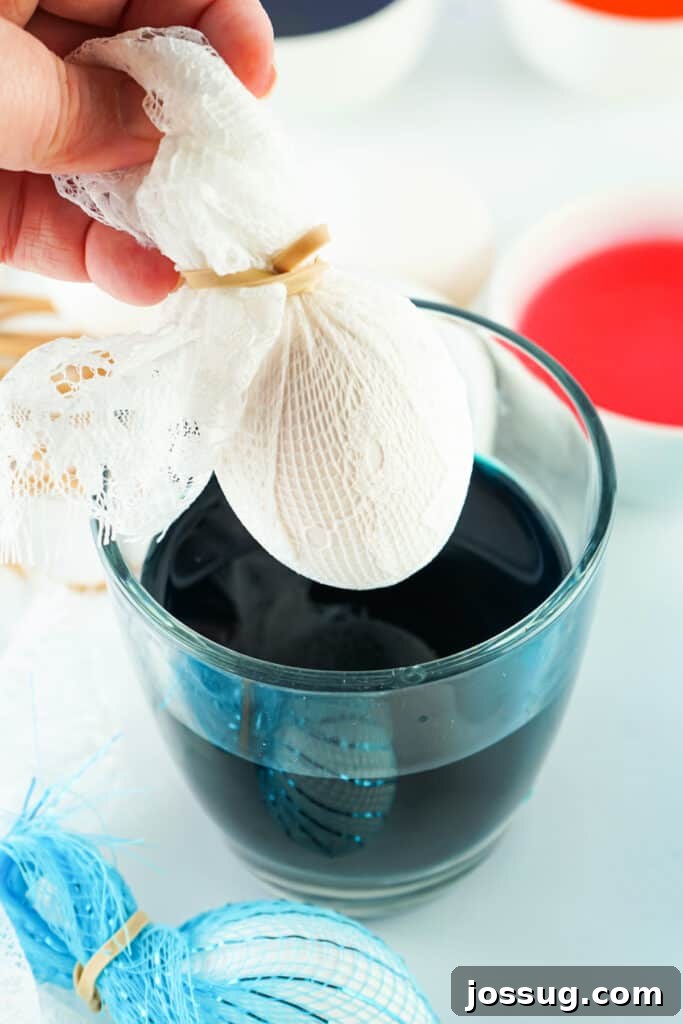
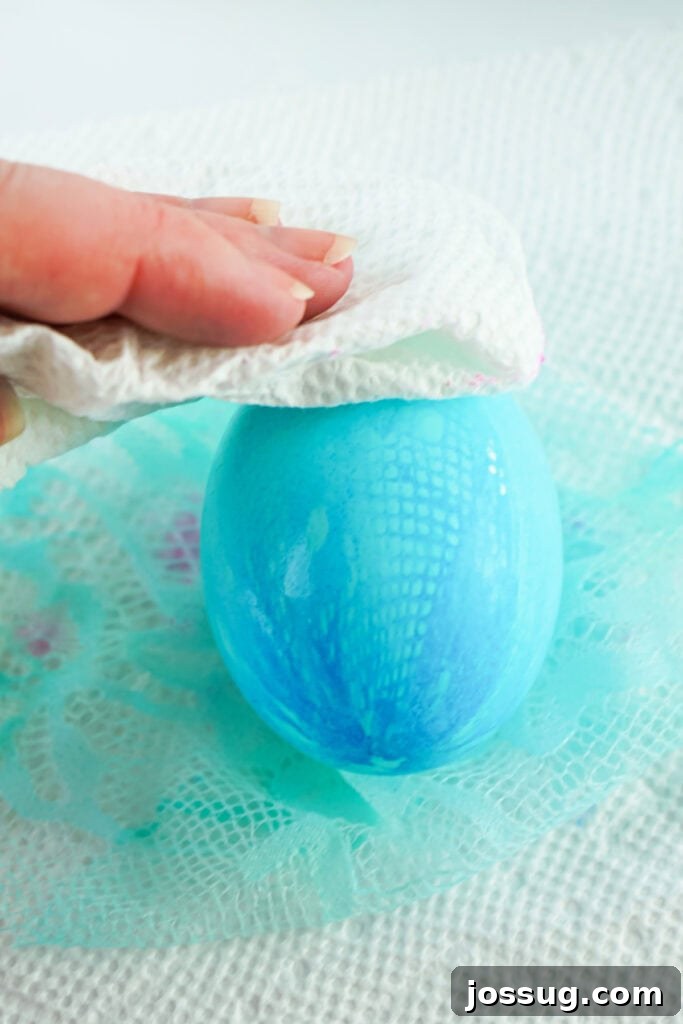
- After removing the egg from the dye, gently pat the wrapped egg dry with a paper towel while the fabric is still attached. This crucial step helps absorb excess dye and prevents it from spreading or bleeding onto the patterned areas when you finally remove the fabric.
- **Optimal Color Choices:** Some colors perform better than others.
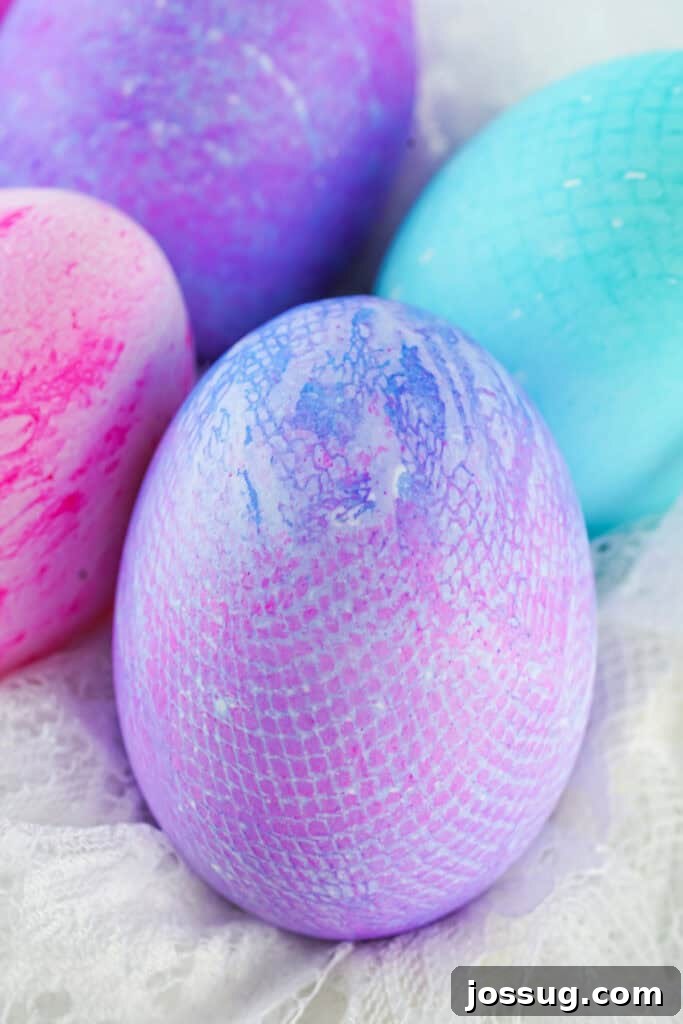
- Bright colors like vibrant pink, rich blue, and deep purple consistently produced the most striking and noticeable results.
- Lighter hues like orange and yellow sometimes struggled to create a distinct pattern, especially on white eggs. They may blend in more or appear too faint. Consider using these colors for solid-dyed eggs instead, or for a very subtle textured effect.
- **Working with Brown or Farm-Fresh Eggs:**
- This method works beautifully on brown or farm-fresh eggs, but be prepared for the colors to appear darker and more muted due to the egg’s natural shell pigment.
- As always, test one egg first to ensure you’re happy with the depth and clarity of the color against the darker background. This can result in a sophisticated, rustic look.
❓ Frequently Asked Questions About Fabric-Textured Easter Eggs
Absolutely! If you use food-safe dyes (like food coloring or commercial egg dye kits) and store the hard-boiled eggs properly in the refrigerator, they are perfectly safe to eat. Remember, hard-boiled eggs should be consumed within one week.
Yes, brown eggs work! However, it’s important to keep in mind that the colors will appear darker and more muted compared to white eggs. This can result in a beautiful, natural, or vintage aesthetic. We always recommend testing one brown egg first to ensure you like the resulting color intensity and pattern clarity before dyeing a larger batch.
Several factors can contribute to a blurry pattern. First, try using a fabric with a thicker thread or a more open, defined texture. Very fine or flimsy lace might not hold its shape well. Second, ensure the fabric is wrapped very tightly around the egg and secured snugly with a rubber band to prevent dye from seeping underneath. Lastly, reduce the amount of time the egg spends in the dye bath, as prolonged exposure can lead to bleeding.
Yes, absolutely! As long as the fabric hasn’t torn or become overly saturated with dye to the point of structural compromise, you can definitely reuse it. Simply rinse the fabric pieces under cool water immediately after use, gently pat them dry, and allow them to air dry completely before storing them for your next batch of eggs or for future crafting projects.
While technically possible to dye raw eggs, hard-boiled eggs are highly recommended. They are much safer and easier to handle, especially when wrapping with fabric and dipping. They also make for better display items as they are less fragile. If your intention is purely for long-term decoration and not consumption, consider carefully hollowing out eggs before dyeing them. This allows them to last indefinitely as decorative pieces.
If you’ve used hard-boiled eggs, they should be stored in the refrigerator and are generally safe to eat for up to one week after dyeing. For decorative purposes only, you can empty the contents of raw eggs by blowing them out through small holes, cleaning the shells, and then dyeing the hollowed shells. These hollowed-out eggs can last indefinitely as beautiful keepsakes.
Dye bleeding typically occurs for two main reasons. Firstly, the fabric may not have been wrapped tightly enough around the egg, creating small gaps where dye could seep in. Ensure you pull the fabric taut and secure it firmly with rubber bands. Secondly, leaving the egg in the dye for too long can also cause bleeding, as the dye has more time to penetrate. Try reducing your dip time, especially with strong dyes.
These fabric-textured eggs are incredibly versatile for display! Arrange them artfully in a festive basket lined with colorful paper grass, use individual egg stands to showcase their unique patterns on a mantelpiece, or integrate them into a charming spring wreath. They also look lovely lined up along a windowsill, nestled amongst fresh flowers in a centerpiece, or placed individually as thoughtful placeholders at your Easter brunch table.
These DIY Fabric-Textured Easter Eggs offer a beautiful, creative, and memorable way to celebrate the arrival of spring and the joy of Easter. Beyond being simple decorations, they make stunning centerpieces, delightful basket fillers, or even heartfelt handmade gifts for loved ones. Embrace the fun of crafting and enjoy the unique beauty each egg brings to your holiday. Happy crafting!
🍽️ More Creative Easter Egg Ideas You’ll Love
- Galaxy Easter Eggs: A Cosmic Craft
- Classic Food Coloring Dyed Easter Eggs: Simple & Vibrant
- Cool Whip Dyed Easter Eggs: Fun Marbled Designs
- Marbled Easter Eggs: Elegant & Artistic
- Tissue Paper Dyed Easter Eggs: Watercolor Wonders
12
servings
Fabric-Textured Easter Eggs
Jamie Sherman
10
5
15
Pin
Rate
Materials
-
6×10-inch pieces of textured fabric (lace, burlap, netting, or poly mesh ribbon)
-
Rubber bands
-
Paper towels
-
Scissors
Ingredients
- Hard-boiled eggs
- Egg dye, store-bought or homemade
Instructions
-
**1. Prepare the Dye.** Mix your chosen egg dye according to the package instructions. If using food coloring, remember it can be very potent, so a little often goes a long way for vibrant results.
-
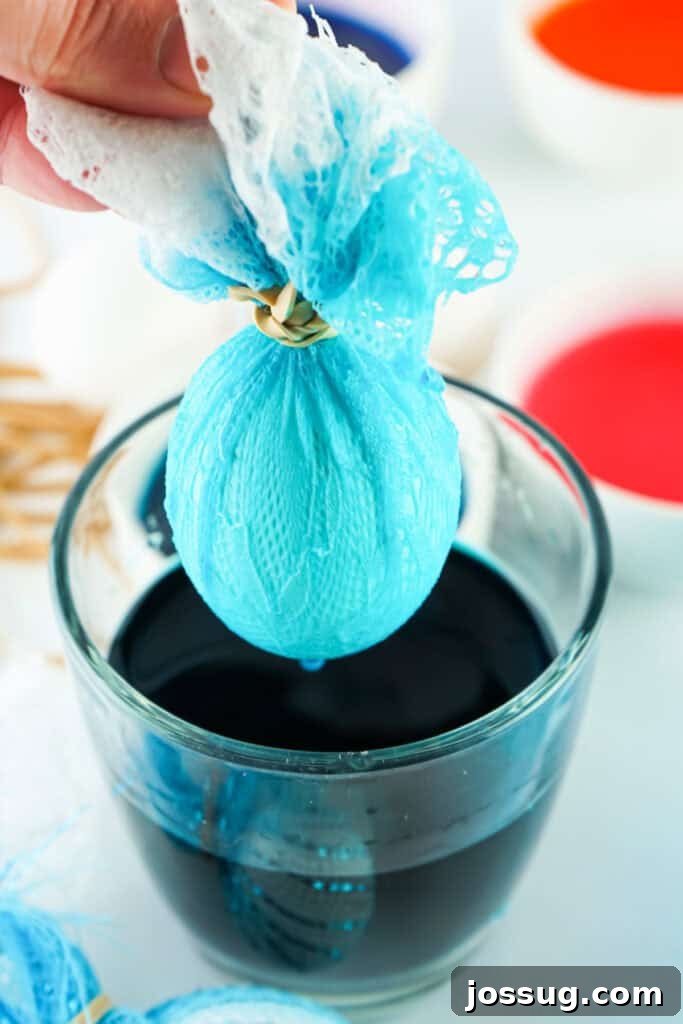
**2. Wrap the Egg.** Select a piece of textured fabric that’s large enough to fully cover your hard-boiled egg. Tightly wrap the fabric around the egg, ensuring it’s pressed snugly against the shell to prevent dye from bleeding. Secure the fabric firmly at the top with a rubber band.
-
**3. Dye the Egg.** Carefully dip the fabric-wrapped egg completely into the dye solution. Allow it to soak for approximately 30 seconds. For very strong dyes, you might need even less time, around 15 seconds. Longer soak times can result in deeper colors but also increase the risk of blurry patterns.
-
**4. Dry the Egg.** Remove the egg from the dye and gently pat it dry with a paper towel while the fabric is still attached. This helps set the color and prevents bleeding. Let the egg rest for about 2 minutes to allow the surface dye to dry further.
-
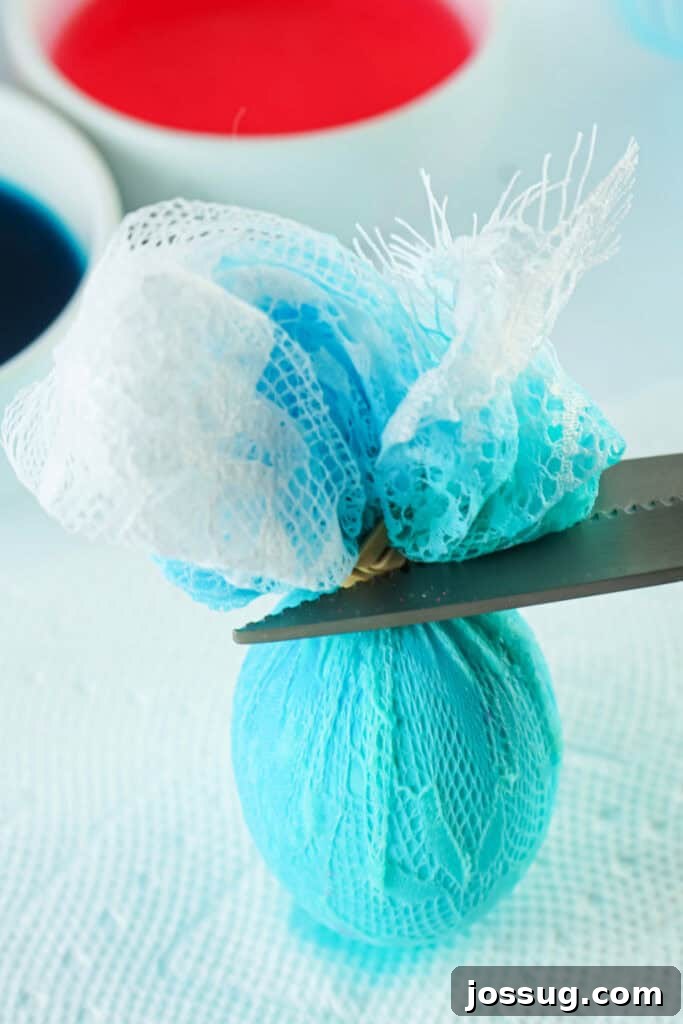
**5. Unwrap.** Carefully cut away the rubber band and then gently unwrap the fabric from the egg to reveal your unique pattern.
-
**6. Final Dry.** Give the egg another light pat dry, then allow it to rest for 3 more minutes to ensure it’s completely dry before handling or displaying.
-
**7. Repeat and Enjoy!** Continue the process with as many eggs as you like, experimenting with different fabrics and colors to create a diverse and beautiful collection.
Notes
- Hard-boiled eggs, if kept refrigerated, typically last about a week. Ensure you’re using food-safe dyes if planning to eat them.
Tips for Success
- **The tighter the fabric, the clearer the pattern.** Always ensure your fabric is snug against the egg.
- **Don’t leave the egg in the dye too long** – 30 seconds or less is ideal, especially for strong dyes, to prevent bleeding.
- **Always pat dry *before* removing the fabric** to help preserve the crispness of your design.
- **Test one egg first** to figure out the best dye time and fabric combination for optimal results.
- **Experiment with fabric types** to discover which textures create your favorite patterns – from bold and geometric to delicate and intricate.
Loved this DIY? Share your creations and leave a comment below!