
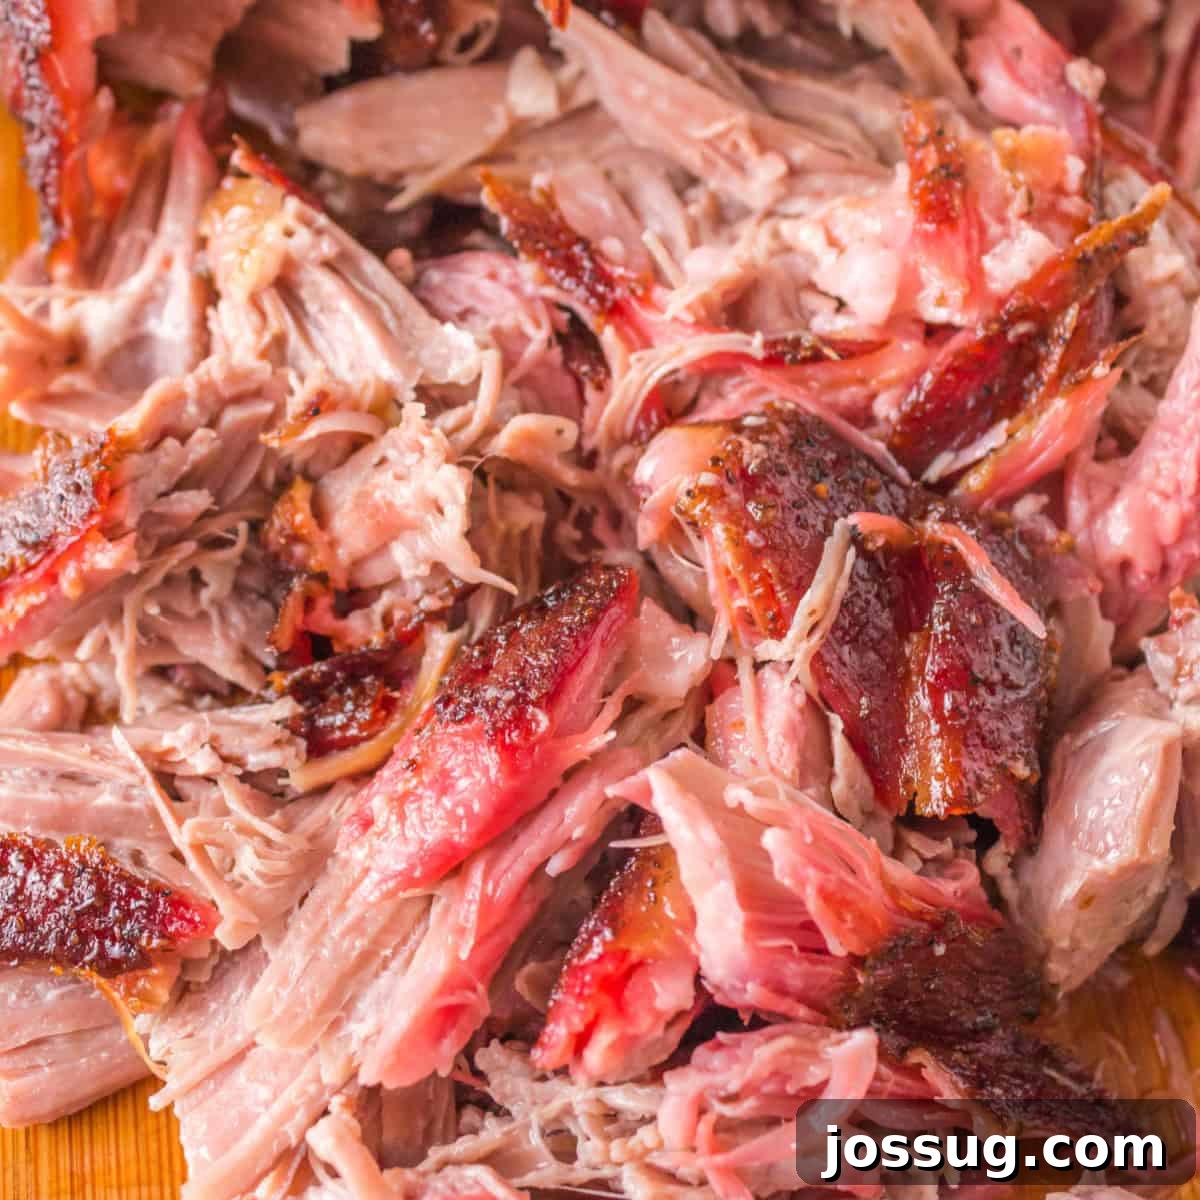
🔥 Slow-cooked, smoky, and bursting with incredible flavor, this **Grilled Boston Butt** recipe promises to be the ultimate showstopper at your next cookout or summer gathering. Get ready to impress with mouth-watering, tender pulled pork! 🐷
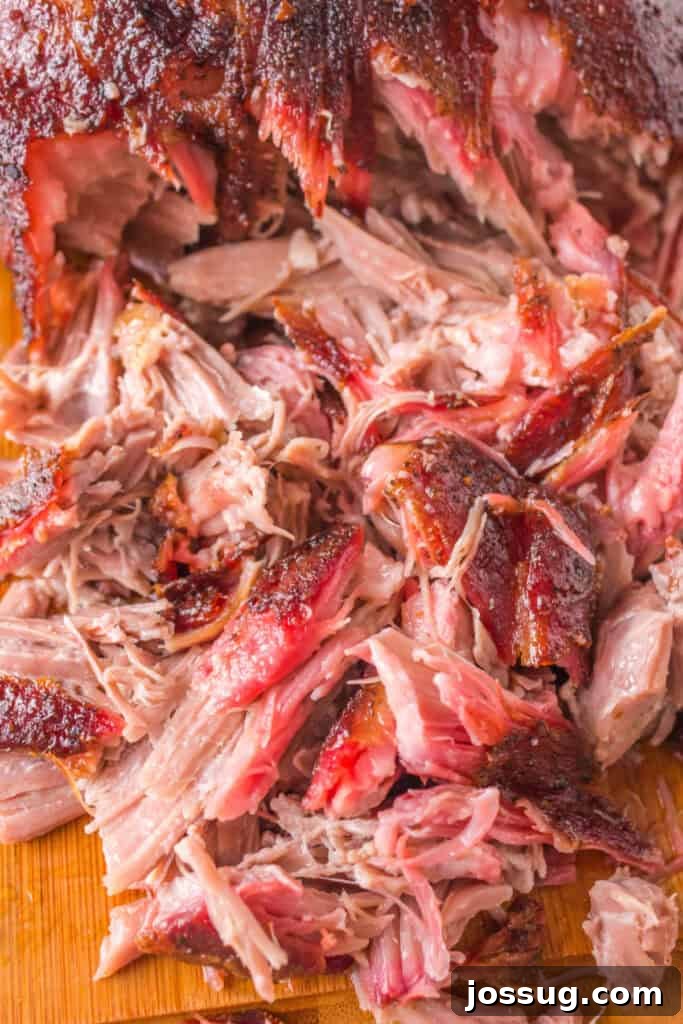
The Ultimate Grilled Boston Butt Recipe: Your Guide to Perfect Pulled Pork
There’s nothing quite like the irresistible aroma and taste of perfectly slow-cooked pulled pork. When it comes to summertime grilling, a succulent Boston butt stands unrivaled as a true BBQ masterpiece. This comprehensive recipe for grilled Boston butt has become a cherished staple in our household, consistently delivering that melt-in-your-mouth tenderness and rich, smoky flavor that everyone craves. Whether we’re hosting a lively backyard BBQ, celebrating a special occasion, or simply yearning for a satisfying family meal, this recipe never fails to gather rave reviews.
The first time I ventured into preparing this magnificent cut of pork, I was genuinely astonished by the depth of flavor a well-seasoned Boston butt could achieve. With its ideal fat-to-meat ratio, the pork shoulder (commonly known as Boston butt) transforms into incredibly moist and flavorful pulled pork when cooked low and slow. The secret lies in a robust dry rub, meticulously crafted with a harmonious blend of brown sugar, aromatic garlic, pungent mustard, smoky paprika, and other common pantry spices. This simple yet powerful seasoning penetrates deep into the meat overnight, creating an unforgettable crust, or “bark,” that seals in juices and intensifies every bite.
Regardless of whether you’re a novice venturing into the art of smoking meat or a seasoned pitmaster refining your technique, this grilled Boston butt recipe is designed for success. It’s straightforward, easy to follow, and consistently produces spectacular results, making it an instant favorite for anyone who appreciates authentic, home-cooked BBQ. Prepare to elevate your grilling game and become the undisputed champion of your next cookout!
⭐ Why You’ll Love This Grilled Pulled Pork Recipe
- Feeds a Crowd Effortlessly: A single Boston butt can yield a significant amount of pulled pork, making it an incredibly economical and convenient option for large gatherings. Spend less time cooking individual portions and more time enjoying your guests.
- Unforgettable Deep, Smoky Flavor: The slow grilling process, combined with our signature dry rub, develops an exceptional smoky taste and a dark, flavorful caramelized “bark” on the exterior that’s simply addictive.
- Simple, Pantry-Friendly Rub: You likely already have most of the spices needed for this incredibly flavorful rub in your kitchen cabinet. No need for exotic ingredients or complicated preparations.
- Versatile Cooking Methods: While designed for the grill or smoker, this recipe is highly adaptable. You can easily achieve fantastic results using a conventional oven or a slow cooker, ensuring delicious pulled pork no matter your equipment.
- Beginner-Friendly with Expert Results: Even if you’re new to cooking large cuts of meat, our step-by-step instructions guide you to a perfectly tender and juicy result every single time.
- Perfect for Meal Prep: Leftover pulled pork is incredibly versatile. It freezes beautifully and can be used in countless dishes throughout the week, from sandwiches and tacos to nachos and casseroles.
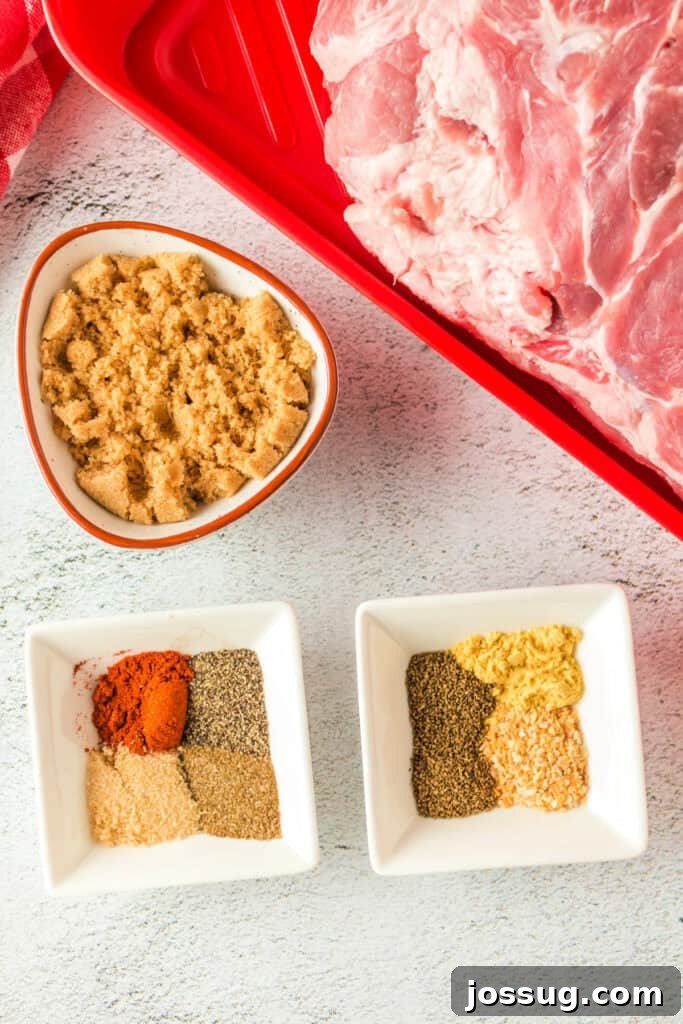
🛒 Ingredients for Grilled Boston Butt & Smart Substitutions
Crafting the perfect grilled Boston butt starts with quality ingredients and a killer rub. Here’s what you’ll need, along with some handy substitutions:
- Bone-in Boston Butt: This is the star! A 10-pound bone-in pork shoulder, often labeled as Boston butt or pork butt, is ideal. The bone helps distribute heat evenly and imparts extra flavor and moisture to the meat, making it incredibly juicy and tender.
- Light Brown Sugar (packed): Essential for that beautiful caramelized crust, or “bark,” and for balancing the savory and smoky flavors with a touch of sweetness. Dark brown sugar can be used for a deeper molasses flavor.
- Ground Black Pepper: Provides a classic, sharp, and pungent note that is fundamental to any good BBQ rub. Freshly ground pepper offers the best aroma.
- Smoked Paprika: This ingredient is crucial for adding a deep, authentic smoky flavor and a vibrant reddish hue to your pork. If you don’t have smoked paprika, regular sweet paprika can be used, but you’ll miss some of that desirable smoky depth. Consider adding a small pinch of liquid smoke to your drip pan if using regular paprika.
- Celery Salt: Offers a unique savory, slightly earthy, and salty flavor that complements pork wonderfully. If unavailable, combine regular salt with a pinch of ground celery seed for a similar effect.
- Garlic Salt: Provides both salt and a foundational garlic flavor. For a more controlled seasoning, you can substitute with separate garlic powder (1 teaspoon) and kosher salt (1 teaspoon or to taste).
- Ground Mustard: Adds a subtle tang and helps create a fantastic crust. Yellow mustard powder is preferred. If you only have Dijon mustard, reduce the amount slightly to avoid excessive moisture and intense flavor, or spread a thin layer on the pork before applying the dry rub.
- Minced Garlic: Fresh garlic offers an unmatched aromatic punch. If fresh isn’t an option, 1 teaspoon of garlic powder can be substituted per 2 teaspoons of fresh minced garlic.
- Celery Seeds: These tiny seeds intensify the celery flavor, adding another layer of complexity to the rub. If you can’t find celery seeds, fennel seeds can be used for a different, slightly anise-like flavor profile, or you can simply omit them without drastically altering the rub.
✨ Flavorful Variations for Your Pulled Pork
Once you master the classic grilled Boston butt, feel free to experiment with these exciting variations to customize your pulled pork:
- Spice It Up: For those who love a kick, add a teaspoon of cayenne pepper or a pinch of red chili flakes to your dry rub. You could also mix in some chipotle powder for a smoky, spicy heat.
- Boost the Flavor Depth: Incorporate a tablespoon of chili powder, a dash of onion powder, or even a teaspoon of espresso powder or instant coffee grounds into the rub for a richer, more complex flavor profile. A splash of Worcestershire sauce or apple cider vinegar can also be spritzed on the meat during the cook.
- Sauce It Your Way: After shredding, toss the tender pulled pork with your favorite BBQ sauce. Whether you prefer a sweet Kansas City style, a tangy Carolina vinegar-based sauce, or a spicy Texas-style sauce, the possibilities are endless. Alternatively, serve the sauce on the side for guests to choose their preference.
- Herb Infusion: For a slightly different twist, consider adding dried herbs like thyme or rosemary to your rub. A teaspoon of dried oregano can also add a Mediterranean flair.
- Citrus Zest: A little lemon or orange zest in the rub can add a bright, fresh note that cuts through the richness of the pork, especially if you’re planning a lighter, spring-time BBQ.
🔥 Expert Tips for Grilling the Best Boston Butt
Achieving BBQ perfection with your Boston butt is all about patience and a few key techniques:
- Maximize Flavor with Overnight Rubbing: Don’t rush this step! Allowing the dry rub to penetrate the meat overnight (8-12 hours) in the refrigerator is crucial. This process tenderizes the pork and allows the flavors to meld deeply, creating that incredible “bark” and a more profound taste.
- Always Cook Fat Side Up: Placing the Boston butt fat side up on the grill or smoker allows the fat to slowly render and baste the meat below as it cooks. This self-basting action is key to keeping the pork incredibly juicy and moist throughout the long cooking process.
- Use a Drip Pan for Moisture and Flavor: Position a drip pan filled with water or apple juice directly beneath your Boston butt. This not only catches delicious drippings (which can be used for gravy or serving with the pork) but also helps maintain a moist cooking environment in your grill or smoker, preventing the meat from drying out.
- Resting is Non-Negotiable: Once the pork reaches its target internal temperature, resist the urge to shred it immediately. Wrapping it tightly in foil and letting it rest for at least one hour (or even two) allows the muscle fibers to relax and reabsorb all those wonderful juices. Skipping this step can result in dry, less flavorful pulled pork.
- Invest in a Good Thermometer: An accurate leave-in probe thermometer is your best friend for low-and-slow BBQ. It allows you to monitor the internal temperature without constantly opening the grill, ensuring consistent heat and perfectly cooked pork.
- Consider Your Wood Choice: For smoking, the type of wood you use significantly impacts flavor. Hickory offers a strong, classic smoke flavor, while apple or pecan woods provide a milder, sweeter smoke that pairs beautifully with pork. Oak is a great all-around choice.
Follow these tips, and your Boston butt pork will transform into rich, tender grilled pulled pork that practically melts in your mouth. Once you master this Boston butt recipe, it’ll be on repeat all season long!
❓ Frequently Asked Questions (FAQs)
- What is a Boston butt?
- Despite its misleading name, a Boston butt is not from the rear of the pig. It’s actually a cut from the upper part of the pig’s front shoulder. This cut includes parts of the neck, shoulder blade, and upper arm, making it rich in connective tissue and fat, which breaks down beautifully during slow cooking to yield incredibly tender pulled pork.
- Can I use boneless Boston butt pork?
- Yes, you can certainly use a boneless Boston butt, but there are a few considerations. Bone-in cuts generally offer a richer flavor profile and tend to retain more moisture during the long cooking process. The bone also acts as a heat conductor, helping the meat cook more evenly. If using boneless, expect a slightly shorter cooking time and be extra vigilant about moisture.
- How do I know when the pork is done?
- Your grilled Boston butt is perfectly done when it reaches an internal temperature of 200°F to 205°F. More importantly, it should feel incredibly tender when probed with a thermometer or skewer, and the bone should easily twist free. This is known as “probe tender,” indicating that the connective tissues have completely broken down, allowing the meat to shred effortlessly with a fork.
- How long does it take to cook a 10-pound Boston butt?
- For a 10-pound Boston butt cooked low and slow at around 250-275°F, you should plan for approximately 10 to 12 hours of cook time. Remember that BBQ is about “cooking to temperature, not to time,” so always rely on your thermometer and probe tenderness. Don’t forget to factor in an additional 1-2 hours for resting the meat after cooking.
- What if I don’t have a smoker or grill?
- No problem! You can still achieve delicious pulled pork. For oven cooking, place the rubbed pork in a roasting pan with a rack, add about ½ cup of apple juice or water, cover tightly with foil, and cook at 250°F. For a slow cooker, add the rubbed pork with ½ cup of apple juice or water and cook on low for 8 to 10 hours, or until fork-tender.
- Do I need to trim the fat cap?
- Generally, no, it’s recommended to leave the fat cap on your Boston butt. When cooked fat side up, the fat cap slowly renders, self-basting the meat below and contributing to its exceptional juiciness and flavor. It also helps create that desirable crispy “bark” on the exterior. Any excess fat can be easily removed after shredding.
- Can I use this recipe for smaller pork shoulders?
- Absolutely! This recipe can be adapted for smaller pork shoulders or Boston butts. Simply adjust the cooking time accordingly. A 5-pound Boston butt, for example, will typically take roughly 6 to 7 hours of total cook time, plus resting. Always monitor the internal temperature for doneness.
- What should I serve with grilled pulled pork?
- Grilled pulled pork pairs perfectly with classic BBQ sides. Crowd favorites include creamy coleslaw, savory baked beans, fluffy cornbread, rich mac and cheese, or a hearty potato salad. Don’t forget some soft buns for making pulled pork sandwiches!
- Why does my pork stall at a certain temp?
- The “stall” is a common phenomenon in low-and-slow BBQ, typically occurring when the meat’s internal temperature hovers around 160°F to 170°F for an extended period. This happens due to evaporative cooling, where moisture on the surface of the meat cools it down as it evaporates. Patience is key here; just let it ride, or if you’re in a hurry, use the “Texas Crutch” by wrapping the pork tightly in foil to push through the stall faster.
- Do I need to spritz the meat while it cooks?
- For this specific recipe, spritzing isn’t strictly necessary as the fat cap and drip pan help maintain moisture. However, if you enjoy building a thicker bark or want to add an extra layer of flavor, you can spritz the pork with apple juice, apple cider vinegar, or even a mixture of both every hour or so after the first 4 hours of cooking. This can enhance the color and texture of the bark.
🍽️ Other Recipes You May Enjoy
Grilling and Smoker
Smoked Ribs
Main Dish
Smoked Pork Tenderloin
Sandwich
BBQ Pulled Pork Sandwiches
Pork
Grilled Pork Chops
Grilled Boston Butt
This juicy Grilled Boston Butt is slow-cooked with a bold dry rub and smoky flavor – perfect for gatherings and backyard BBQs!
Print Recipe
Equipment
- Large tray
- Paper towels
- Mixing bowl
- Gas grill or smoker (Big Green Egg or similar)
- Drip pan
- Heavy Duty Aluminum Foil
- Grill-safe thermometer (leave-in probe thermometer recommended)
- Tongs or forks for shredding
Ingredients
- 1 bone-in Boston butt, about 10 lbs
- ½ cup light brown sugar, packed
- 2 teaspoons ground black pepper
- 2 teaspoons smoked paprika
- 2 teaspoons celery salt
- 2 teaspoons garlic salt
- 2 teaspoons ground mustard
- 2 teaspoons garlic, minced
- 2 teaspoons celery seeds
Instructions
- Pat the Boston butt thoroughly dry with paper towels and place it in a large tray. This step helps the rub adhere better and promotes a crisper bark.
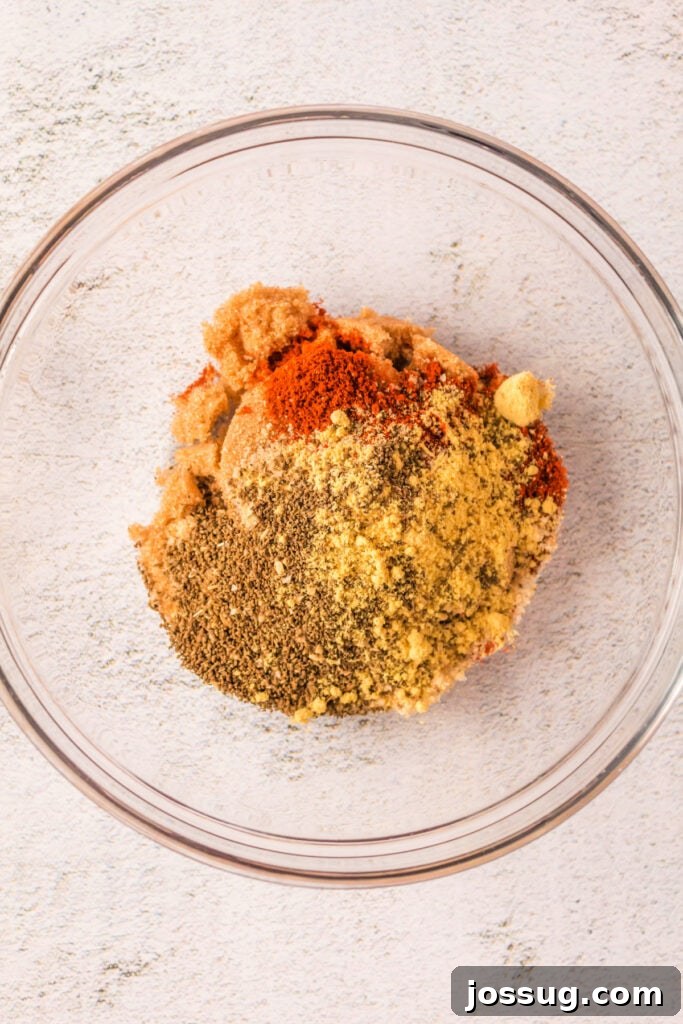
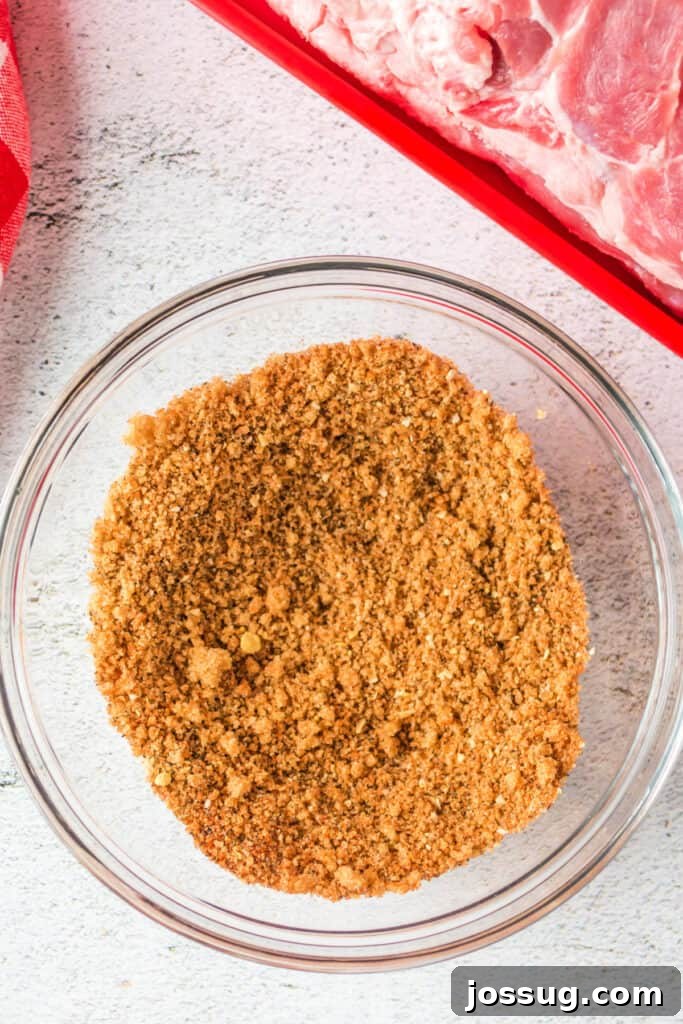
- In a medium bowl, combine the light brown sugar, ground black pepper, smoked paprika, celery salt, garlic salt, ground mustard, minced garlic, and celery seeds. Mix until all ingredients are well incorporated and form a cohesive rub.
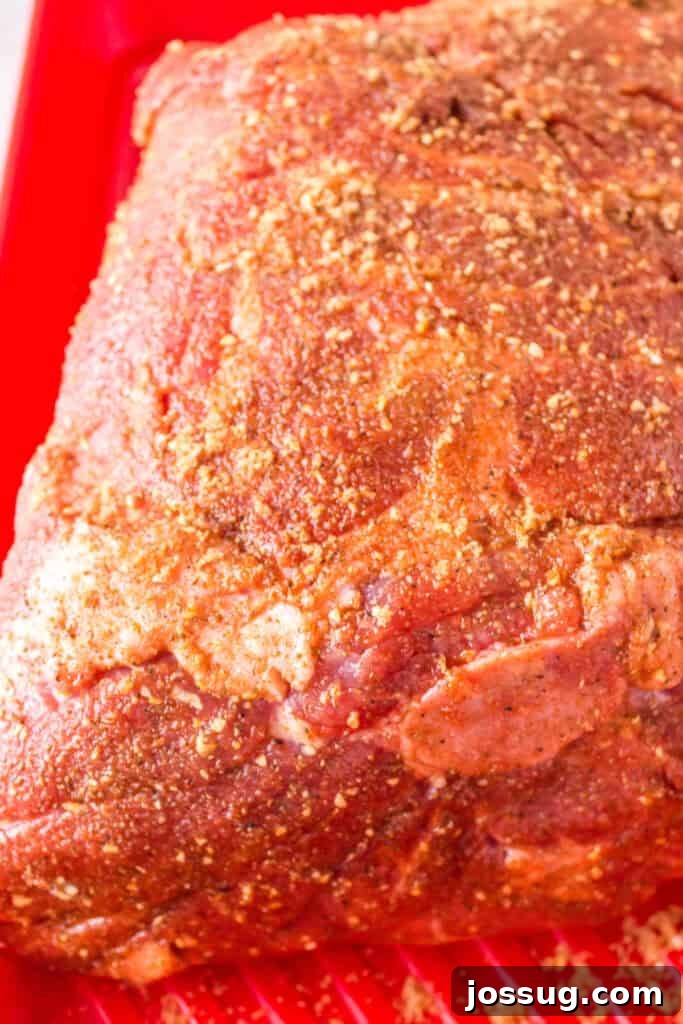
- Generously rub the mixture over all sides of the pork, pressing gently to ensure an even and thick coating. Cover the tray loosely or leave uncovered in the refrigerator overnight (at least 8 hours, up to 24 hours). This allows the rub to work its magic.
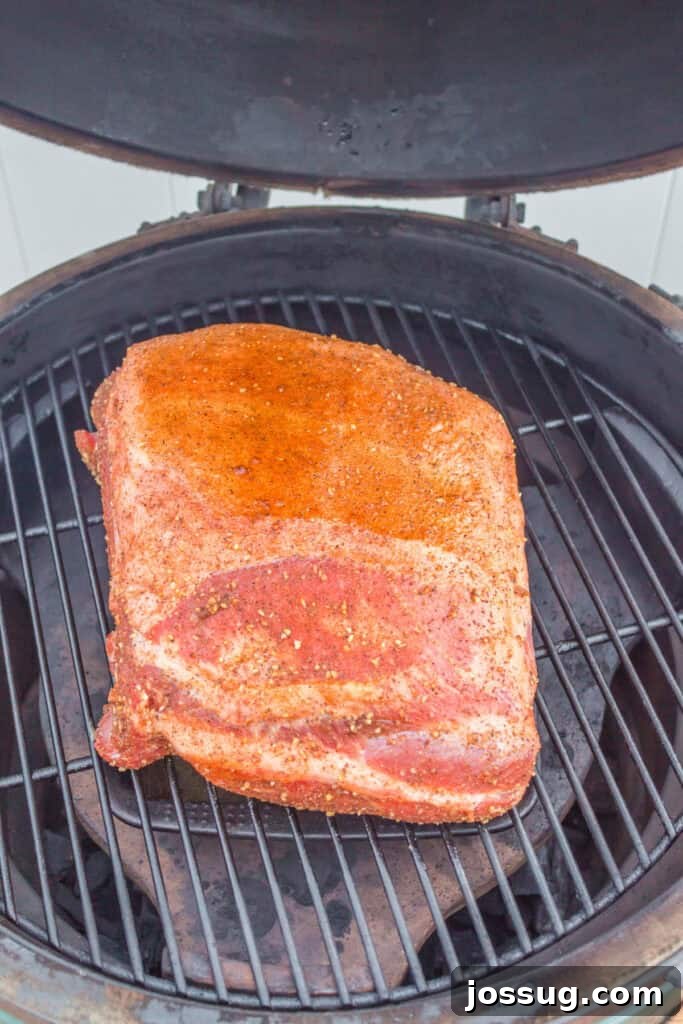
- The next morning, about 30 minutes before cooking, remove the pork from the fridge to come closer to room temperature. Preheat your grill or smoker to a consistent 250°F (120°C) using indirect heat. Set up a drip pan filled with about 1 inch of water or apple juice directly beneath where the pork will cook to maintain moisture.
- Place the pork on the grill grates, fat side up, directly over the drip pan. Close the lid and cook for 5 hours. Avoid opening the lid frequently, as this causes temperature fluctuations.
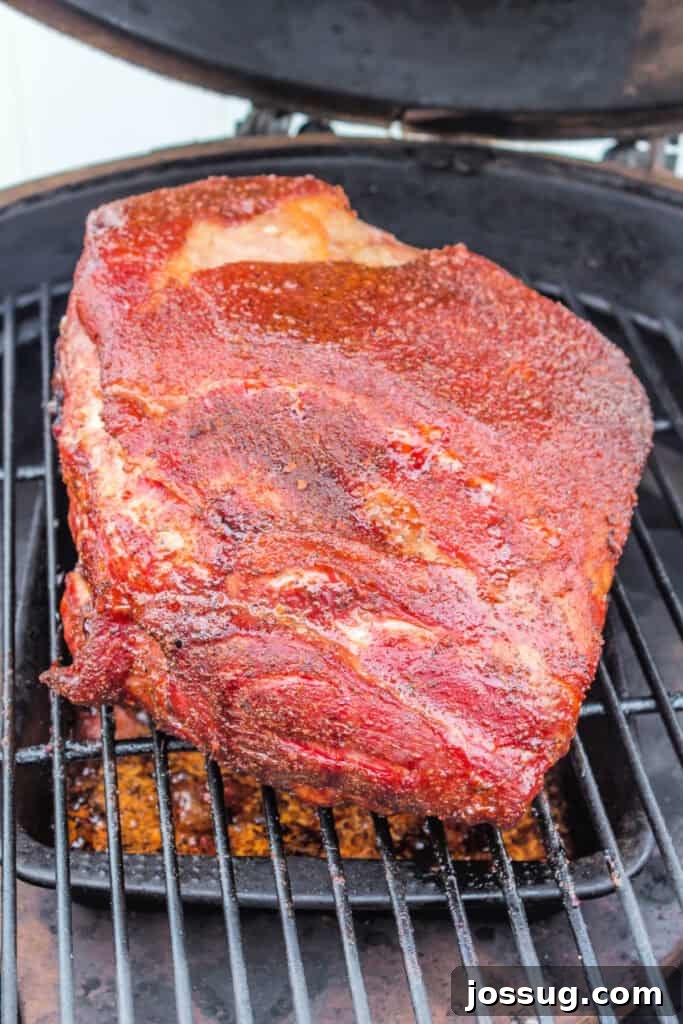
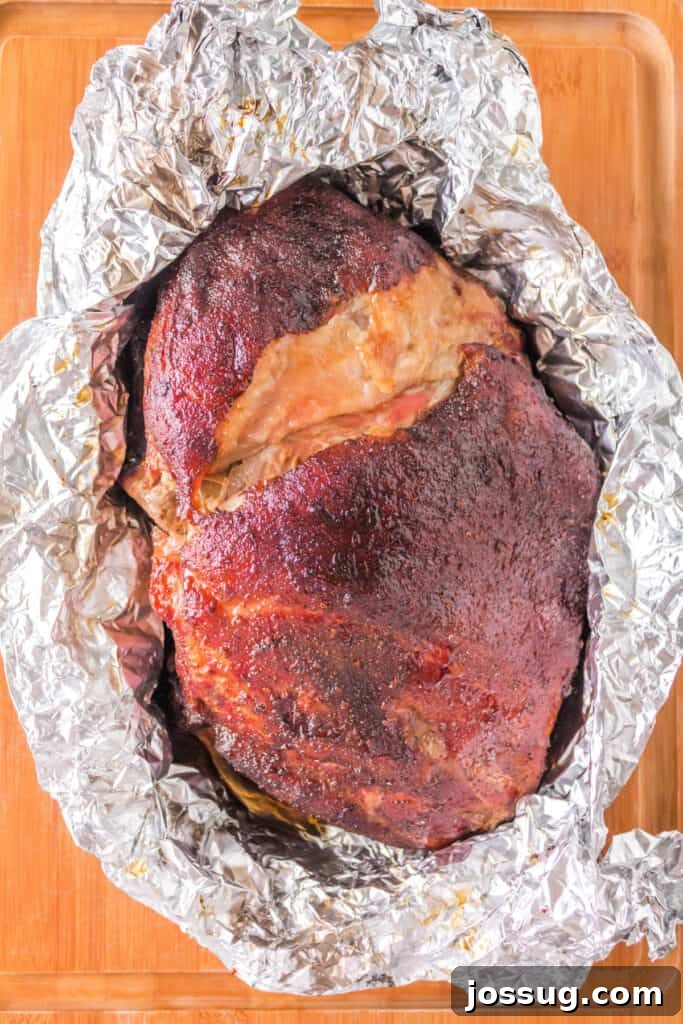
- After 5 hours, increase the temperature of your grill or smoker to 275°F (135°C). Continue cooking, covered, until the pork develops a deep mahogany color, a firm “bark” has formed on the surface, and the fat cap shows visible cracks. At this point, the internal temperature should be approximately 185°F to 190°F (85°C to 88°C). This phase typically takes about 3 more hours, bringing the total cooking time to around 8 hours for the bark development.
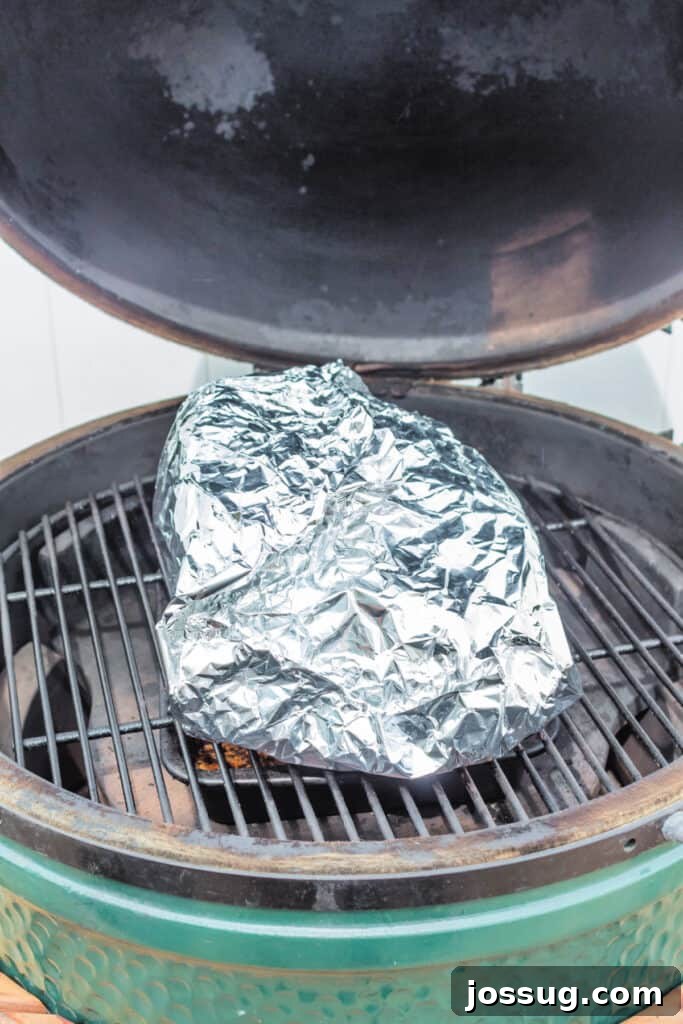
- Once the bark is set and the internal temperature is in the 185-190°F range, carefully remove the pork from the grill. Wrap it tightly in two layers of heavy-duty aluminum foil. This “Texas Crutch” helps the pork power through the stall, tenderizes it, and retains all the precious juices.
- Return the wrapped pork to the grill (still at 275°F) and continue cooking until the internal temperature reaches 200°F to 205°F (93°C to 96°C). This usually takes about 2 more hours, but it’s crucial to cook until the pork feels “probe tender” – the thermometer should slide in with very little resistance.
- Remove the wrapped pork from the heat. Transfer it to a cutting board or a cooler and let it rest, still tightly wrapped, for at least 1 hour (up to 2 hours is even better). This critical resting period allows the muscle fibers to relax and reabsorb juices, ensuring incredibly moist and tender pulled pork.
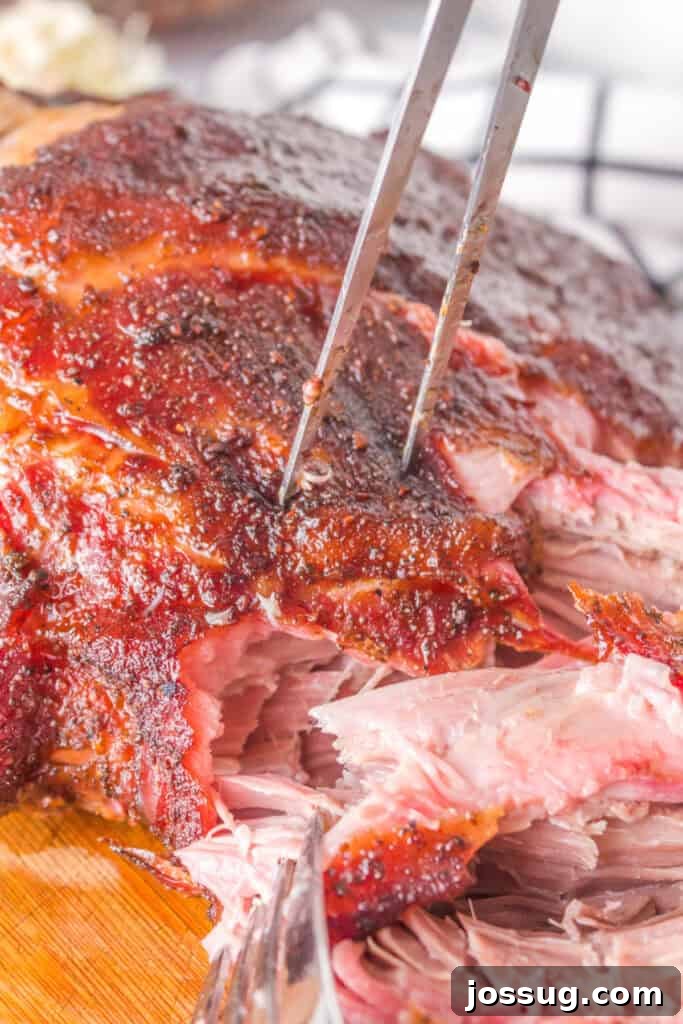
- Carefully unwrap the pork, discarding any rendered fat if desired. The bone should pull out cleanly with minimal effort. Using two forks, shred the meat thoroughly, mixing in any remaining juices and delicious bark pieces.
- Serve your delicious grilled Boston butt warm, either on its own or piled high on soft buns with your favorite BBQ sauce and coleslaw. Enjoy the fruits of your labor!
Notes
🥡 STORAGE
Allow cooled pulled pork to come to room temperature before storing. Place it in an airtight container or freezer-safe bags. It will keep fresh in the fridge for up to 4 days.
♨️ REHEATING
- Skillet: Reheat pulled pork in a skillet over medium heat. Add a splash of broth, water, or reserved pan juices to prevent drying out. Stir occasionally until warmed through.
- Oven: Preheat oven to 300°F (150°C). Place the pork in a baking dish, add a tablespoon or two of liquid (broth or water), cover tightly with foil, and heat for 20 to 30 minutes, or until hot.
- Microwave: For smaller portions, place pulled pork on a microwave-safe plate, cover with a damp paper towel, and reheat at 50% power in 1-minute intervals, stirring in between, until heated through.
- Air Fryer: Preheat your air fryer to 350°F (175°C). Place the pork in a foil packet or a small, air-fryer-safe dish with a little liquid. Heat for 5 to 7 minutes, checking and tossing once or twice, until hot.
❄️ FREEZING
Pulled pork freezes exceptionally well. Divide cooled pork into portioned freezer-safe bags or containers, preferably with some of its cooking juices or a little BBQ sauce to maintain moisture. It can be stored in the freezer for up to 3 months. Thaw overnight in the fridge before reheating using any of the methods above.
💡 TIPS FOR BEST RESULTS
- Don’t skip the overnight rub – it allows the spices to deeply infuse the meat and contributes significantly to the formation of a delicious bark.
- Always use a drip pan filled with water or apple juice. This helps maintain a moist environment in your grill or smoker, preventing the pork from drying out and catching flavorful drippings.
- Wrap the pork tightly in foil during the final stage of cooking (the Texas Crutch). This helps power through the stall, tenderizes the meat, and preserves the internal juices, resulting in incredibly tender and moist pulled pork.
- Resting the meat is crucial. It allows the muscle fibers to relax and reabsorb their juices, ensuring a better texture and preventing dry pulled pork. Don’t rush this step!
- Monitor your grill or smoker temperature closely. Consistency is key for low-and-slow cooking.
🍳 ALTERNATE COOKING METHODS
- Oven: Preheat your oven to 250°F (120°C). Prepare the Boston butt with the rub as instructed. Place it on a rack in a roasting pan with about ½ cup of water or apple juice at the bottom. Cover the pan tightly with heavy-duty aluminum foil. Follow the same temperature increases and wrapping/resting steps as you would for grilling. The total cooking time will be similar.
- Slow Cooker: After applying the dry rub, place the pork in a large slow cooker. Add ½ cup of water or apple juice. Cook on low for 8 to 10 hours, or on high for 5 to 6 hours, until the pork is incredibly tender and shreds easily with two forks. You won’t get the same bark as grilling, but the flavor will still be fantastic.
- Electric Smoker: Use the same time and temperature guidelines as you would for a traditional grill or offset smoker. Keep the water pan in your electric smoker full throughout the cook, and consistently monitor the internal temperature of the pork with a probe thermometer. The flavor will be beautifully smoky.
♻️ LEFTOVERS
Leftovers are a blessing! Get creative with your extra pulled pork: make delicious sandwiches, tacos, loaded nachos, or mix it into mac and cheese, breakfast hash, quesadillas, or even a hearty soup or chili. The possibilities are endless!
Nutrition
Carbohydrates: 7g,
Protein: 5g,
Fat: 2g,
Saturated Fat: 1g,
Polyunsaturated Fat: 0.2g,
Monounsaturated Fat: 1g,
Trans Fat: 0.01g,
Cholesterol: 15mg,
Sodium: 535mg,
Potassium: 107mg,
Fiber: 0.2g,
Sugar: 6g,
Vitamin A: 111IU,
Vitamin C: 0.2mg,
Calcium: 16mg,
Iron: 1mg
Nutrition information is an approximation provided for convenience.
Like this? Leave a comment below!