
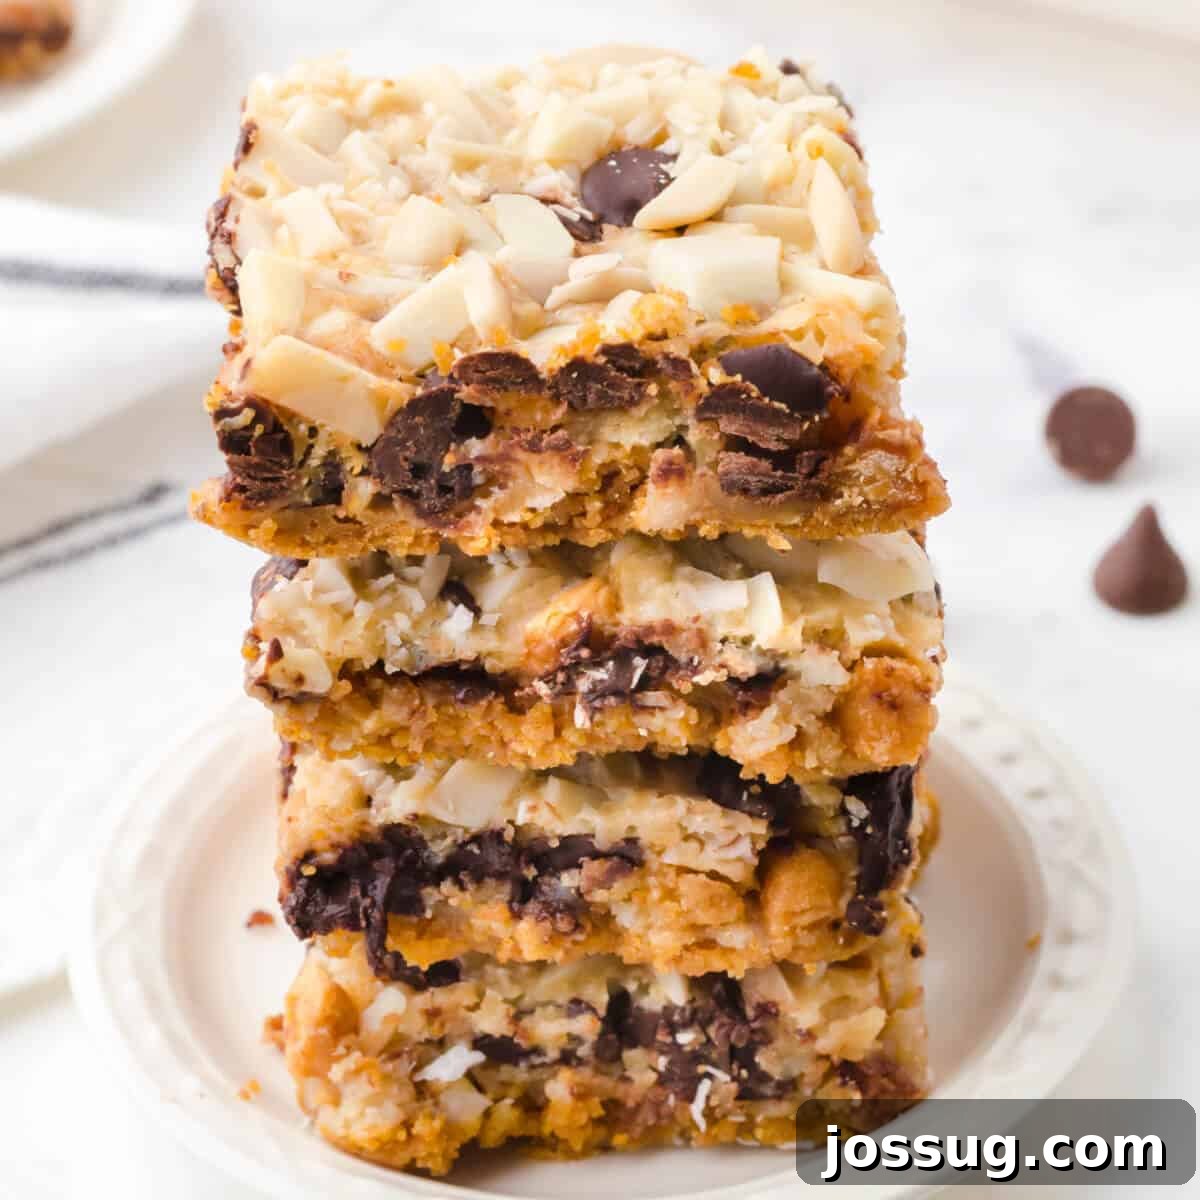
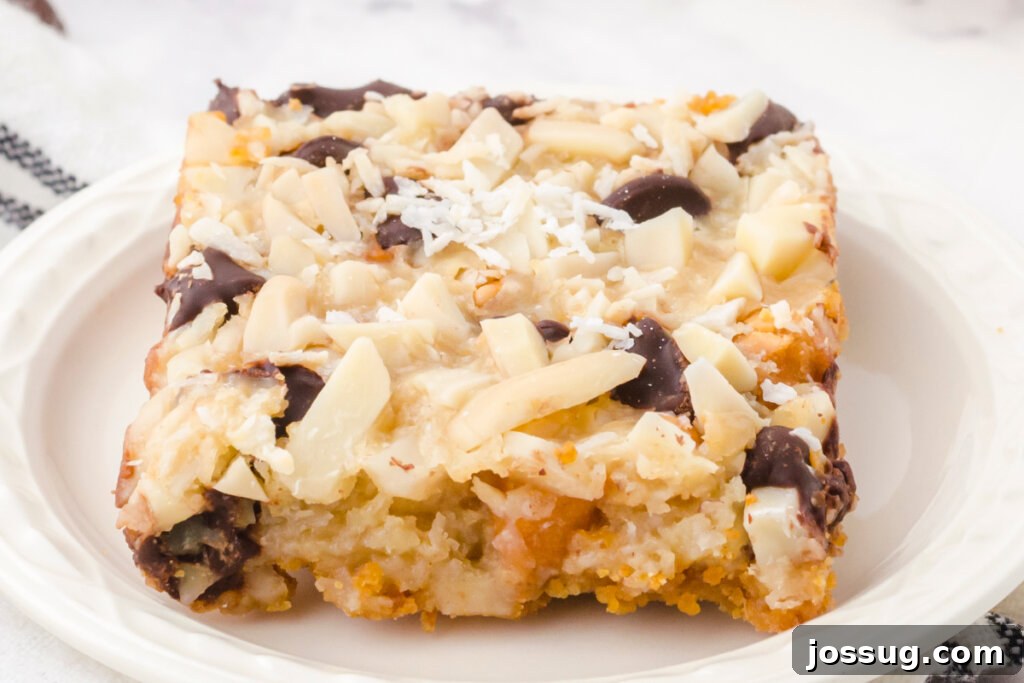
Prepare to be enchanted by the timeless delight of **Magic Cookie Bars**, a dessert so famously simple and utterly delicious that it has captured hearts for generations. These irresistible bars are a symphony of textures and flavors, featuring a rich, buttery graham cracker crust crowned with generous layers of chocolate chips, creamy butterscotch chips, shredded coconut, and crunchy nuts, all sealed with a pour of luscious sweetened condensed milk. Perfect for any occasion – be it a casual potluck, a bustling bake sale, or a cherished holiday celebration – Magic Cookie Bars are not just a recipe; they’re a tradition.
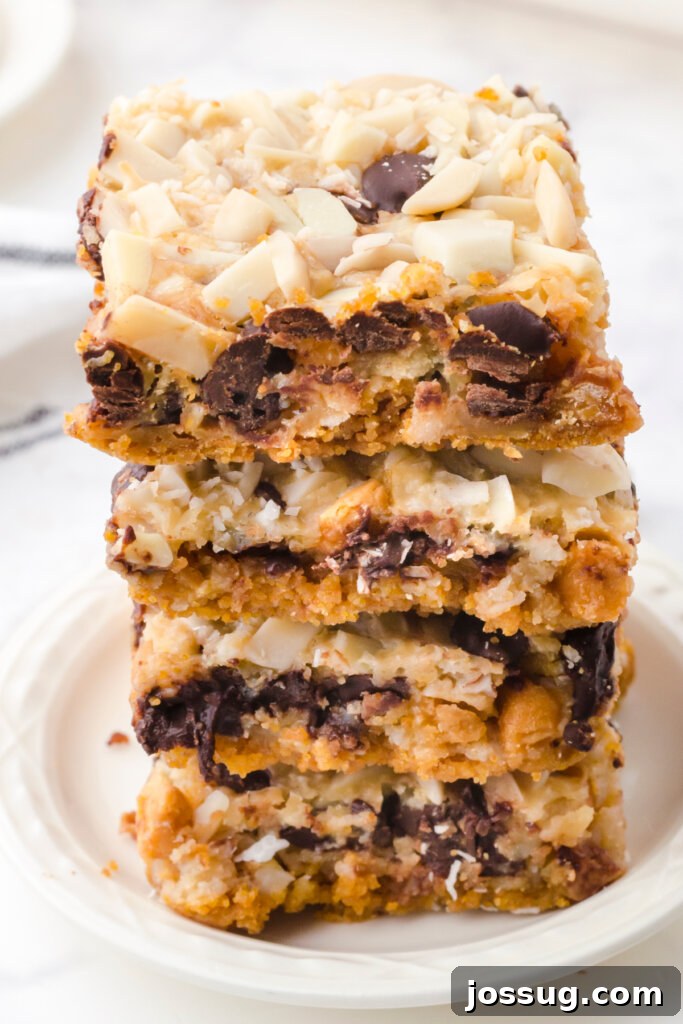
The Legend of Magic Cookie Bars: Many Names, One Delicious Treat
While you might know them as Magic Cookie Bars, this beloved dessert goes by many aliases. Perhaps you’ve heard them called 7 Layer Bars, a nod to the distinct and delightful strata that make up each bite. Or maybe, you know them as Hello Dolly Bars, a charming name that has stuck with this recipe since its popularization in the 1960s. No matter what name they carry in your kitchen, one thing remains consistent: their incredible ease of preparation and universally adored flavor.
These bars have earned their legendary status for a reason. They require minimal effort for maximum reward, making them a go-to choice for busy bakers and dessert enthusiasts alike. From their humble origins, likely popularized by the Eagle Brand sweetened condensed milk company, Magic Cookie Bars quickly became a staple in cookbooks and family gatherings, celebrated for their chewy, sweet, and nutty profile.
Why Magic Cookie Bars Are Your Ultimate Dessert Solution
What makes Magic Cookie Bars so utterly irresistible and a perennial favorite? It’s their unique combination of simplicity, versatility, and undeniable deliciousness. This dessert effortlessly caters to various occasions and preferences, solidifying its place as a baking superstar.
- Effortless Preparation: Forget complicated techniques or extensive ingredient lists. Magic Cookie Bars are famously easy to assemble, requiring no mixer and just a few simple steps. This makes them ideal for beginner bakers or anyone looking for a quick yet impressive dessert.
- A Crowd-Pleasing Sensation: With a harmonious blend of sweet, salty, crunchy, and chewy textures, these bars appeal to almost everyone. The combination of chocolate, butterscotch, coconut, and nuts creates a flavor profile that is both familiar and exciting, ensuring they’re a hit at any gathering.
- Perfect for Any Occasion: Whether it’s a casual backyard BBQ, an elegant holiday feast, a school bake sale, or simply a treat for family lunchboxes, Magic Cookie Bars fit right in. Their sturdy nature makes them perfect for transport, and their universal appeal guarantees an empty platter every time.
- Holiday Tradition: For many families, Magic Cookie Bars are an integral part of holiday traditions, especially during Christmas. Their festive appearance and rich flavors evoke a sense of warmth and celebration, making them a cherished part of seasonal baking.
- Easy to Customize: While the classic recipe is perfect, these bars are incredibly forgiving and adaptable. You can easily swap out ingredients to suit dietary needs or personal preferences, creating a unique treat every time.
The “magic” truly happens in the oven, as the sweetened condensed milk caramelizes and binds all the delightful layers together, creating a rich, cohesive bar that’s both satisfying and utterly addictive. This magical transformation makes them a joy to bake and an even greater joy to eat!
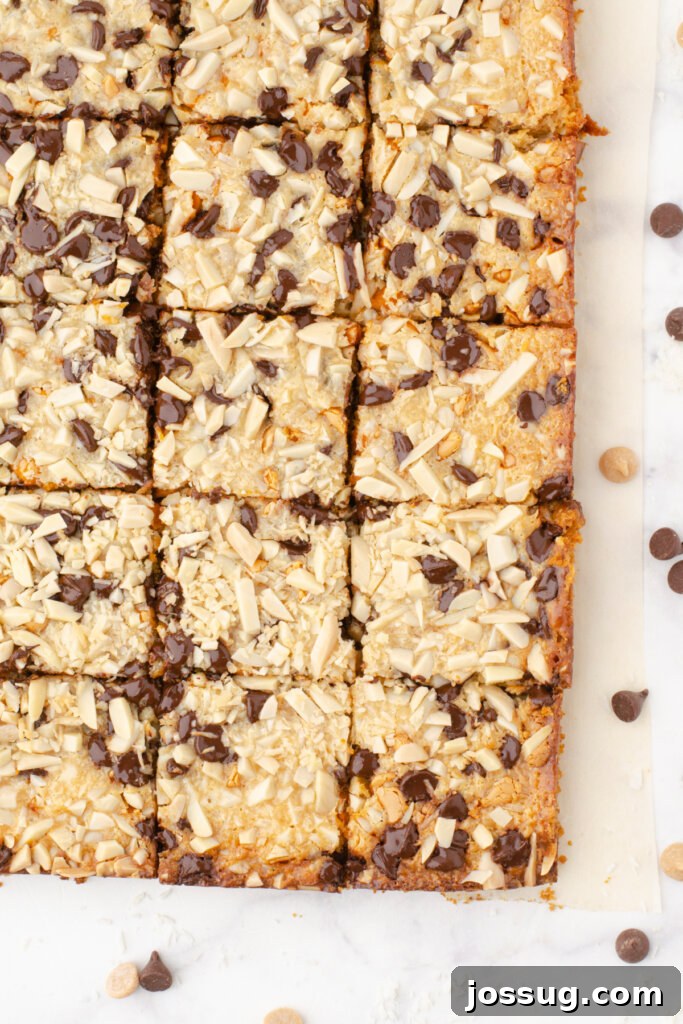
Essential Ingredients for Magic Cookie Bars
Crafting the perfect Magic Cookie Bar requires just a handful of readily available ingredients, each playing a crucial role in creating this iconic layered dessert. Understanding what each component contributes will help you appreciate the simplicity and genius behind this recipe.
- Graham Cracker Crumbs: These form the foundation of your bars, providing a subtly sweet and crunchy base that complements the rich toppings. The fine crumbs, when mixed with butter, create a firm yet tender crust.
- Melted Salted Butter: Butter is essential for binding the graham cracker crumbs together, forming a delicious, golden crust. Using salted butter enhances the overall flavor, providing a subtle contrast to the sweetness of the other layers.
- Sweetened Condensed Milk: This is the true “magic” ingredient! When poured over the layers, it seeps down, caramelizing during baking and acting as a delicious adhesive. It binds all the toppings together, infusing the bars with a rich, creamy sweetness and a delightful chewy texture.
- Semi-Sweet Chocolate Chips: A classic choice, these chips melt into pockets of rich chocolate goodness, offering a beloved flavor that balances the overall sweetness.
- Butterscotch Chips: Adding another layer of distinct flavor, butterscotch chips introduce a caramel-like, buttery sweetness that pairs beautifully with the chocolate and coconut.
- Flaked Coconut: Shredded coconut contributes a wonderfully chewy texture and a tropical, nutty aroma that is a hallmark of Magic Cookie Bars. It toasts lightly in the oven, enhancing its flavor.
- Chopped Nuts (Almonds, Pecans, or Walnuts): Nuts provide a satisfying crunch and a wholesome, earthy flavor that cuts through the sweetness. Slivered almonds are traditional, but pecans or walnuts are also excellent choices for variety.
The beauty of this recipe lies in how these simple ingredients interact, transforming into a complex and satisfying dessert with minimal effort. Each layer is carefully chosen to contribute to the ultimate taste and texture experience.
Crafting Your Own Magic: Step-by-Step Recipe
Making Magic Cookie Bars is incredibly straightforward, requiring just a few simple steps from prep to plate. Follow this guide to create a batch of perfectly layered, golden-brown bars that will disappear in no time!
- Preheat Oven: Begin by preheating your oven to 350°F (175°C). This ensures your bars bake evenly and achieve that perfect golden finish.
- Prepare Baking Pan: Generously grease a 9×13-inch baking pan, or for even easier cleanup and removal, line it with parchment paper, leaving an overhang on the sides. The parchment paper acts as a sling, allowing you to lift the entire batch out of the pan once cooled.
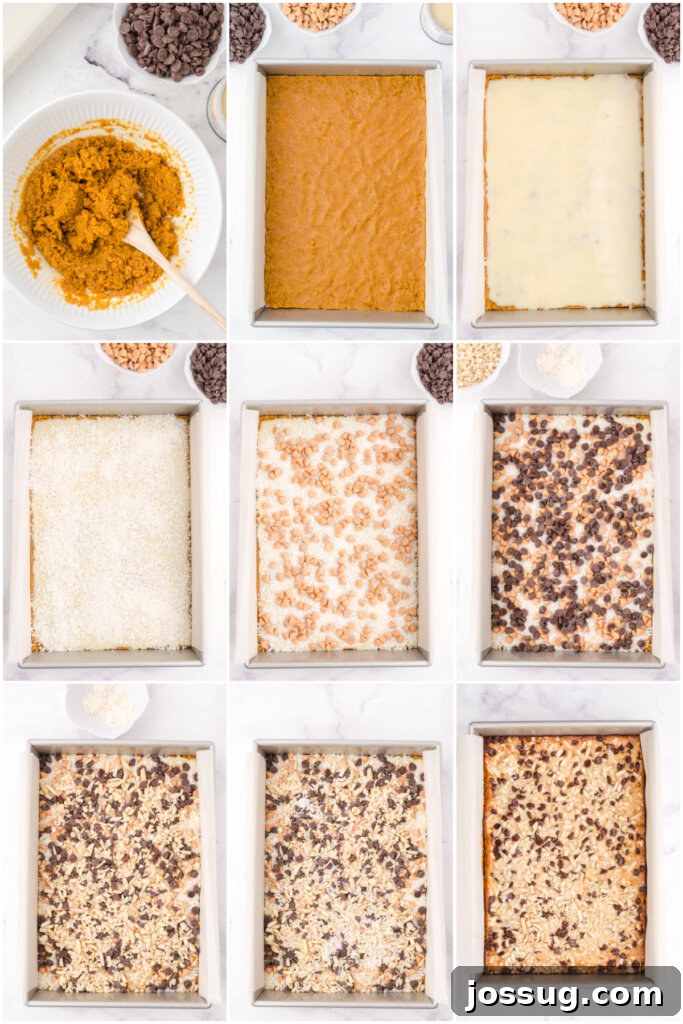
- Make the Graham Cracker Crust: In a medium-sized mixing bowl, combine the graham cracker crumbs with the melted butter. Stir until the crumbs are thoroughly moistened and resemble wet sand.
- Press the Crust: Firmly press the graham cracker mixture evenly into the bottom of the prepared 9×13-inch pan. Use the bottom of a glass or your hands to create a compact, even layer.
- Pour Sweetened Condensed Milk: Slowly and carefully pour the entire can of sweetened condensed milk over the pressed graham cracker crust. Ensure it covers the crust as evenly as possible; this milk will be the “glue” that holds all your delicious toppings.
- Layer the Toppings: Systematically sprinkle your desired toppings over the condensed milk. Start with a layer of flaked coconut (reserving a small amount if you wish for a final sprinkle). Then, add the semi-sweet chocolate chips, followed by the butterscotch chips, and finally, the chopped nuts. If you reserved coconut, sprinkle the rest on top for extra texture.
- Bake to Golden Perfection: Place the pan in the preheated oven and bake for 25-30 minutes, or until the edges are golden brown and the top is lightly toasted and bubbly. The sweetened condensed milk should be caramelized and firm.
- Cool Before Cutting: Remove the pan from the oven and place it on a wire rack to cool for at least 15 minutes. This initial cooling period allows the bars to set. For easier slicing, you can lift the entire batch out of the pan using the parchment paper overhang once it’s slightly cooled.
- Slice and Serve: Allow the bars to cool completely on the wire rack (this can take 1-2 hours) before slicing them into 24 squares. Cooling them fully is crucial for clean, neat slices. Enjoy your magical creation!
Magic Cookie Bars FAQs
No, these are two very different products and cannot be substituted for one another in this recipe. Sweetened condensed milk is a thick, syrupy milk product that has sugar added to it. Evaporated milk, on the other hand, is unsweetened and has a thinner consistency, more like regular milk but with about 60% of the water removed. Using evaporated milk instead of sweetened condensed milk would result in a runny, unsweetened mess that won’t bind your cookie bars together.
To keep your Magic Cookie Bars fresh and delicious, store them in a tightly sealed airtight container at room temperature for up to 5 days. For longer storage, you can refrigerate them, where they will last for about a week. When stacking layers in the container, it’s best to place a piece of parchment paper or wax paper in between them to prevent sticking.
Absolutely! Magic Cookie Bars freeze exceptionally well, making them an excellent make-ahead treat for future events or whenever a craving strikes. To freeze, ensure the bars are completely cooled and then arrange them in a single layer in an airtight freezer-safe container. For stacking, place parchment paper between layers to prevent them from sticking together. They will maintain their quality in the freezer for up to 3 months. Thaw at room temperature for a few hours before serving.
Pro Tips and Customization Ideas for Magic Cookie Bars
While the classic Magic Cookie Bar recipe is undeniably perfect, there’s plenty of room for creative twists and practical tips to ensure your baking experience is flawless and your bars are uniquely yours.
Recipe Tips for Success:
- The Eagle Brand Connection: Remember, this is a variation of the famous recipe popularized by Eagle Brand Condensed Milk. Their version solidified this dessert as a household favorite.
- Parchment Paper is Your Best Friend: Don’t skip lining your pan with parchment paper. It makes lifting the whole batch out for cooling and cutting incredibly easy, ensuring perfectly neat slices and virtually no cleanup.
- Cooling is Crucial: Patience is key! Allow your bars to cool completely before slicing. Warm bars will be gooey and difficult to cut cleanly. For best results, chill them in the refrigerator for 30 minutes to an hour before slicing.
- Even Layering: Spread each layer evenly, especially the condensed milk. This ensures every bite has a balanced distribution of flavors and textures.
Customization for Your Palate:
- Chip Choices: Feel free to substitute the semi-sweet and butterscotch chips with any kind of chips you love. Dark chocolate chips add a sophisticated bitterness that beautifully cuts through the sweetness. Peanut butter chips, white chocolate chips, or even a combination of all three can create a whole new flavor profile.
- Nutty Variations: While chopped almonds are classic, consider pecans or walnuts for different nuances in flavor and texture. For those with nut allergies, you can omit nuts entirely or substitute them with seeds like pumpkin or sunflower seeds (though ensure they are safe for your specific allergy needs).
- Add a Salty Crunch: For an intriguing sweet and salty contrast, try crushing pretzels and adding them as an additional layer or mixing them into the graham cracker crust.
- Dried Fruit Fun: A sprinkle of dried cranberries, cherries, or finely chopped apricots can add a lovely tartness and chewy texture.
- Spice It Up: A pinch of cinnamon or nutmeg mixed into the graham cracker crust can add a warm, cozy dimension, especially for fall or winter baking.
These easy-to-make bars are not only perfect for personal indulgence but also make fantastic gifts. Pack them well in a decorative box with parchment paper between layers, and you have a thoughtful, homemade present that travels beautifully.
Serving and Pairing Suggestions
Magic Cookie Bars are wonderfully versatile and can be enjoyed in various ways. They are hearty enough to be a standalone dessert but also pair beautifully with other treats.
- Classic Dessert: Serve them chilled or at room temperature as a simple yet satisfying dessert after any meal.
- Coffee Break Companion: Their rich sweetness makes them an ideal partner for a warm cup of coffee, espresso, or tea.
- Ice Cream Topping: Warm a bar slightly and serve it alongside a scoop of vanilla bean ice cream for an indulgent, gooey treat. A drizzle of caramel or chocolate sauce would elevate this even further.
- Part of a Dessert Platter: Arrange them on a platter with other small treats like fresh berries, shortbread cookies, or mini cupcakes for an impressive spread.
- Lunchbox Delight: Cut into smaller portions, they make a delightful and energizing treat in school or work lunchboxes.
No matter how you choose to enjoy them, Magic Cookie Bars promise a delightful experience every time.
Magic Cookie Bars Recipe
By Jamie Sherman
Magic Cookie Bars have layers of chips, coconut, and nuts sprinkled over a buttery graham crust and topped with sweetened condensed milk. They’re perfect for potlucks, bake sales, and lunches – and they are also a favorite Christmas sweet treat recipe.
Yields: 24 servings
Prep time: 10 mins
Cook time: 25 mins
Cooling time: 2 hrs
Total time: 2 hrs 35 mins
Equipment
- Silicone Pot Holder Trivet Mats – Hot Pads Spoon Rest, Multipurpose Trivet for Hot Dishers Heat Resistant Food Grade Silicone Set of 4
- Wire cooling rack
- Rubber spatula or wooden spoon
- Mixing bowl
- Measuring cups and spoons
- 9×13-inch cake pan
Ingredients
- ½ cup melted salted butter
- 1 ½ cups graham crumbs
- 1 can sweetened condensed milk, 14 oz.
- 1 cup semi-sweet chocolate chips
- 1 cup butterscotch chips
- 1 cup flaked coconut
- 1 cup chopped almonds
Instructions
- Preheat oven to 350°F (175°C).
- Prepare a 9×13-inch pan by greasing it or lining it with parchment paper. (The parchment paper makes cleanup a breeze!)
- In a medium-sized mixing bowl, stir to combine the graham crumbs and melted butter.
- Press graham crumb mixture into the bottom of the prepared 9×13-inch pan.
- Slowly pour over the can of sweetened condensed milk, ensuring it covers the graham crust evenly.
- Sprinkle evenly with coconut (reserving a bit for the top if desired), then each type of chip, nuts, and any remaining coconut.
- Bake at 350°F (175°C) for 25-30 minutes, or until the top starts to get golden brown and the edges are bubbly.
- Cool the pan on a wire rack for at least 15 minutes before carefully removing the entire batch of squares using the parchment paper.
- Once the bars are completely cooled (this may take 1-2 hours), slice into 24 slices.
Notes
- This recipe is a variation of the classic made famous by Eagle Brand Condensed Milk.
- You may also know this recipe as 7 Layer Cookie Bars or Hello Dolly Bars.
- Feel free to substitute any kind of chips you prefer for the semi-sweet and butterscotch chips. Dark chocolate chips would also taste wonderful and help balance the sweetness, as would peanut butter chips for a new flavor twist.
- Substitute pecans, walnuts, or any other preferred nuts for the almond layer.
- This easy-bars recipe is perfect for gift-giving. They are easy to transport (or even mail in a sturdy box) – just pack them well with parchment paper between layers.
Nutrition
Serving: 1 bar, Calories: 238kcal, Carbohydrates: 25g, Protein: 4g, Fat: 14g, Saturated Fat: 7g, Polyunsaturated Fat: 1g, Monounsaturated Fat: 4g, Trans Fat: 0.2g, Cholesterol: 17mg, Sodium: 116mg, Potassium: 177mg, Fiber: 2g, Sugar: 19g, Vitamin A: 173IU, Vitamin C: 0.5mg, Calcium: 74mg, Iron: 1mg
Nutrition information is automatically calculated, so should only be used as an approximation.
Loved This Recipe? Share Your Thoughts!
We hope you enjoy making and devouring these incredibly simple and satisfying Magic Cookie Bars. If you tried this recipe or have your own favorite customizations, we’d love to hear from you in the comments below!