
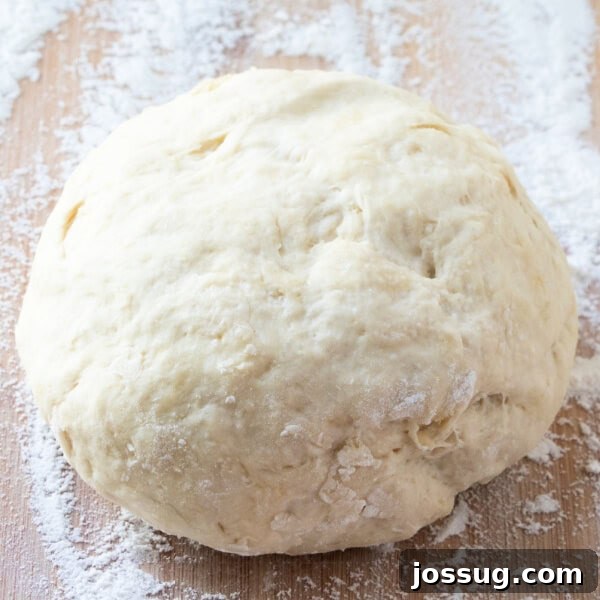
Imagine sinking your teeth into a slice of pizza with a perfectly golden, delightfully crisp, and wonderfully chewy crust. What if we told you that achieving this dream isn’t just possible but incredibly simple to do right in your own kitchen? Homemade pizza dough can be crafted in about 30 minutes, using just a handful of everyday pantry ingredients. Forget about bland, store-bought crusts – this recipe promises a superior texture and flavor that will elevate your pizza nights from ordinary to extraordinary. Get ready to transform your culinary experience and impress your family and friends with the freshest, most delicious pizza you’ve ever tasted!
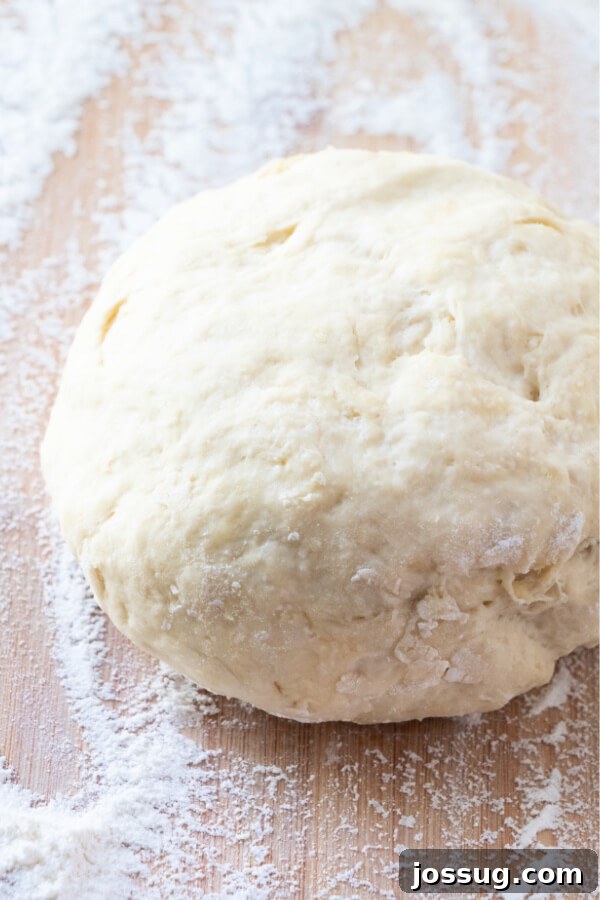
The Ultimate Quick Pizza Dough Recipe for Memorable Pizza Nights
This particular pizza dough recipe holds a special place in my heart, as it was one of the first culinary treasures I received when I embarked on my independent journey. As a young adult navigating the world on a tight budget, I quickly realized the importance of mastering affordable, yet delicious, meals. My Aunt Tammy, a seasoned home cook with an incredible repertoire of practical recipes, generously shared her secrets. Many of her recipes, including this phenomenal pizza dough, have remained staples in my kitchen for decades, a testament to their timeless appeal and simplicity. This specific dough recipe is a game-changer, promising not just ease but a consistently delicious result that will have everyone asking for your secret!
For many, the idea of making pizza dough from scratch can seem daunting, conjuring images of complex techniques, sticky messes, and unpredictable results. Perhaps you’ve tried it before and felt frustrated, or you simply assume it’s a task best left to professional pizzerias. However, I am here to debunk that myth entirely. This recipe is designed to be incredibly forgiving and straightforward, making it perfect for novice bakers and seasoned chefs alike. You don’t need fancy equipment, a stand mixer, or extensive experience; just a few basic ingredients, about 30 minutes of your time, and a willingness to create something truly delicious. Let me walk you through the process, and you’ll soon discover that homemade pizza dough is not only easy but also deeply rewarding, bringing the authentic taste of Italy right to your dining table!
Understanding Your Ingredients: The Foundation of Flavor and Texture
The beauty of this quick pizza dough lies in its simplicity, utilizing staple ingredients that likely already reside in your pantry. Each component plays a crucial role in developing the perfect texture, flavor, and rise that defines an exceptional pizza crust. Taking a moment to understand the function of each ingredient can make you a more confident and successful baker.
For the Perfect Pizza Dough
- Active Dry Yeast: This is the living leavening agent responsible for making your dough light and airy. When activated, yeast feeds on sugars and produces carbon dioxide, which creates bubbles that cause the dough to rise. Ensure your yeast is fresh and active for reliable results.
- Granulated Sugar: A small amount of sugar acts as immediate fuel for the active dry yeast, helping it to bloom and become robust. Beyond feeding the yeast, sugar also contributes to the beautiful golden-brown color of your pizza crust and can enhance its overall flavor.
- Warm Water (110-115°F / 43-46°C): The temperature of the water is absolutely critical for yeast activation. Water that is too cold will prevent the yeast from waking up and performing its job, leading to a flat dough. Conversely, water that is too hot (above 120°F/49°C) will kill the yeast, rendering it ineffective. Aim for a temperature that feels comfortably warm, like a baby’s bath – easily verifiable with a kitchen thermometer.
- Bread Flour: While all-purpose flour can certainly work in a pinch (and we’ll discuss that in our FAQs), bread flour is highly recommended for its higher protein content. This extra protein is essential for developing strong gluten strands when mixed and kneaded. Gluten provides the elasticity and structure necessary for a truly chewy pizza crust that holds its shape and can support generous toppings without becoming soggy.
- Olive Oil: More than just a flavor enhancer, olive oil plays several important roles in pizza dough. It adds a subtle richness and depth of flavor, contributes to the dough’s overall elasticity and tenderness, and helps create a desirable crispy exterior. It also makes the dough easier to handle and prevents sticking.
- Salt: Essential for seasoning, salt brings out the full flavor of the dough and complements your toppings beautifully. Furthermore, salt is crucial for controlling yeast activity and strengthening the gluten network, which significantly impacts the dough’s texture, ensuring it has the right bite and structure.
Transforming Dough to Delight: Pizza Topping Essentials
Once your flawlessly prepared pizza dough is ready, the real fun begins: customizing your culinary masterpiece! The beauty of homemade pizza lies in the endless possibilities for personalization. While the options for toppings are limitless, here are the core elements for any classic pizza, along with ideas for personalizing your pie to suit every taste:
- Pizza Sauce: The foundation of your pizza’s flavor, the sauce can range from a simple, rustic crushed tomato base seasoned with garlic and basil to a robust, slow-simmered marinara. Don’t be afraid to think outside the red sauce box; experiment with creamy pesto for a vibrant herb flavor, a zesty white garlic sauce, or even a tangy barbecue base for a unique twist.
- Mozzarella Cheese (shredded): This is the quintessential pizza cheese, loved for its incredible meltability and mild, milky flavor. For an extra layer of complexity, stretchiness, and depth, consider blending your mozzarella with other cheeses such as sharp provolone, salty Pecorino Romano, nutty Parmesan, or even a touch of creamy goat cheese or smoked gouda.
- Desired Pizza Toppings: This is where your creativity truly shines! Classic and universally loved choices include spicy pepperoni, earthy mushrooms, sweet onions, crunchy bell peppers, and briny black olives. For gourmet touches and adventurous palates, explore toppings like fresh basil leaves, sun-dried tomatoes, caramelized onions, grilled chicken, fresh spinach, crumbled Italian sausage, or even pineapple (if you’re a fan of that sweet and savory debate!). Remember to pre-cook any meats and drain any excessively wet vegetables to prevent a soggy crust.
Step-by-Step Guide: How to Make Quick Pizza Dough Like a Pro
Ready to get your hands dirty and create something truly delicious? This straightforward, step-by-step guide will walk you through each stage of making perfect pizza dough, ensuring a successful and incredibly tasty outcome. Pay close attention to these simple instructions, and you’ll be enjoying fresh, homemade pizza faster than delivery!
- Prepare Your Oven for Optimal Baking.
Begin by setting your oven to a high temperature of 450°F (232°C). A hot oven is absolutely crucial for a quickly cooked, crisp crust and perfectly melted, bubbly toppings. If you own a pizza stone or baking steel, place it in the oven during this preheating phase to ensure it gets intensely hot. This high, even heat mimics a traditional brick oven and is the secret to achieving an incredibly crispy bottom crust, preventing a dreaded soggy pizza base.
- Activate the Yeast for a Fluffy Dough.
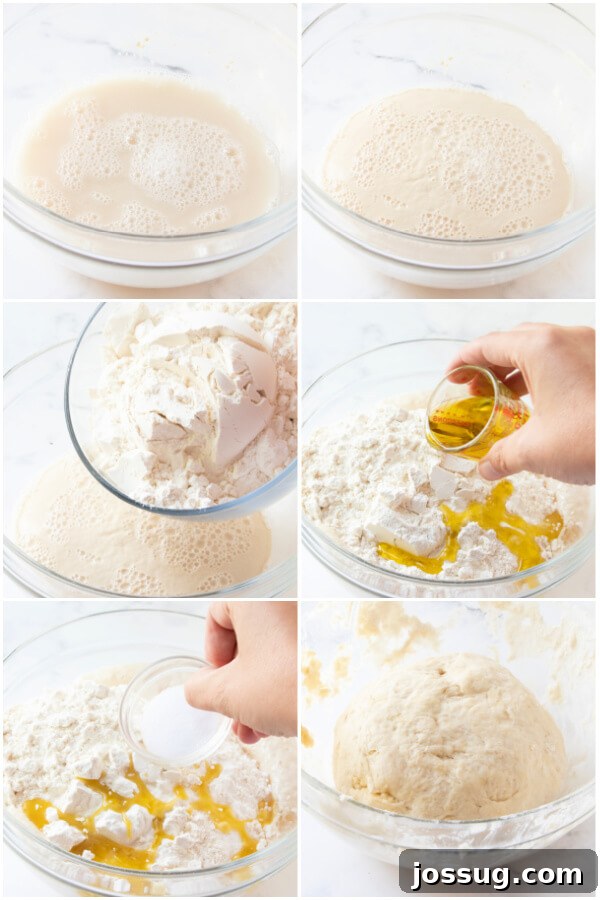
In a medium-sized mixing bowl, combine your packet of active dry yeast and the granulated sugar with the warm water (ensuring it’s within the ideal 110-115°F / 43-46°C range). Stir gently until both the yeast and sugar are fully dissolved. Now, comes the critical waiting game – let this mixture sit undisturbed for about 5-10 minutes. You’ll know your yeast is alive and vibrant when a creamy, frothy layer forms on the surface. If you don’t observe any frothing, your yeast might be old or the water temperature was incorrect, and it’s best to start over with new yeast to guarantee a successful rise.
- Combine Remaining Dough Ingredients.
Once your yeast mixture is gloriously frothy and active, add the bread flour, olive oil, and salt to the same bowl. Using a sturdy wooden spoon or a robust rubber spatula, stir vigorously until all the ingredients are thoroughly combined and form a smooth, though perhaps slightly shaggy, dough. For this quick recipe, you don’t need extensive, laborious kneading; simply mix until no dry streaks of flour remain visible. Cover the bowl lightly with a clean kitchen towel or plastic wrap and let the dough rest for just 5 minutes. This brief rest period is vital as it allows the gluten to relax, making the dough much easier to handle and shape without excessive resistance.
- Pat or Roll Pizza Dough into Desired Shape.
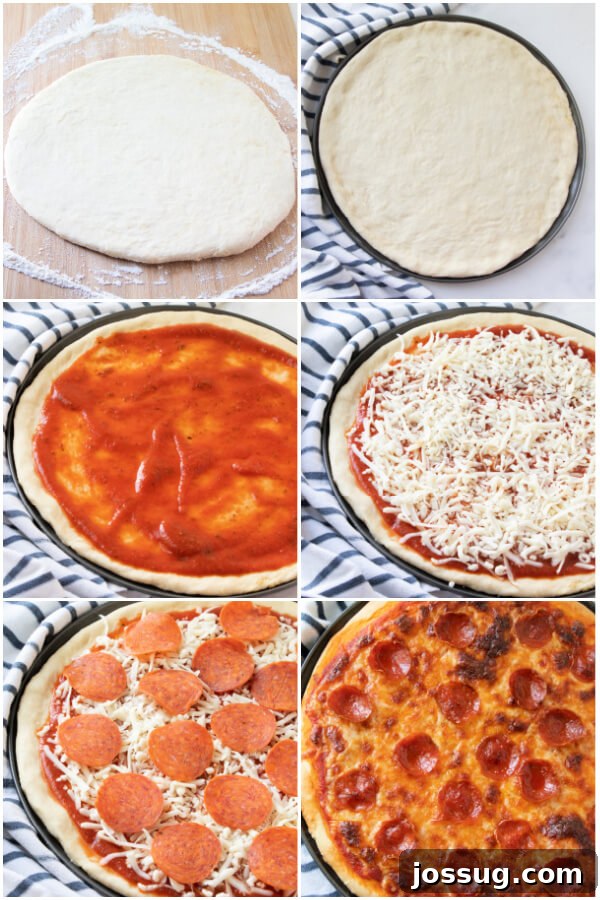
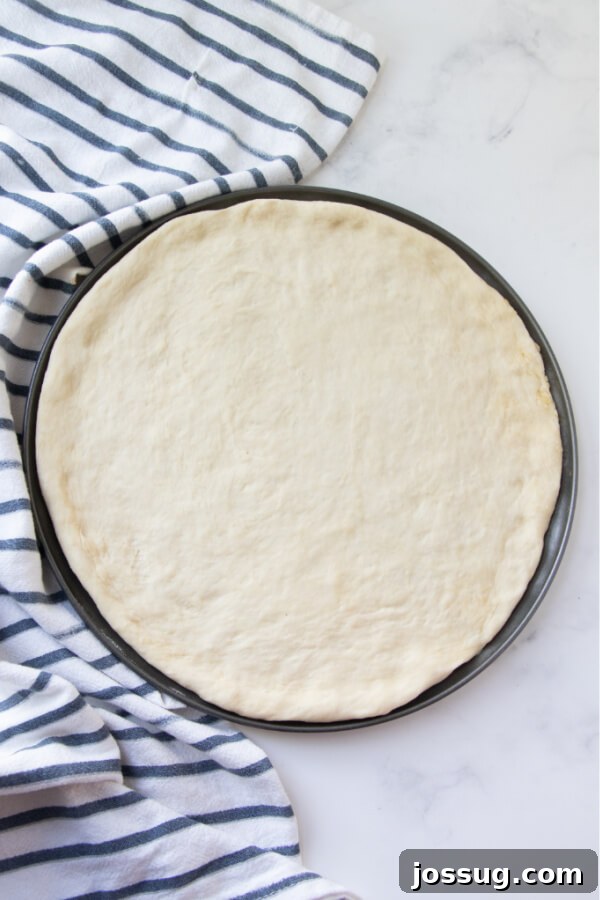
Lightly flour a clean work surface, such as your countertop or a large cutting board. Turn the rested dough out onto the floured surface. You have two main options for shaping: you can gently pat the dough out with your hands, working from the center outwards, into your desired pizza shape (a classic round, a rustic rectangle, or even an irregular freeform for a homemade charm). Alternatively, you can use a rolling pin for a more uniform thickness. Aim for an even thickness, typically around ¼ inch. If the dough springs back significantly or is difficult to stretch, simply let it rest for another 5 minutes – it just needs a little more time to relax its gluten structure.
- Transfer Dough to Pan and Add Toppings.
Carefully transfer your shaped pizza crust to a lightly greased pizza pan, a large baking sheet, or a baker’s peel that has been lightly dusted with a sprinkle of cornmeal. The cornmeal serves a dual purpose: it helps prevent the dough from sticking to the pan and adds a delightful extra crispness to the bottom of the crust. Evenly spread your chosen pizza sauce over the dough, ensuring you leave a small border around the edge for the crust. Then, generously sprinkle with your shredded mozzarella cheese and arrange your desired toppings artistically over the cheese. Don’t overload it, as too many toppings can make the crust soggy.
- Bake Until Golden Brown and Bubbly.
Carefully slide your prepared pizza into the intensely preheated oven (or directly onto your hot pizza stone/steel). Bake for 15-20 minutes. The exact baking time can vary slightly depending on your specific oven and the quantity/type of toppings you’ve used, so keep a close eye on it. You’re looking for a beautiful golden-brown crust and bubbling, slightly browned cheese that indicates perfect doneness. Begin checking for readiness after about 12-15 minutes to prevent overcooking.
- Cool, Slice, and Serve Your Masterpiece.
Once baked to golden perfection, carefully remove the pizza from the oven using oven mitts. As tempting as it may be, resist the urge to cut into it immediately! Allow the pizza to cool on a cutting board or wire rack for approximately 5 minutes. This crucial cooling period allows the cheese and toppings to set properly, preventing them from sliding off when you slice. After cooling, use a sharp pizza wheel to slice your magnificent homemade creation into wedges, and serve it hot to your eagerly awaiting family and friends. Enjoy the delicious fruits of your labor!

Pizza Dough FAQs: Your Questions Answered for Perfect Pizza Every Time
Even with a simple and straightforward recipe, questions can arise, especially when you’re aiming for pizza perfection. Here are some of the most common inquiries about making and managing pizza dough, designed to help you troubleshoot, understand the process better, and master your homemade pizza journey with confidence.
Absolutely! Preparing a batch of dough and freezing individual portions is an excellent strategy for future busy weeknight pizza nights. To freeze, prepare the dough completely as outlined in the recipe steps, up to the point of shaping. Lightly coat the dough ball with olive oil, then place it in a freezer-safe, airtight container or a heavy-duty zip-top bag. Make sure to press out as much air as possible from the bag to prevent freezer burn, which can affect texture. The dough can be successfully frozen for up to three months without significant loss of quality. When you’re ready to bake, transfer the frozen dough to the refrigerator to thaw slowly overnight, or place it on the countertop for a few hours until it reaches room temperature. It’s crucial to allow the dough to come to room temperature completely before attempting to roll it out, as cold dough will be stiff, difficult to work with, and prone to tearing.
Yes, pizza dough can be successfully refrigerated for 1-3 days. This is a fantastic option if you prefer to prep ahead of time or if you’re experimenting with a slow cold-proof for a more complex flavor development (though this specific recipe is designed for quick use). After preparing the dough, lightly coat it with a thin layer of olive oil and place it in an airtight container or a bowl covered tightly with plastic wrap to prevent it from drying out or forming a crust. Store it in the coldest part of your refrigerator. When you’re ready to make pizza, remove the dough from the fridge at least 30-60 minutes before you plan to use it. Allowing it to gradually come back to room temperature makes it much more pliable, elastic, and easier to stretch into your desired shape without tearing or shrinking back excessively.
A disappointing lack of rise is a common issue for many bakers, and it typically boils down to one of three primary culprits: old or inactive yeast, improper water temperature, or insufficient activation. First, always check the expiration date on your active dry yeast; yeast loses its potency over time. Second, the water temperature is absolutely critical: if it’s too hot (above 120°F/49°C), it will kill the delicate yeast organisms, rendering them useless. Conversely, if the water is too cold, the yeast won’t activate and multiply effectively. Aim for a comfortable 110-115°F (43-46°C). Lastly, ensure proper activation: active dry yeast *must* froth and expand for about 5-10 minutes when initially mixed with warm water and a small amount of sugar. If you don’t observe this frothing, your yeast isn’t active, and the dough will not rise. It’s always a good practice to “proof” your yeast first to confirm its viability before combining it with flour.
Yes, you can certainly use all-purpose flour in place of bread flour in this recipe, and you will still achieve a delicious pizza. However, it’s important to be aware that there will be a noticeable difference in the final texture of your pizza crust. Bread flour has a higher protein content (typically 12-14%), which leads to greater gluten development, giving the crust its characteristic chewiness, elasticity, and structure. When using all-purpose flour (which has a lower protein content, usually 10-12%), your crust may be slightly less chewy, a bit softer, and might not achieve the same level of crispness. While it will still make a perfectly acceptable pizza, for that ideal, authentic pizza parlor chew and structure, bread flour is the preferred choice for optimal results.
Achieving a truly crispy pizza crust involves a few key factors working in harmony. Firstly, a very hot oven is absolutely essential (aim for 450-500°F or 232-260°C). If you have a pizza stone or baking steel, preheating it in the oven for at least 30-60 minutes before baking will provide an intense, even heat that quickly crisps the bottom of the crust, creating that coveted crunch. Secondly, avoid overloading your pizza with too many wet toppings, as excessive moisture can release steam and lead to a soggy crust. Lastly, ensure your dough is rolled or patted to a consistent, relatively thin thickness (unless you explicitly prefer a thicker, chewier crust). A small amount of olive oil on your pizza pan and a light sprinkle of cornmeal before placing the dough also significantly contribute to that desired, irresistible crunch.
Working with dough can sometimes be a sticky affair, especially if it’s a bit wetter or if you’re new to handling it. The key to preventing sticking is the judicious use of flour on your hands and work surface. Don’t douse it excessively, but use enough so that the dough does not readily adhere. Alternatively, you can lightly oil your hands and the counter with a tiny bit of olive oil – this technique is often preferred for more delicate or wetter doughs as it doesn’t dry out the dough as much as excess flour. If the dough feels excessively sticky and unmanageable, it might have too much water – try incorporating a tablespoon or two of flour at a time until it reaches a more manageable consistency. Conversely, if it feels too dry and crumbly, add a teaspoon of water at a time. Remember, practice makes perfect, and you’ll quickly develop a feel for the right dough consistency!

For over two decades, my family and I have relied on Aunt Tammy’s simple yet spectacular pizza dough recipe, and it remains as beloved today as it was the very first time I whipped it up. There’s something truly magical and incredibly satisfying about transforming basic pantry ingredients into a fresh, flavorful, and satisfying meal that everyone gathers around, eager for a slice. This recipe has not only provided countless delicious meals but also created lasting memories during our pizza nights.
If you’ve decided to embark on your own homemade pizza adventure with this recipe, I would absolutely love to hear about your experience! Did it become an instant hit with your household? Were there any fun moments (or minor, easily overcome challenges!) during your pizza-making process? Did the kids join in the fun, helping to stretch the dough and sprinkle toppings, making it a true family pizza night tradition? Share your stories, tips, and thoughts in the comments section below – I cherish hearing from each and every one of you and love to know how these recipes bring joy to your kitchens!

Other Pizza & Bread-Inspired Recipes You May Enjoy
If you loved making this quick and easy pizza dough, you might also enjoy exploring other delightful recipes that celebrate the versatility of pizza and various bread creations. Expand your culinary repertoire and discover new family favorites with these fantastic ideas:
- Tortilla Pizza: A brilliant, super-fast solution to satisfy your pizza cravings using simple tortillas as a deliciously crisp base. Perfect for quick lunches or snacks!
- Cheesy Breadsticks: The ultimate companion to any Italian meal or a fantastic stand-alone snack. These irresistible cheesy delights are perfect for dipping in warm marinara sauce and are always a crowd-pleaser.
- Brunch Pizza: Reinvent your breakfast or brunch with this innovative pizza, featuring savory toppings like eggs, crispy bacon or sausage, and a medley of cheeses. A delightful twist on morning meals!
- Chicken Bacon Ranch Naan Bread Pizza: An incredibly easy and flavorful individual pizza, utilizing convenient naan bread as a soft, chewy base, topped with a creamy ranch sauce, chicken, and bacon.
- Elote Pizza (aka Mexican Street Corn Pizza): Embark on a flavor adventure with this unique and vibrant pizza, inspired by the beloved classic Mexican street corn. A truly exciting and fresh taste experience!
- French Bread Pizza: A nostalgic and wonderfully quick meal that leverages the hearty and crusty texture of French bread as a robust base for all your favorite pizza toppings.
Quick and Easy Homemade Pizza Dough
This incredibly simple and quick pizza dough recipe allows you to make perfect, chewy, golden, and crisp homemade pizza in just 30 minutes with minimal ingredients. Ideal for a fun family pizza night, it’s a recipe you’ll come back to again and again!
Equipment Needed
- Rubber spatula or wooden spoon
- Measuring cups and spoons
- Mixing bowl (medium size)
- 4-Inch Pizza Wheel (Stainless Steel recommended)
- Pizza Pan, 14 inch (or a large baking sheet, pizza stone, or baking steel)
Ingredients
For the Quick Pizza Dough
- 1 package (0.25 ounce / 7g) active dry yeast
- 1 teaspoon granulated sugar
- 1 cup warm water (110-115°F / 43-46°C)
- 2 ½ cups bread flour (or all-purpose flour for a slightly softer crust)
- 2 tablespoons olive oil
- 1 teaspoon salt
For Assembling Your Perfect Pizza
- Pizza sauce (your favorite brand or homemade)
- Shredded Mozzarella cheese (quantity to your liking)
- Assorted pizza toppings (e.g., pepperoni, mushrooms, bell peppers, onions, cooked meats)
Instructions
- Preheat Oven: Preheat your oven to 450°F (232°C). If you are using a pizza stone or baking steel, place it in the oven now to heat thoroughly.
- Activate Yeast: In a medium mixing bowl, dissolve the active dry yeast and granulated sugar in the warm water. Allow the mixture to stand for 5-10 minutes until it becomes frothy, indicating the yeast is active.
- Mix Dough: To the activated yeast mixture, add the bread flour, olive oil, and salt. Stir vigorously with a wooden spoon or rubber spatula until all ingredients are well combined and a smooth dough forms. Let the dough rest in the bowl for 5 minutes.
- Shape Crust: Lightly flour a clean work surface. Turn the rested dough out onto the floured surface and pat or roll it into your desired pizza shape and thickness (typically ¼ inch).
- Transfer and Top: Carefully transfer the shaped crust to a lightly greased pizza pan or a baker’s peel dusted with cornmeal. Spread your chosen pizza sauce evenly over the crust, leaving a small border. Then, generously top with shredded mozzarella and your favorite pizza toppings.
- Bake Pizza: Bake in the preheated oven for 15-20 minutes, or until the crust is beautifully golden brown and the cheese is bubbly and slightly browned.
- Cool and Serve: Carefully remove the baked pizza from the oven. Let it cool on a cutting board or wire rack for 5 minutes before slicing and serving. This cooling period helps the toppings set.
Recipe Notes
- For a slightly different texture, you can use all-purpose flour in place of bread flour. However, please note that the crust may not be as chewy or crisp as it would be with bread flour.
- The provided nutrition information is an estimation and applies solely to the pizza crust, not including any added toppings or sauces.
Nutrition Information (Crust Only)
Serving: 1 slice,
Calories: 177kcal,
Carbohydrates: 29g,
Protein: 5g,
Fat: 4g,
Saturated Fat: 1g,
Polyunsaturated Fat: 1g,
Monounsaturated Fat: 3g,
Sodium: 293mg,
Potassium: 48mg,
Fiber: 1g,
Sugar: 1g,
Vitamin A: 1IU,
Vitamin C: 0.003mg,
Calcium: 7mg,
Iron: 0.4mg
This nutrition information is automatically calculated and should be considered an approximation based on the dough ingredients alone.