
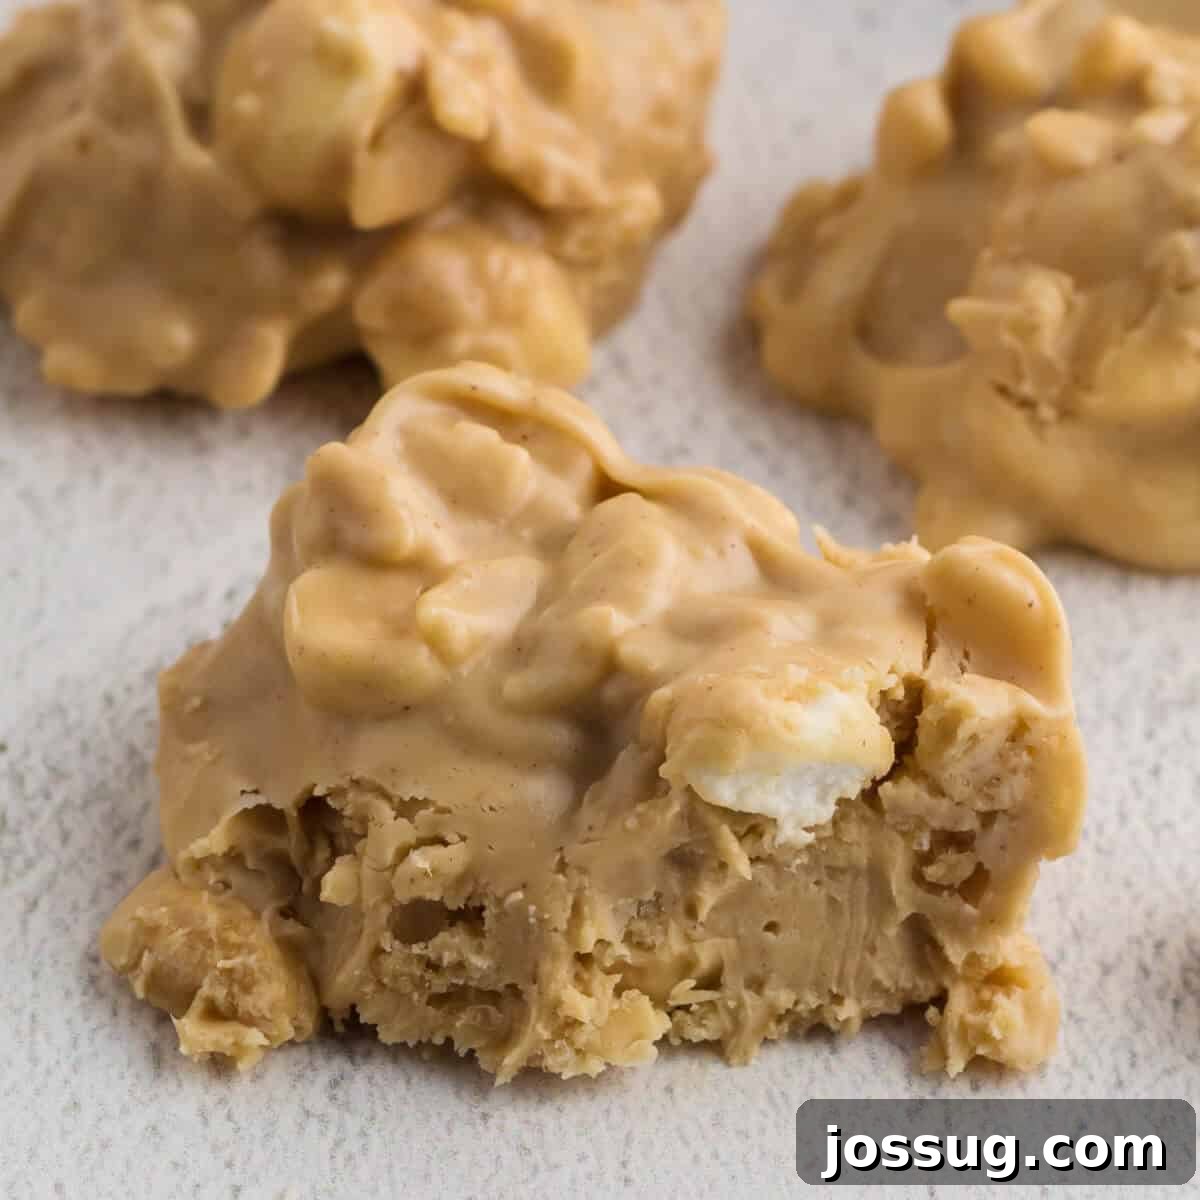
Prepare to be delighted by these incredibly easy No-Bake Rocky Mountain Snowdrops, famously known as Avalanche Cookies! These delightful treats are the perfect solution for anyone craving a quick, satisfying, and utterly peanut buttery dessert without the hassle of baking. Whether you’re short on time, avoiding the oven on a hot day, or simply looking for a fun recipe to make with kids, these cookies deliver maximum flavor with minimal effort.
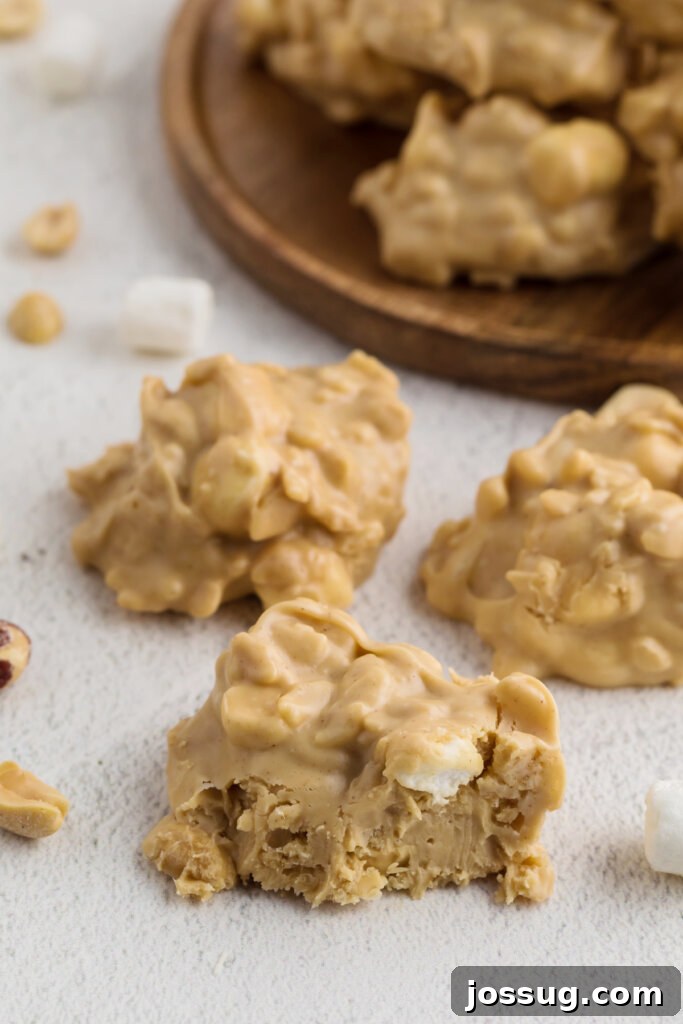
Easy No-Bake Rocky Mountain Snowdrops: The Ultimate Avalanche Cookies Recipe
Welcome to the world of effortless indulgence! Our Rocky Mountain Snowdrops, widely celebrated as Avalanche Cookies, are more than just a cookie – they’re a delightful confection that blurs the line between a traditional cookie and a rich, satisfying candy. Whatever you choose to call them, their irresistible blend of sweet, creamy, and crunchy textures guarantees they’ll be a hit. Get ready to fall in love with a treat that’s as fun to make as it is to eat.
What Are Rocky Mountain Snowdrops (Avalanche Cookies)?
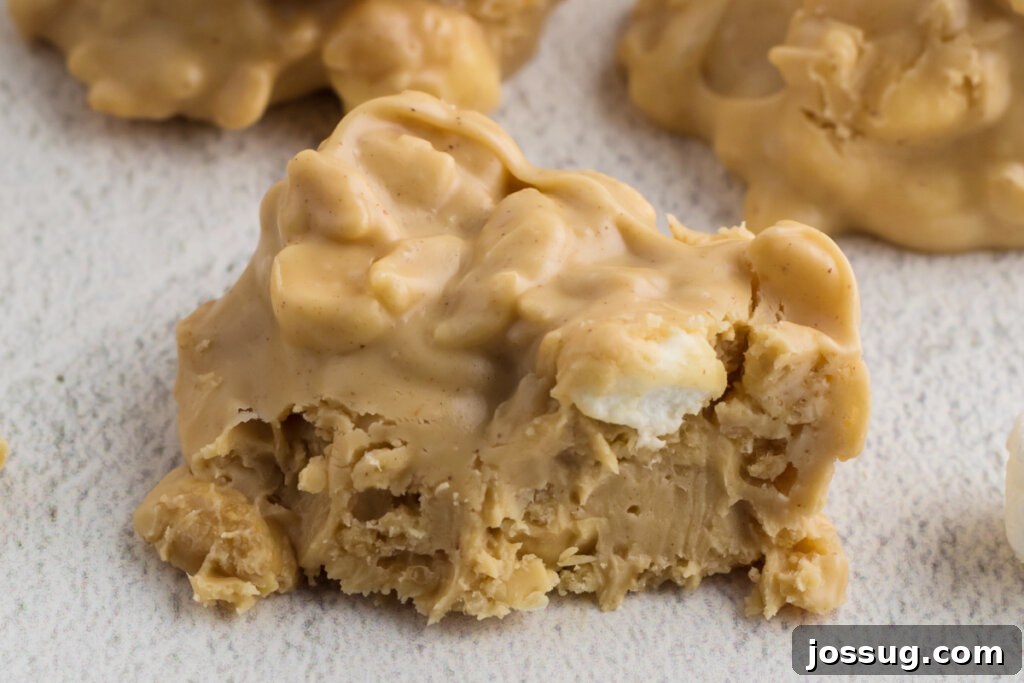
Rocky Mountain Snowdrops, or Avalanche Cookies, are a beloved no-bake confection known for their simple preparation and complex flavor profile. Imagine a rich mixture of melted white chocolate and creamy peanut butter, generously studded with crispy rice cereal, fluffy mini marshmallows, and savory dry roasted peanuts. Once mixed, this delightful concoction is dropped into bite-sized mounds and allowed to set, transforming into a firm, chewy, and crunchy treat. Each bite offers a harmonious balance of sweet white chocolate, salty peanut butter, and varying textures, making them uniquely addictive. They get their charming names from their appearance – resembling snow-covered peaks or a delicious avalanche of ingredients – and are a testament to how incredible simple ingredients can be when combined perfectly.
Why You’ll Love This No-Bake Recipe
The beauty of Rocky Mountain Snowdrops lies in their sheer simplicity and delightful results. This recipe is an absolute game-changer for several reasons:
- Effortless Preparation: No oven required! This makes them perfect for hot summer days, busy weeknights, or when you simply don’t want to heat up your kitchen.
- Speedy Satisfaction: From start to finish, these cookies come together incredibly fast, with most of the time dedicated to cooling. You can have a batch ready to enjoy in just a couple of hours.
- Kid-Friendly Fun: This is an ideal recipe for involving the little ones. They can help with measuring, mixing, and dropping the mounds, making it a fantastic activity for budding chefs.
- Irresistible Flavor: If you’re a peanut butter enthusiast, these are a dream come true. The combination of white chocolate and peanut butter is truly magical, enhanced by the added crunch and chew.
- Versatile Treat: Perfect for any occasion – from casual snacking and after-school treats to holiday platters and potlucks. They travel well and are always a crowd-pleaser.
- Minimal Cleanup: With no baking, there’s less mess to deal with, leaving you more time to savor your delicious creation.
This dessert recipe is so quick and easy, you’ll wonder why you haven’t made them sooner. Get ready to experience the joy of homemade treats without the fuss!
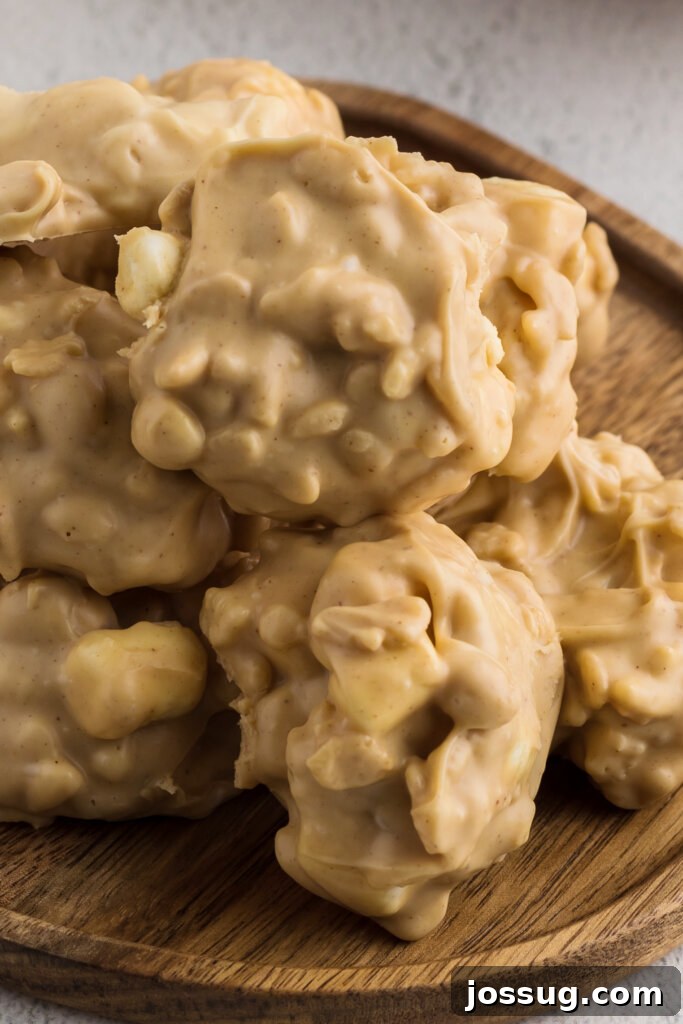
How to Make Rocky Mountain Snowdrops: Your Simple Guide to No-Bake Perfection
Crafting these delectable no-bake cookies is incredibly straightforward. Follow these steps for a perfect batch every time:
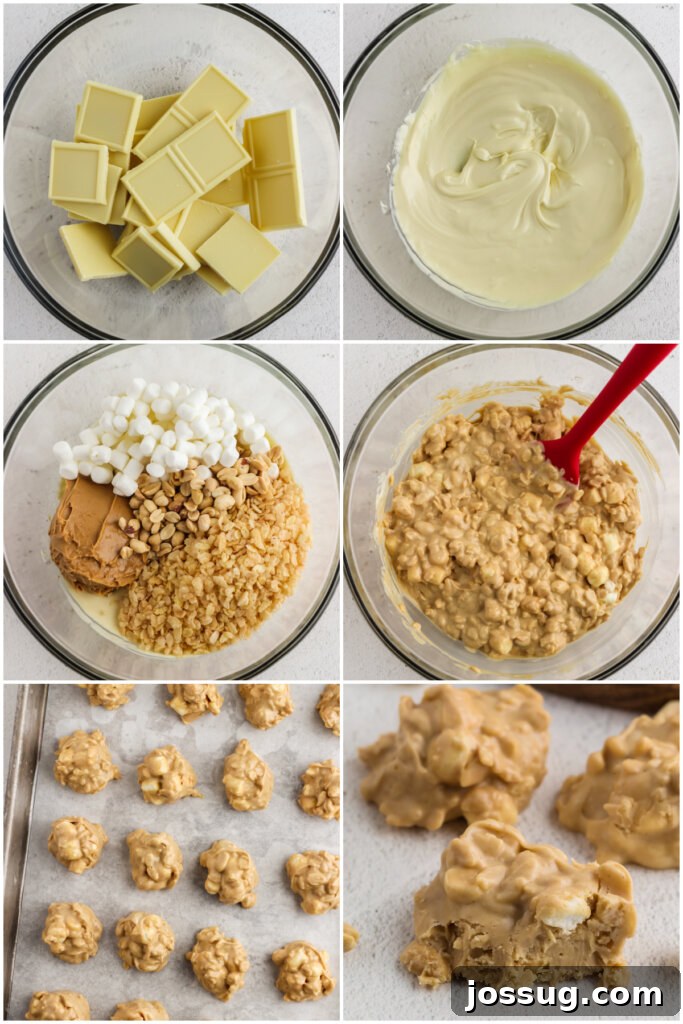
- **Prepare Your Workspace:** Begin by lining a baking sheet (or two, depending on size) with parchment paper or wax paper. This crucial step prevents sticking and makes for easy removal of the cooled cookies. Set this aside.
- **Melt the Chocolate:** In a double boiler over simmering water (or a heat-proof bowl set over a saucepan of gently simmering water), gently melt the white chocolate. Stir occasionally until it’s smooth and fully melted. Alternatively, you can use a microwave; see our “Pro Tips” section for microwave instructions. Once melted, remove the bowl from the heat and allow the chocolate to cool slightly for a few minutes. This prevents the marshmallows from melting too much and ensures a better texture.
- **Combine Ingredients:** While the chocolate is still warm and in its liquid state (but not piping hot), add the creamy peanut butter, crispy rice cereal, fluffy mini marshmallows, and crunchy dry roasted peanuts to the bowl. Stir diligently with a rubber spatula or wooden spoon until all ingredients are thoroughly combined and coated in the chocolate-peanut butter mixture. Ensure an even distribution of all components.
- **Form the Cookies:** Using a 2-tablespoon cookie scoop or two spoons, drop rounded mounds of the mixture onto your prepared baking sheet. Leave a little space between each cookie to prevent them from merging as they settle.
- **Cool and Serve:** Allow the cookies to cool completely at room temperature until they are firm and set. This typically takes a couple of hours, but you can speed up the process by placing them in the refrigerator. Once fully cooled, they are ready to be enjoyed!
Creative Variations & Customization Ideas
One of the best things about Avalanche Cookies is how versatile they are! Feel free to get creative and customize them to suit your taste or occasion:
- **Add More Chocolate:** For an extra dose of chocolatey goodness, stir in mini chocolate chips along with the other ingredients, or sprinkle some on top of the formed cookies before they set. Both options are delightful!
- **Festive Sprinkles:** Making these for a holiday or celebration? Add some colorful festive sprinkles on top of the cookies while they’re still warm and before they set. This instantly elevates their appearance and makes them even more fun.
- **Cereal Swap:** Instead of traditional Rice Krispies, try using Cap’n Crunch Peanut Butter Cereal for an even more intense peanut butter flavor and unique texture. You can lightly crush the cereal if you prefer smaller, more uniform pieces. Other crispy cereals like Corn Flakes or Cheerios can also work for different textural experiences.
- **Nutty Alternatives:** If you’re not a fan of peanuts or want to try something different, simply omit the dry roasted peanuts and substitute them with extra rice cereal for more crunch, or try another nut like chopped almonds or pecans.
- **Nut Butter Exploration:** While peanut butter is classic, feel free to experiment with other favorite nut butters. Almond butter or cashew butter can offer a slightly different flavor profile. For a decadent twist, try using Nutella for a chocolate-hazelnut delight, or Biscoff Cookie Butter for a unique spiced cookie flavor.
- **Candy Add-ins:** Stir in other small candies like M&M’s, chopped candy bars, or even miniature caramel bits for additional flavors and textures.
- **A Touch of Spice:** A pinch of cinnamon or a dash of vanilla extract added with the peanut butter can subtly enhance the overall flavor.
Storage and Freezing Tips for Maximum Freshness
Proper storage ensures your Rocky Mountain Snowdrops remain fresh and delicious for as long as possible. Here’s how to keep them at their best:
- **Room Temperature Storage:** For immediate enjoyment, these cookies can be stored in an airtight container at room temperature for about 5-7 days. It’s best to keep them out of direct sunlight and away from heat sources to prevent the chocolate from softening.
- **Refrigeration:** If you want to extend their shelf life, place the cooled cookies in an airtight container and refrigerate them. They will stay fresh for up to 10-14 days in the fridge. The colder temperature helps them maintain their firm texture.
- **Freezing for Long-Term Storage:** Yes, you can freeze no-bake cookies! Once the Avalanche Cookies are completely cooled and fully set, transfer them to an airtight freezer-safe container. To prevent them from sticking together, place a sheet of parchment paper or wax paper between each layer of cookies. They can be stored in the freezer for up to 2-3 months.
- **Thawing Frozen Cookies:** To enjoy frozen cookies, simply remove them from the freezer and let them thaw. You can place them in the refrigerator overnight, or leave them at room temperature for a few hours until they are completely thawed and softened to your liking.
Always remember to use an airtight container to protect your cookies from air exposure, which can lead to staleness and absorption of other refrigerator odors.
Frequently Asked Questions About Rocky Mountain Snowdrops
No, not necessarily for short-term storage. If you plan to eat them within 5-7 days, storing them in an airtight container at room temperature is perfectly fine. However, if you’d like them to last longer or prefer a firmer texture, refrigerating them can extend their freshness for up to 10-14 days.
Absolutely! No-bake cookies freeze beautifully. Once your Avalanche Cookies are completely cooled and set, arrange them in a single layer in an airtight, freezer-safe container. For layered storage, place a piece of parchment or wax paper between each layer to prevent sticking. They can be stored in the freezer for up to 2-3 months. When you’re ready to enjoy them, simply let them thaw in the refrigerator overnight or at room temperature until softened.
When stored correctly in an airtight container, these delicious cookies will maintain their quality for about a week at room temperature. If kept in the refrigerator, their freshness can be extended to approximately two weeks. For even longer enjoyment, freezing is a great option as detailed above.
While creamy, conventional peanut butter is recommended for its consistency and setting properties, you can try natural peanut butter. However, be aware that natural peanut butter tends to be runnier and may alter the final texture, potentially requiring slightly longer cooling times or a bit more cereal for binding. Stir it very well before adding to the melted chocolate.
This recipe can easily be made gluten-free! Simply ensure that you use certified gluten-free rice cereal. All other main ingredients (white chocolate, peanut butter, marshmallows, peanuts) are typically gluten-free, but always double-check product labels to be certain.
Pro Tips for Perfect Rocky Mountain Snowdrops Every Time
Achieving the perfect batch of Rocky Mountain Snowdrops is easy with these helpful tips:
- **Accelerate Cooling:** If you’re eager to enjoy your cookies sooner, pop the baking sheet into the refrigerator for about 30-60 minutes. This will help them set much faster than at room temperature.
- **Microwave Melting Method:** Don’t have a double boiler? No problem! You can melt the white chocolate in the microwave. Place the chocolate in a microwave-safe bowl and heat it on half-power (or 50% power) in 30-second increments. Stir thoroughly after each interval to prevent burning. Continue until the chocolate is smooth and fully melted.
- **Prevent Sticking During Storage:** When layering cookies in an airtight container for storage, always place a piece of wax paper or parchment paper between each layer. This simple step prevents them from sticking together, making it easy to grab a single cookie without damaging the others.
- **Bars or Squares Option:** If you prefer a more structured treat, you can easily turn this recipe into bars or squares. Line a 9×9-inch baking dish with parchment paper or wax paper, leaving an overhang on the sides for easy removal. Pour the entire mixture into the lined pan and spread it evenly. Allow it to cool completely and set. Once firm, use the overhanging paper to lift the entire block out of the pan. Remove the paper and then cut the mixture into your desired bar or square shapes.
- **Choose Your White Chocolate Wisely:** While white chocolate baking bars are often preferred for their smooth melting, you can also use white chocolate chips or white melting chocolate (often labeled as “candy melts” or “almond bark”). Each type melts slightly differently, so adjust your melting method as needed to achieve a smooth consistency.
- **Mess-Free Peanut Butter Measuring:** Peanut butter can be sticky! For an easy, no-mess way to measure it, line your measuring cup with plastic wrap before adding the peanut butter. Once measured, simply lift the plastic wrap, and the peanut butter will plop right out into your mixture without leaving a sticky residue in your measuring cup.
More Delicious No-Bake Peanut Butter Delights You’ll Love
If you’ve fallen in love with the ease and flavor of these Rocky Mountain Snowdrops, you’re in for a treat! The world of no-bake desserts, especially those featuring peanut butter, is vast and wonderful. Here are some other fantastic recipes that celebrate the irresistible combination of sweet and nutty, all without turning on your oven:
- **Peanut Butter Balls:** A classic holiday favorite, these rich, fudgy spheres are typically coated in chocolate for an extra layer of decadence.
- **No-Bake Peanut Butter Cookie Bars:** Similar to our Avalanche Cookies but often without the white chocolate base, these bars offer a dense, chewy peanut butter experience.
- **No-Bake Peanut Butter Pie:** A creamy, dreamy dessert featuring a rich peanut butter filling in a crushed cookie crust, often topped with whipped cream or chocolate drizzle.
- **Peanut Butter Frosting (No-Bake Application):** While a frosting, this creamy concoction can be used as a delicious no-bake dip or spread for cookies and fruit.
- **Peanut Butter Fudge:** A smooth, melt-in-your-mouth fudge that’s surprisingly easy to make on the stovetop and sets without baking.
These recipes prove that you don’t need an oven to create amazing, satisfying desserts. They are perfect for expanding your no-bake repertoire and keeping your sweet tooth happy!
Average Rating: 4.41 out of 5 stars from 245 votes
25
cookies
Rocky Mountain Snowdrops
Jamie Sherman
10 mins
10 mins
2 hrs
2 hrs
20 mins
Rate This
Print Recipe
Equipment
-
Baking Sheets
-
Parchment Paper
-
Cookie Scoop
-
Measuring Cups and Spoons
-
Rubber Spatula or Wooden Spoon
-
Mixing Bowl
-
Stainless Steel Double Boiler Pot for Melting Chocolate
Ingredients
- 1 pound white chocolate
- ¾ cup creamy peanut butter
- 1 ½ cups Rice Krispies cereal
- 1 ½ cups mini marshmallows
- ½ cup dry roasted peanuts
Instructions
-
Line a baking sheet with parchment or wax paper and set it aside.
-
Melt the white chocolate in a double boiler over simmering water (or in the microwave, following our pro tips). Remove from heat and allow the chocolate to cool slightly for a few minutes.
-
While the chocolate is still warm and melted, stir in the creamy peanut butter, Rice Krispies cereal, mini marshmallows, and dry roasted peanuts until all ingredients are well combined and thoroughly coated.
-
Using a 2-tablespoon cookie scoop or two spoons, drop rounded mounds of the mixture onto the prepared baking sheet.
-
Allow the cookies to cool completely and set before serving. This can be done at room temperature or in the refrigerator to speed up the process.
Notes
- Cool the cookies faster by popping the baking sheet into the fridge for about 30-60 minutes.
- If using a microwave instead of a double boiler, melt the chocolate on half-power in 30-second increments, stirring well after each session, until smooth and melted.
- When storing, place wax paper between layers of cookies in an airtight container to prevent them from sticking.
- To make bars or squares, line a 9×9-inch baking dish with parchment paper (leaving an overhang), pour the mixture in, spread evenly, and cool completely. Lift the slab out using the paper and cut into desired shapes.
- You can use white chocolate baking bars, white chocolate chips, or white melting chocolate/almond bark for this recipe.
- For a no-mess way to measure peanut butter, line your measuring cup with plastic wrap before filling. The peanut butter will easily release when you add it to the mixture.
Nutrition
Serving: 1 cookie, Calories: 178 kcal, Carbohydrates: 17g, Protein: 4g, Fat: 11g, Saturated Fat: 5g, Polyunsaturated Fat: 1g, Monounsaturated Fat: 4g, Cholesterol: 4mg, Sodium: 73mg, Potassium: 117mg, Fiber: 1g, Sugar: 14g, Vitamin A: 117IU, Vitamin C: 1mg, Calcium: 42mg, Iron: 1mg
Nutrition information is automatically calculated, so should only be used as an approximation.
Enjoy these delightful, no-fuss Rocky Mountain Snowdrops, and don’t forget to share your creations and comments below!