

Welcome to your new favorite dessert sensation! This incredible No-Bake Peanut Butter Pie recipe is not just quick and easy, but also unbelievably indulgent. It’s the perfect solution for satisfying your sweet tooth on a busy weekday or impressing guests at last-minute gatherings without the fuss of turning on your oven. Prepare to fall head over heels for its rich flavor and delightful, melt-in-your-mouth texture!
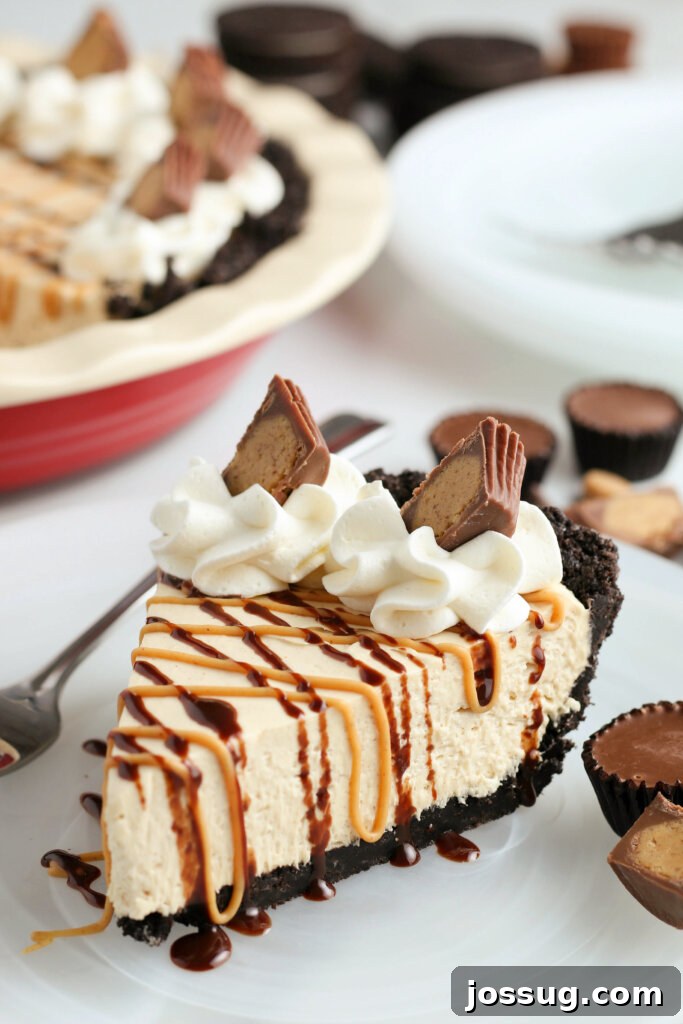
No-Bake Peanut Butter Pie: The Ultimate Easy Dessert Experience
Few flavor combinations capture hearts and taste buds quite like the dynamic duo of chocolate and peanut butter. When these two beloved powerhouses unite in a luscious, creamy pie that demands absolutely no baking, you know you’ve discovered a truly remarkable recipe! This heavenly No-Bake Peanut Butter Pie is destined to become your signature dessert, captivating everyone who tries it with just one unforgettable bite. Say goodbye to complicated culinary endeavors and hello to pure, unadulterated dessert bliss!
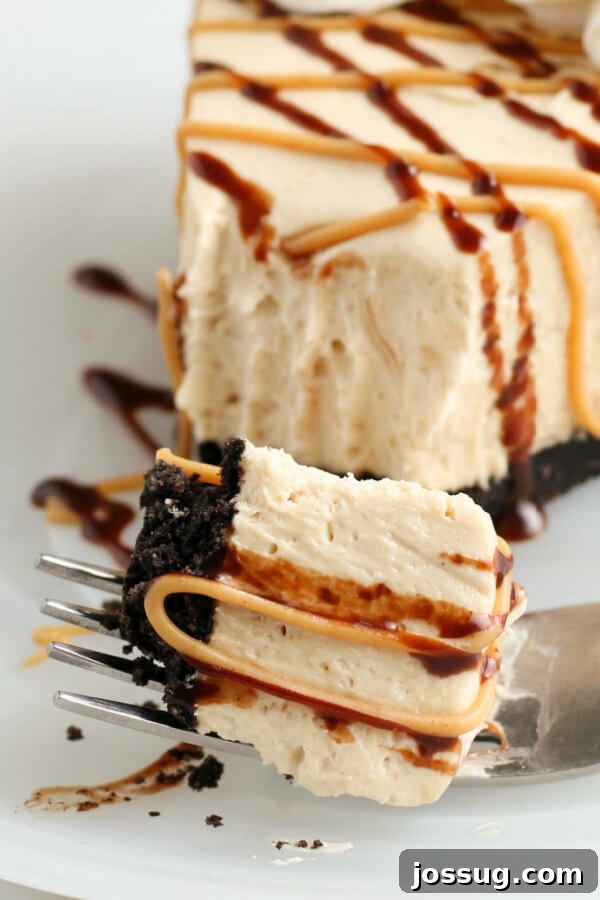
Honestly, I almost feel a little mischievous sharing just how ridiculously good and deceptively simple this peanut butter pie recipe truly is. It’s beyond exceptional. While I confess to having a deep affection for many desserts, I sincerely mean it when I say this one stands out from the crowd. The exquisite contrast between the sturdy, rich chocolate cookie crust and the velvety-smooth, melt-in-your-mouth peanut butter filling creates an incredible textural symphony. And the perfectly balanced chocolatey-peanut taste? It’s simply out of this world, hitting all the right notes of sweet, salty, and savory perfection in every spoonful.
One of the most appealing qualities of this no-bake wonder is its incredible versatility. It fits seamlessly as a dessert for any meal or occasion, regardless of the season. Craving something light, refreshing, and chilled to beat the summer heat? This peanut butter pie is your ideal companion. Need something comforting, hearty, and satisfying during the colder winter months? Again, this peanut butter pie delivers. It possesses a remarkable ability to feel both surprisingly light on the palate and wonderfully filling at the same time – a unique balance you’ll have to experience to truly appreciate. This easy no-bake pie recipe is never overwhelming, never underwhelming; it’s consistently just right.
Oh, and the best part, which warrants repeating: it’s NO-BAKE! You heard correctly – this magnificent peanut butter pie requires absolutely no oven time! This means you simply combine your ingredients, pour them into the prepared crust, and let your refrigerator (or freezer, for a quicker set) handle all the hard work of chilling and solidifying for a few hours. This makes it an absolute lifesaver when your oven is already occupied, perhaps during the bustling holiday season or a large family gathering where oven space is a precious and competitive commodity. It’s truly wonderful to have a show-stopping dessert that doesn’t demand prime oven real estate, freeing you up to focus on other culinary delights or simply relax.
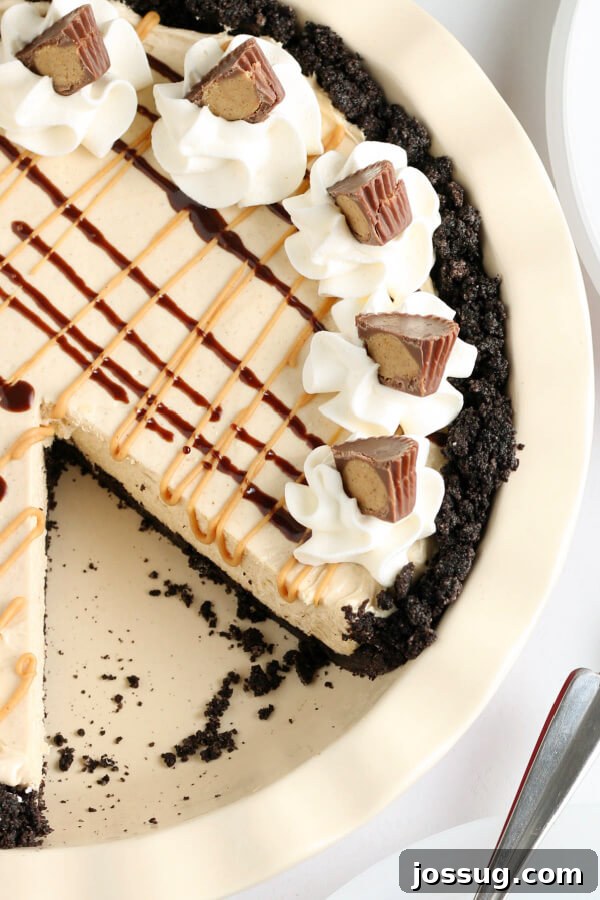
Crafting Your Dream No-Bake Peanut Butter Pie: Ingredients and Preparation
Creating this irresistible dessert is surprisingly straightforward, making it an excellent choice even for novice bakers. The magic lies in simple, readily available ingredients and a few easy-to-follow steps. Let’s gather everything you’ll need to whip up this creamy, decadent confection that will surely become a household favorite.
Essential Ingredients for Your Perfect Peanut Butter Pie
For the Decadent Chocolate Cookie Crust:
- 26 Oreo Chocolate Sandwich Cookies with Filling: These iconic cookies provide the perfect foundation for our pie. The chocolatey flavor offers a fantastic contrast to the rich peanut butter, and the cream filling within the Oreos helps bind the crumbs together beautifully when combined with butter, resulting in a firm yet tender crust.
- 6 Tablespoons Unsalted Butter, Melted: Butter is the crucial binding agent that transforms the crushed cookies into a cohesive, flavorful crust. Using unsalted butter allows you to control the overall saltiness of the pie, ensuring it’s perfectly balanced. Make sure it’s fully melted for easy mixing.
For the Silky-Smooth Peanut Butter Filling:
- ½ Cup Creamy Peanut Butter: This is, naturally, the star ingredient for our luscious filling. Opt for a smooth, creamy peanut butter for the best possible texture. Avoid using natural peanut butter that tends to separate, as its oil content can affect the consistency of the filling. Classic commercial creamy peanut butter works best here.
- 1 Package (8 oz.) Cream Cheese, Softened: Full-fat cream cheese adds a delightful tang and contributes to the wonderfully rich, stable, and undeniably creamy base of the filling. It’s absolutely essential that your cream cheese is softened to room temperature before mixing to prevent any lumps and ensure a perfectly smooth consistency.
- ½ Cup Powdered Sugar (Confectioners’ Sugar): This finely milled sugar is ideal for our no-bake filling because it dissolves easily and completely, ensuring a silky-smooth texture without any undesirable grittiness. It provides just the right amount of sweetness to complement the peanut butter.
- 1 Container (8 oz.) Whipped Topping (e.g., Cool Whip), Thawed: This ingredient is key to achieving the light, airy, and fluffy texture of the filling. Ensure the whipped topping is thoroughly thawed in the refrigerator before using, but still cold. This is crucial for proper and gentle incorporation into the cream cheese mixture.
For Garnish (Optional, but Highly Recommended!):
- Additional Whipped Topping, Thawed: Perfect for creating beautiful dollops or a complete layer on top of your finished pie.
- Chocolate Peanut Butter Candy (e.g., Mini Reese’s Cups), Chopped: Adds an extra burst of classic flavor and a delightful textural contrast.
- Melted Peanut Butter Chips for Drizzle: Creates an eye-catching design and enhances the peanut butter flavor.
- Chocolate Syrup for Drizzle: A beautiful and delicious complement to the chocolate crust and peanut butter filling.
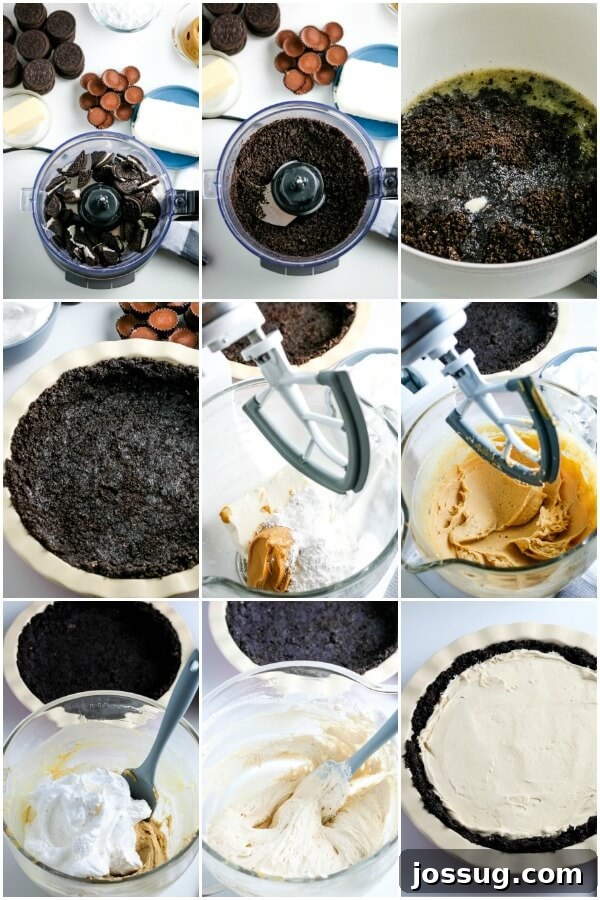
How to Make the Best No-Bake Peanut Butter Pie: A Step-by-Step Guide
This recipe is designed for maximum simplicity and incredible flavor payoff. With just a minimal amount of active preparation, you’ll have a show-stopping dessert ready to chill to perfection.
Estimated Time Needed: Approximately 15 minutes of active preparation, plus 4-5 hours of essential chilling time.
- Prepare Your Cookie Crumbs: Begin by crushing your Oreo cookies. The easiest method is to use a food processor, pulsing the cookies until they form fine, uniform crumbs. If you don’t have a food processor, a simple alternative is to place the cookies in a sturdy Ziploc bag, remove excess air, and crush them finely with a rolling pin or the bottom of a heavy glass. Once crushed, transfer these delicious crumbs to a medium-sized mixing bowl.
- Form the Decadent Crust: Pour the melted unsalted butter over the cookie crumbs in the bowl. Using a fork or a rubber spatula, stir the mixture thoroughly until all the crumbs are evenly moistened and resemble wet sand. This complete saturation ensures a firm and stable crust.
- Press into Pie Plate: Now, transfer the buttered cookie crumb mixture into a standard 9-inch pie plate. Gently but firmly press the mixture evenly into the bottom of the plate and up the sides. Use the back of a spoon or your clean fingers to create a compact, uniform crust. Don’t press excessively hard, but ensure it’s solid enough to hold its shape once set.
- Chill the Crust to Perfection: This step is crucial for establishing the crust’s structure. Place the prepared pie crust in the freezer for at least 30 minutes. This chilling period helps the butter solidify and the crust set firmly before you add the filling, preventing it from crumbling when you slice your beautiful pie.
- Create the Creamy Filling Base: In a large mixing bowl, combine the creamy peanut butter, the softened cream cheese, and the powdered sugar. Using a hand mixer (or a stand mixer fitted with a paddle attachment), beat these ingredients together on medium speed. Continue mixing until the mixture is completely smooth, light, and fluffy, ensuring there are absolutely no lumps of cream cheese remaining. Remember to scrape down the sides of the bowl periodically to ensure everything is thoroughly incorporated.
- Gently Fold in the Whipped Topping: This is a key technique for achieving that signature light and airy filling texture. Carefully, using a rubber spatula, fold in the thawed whipped topping. Use a gentle, upward motion, sweeping from the bottom of the bowl upwards, to incorporate the whipped topping without deflating its airy volume. Continue folding until the mixture is uniform and smooth throughout. Avoid overmixing, as this can make the filling denser than desired.
- Fill the Chilled Crust: Pour the luscious, creamy peanut butter filling into your prepared and chilled cookie crust. Use your spatula to spread the filling evenly across the crust, creating a smooth and inviting top surface.
- Chill Until Perfectly Set: This is arguably the most important step for achieving a firm, sliceable pie. Place the filled pie in the refrigerator to chill for a minimum of 4 hours, or ideally, overnight. For those times when you simply can’t wait, you can place it in the freezer for 1 to 2 hours, then transfer it to the refrigerator to finish setting.
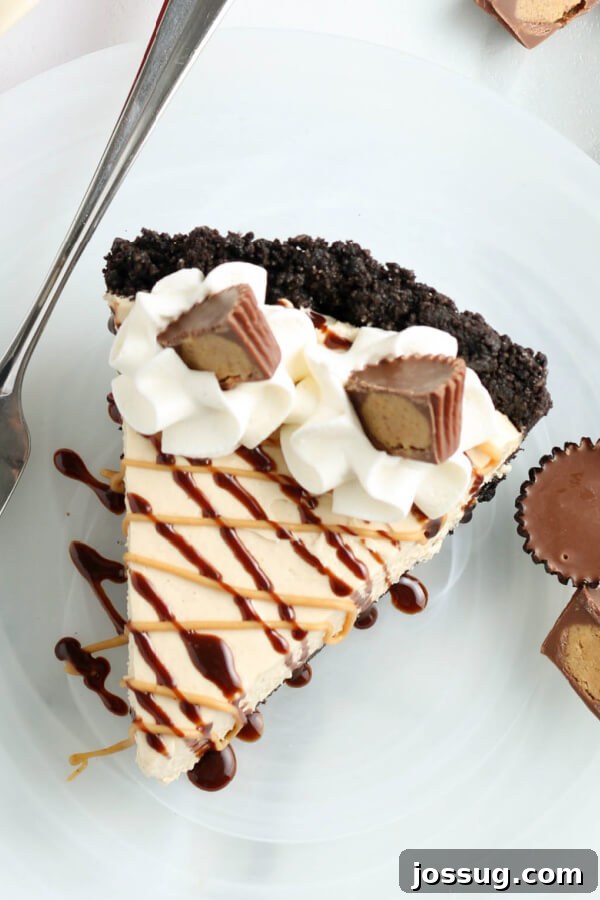
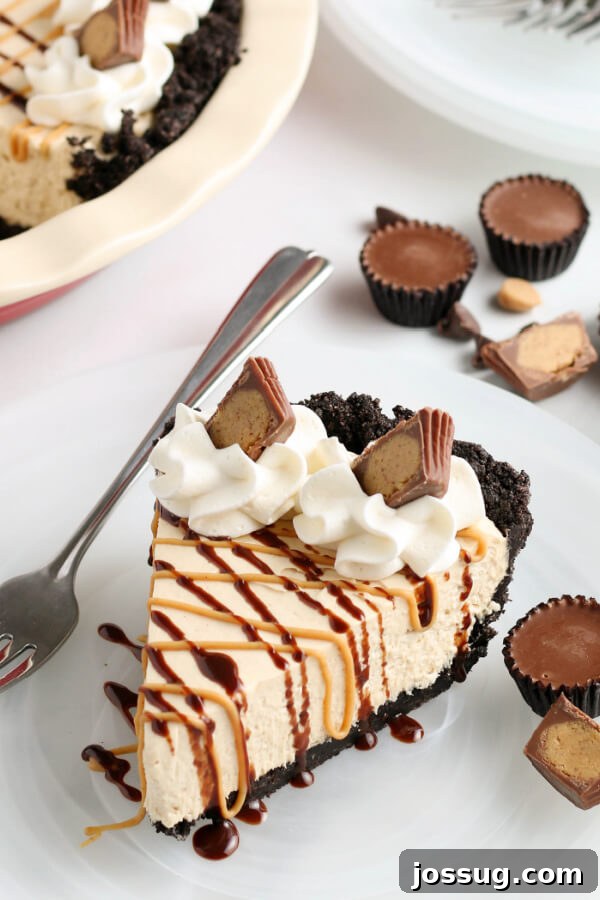
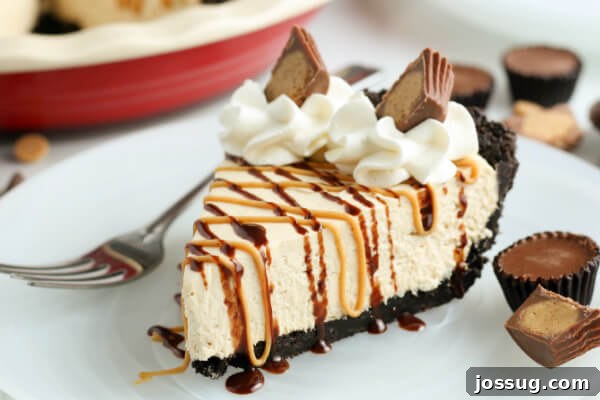
- Garnish and Serve with Flair: Just before serving, unleash your creativity with garnishes! Add extra dollops of thawed whipped topping, a generous drizzle of melted peanut butter chips, a swirl of rich chocolate syrup, or sprinkle with chopped chocolate peanut butter candies. The more delightful toppings, the merrier!
- Storing Leftovers: Should you be fortunate enough to have any leftover pie, ensure it is stored covered tightly in the refrigerator to maintain its freshness and deliciousness.
Expert Tips and Delicious Variations for Your Peanut Butter Pie Masterpiece
Take your No-Bake Peanut Butter Pie experience from great to absolutely extraordinary with these helpful tips and creative twists. Customizing your pie is part of the fun!
Tips for No-Fail Pie Success:
- Softened Cream Cheese is Your Best Friend: This cannot be stressed enough! Always ensure your cream cheese is at true room temperature. Cold cream cheese will inevitably lead to a lumpy, unappealing filling, no matter how much you try to beat it smooth. Plan ahead and take it out of the fridge at least 30-60 minutes before you start.
- The Art of Gentle Folding for Whipped Topping: When it comes to incorporating the whipped topping, abandon any aggressive stirring. Instead, use a light, gentle folding motion with your rubber spatula. This delicate technique preserves the airiness and volume of the whipped topping, which is crucial for the light, fluffy texture of the pie filling. Over-stirring can deflate it, resulting in a dense pie.
- Chill Time is Sacred: Resist the temptation to cut into your pie too early! The minimum 4-hour chill time (or ideally, overnight) is absolutely essential for the pie to set properly. This ensures you’ll achieve clean, firm slices that hold their shape beautifully. If you’re really pressed for time, a freezer quick-chill for an hour or two can speed things up, but remember to let the pie soften slightly in the refrigerator before serving if it’s too hard straight from the freezer.
- Quality Ingredients Make a Difference: While this is a wonderfully simple recipe, the quality of your key ingredients—especially your peanut butter and cream cheese—will significantly impact the final taste and texture. Choose brands that you personally love for the best possible flavor outcome.
- Troubleshooting a Watery Pie: If your pie comes out watery, the most common culprit is improper incorporation of the whipped topping or using whipped topping that wasn’t fully thawed. Double-check that your whipped topping is completely thawed but still cold before you begin. And once again, always *fold* it in gently, never stir it vigorously, to maintain its structure and prevent a runny filling.
Creative Variations to Try:
- Crust Alternatives: While the classic Oreo chocolate cookie crust offers an undeniably delicious pairing, feel absolutely free to experiment with other bases! A buttery graham cracker crust provides a slightly less intense and more traditional foundation. For an even more profound peanut butter experience, try a crushed Nutter Butter cookie crust. You can also opt for maximum convenience by using any pre-made, store-bought pie crust (chocolate, graham cracker, or even shortbread) from your local grocery store.
- Boost the Chocolate Factor: For true chocoholics, consider folding mini chocolate chips directly into the peanut butter filling before chilling. Another delightful option is to swirl a little melted chocolate sauce or even a thin layer of fudge at the bottom of the crust for an extra layer of decadence and a beautiful marble effect when sliced.
- Beyond Peanut Butter: While this is a peanut butter pie, if you’re feeling adventurous or have dietary considerations, you could experiment with other nut butters. An almond butter pie, cashew butter pie, or even a sunflower seed butter pie would offer unique, yet equally delicious, flavor profiles. Just ensure the consistency is similar to creamy peanut butter.
- Add a Salty Crunch: For a fantastic sweet-and-salty contrast, sprinkle a layer of finely crushed pretzels or pretzel pieces over the bottom of your crust before adding the filling, or even mix some into the filling itself. This adds an unexpected and delightful textural element.
- Topping Extravaganza: Beyond the suggested garnishes, don’t limit your imagination! Think about toasted coconut flakes, a sprinkle of coarse sea salt to truly make the peanut butter flavor pop, miniature candies, or even a luscious drizzle of caramel sauce. Each addition can take your pie to a new level of deliciousness.
Frequently Asked Questions About Your No-Bake Peanut Butter Pie
Have some lingering questions after reading through this delightful recipe? We’ve got answers! Here’s some additional information to ensure your No-Bake Peanut Butter Pie experience is absolutely perfect, from preparation to storage.
How long will this pie last in the fridge?
Leftovers, you say? That’s a rare occurrence with this pie, it’s that good! However, if you do manage to have some remaining, ensure it’s properly covered with plastic wrap or in an airtight container. Your No-Bake Peanut Butter Pie should maintain its delicious freshness for approximately 5 days when stored in the refrigerator.
Can I freeze this peanut butter pie?
Absolutely! This pie is wonderfully freezer-friendly. For optimal storage, wrap the entire pie (or individual slices) tightly first in plastic wrap, then encase it in a layer of aluminum foil. This double-layer protection helps prevent freezer burn. It will keep beautifully in the freezer for up to 3 months. When you’re ready to enjoy it, simply thaw it in the refrigerator overnight, or at room temperature for an hour or two until it reaches your preferred serving consistency.
Can you use a different kind of crust for this recipe?
You most certainly can! While the chocolate cookie crust is a favorite for its deep flavor, this pie is also fantastic with other bases. A classic graham cracker crust offers a buttery, slightly less intense flavor profile. Many people also enjoy it with a vanilla wafer crust or even a unique pretzel crust for a delightful sweet and salty kick. You can also easily use any pre-made, store-bought crust for ultimate convenience. Feel free to experiment to find your personal favorite pairing!
What other toppings do you recommend for peanut butter pie?
The possibilities for toppings are truly endless, limited only by your imagination! Beyond the suggested extra whipped topping, melted peanut butter chips, and chocolate syrup, consider adding a sprinkle of chopped roasted peanuts for extra crunch, mini chocolate chips, a drizzle of luscious caramel sauce, or even a delicate dash of flaky sea salt to really make the flavors pop. Get creative and have fun – this pie generously rewards bold and imaginative topping choices!
I can’t wait that long for it to chill! Can I do anything to make the process go faster?
If you find yourself in a rush and craving a slice sooner, you can indeed speed up the setting process by placing the pie in the freezer for about 1 to 2 hours. This will help it firm up much quicker. However, remember to transfer it to the refrigerator for about 15-30 minutes before serving, or let it sit at room temperature for a short while, as it might be too firm or “rock hard” straight from the freezer.
My pie came out watery! What should I do?
A watery pie filling is a common issue and almost always points to improper incorporation of the whipped topping. The absolute key here is to *fold* the thawed whipped topping into the cream cheese mixture gently, rather than stirring it vigorously. Folding helps to maintain the airy structure of the whipped topping, which is crucial for a light and firm filling. Ensure your whipped topping is completely thawed but still cold before you begin, and avoid overmixing the entire filling once the topping is added.
Your Feedback Matters! Share Your Peanut Butter Pie Experience!
Peanut butter and pie – truly a match made in dessert heaven, wouldn’t you wholeheartedly agree? We are incredibly eager to hear your thoughts and experiences with this amazingly easy No-Bake Peanut Butter Pie recipe. Did you introduce any unique additions or creative variations that delighted your taste buds? Were there any specific steps that particularly stood out to you, or perhaps caused a moment of confusion? Please don’t hesitate to share your insights, tips, and any questions you might have in the comments section below. Your feedback not only helps fellow dessert enthusiasts embark on their own pie-making adventures but also helps us improve, and I’m always happy to provide further assistance!
No-Bake Peanut Butter Pie Recipe Card

Recipe by: Jamie Sherman
Summary: This No-Bake Peanut Butter Pie recipe is quick, easy, and incredibly indulgent! It’s the perfect dessert for busy weekdays and last-minute events, combining a rich chocolate cookie crust with a dreamy, creamy peanut butter filling.
- Yields: 8 generous servings
- Prep Time: 15 minutes
- Chill Time: 4 hours (minimum)
- Total Time: 4 hours 15 minutes
- Average Rating: 4.47 out of 5 stars (based on 26 votes)
Recommended Equipment:
- Rubber spatula or wooden spoon
- Electric hand mixer (or stand mixer)
- Food processor (for crushing cookies)
- Large and medium mixing bowls
- Pie plate (9-inch)
- Pie server
- Glass pie plate with lid (for storage)
Ingredients:
For the Chocolate Cookie Crust:
- 26 Oreo chocolate sandwich cookies with cream filling
- 6 tablespoons unsalted butter, melted
For the Creamy Peanut Butter Filling:
- ½ cup creamy peanut butter (such as Jif or Skippy)
- 1 package (8 oz.) cream cheese, fully softened at room temperature
- ½ cup powdered sugar (confectioners’ sugar)
- 1 container (8 oz.) whipped topping, thoroughly thawed (e.g., Cool Whip)
For Garnish (Optional):
- Additional whipped topping, thawed
- Chocolate Peanut Butter Candy, chopped (e.g., mini Reese’s Cups)
- Peanut Butter Chips, melted for drizzling
- Chocolate Syrup, for drizzling
Instructions:
Preparing the Crust:
- Crush Cookies: In a food processor, pulse the Oreo cookies until they form fine, even crumbs. Transfer the crumbs to a medium-sized mixing bowl.
- Combine with Butter: Pour the melted butter over the cookie crumbs. Stir thoroughly with a fork or spatula until all crumbs are completely moistened and resemble wet sand.
- Press into Pie Plate: Press the cookie crumb mixture evenly into the bottom and up the sides of a 9-inch pie plate. Use the back of a spoon or your fingers to compact it firmly.
- Chill Crust: Place the prepared crust in the freezer for at least 30 minutes to set firmly.
Making the Filling:
- Cream Ingredients: In a large mixing bowl, combine the creamy peanut butter, softened cream cheese, and powdered sugar. Using an electric mixer, beat on medium speed until the mixture is smooth, light, and fluffy, ensuring no cream cheese lumps remain.
- Fold in Whipped Topping: Gently fold in the thawed whipped topping using a rubber spatula. Use an upward motion to incorporate it without deflating, continuing until the filling is uniform and smooth.
- Fill the Crust: Pour the creamy peanut butter filling into the chilled cookie crust and spread it evenly with your spatula.
- Chill Thoroughly: Place the pie in the refrigerator and chill for a minimum of 4 hours, or preferably overnight, until it is completely set.
Serving and Storage:
- Garnish: Just before serving, garnish your pie with additional dollops of whipped topping, a drizzle of melted peanut butter chips, chocolate syrup, and chopped chocolate peanut butter candy, if desired.
- Store Leftovers: Store any leftover pie tightly covered in the refrigerator for up to 5 days. It can also be frozen for up to 3 months.
Recipe Notes:
- For ultimate convenience, you can easily skip making your own crust and opt for a store-bought pre-made pie crust (graham cracker or chocolate) instead.
- Ensure all cold ingredients, especially the cream cheese, are at room temperature for the smoothest filling.
- Folding, not stirring, the whipped topping is crucial for an airy, light pie texture.
Nutrition Information (per 1 slice serving – approximate):
- Calories: 537 kcal
- Carbohydrates: 46g
- Protein: 8g
- Fat: 37g
- Saturated Fat: 18g
- Polyunsaturated Fat: 4g
- Monounsaturated Fat: 13g
- Trans Fat: 0.4g
- Cholesterol: 52mg
- Sodium: 325mg
- Potassium: 247mg
- Fiber: 2g
- Sugar: 32g
- Vitamin A: 665 IU
- Calcium: 66mg
- Iron: 5mg
Please note: Nutrition information is an automatic calculation and should only be used as an approximation. Actual values may vary based on specific brands and preparation methods.
More Delicious No-Bake & Easy Dessert Recipes You’ll Love
If you enjoyed the simplicity and incredible flavor of this No-Bake Peanut Butter Pie, then you’re in for a treat! Explore these other fantastic dessert recipes that are equally delightful and often just as easy to prepare:
- No-Bake Key Lime Pie: A zesty, refreshing classic perfect for summer or any time you crave a burst of citrus.
- No Bake Mini Chocolate Peanut Butter Cheesecakes: Individual servings of that beloved chocolate peanut butter combination, perfect for parties or portion control.
- Frozen Lemonade Pie: A wonderfully tart and sweet, icy cold dessert that’s incredibly refreshing and simple to make.
- Strawberry Cream Pie (Easy No-Bake): Light, creamy, and bursting with fresh strawberry flavor – a fantastic seasonal treat.
- Chocolate Chess Pie: While not no-bake, this classic chocolate pie is wonderfully rich and surprisingly straightforward to prepare, a true comfort food dessert.