
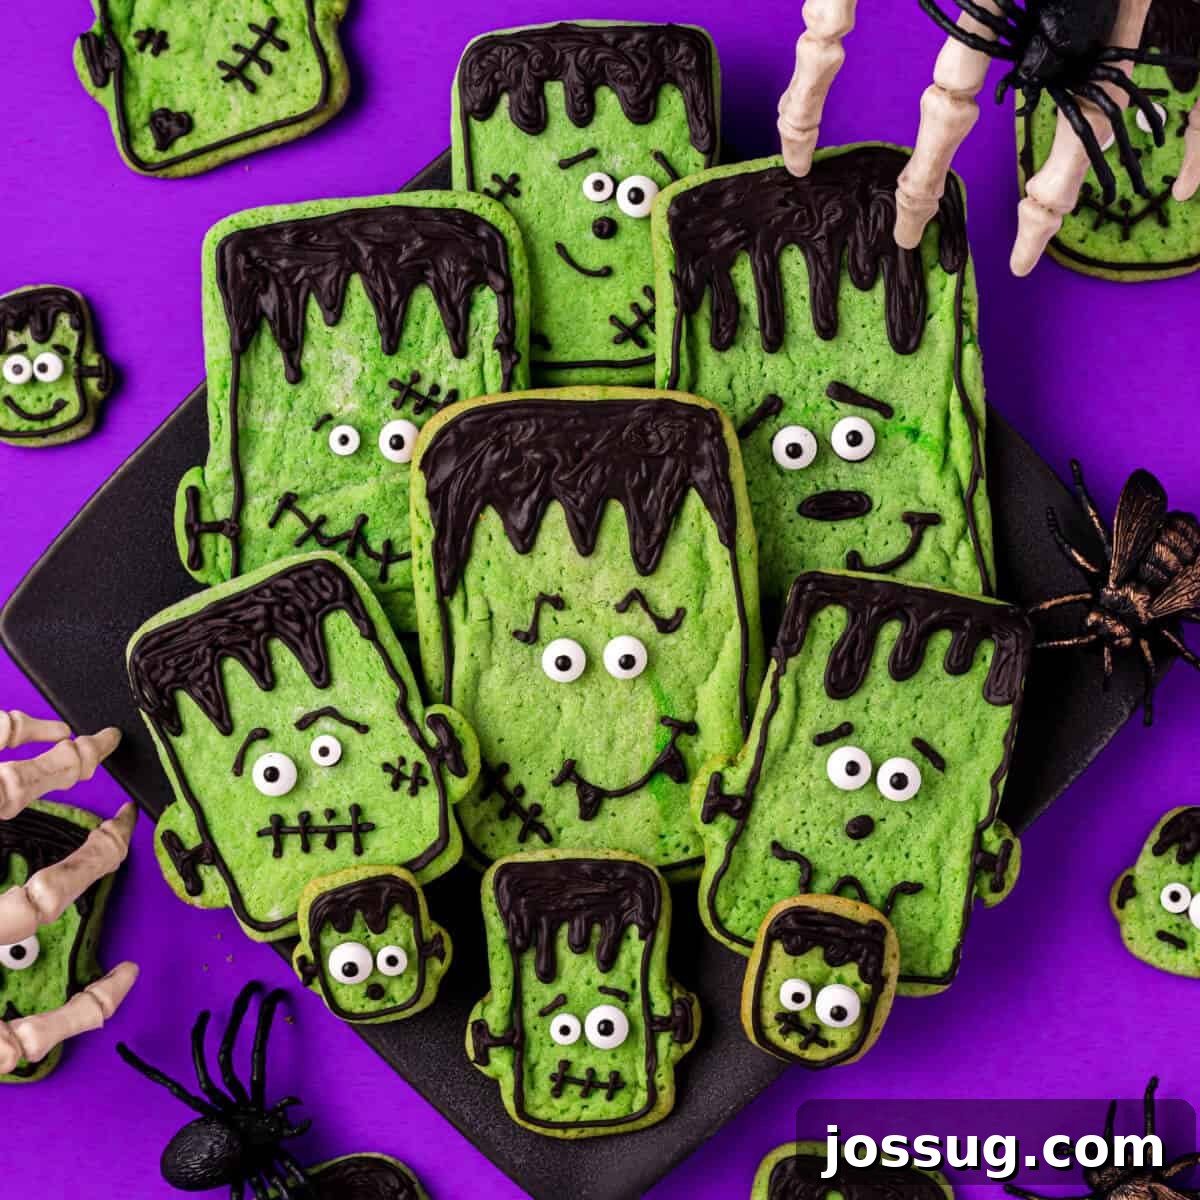
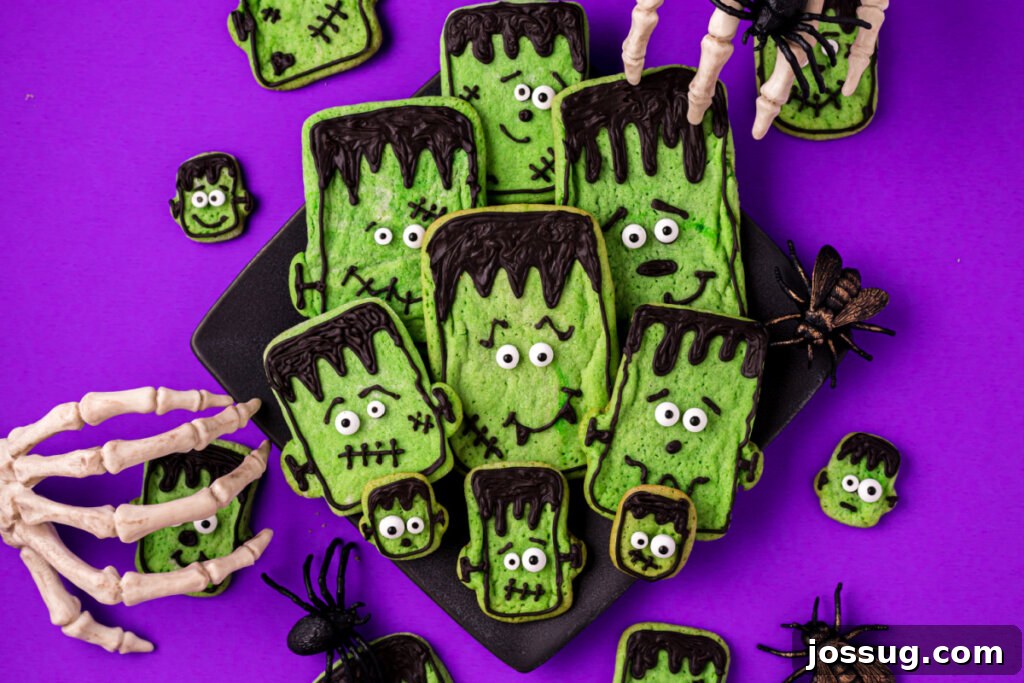
Get ready to conjure up some magic this Halloween with these absolutely adorable Frankenstein Sugar Cookies! 🎃 If you’re searching for a quick, fuss-free, yet utterly delightful treat that captures the spirit of the season, your quest ends here. Crafted with just a handful of readily available store-bought ingredients, this recipe is a true savior for busy parents and anyone looking to add a homemade touch to their Halloween festivities without spending hours in the kitchen. These charming cookies are not only simple to create but are also incredibly versatile – perfect for spooky Halloween parties, thoughtful homemade gifts, or a fantastically fun family baking activity. Don’t let another Halloween pass by without experiencing the joy of these cute, easy, and undeniably delicious Frankenstein treats that are guaranteed to be a monstrous hit!
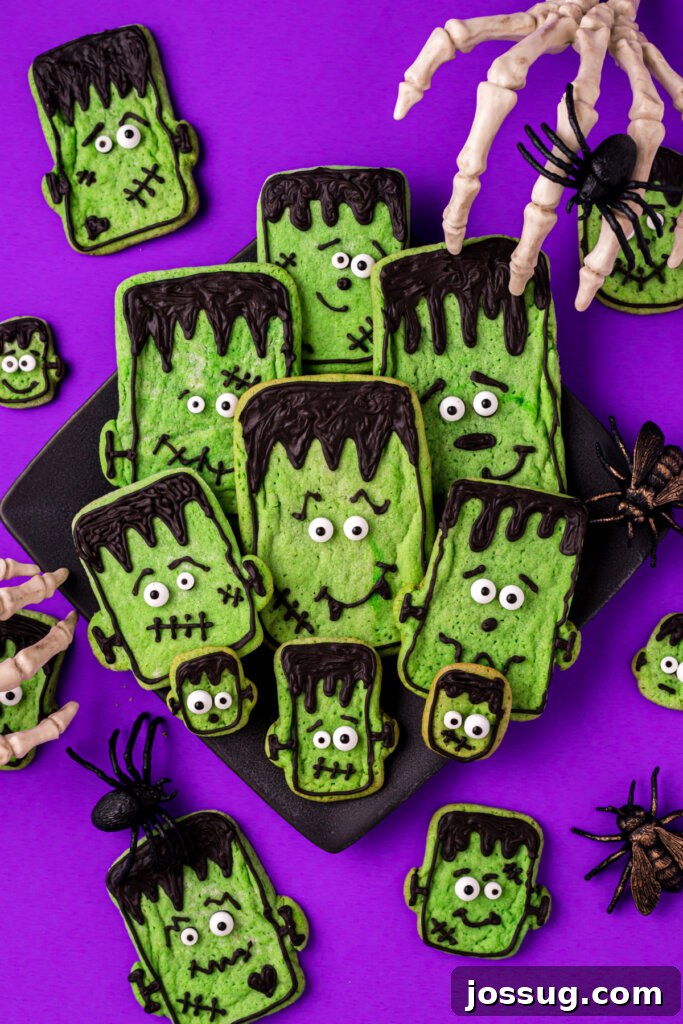
The Ultimate Easy Halloween Cookies: Frankenstein Edition
As the crisp autumn air signals the arrival of Halloween, the excitement for costumes, decorations, and, of course, delicious treats begins to build. If you’re on the lookout for a dessert that’s both quick to prepare and irresistibly cute, these Frankenstein Sugar Cookies are the perfect solution! This recipe redefines simplicity, requiring minimal effort and just two main store-bought ingredients to bring these spooky delights to life. This makes them an absolute game-changer for busy moms and dads who want to embrace the holiday spirit without the stress of complicated baking projects.
Imagine adding these delightful Frankenstein cookies to your Halloween celebration without fretting over extensive ingredient lists or time-consuming techniques. Their straightforward nature means less time baking and more time enjoying the holiday with your family. This recipe is designed for maximum impact with minimum fuss, ensuring you can deliver a memorable treat effortlessly.
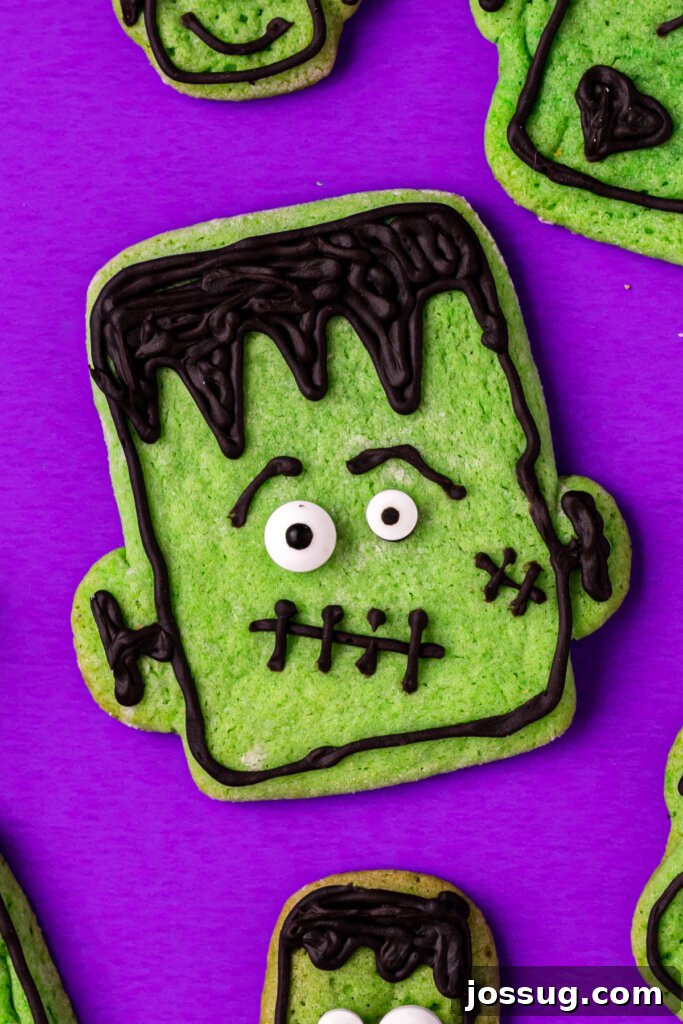
While the recipe champions simplicity, it also encourages creativity! Want to infuse your cookies with an extra layer of flavor? Feel free to incorporate an exciting extract, such as almond, vanilla bean, or even a touch of mint, directly into the dough. Or perhaps a scattering of chocolate sprinkles or mini chocolate chips before baking to add texture and a subtle crunch. When it comes to decorating the iconic Frankenstein faces, there’s truly no ‘right’ or ‘wrong’ way. Let your imagination run wild! Each unique cookie will be a testament to your personal touch, making the entire process an enjoyable artistic endeavor.
Beyond their ease of creation, these Halloween Cookies offer incredible versatility. They’re more than just a party snack; they’re an experience. For families, the decorating phase is particularly straightforward, making it an ideal activity for even the littlest hands. Kids can take immense pride in crafting their own monster masterpieces, fostering a love for baking and art while building anticipation for the upcoming holiday. It’s a wonderful way to create lasting family memories, filled with laughter and green-fingered fun.
And let’s not overlook their potential as thoughtful gifts. Pack these charming cookies in an airtight container, perhaps tied with a festive Halloween-themed ribbon, and you have a heartfelt, homemade present ready for neighbors, friends, teachers, or co-workers. They’re a delightful way to spread cheer and share a piece of your holiday spirit with those you care about, proving that handmade treats carry a special warmth that store-bought items simply can’t match.
In essence, these Frankenstein Sugar Cookies tick every box: they are effortless, quick, and utterly adorable. They provide a fantastic opportunity to infuse your Halloween festivities with a handmade touch, all without requiring a culinary degree or countless hours slaving away in the kitchen. So, why wait for another spooky season to pass by? Make this year’s Halloween celebration extra special and wonderfully unique with these delightful, monstrously good treats!
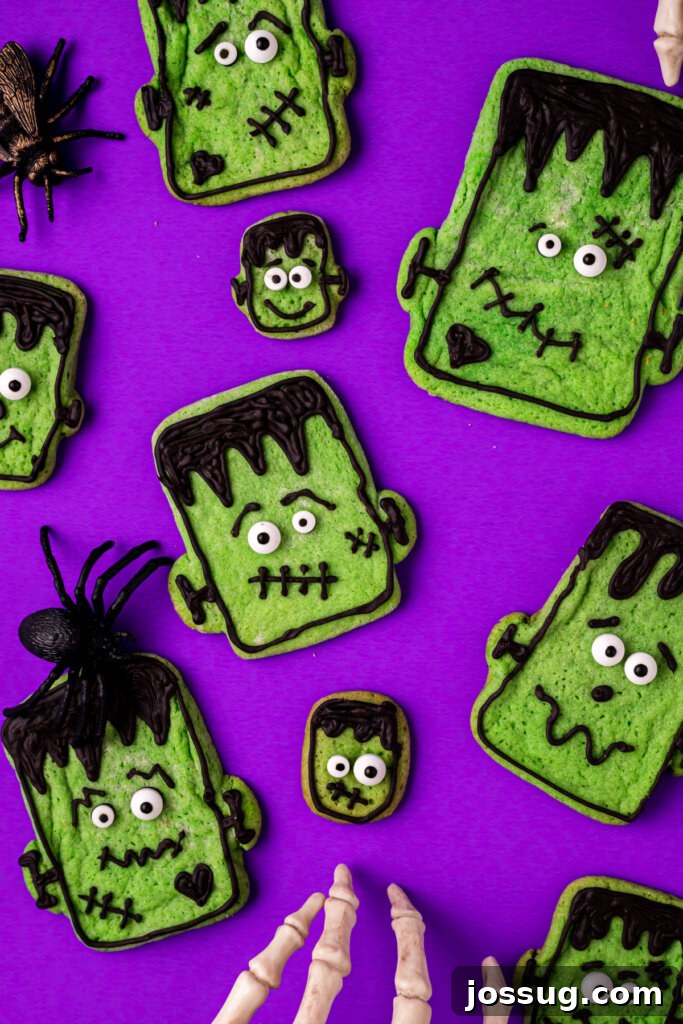
Frankenstein Sugar Cookies: Essential Ingredients & Creative Substitutions
Crafting these iconic Frankenstein Sugar Cookies is surprisingly simple, thanks to a carefully selected list of ingredients. Here’s what you’ll need to transform basic cookie dough into spooky, green masterpieces, along with some tips for substitutions to fit your preferences:
Key Ingredients
- All-Purpose Flour: While not a primary ingredient in the cookie dough itself (especially if using premade), a light dusting of all-purpose flour on your work surface and rolling pin is crucial. It prevents the dough from sticking, ensuring a smooth rolling and cutting process, making your cookie shaping much easier.
- Premade Sugar Cookie Dough: This is the star of our “easy and fast” promise! Opting for store-bought dough dramatically cuts down on prep time, making this recipe perfect for busy schedules. You’ll typically need a 16 to 17 oz package. However, if you prefer, you can certainly use your favorite homemade sugar cookie dough recipe. Just ensure you use a similar weight and keep it well-chilled until you’re ready to incorporate the green food gel. The key is a firm, manageable dough.
- Chocolate Frosting and Black Food Gel: This dynamic duo creates the rich, dark frosting perfect for Frankenstein’s signature hair, mouth, and stitches. The chocolate frosting provides a delicious base, and the black food gel intensifies the color to achieve that classic monster look. Ensure the frosting is slightly warmed for easier piping.
- Green Food Gel: This is essential for giving our Frankenstein cookies their unmistakable green hue. High-quality food gels are recommended as they deliver vibrant, concentrated color without significantly altering the texture or flavor of your cookie dough. A little goes a long way, ensuring a striking green.
- Candy Eyes: These whimsical edible eyes bring your Frankenstein monsters to life, adding a playful and somewhat goofy charm. You can choose eyes of the same size for a uniform look or mix and match different sizes for more character and expression. They’re readily available in most baking aisles during the holiday season.
Ingredient Notes & Tips:
For those who love to customize, don’t hesitate to experiment! You could use white frosting with black food gel if you prefer a different flavor profile, or even a dark green frosting for a monochromatic monster. If candy eyes aren’t available, small chocolate chips or dots of white frosting with a black dot can work as creative alternatives. The beauty of this recipe lies in its adaptability, allowing you to tailor it to your pantry and preferences.
Crafting Your Frankenstein Cookies: A Simple Step-by-Step Guide
Creating these delightful Frankenstein cookies is a fun and straightforward process. Follow these easy steps to bring your edible monsters to life, perfect for bakers of all skill levels:
- Prepare Your Baking Station: First, preheat your oven to the temperature specified on your sugar cookie dough package. This ensures the oven is perfectly ready when your cookies are. Next, line a baking sheet with parchment paper. This vital step prevents sticking, ensures even baking, and makes for effortless cleanup, which is always a bonus!
- Infuse the Dough with Green: Take your premade sugar cookie dough and place it in a large mixing bowl. Add 4 to 5 drops of vibrant green food gel. Using your hands (or a sturdy spoon), knead the dough until the green color is uniformly distributed, creating a perfectly monstrous hue. If you desire a deeper shade, add an additional drop or two of food gel until you reach your preferred intensity.
- Roll Out the Green Dough: Lightly dust your clean countertop or work surface with all-purpose flour. Place the green sugar cookie dough on it and, using a rolling pin, roll it out to an even thickness, typically about ¼ inch. This consistent thickness is key for uniform baking. The flour ensures the dough doesn’t stick, making the rolling process smooth and frustration-free.
- Shape Your Monsters: Now for the fun part! Take your rectangle cookie cutter and cut out as many cookie shapes as possible from the rolled dough. Carefully gather any scraps, gently re-roll them, and cut out more rectangles until all the dough is used. To create Frankenstein’s iconic neck bolts, take two small, pea-sized pieces of cookie dough and attach them to each side of the rectangle, approximately three-quarters of the way down. Gently press them into place so they adhere to the main cookie body.
- Time to Bake: Carefully transfer your shaped Frankenstein cookies to the prepared baking sheet, leaving a small space between each. Bake them in your preheated oven for 8-10 minutes. Keep a close eye on them; cookies are done when the edges are lightly golden. Overbaking can make them dry, so aim for a soft center.
- Cool Down: Once baked, remove the cookies from the oven. Immediately, and carefully, transfer them to a wire cooling rack. This allows air to circulate around the cookies, preventing them from becoming soggy and ensuring they cool completely and evenly. Patience is key here; completely cooled cookies are essential for successful frosting.
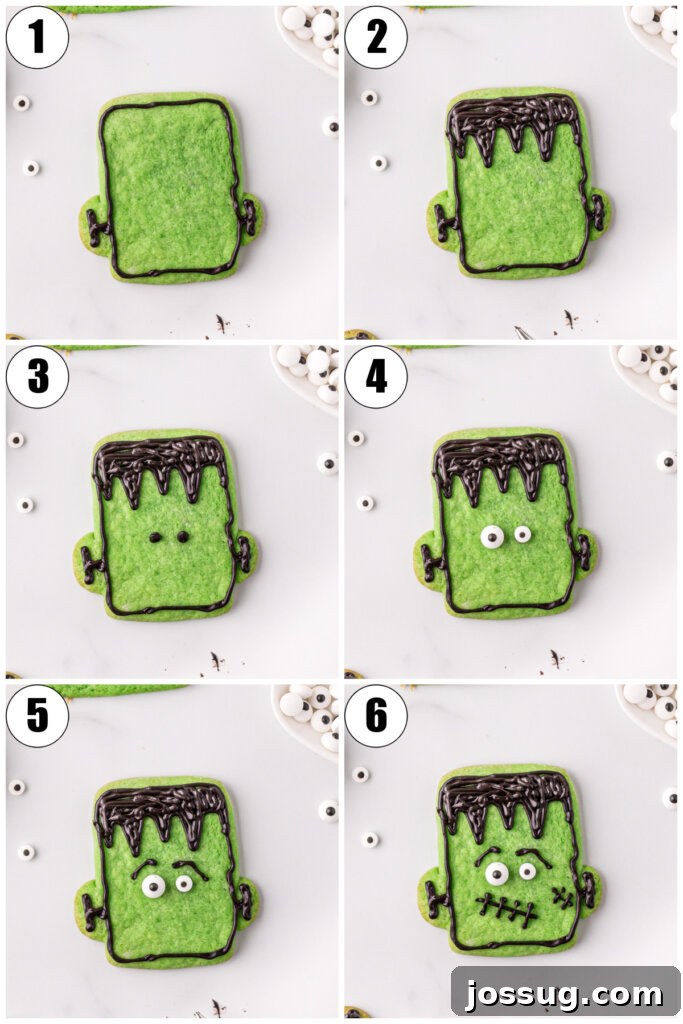
- Prepare the Spooky Frosting: In a medium-sized microwave-safe bowl, place your chocolate frosting. Microwave it for about 30 seconds. This brief warming will make the frosting smoother and easier to work with. Stir in a few drops of black food gel until the frosting achieves a deep, rich black color. Transfer this dark frosting to a piping bag fitted with a small round tip. If you don’t have a piping bag, a Ziploc bag with a tiny corner snipped off works perfectly!
- Decorate Your Monsters: Now, the moment of truth! Unleash your creativity by piping fun Frankenstein faces onto each cooled cookie. Use the black frosting to create hair, a stitched mouth, and any scars you desire. Press the candy eyes into the frosting before it sets. Remember, no two Frankensteins are exactly alike, so have fun with different expressions! Allow the frosting to harden completely before stacking or storing the cookies. This prevents smudging and ensures your designs remain intact.
- Store and Enjoy: Once the frosting has set, store your delightful Frankenstein Sugar Cookies in an airtight container at room temperature. They will remain fresh and delicious for up to a week, ready to be enjoyed or shared at any Halloween gathering!
Halloween Sugar Cookies: Your Questions Answered
➡️ Do I have to use store-bought sugar cookie dough?
Not at all! While store-bought dough offers incredible convenience, you can absolutely use your favorite homemade sugar cookie recipe. Just remember to add green food gel to your dough to achieve that signature Frankenstein color.
➡️ Can I use regular liquid food coloring instead of food gel?
You can, but food gel is highly recommended. Food gels provide a much more vibrant and concentrated color without significantly altering the dough’s consistency. Regular liquid food coloring might require a larger quantity to achieve the desired intensity, which could potentially thin out your cookie dough.
➡️ What if my cookies spread too much while baking?
This is a common occurrence, especially with certain types of store-bought dough. Don’t worry! Immediately after taking the cookies out of the oven, while they are still warm and pliable, you can gently reshape them. Use a flat wooden spoon or a butter knife to push the edges back into your desired rectangular shape before they cool and set.
➡️ Can I use homemade frosting?
Absolutely! If you have a go-to frosting recipe that you love and trust, feel free to use it for decorating. Simply add black food gel to your homemade frosting to achieve the perfect dark color for Frankenstein’s features.
➡️ How long will these cookies stay fresh?
When stored properly in an airtight container at room temperature, these decorated Frankenstein Sugar Cookies will stay fresh and delicious for up to one week.
➡️ Can I freeze these cookies?
Yes, you can! For best results, it’s recommended to freeze the undecorated cookies. Arrange them in a single layer in an airtight container, separating layers with parchment paper to prevent sticking. They can be frozen for up to 3 months. Once thawed, you can proceed with the fun decorating steps.
➡️ Any other suggestions for making these cookies extra special?
Definitely! Consider incorporating a fun extract, like almond or peppermint, into the cookie dough before baking for an extra flavor dimension. You could also mix in chocolate sprinkles or mini chocolate chips into the dough, or sprinkle them on top of the frosting for added texture and visual appeal.
➡️ Do you have any decorating suggestions for Frankenstein faces?
The beauty of decorating Frankenstein cookies is that there’s truly no ‘right’ or ‘wrong’ way to create their faces. Embrace your creativity! Experiment with different eyebrow shapes, varying scar patterns, or even add a playful tongue. Let each cookie have its own unique personality!
➡️ How can kids participate in making these cookies?
These cookies are perfect for involving children! Kids can help with adding the green food gel to the dough, rolling out the dough (with supervision), and are especially great at decorating the faces with frosting and candy eyes. It’s a wonderful, hands-on family activity that allows everyone to get creative and feel part of the Halloween fun!
More Spooktacular Recipes You May Enjoy
- Monster Eye Cookies
- Sugar Cookie Bars
- Ghost in the Graveyard Halloween Pudding Cups
- Boo-nanas
- Kitty Litter Cake
Frankenstein Sugar Cookies
By Jamie Sherman
Bake the perfect Frankenstein Sugar Cookies for a frightfully fun Halloween! It’s a quick recipe, kid-friendly, and great for parties.
Servings: 15 cookies
Prep Time: 15 mins
Cook Time: 10 mins
Additional Time: 1 hr (for cooling/frosting to harden)
Total Time: 1 hr 25 mins
Equipment
- Piping Tip
- Piping Bags
- Rectangle Cookie Cutter Set
- Rubber Spatula or Wooden Spoon
- Mixing Bowl
- Rolling Pin
- Small Candy Eyes
- Gel Food Coloring Set
- Parchment Paper
- Baking Sheets
- Wire Cooling Rack
Ingredients
- 1 package sugar cookie dough, 16 to 17 oz.
- 1 tub chocolate frosting, 16 oz.
- 2 drops black food gel
- 4 – 5 drops green food gel
- Candy eyes
- All-purpose flour (for dusting)
Instructions
- Preheat your oven according to the sugar cookie dough package directions. Line a baking sheet with parchment paper and set it aside.
- Add the store-bought sugar cookie dough to a large mixing bowl. Mix in 4 to 5 drops of green food gel until the color is thoroughly combined throughout the dough.
- Lightly dust your work surface with all-purpose flour. Roll out the green sugar cookie dough to an even thickness (about ¼ inch). Use a rectangle cookie cutter to cut out the cookie shapes. To form Frankenstein’s bolts, attach two small pieces of cookie dough to each side of the rectangle, approximately three-quarters of the way down. Place the shaped cookies on the prepared baking sheet.
- Bake the cookies in the preheated oven for 8-10 minutes, or until the edges are lightly golden.
- Remove the cookies from the oven and immediately transfer them to a wire cooling rack to cool completely.
- In a medium-sized microwave-safe bowl, add the chocolate frosting and microwave for 30 seconds to soften. Stir in the black food gel until you achieve a dark black color. Transfer the frosting to a piping bag fitted with a small tip.
- Once the cookies are completely cooled, use the black frosting and candy eyes to create fun Frankenstein faces. Allow the frosting to harden before storing.
- Store the decorated cookies in an airtight container until ready to eat.
Notes for Success
- Cookie Spreading Tip: If your cookies spread slightly during baking (common with store-bought dough), don’t fret! As soon as you remove them from the oven, while they are still hot and pliable, use a butter knife or a flat wooden spoon to gently push the edges back into a neat rectangular shape. This needs to be done immediately before they cool and firm up.
- Flavor Variations: Feel free to customize your cookies! Before baking, you can knead a few drops of your favorite extract (like almond, peppermint, or even rum) into the dough for an added flavor twist. You can also mix in some chocolate sprinkles or mini chocolate chips into the dough, or add them to the frosting when decorating.
- Storage: These cookies will remain fresh for up to a week when stored in an airtight container at room temperature.
- Freezing Instructions: If you plan to make them ahead, you can freeze the undecorated baked cookies for up to 3 months. Lay them in a single layer in an airtight container, using parchment paper between layers to prevent sticking. Thaw them at room temperature before decorating.
Nutrition Information (Approximate per cookie)
Calories: 260kcal,
Carbohydrates: 39g,
Protein: 2g,
Fat: 12g,
Saturated Fat: 3g,
Polyunsaturated Fat: 1g,
Monounsaturated Fat: 6g,
Cholesterol: 4mg,
Sodium: 149mg,
Potassium: 106mg,
Fiber: 1g,
Sugar: 29g,
Vitamin A: 12IU,
Calcium: 5mg,
Iron: 1mg
Nutrition information is automatically calculated and should only be used as an approximation.