
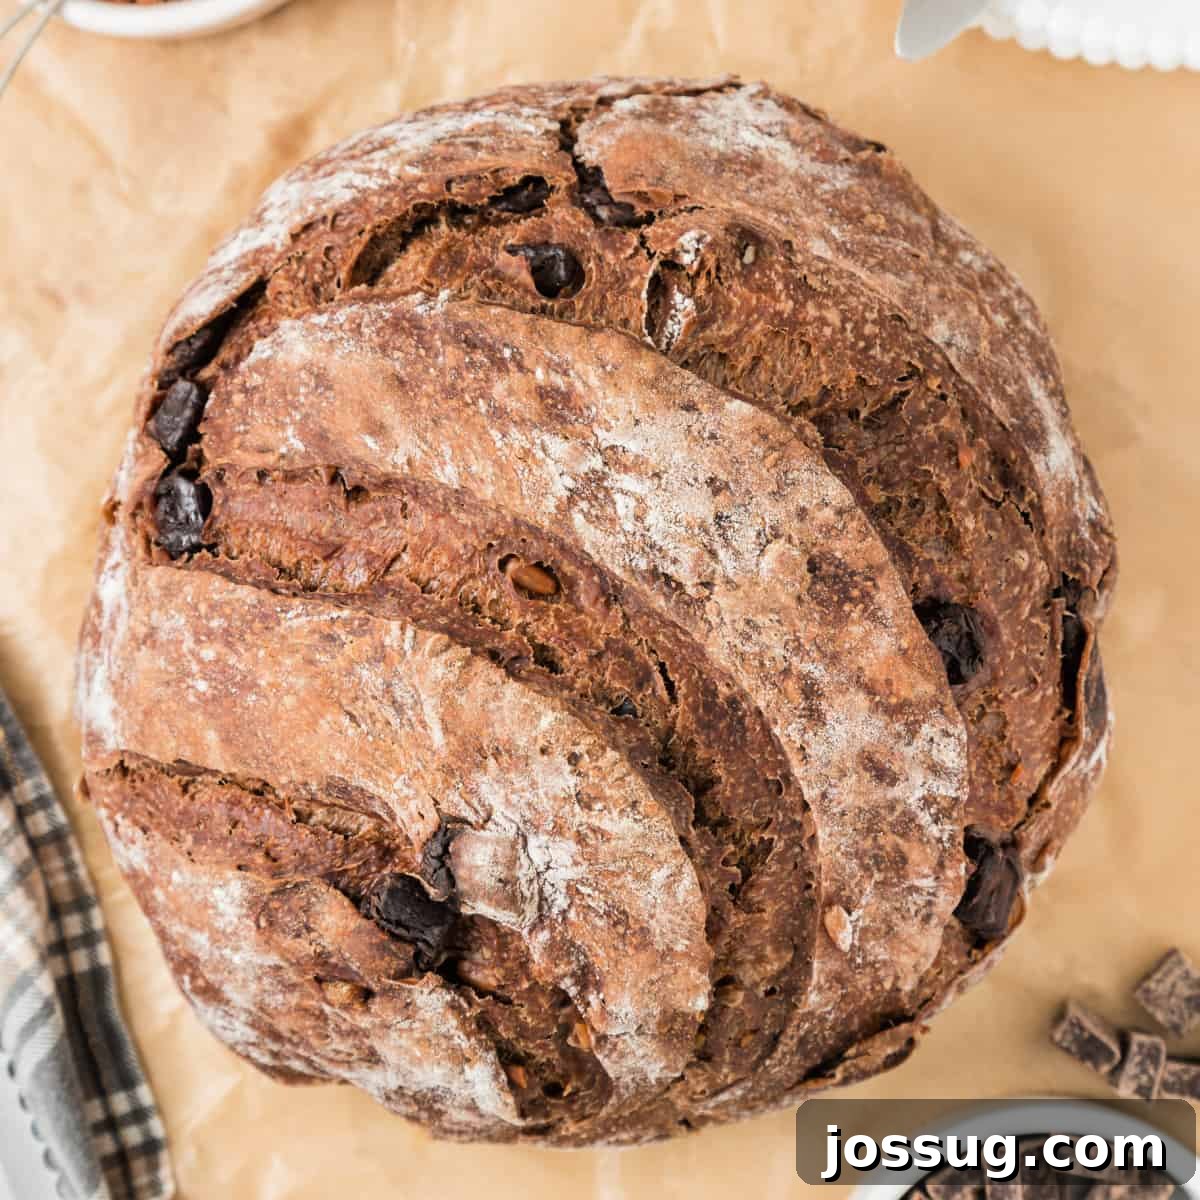
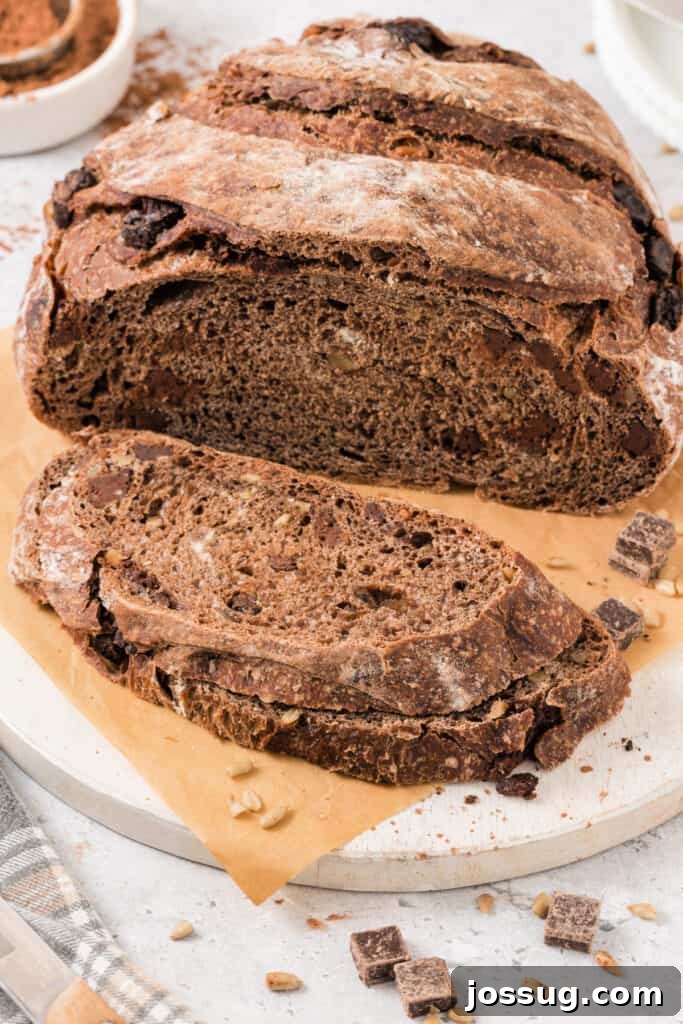
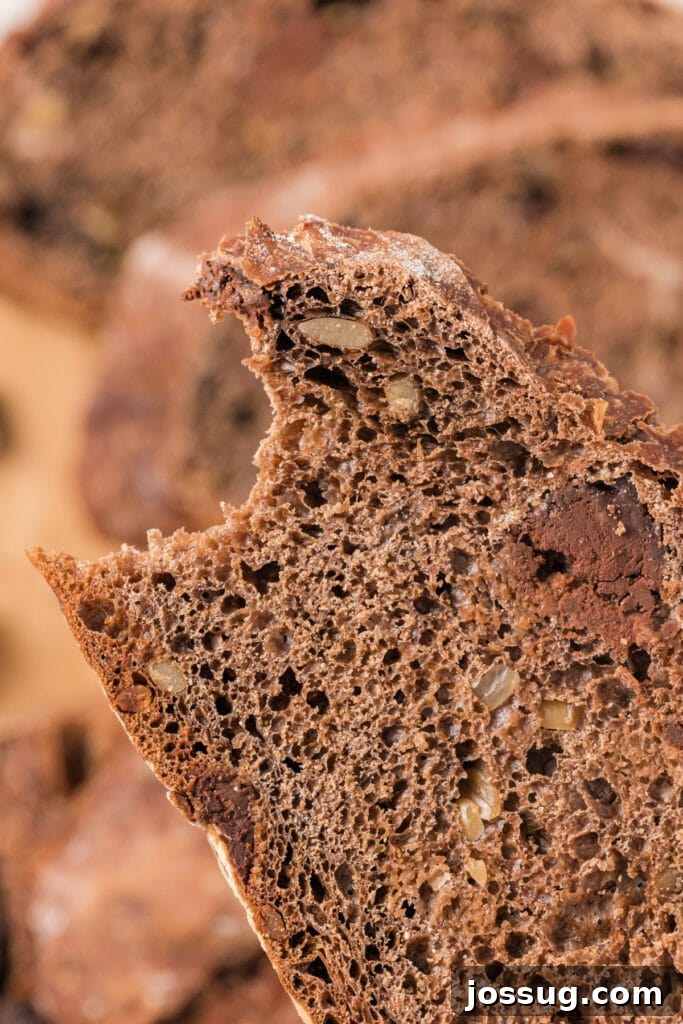
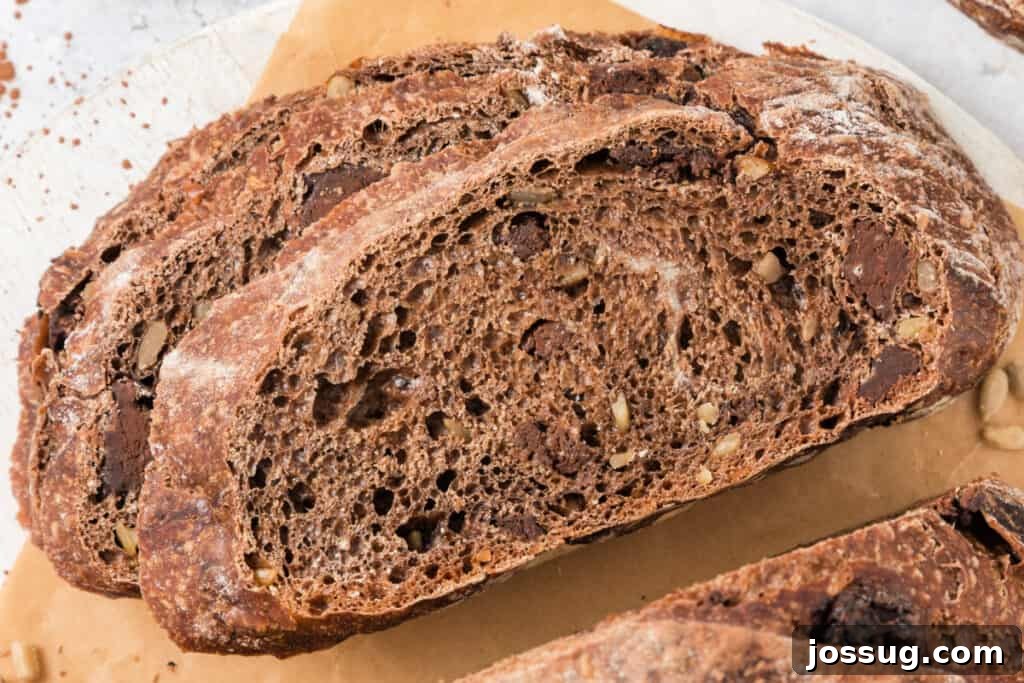
Prepare to be enchanted by a truly exceptional creation: Chocolate No-Knead Bread. This isn’t just a simple loaf; it’s a culinary revelation that marries the deep, luxurious notes of premium chocolate with the rustic charm of artisan bread. Each slice boasts a perfectly crisp crust that gives way to a tender, airy interior, generously studded with abundant chocolate chunks. It’s an ideal canvas for your favorite spreads, from creamy peanut butter to decadent Nutella, or simply divine on its own. What truly sets this bread apart is its balanced sweetness – it’s rich without being cloying, making it a sophisticated addition to any brunch buffet, a delightful breakfast treat, or a cherished snack that appeals to everyone, young and old alike. Discover the sheer joy of homemade bread, elevated by the irresistible allure of chocolate, with minimal effort.
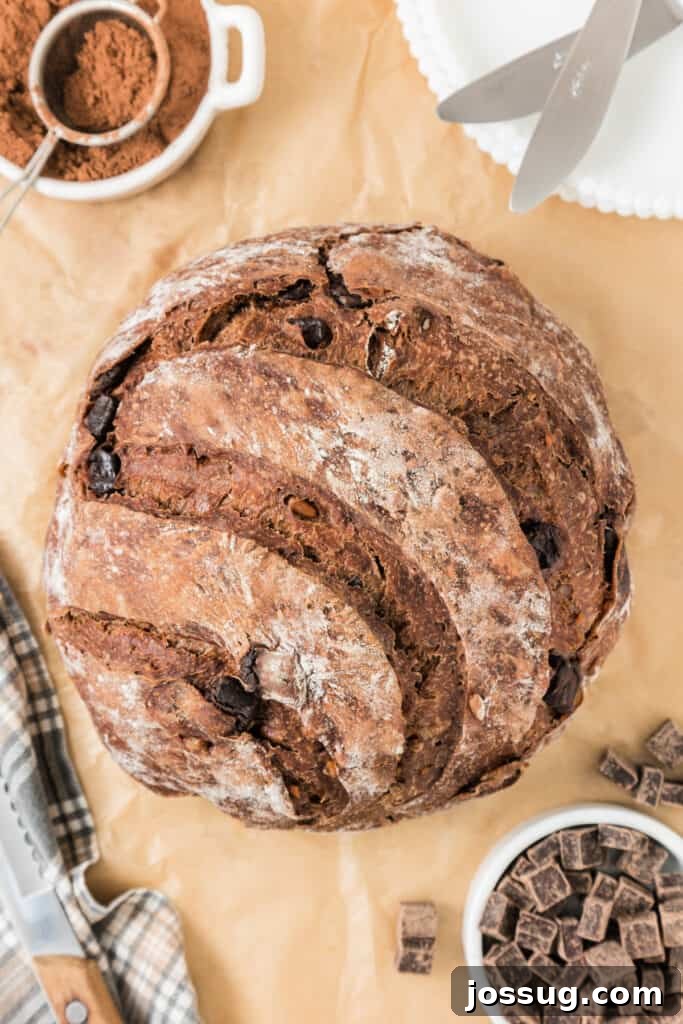
Heavenly Delights: The Ultimate Chocolate No-Knead Bread Recipe
There’s something uniquely comforting about freshly baked bread, and when you infuse it with the luxurious taste of chocolate, you create an unparalleled experience. If your palate craves an imaginative departure from traditional bread recipes, then this Chocolate No-Knead Bread is not merely an answer, but a culinary revelation. This masterful creation seamlessly blends the deep, comforting nuances of chocolate with the remarkable simplicity of a no-knead bread method. The result is a truly mouthwatering treat, offering a symphony of textures and flavors that will undoubtedly leave you yearning for more.
Unveiling the Magic of Chocolate Bread
Chocolate bread, often celebrated affectionately as “bread and chocolate,” represents a harmonious marriage of two universally adored comfort foods. This delightful fusion marries the wholesome, earthy aroma of bread, fresh from the oven, with the rich, decadent indulgence of chocolate. It transcends the ordinary, transforming a simple loaf into a gourmet experience. Whether enjoyed for breakfast, as a sophisticated accompaniment to coffee, or a surprising dessert, chocolate bread offers a versatile treat that satisfies both the desire for something savory and a sweet craving. It’s a testament to how simple ingredients can combine to create something truly extraordinary, making it an irresistible choice for anyone with a fondness for fine flavors.
The Simplicity and Science Behind No-Knead Bread
The true genius of this recipe lies in its elegant simplicity – the magic of the no-knead method. No-knead bread recipes have rightfully soared in popularity due to their astonishing ease of preparation, democratizing the art of bread making for home bakers of all skill levels. By liberating you from the laborious and time-consuming process of traditional kneading, this method allows you to revel in the satisfaction of creating artisanal bread without the strenuous effort. The secret lies in a long, slow fermentation process, which allows the gluten to develop naturally over time, resulting in a remarkably chewy texture and complex flavor profile. When this effortless technique is united with the rich, comforting flavors of chocolate, the outcome is nothing short of a culinary match made in heaven – a perfect blend of convenience, quality, and indulgence.
Achieving Perfection: Baking with a Dutch Oven
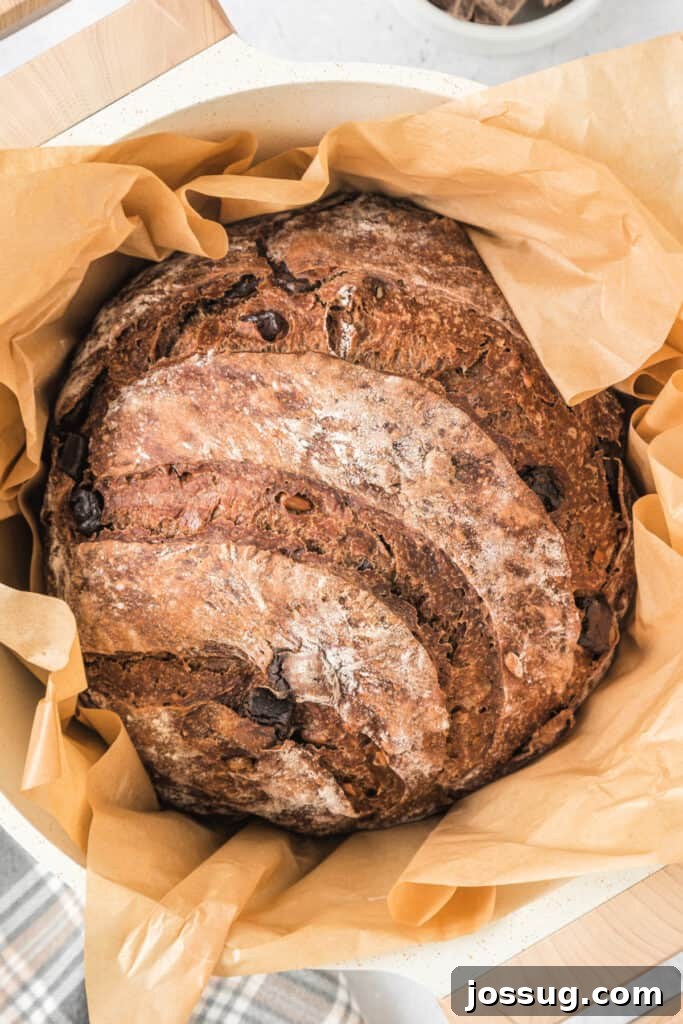
For those aspiring to achieve an impeccably crisp crust and a perfectly textured crumb in their no-knead bread, the Dutch oven stands as an indispensable tool in the baker’s arsenal. This robust piece of cookware plays a crucial role by creating a mini-oven environment within your main oven. Its heavy lid effectively traps the steam released from the dough during the initial stages of baking. This trapped steam is vital for keeping the crust soft and pliable, allowing the loaf to expand fully before it sets. Once the lid is removed, the bread is exposed to the dry heat, which then allows the crust to caramelize and crisp up beautifully, developing that coveted golden-brown hue and satisfying crunch. This dual-stage baking process ensures a deep chocolatey interior protected by a bakery-quality, rustic crust. Therefore, if your ambition is to produce results that rival those from a professional bakery, embracing a Dutch oven for your chocolate bread recipe is an investment well worth making.
This Chocolate Dutch Oven No-Knead Bread recipe is a truly delightful and wonderfully unexpected variation on conventional bread making. Its profound chocolate flavors, elegantly paired with the straightforward no-knead methodology and the transformative capabilities of a Dutch oven, position it as an absolute must-try. It appeals equally to avid bread enthusiasts and fervent chocolate aficionados. Whether you choose to savor it as a comforting breakfast, a standout component of a lavish brunch spread, or simply as a satisfying snack at any time of day, this chocolate bread promises an exquisitely heavenly experience for your taste buds, solidifying its place as a new favorite in your baking repertoire.
Chocolate No-Knead Bread: Essential Ingredients & Savvy Substitutions
Crafting the perfect loaf of Chocolate No-Knead Bread requires a thoughtful selection of ingredients, each playing a crucial role in developing its rich flavor and desirable texture. Here’s a detailed breakdown of what you’ll need, along with smart substitutions to ensure baking success, no matter what you have in your pantry.
Ingredients
- Bread Flour: This is the cornerstone of a chewy, well-structured bread. Bread flour has a higher protein content than all-purpose flour, which means it develops more gluten. This gluten network is what gives the bread its characteristic elasticity and structure, allowing it to rise beautifully and hold its shape. If bread flour isn’t available, you can substitute it with all-purpose flour, though be mindful that the resulting texture might be slightly softer and the rise a little less dramatic. For a healthier twist, consider replacing a portion (up to 25-30%) of the bread flour with whole wheat flour. This will add fiber and a nutty undertone, but typically results in a denser, less airy loaf due to the bran interfering with gluten development.
- Salt: A fundamental ingredient in all bread making, salt is vital for enhancing flavor, controlling yeast activity, and strengthening the gluten structure. Without salt, bread can taste bland and can rise too quickly, leading to an inferior texture.
- Instant Yeast: This is a powerhouse leavening agent that doesn’t require prior activation, making it incredibly convenient for no-knead recipes. It can be mixed directly with the dry ingredients. If you only have active dry yeast, you can certainly use it, but remember to activate it first. Dissolve it in a small amount of the warm water specified in the recipe (around 105-115°F or 40-46°C) with a pinch of sugar for about 5-10 minutes, until foamy, before adding it to the rest of the wet ingredients.
- Cocoa Powder: This provides the foundational chocolate flavor and rich color for your bread. For a more intense, slightly bitter chocolate profile, opt for Dutch-processed cocoa powder. If you prefer a brighter, more complex chocolate flavor with fruity notes, natural cocoa powder works well. For an even deeper, less processed chocolate experience, cacao powder can be substituted. It typically has a more robust flavor and is packed with more antioxidants.
- Granulated Sugar: A small amount of granulated sugar not only adds a touch of sweetness to complement the chocolate but also feeds the yeast, aiding in fermentation and achieving a better rise. If you’re out of granulated sugar, brown sugar can be used as a substitute. It will impart a subtle caramel-like flavor and a slightly more moist texture to the bread.
- Instant Espresso Powder or Coffee: This seemingly small addition is a game-changer. Espresso powder doesn’t make the bread taste like coffee; instead, it magically deepens and intensifies the chocolate flavor, making it taste “more chocolatey.” If you don’t have instant espresso, any instant coffee powder will serve the same purpose, providing that subtle, flavor-boosting nuance.
- Chocolate Chunks (not chips): This is key for pockets of melty chocolate goodness throughout your loaf. Chocolate chunks, which are typically larger and irregularly shaped, melt more slowly and create luscious pools of chocolate compared to smaller, often waxier chocolate chips that tend to hold their shape. You can experiment with different types of chocolate – dark, milk, or semi-sweet – to tailor the sweetness and intensity to your preference. Dark chocolate will yield a more sophisticated, less sweet loaf, while milk chocolate will make it more dessert-like.
- Sunflower Seeds (optional): These add a delightful textural contrast and a subtle nutty flavor to the bread. You can easily customize your loaf with other nuts or seeds of your choice, such as crunchy chopped almonds, earthy walnuts, nutrient-rich flaxseeds, or even pumpkin seeds. Feel free to omit them entirely if you prefer a simpler chocolate bread.
- Room Temperature Water: The temperature of the water is crucial for yeast activity. Room temperature water (around 70-75°F or 21-24°C) is ideal as it allows the yeast to activate gradually without being shocked by overly hot or cold temperatures, contributing to a consistent rise and optimal dough development.
Delightful Serving Suggestions for Your Chocolate No-Knead Bread
The beauty of Chocolate No-Knead Bread extends far beyond its baking simplicity – it also shines in its incredible versatility. Here are some inspired ways to enjoy this delicious loaf, transforming it for any meal or craving:
- Simply Sliced with Butter: Experience pure bliss by serving warm, thick slices of your freshly baked chocolate bread with a generous spread of good quality butter. The butter slowly melts into the warm, chocolatey interior, creating a rich, comforting, and utterly delightful flavor combination that highlights the bread’s crisp crust and soft crumb.
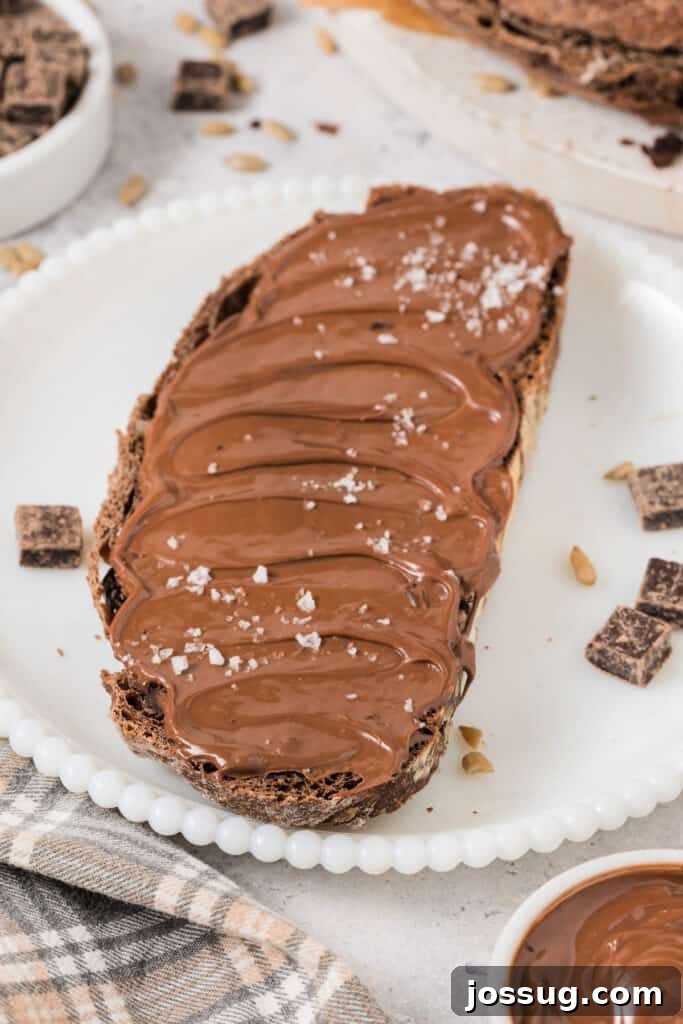
- Indulgent Nutella or Chocolate Spread: For the ultimate chocolate lover’s dream, slather slices of this bread with a decadent layer of Nutella or your favorite gourmet chocolate spread. The double dose of chocolate creates an irresistible treat, perfect for breakfast or a luxurious afternoon snack.
- Classic Peanut Butter Pairing: Chocolate and peanut butter are a match made in culinary heaven. Spread creamy or crunchy peanut butter on a slice of the bread for a harmonious blend of sweet, salty, and nutty flavors, offering a delightful contrast to the rich chocolate.
- Gourmet French Toast Extravaganza: Elevate your breakfast routine by transforming this unique bread into a decadent French toast. Dip thick slices into a mixture of eggs, milk, cinnamon, and a hint of vanilla, then fry until golden brown and custardy. Top with maple syrup, fresh berries, and a dusting of powdered sugar for a truly luxurious and memorable breakfast treat.
- Comforting Bread Pudding Creation: Give your leftover chocolate bread a delicious second life by cubing it and using it to make a rich and comforting chocolate bread pudding. Combine the cubes with a luscious custard made from milk, eggs, sugar, and extra chocolate chips, then bake until set and golden. Serve warm with a scoop of vanilla ice cream or a drizzle of chocolate sauce.
- Inventive Dessert Sandwiches: Unleash your creativity by making unique dessert sandwiches. Spread softened ice cream, fluffy whipped cream, or creamy mascarpone cheese between two slices of chocolate bread. Enhance with fresh fruit slices (like strawberries or bananas), a sprinkle of chocolate chips, or crunchy chopped nuts for added flavor and texture.
- Perfectly Toasted for Crunch: A simple yet effective way to enhance the bread’s appeal is to toast slices until they are slightly crisp. Toasting intensifies the chocolate flavor and provides a satisfying crunch. Enjoy it plain, or with any of your favorite spreads for an elevated experience.
- Elegant Coffee or Tea Companion: Pair slices of chocolate no-knead bread with your morning coffee or afternoon tea. The subtle sweetness and rich chocolate notes of the bread complement hot beverages beautifully, making for a sophisticated and comforting break.
- Brunch Buffet Showstopper: If you’re hosting a brunch, feature this bread as a star attraction on your buffet spread. Arrange it alongside other breads, delicate pastries, fresh seasonal fruits, and an assortment of spreads. This allows guests to craft their own personalized and delicious treats, making your buffet truly special.
- Thoughtful Gift or Party Favor: Share the joy! Wrap individual slices or small loaves of your homemade chocolate bread in decorative packaging with a ribbon. It makes for a thoughtful, personal, and utterly delicious gift for friends, family, or as a unique party favor that is sure to be appreciated.
Chocolate No-Knead Bread: Frequently Asked Questions
Chocolate No-Knead Bread is an innovative and highly popular variation of traditional no-knead bread. It ingeniously incorporates rich cocoa powder and generous chocolate chunks directly into the dough, marrying the deep, earthy flavors of chocolate with the signature simplicity of the no-knead method. This technique allows for a long, slow fermentation, which develops exceptional flavor and a wonderfully chewy texture without the need for intensive kneading.
No, this Dutch oven no-knead bread is intentionally crafted to be wonderfully balanced and not overly sweet. While it undeniably contains the irresistible flavor of chocolate, its sweetness is subtle and primarily derived from the chocolate chunks themselves, rather than excessive added sugar in the dough. This thoughtful balance makes it remarkably versatile and suitable for a wide range of occasions, serving equally well as a breakfast item, a component of a brunch spread, or a satisfying snack, rather than strictly a dessert.
Absolutely! Customizing your chocolate choice is highly encouraged to match your personal preference. Dark chocolate chunks will yield a more sophisticated, slightly bitter, and less sweet loaf, appealing to those who appreciate intense cocoa flavors. Milk chocolate chunks will result in a sweeter, creamier profile, making the bread more akin to a treat. Semi-sweet chocolate chunks offer a delightful middle ground. The type of chocolate you select will significantly influence the overall sweetness and depth of flavor in your finished bread.
While a Dutch oven is highly recommended for achieving the characteristic crisp crust and evenly baked interior due to its ability to trap steam, you can certainly bake this bread without one. An oven-safe pot with a tight-fitting lid (like a heavy-bottomed stockpot or casserole dish) can serve as an alternative. If neither is available, you can bake it on a preheated baking sheet or pizza stone. However, be aware that the crust texture may be less crisp, and the overall results might vary slightly compared to using a Dutch oven.
Yes, doubling this recipe is straightforward and works wonderfully! You can choose to either make one significantly larger loaf, which will require a larger Dutch oven and potentially a longer baking time, or divide the doubled dough into two smaller loaves. If making two loaves, you might need to bake them sequentially or use two Dutch ovens if your oven can accommodate them. Always remember to adjust the baking time proportionally to ensure both large and small loaves are thoroughly cooked through to the correct internal temperature.
Once your Chocolate No-Knead Bread has completely cooled, it’s best stored in the Dutch oven itself with its lid slightly ajar, or in another non-airtight container at room temperature. This method allows for some air circulation, preventing the bread from becoming soggy and discouraging mold growth. It will stay fresh for about 4-5 days. For longer storage, refrigeration is an option, which can extend its shelf life. For ultimate convenience and freshness, this bread freezes beautifully for up to 3-4 months. We recommend pre-slicing the loaf before freezing, making it easy to grab individual portions. You can thaw slices overnight in a cold oven or toast them directly from the freezer for a quick and delicious treat.
The most accurate way to check for doneness is by using a digital instant-read food thermometer. The bread is perfectly baked when its internal temperature reaches 200°F (93°C). Insert the thermometer into the center of the loaf, avoiding any large chocolate chunks. If you don’t have a thermometer, a traditional test is to tap the bottom of the loaf; if it sounds hollow, it’s typically ready. Also, a deep golden-brown crust and a fragrant aroma are good visual and olfactory indicators of doneness.
Several factors can affect dough rise. The most common culprit is inactive yeast, so always check the expiration date. Ensure your water is at the correct room temperature (70-75°F or 21-24°C); water that is too hot can kill the yeast, while water that is too cold will inhibit its activity. Also, make sure your mixing bowl is covered tightly during the fermentation period to maintain warmth and humidity. Finally, patience is key – the no-knead method relies on a long, slow rise, so resist the urge to rush the process.
Explore More Delightful Recipes You May Enjoy
- Classic No-Knead Bread: Simple and Delicious
- Fluffy Dutch Baby Pancake with Fresh Berries
- Rustic No-Knead Skillet Olive Bread
- Effortless Instant Pot Turkey Breast
- Spicy Jalapeño Cheddar No-Knead Bread
Chocolate No-Knead Bread
Pin
Rate
Equipment
-
Sharp Knife
-
Digital Instant Read Food Thermometer
-
Parchment Paper
-
Basketweave Kitchen Towel, Set of Six, Red
-
Danish Dough Whisk or Wooden Spoon
-
Standard Whisk
-
Measuring Cups and Spoons
-
Large Mixing Bowl
-
Bread Lame or Razor Blade
-
6-Qt. Enameled Cast Iron Dutch Oven
Ingredients
- 3 ½ cups bread flour
- 1 teaspoon salt
- ½ teaspoon instant yeast
- ¼ cup cocoa powder
- 2 ½ tablespoons granulated sugar
- 1 tablespoon instant espresso or coffee
- ¾ cup chocolate chunks, not chips
- ¼ cup sunflower seeds, optional
- 1 ¾ cups room temperature water
Instructions
-
In a large mixing bowl, meticulously combine all the dry ingredients, specifically excluding the sunflower seeds and chocolate chunks. Use a whisk to thoroughly blend until the cocoa powder is uniformly incorporated into the flour, ensuring no lumps remain. This step is crucial for an even chocolate flavor throughout your bread.
-
Now, gently fold in the sunflower seeds and chocolate chunks into the dry mixture. Give it a quick but thorough stir to distribute these additions evenly, making sure every bite of your bread will have delicious pockets of chocolate and a pleasant crunch.
-
Pour in the room temperature water. Using a sturdy wooden spoon or a Danish dough whisk, stir the mixture vigorously until a rough, shaggy, and sticky dough begins to form. Continue mixing until all dry ingredients are fully hydrated and incorporated, ensuring no dry flour patches remain at the bottom of the bowl. The dough will be quite wet – this is normal for no-knead bread.
-
Once the dough is combined, cover the bowl securely with a clean kitchen towel or plastic wrap. Set it aside at room temperature (preferably around 70-75°F or 21-24°C) for an extended period of 8-12 hours, or even overnight. This long fermentation process is essential for developing the characteristic flavor and airy texture of no-knead bread.
-
Approximately one hour before you plan to bake your bread, place your Dutch oven (with its lid on) into a cold oven. Preheat the oven to a blazing 450°F (232°C). Allow the Dutch oven to heat thoroughly for 45 minutes to an hour. This preheating is vital for achieving that coveted crisp crust.
-
Lightly flour a clean work surface. Gently scrape the risen, sticky dough onto the floured surface. Dust your hands with a little flour and begin to gently fold the dough. First, fold it in half from right to left. Then, repeat the folding from top to bottom. Finally, gently tuck the edges of the dough underneath itself, carefully shaping it into a relatively smooth, round ball. Avoid overworking the dough to maintain its airy structure.
-
Carefully transfer the shaped dough onto a piece of parchment paper. Cover it again with a clean kitchen towel and let it rest while your Dutch oven finishes preheating in the oven. This brief rest allows the dough to relax before baking.
-
Just before baking, take a bread lame or a very sharp knife and make a few shallow, moon-shaped cuts or a simple cross on the top surface of your bread dough. This step, while optional, serves a practical purpose: it helps control how the bread expands and cracks in the oven, leading to those beautifully rustic and wonderfully crusty edges on top of your finished loaf.
-
With extreme caution, using the parchment paper as a sling, lift the dough and carefully lower it into the preheated Dutch oven. Be exceedingly careful not to touch the intensely hot Dutch oven. Quickly cover it with its lid.
-
Bake the covered bread for 30 minutes. After this time, carefully remove the lid from the Dutch oven and continue baking for another 10-15 minutes, or until the bread achieves a deep golden-brown crust. The bread is perfectly baked when its internal temperature reaches 200°F (93°C). If you don’t have a digital thermometer, tapping on the bottom of the loaf should produce a distinct hollow sound when it is fully cooked.
-
Once baked, carefully remove the bread from the Dutch oven (using the parchment paper) and transfer it to a wire rack. Allow it to cool completely for at least 1-2 hours. Cooling is critical; slicing too early can result in a gummy texture.
-
After it has thoroughly cooled, slice your magnificent chocolate no-knead bread and savor every heavenly bite!
Notes
- For optimal freshness after cooling, store your Chocolate No-Knead Bread in the Dutch oven with the lid slightly ajar, or in another non-airtight container at room temperature. This allows for proper air circulation and helps prevent mold growth, keeping it fresh for 4-5 days. For extended shelf life, you can also refrigerate the bread.
- This bread is freezer-friendly! You can freeze Chocolate No-Knead Bread for 3-4 months. For convenience, it’s highly advisable to pre-slice the bread before freezing. To enjoy, simply thaw slices overnight in a cold oven, or toast them directly from the freezer for a quick and delicious indulgence.
Nutrition
Nutrition information is automatically calculated, so should only be used as an approximation.
Loved This Recipe? Share Your Thoughts Below!