
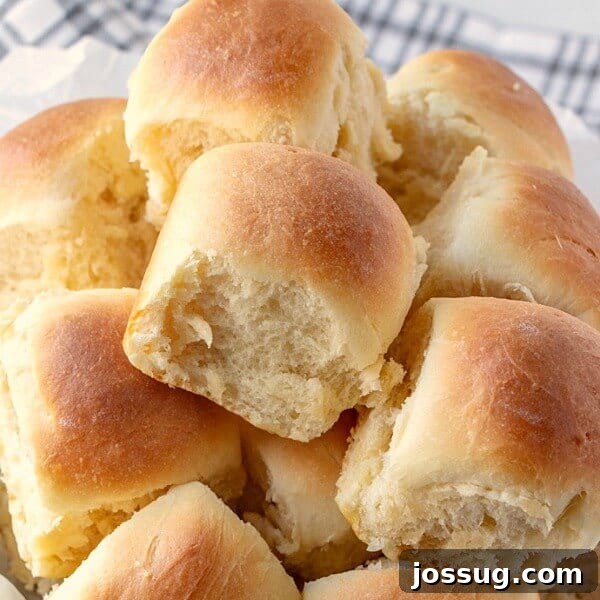
There’s nothing quite like the aroma of freshly baked bread filling your home, and these **soft and easy buttery rolls** are guaranteed to become a family favorite. We make them regularly because they are unbelievably simple to prepare and taste absolutely divine! Whether you’re a seasoned baker or just starting out, this versatile recipe provides clear, step-by-step directions for three different methods: your trusty bread machine, a convenient stand mixer, or the classic approach of kneading by hand.
Effortlessly Delicious: Your Guide to Soft and Easy Buttery Rolls
These buttery rolls are, without a doubt, one of my all-time favorite bread recipes. Their universal appeal lies not only in their incredible flavor and melt-in-your-mouth texture but also in the sheer flexibility of the preparation. I adore how easily I can whip up a batch using my bread machine for minimal effort, achieve perfect consistency with a stand mixer, or enjoy the therapeutic process of kneading them by hand. This adaptability ensures that anyone, regardless of their kitchen setup or baking experience, can create these delightful rolls.
They’ve become a cherished tradition in our home, gracing our table for every major holiday – Thanksgiving, Christmas, and Easter wouldn’t be complete without them. But don’t reserve them just for special occasions! These rolls also make a fantastic accompaniment to a hearty bowl of soup, a simple pasta dish, or even as a base for mini sandwiches. Their rich, buttery flavor and soft, fluffy interior elevate any meal.
Why Homemade Buttery Rolls Are a Must-Try
While store-bought rolls offer convenience, nothing compares to the depth of flavor, texture, and pure satisfaction of homemade buttery rolls. Here’s why you should add this recipe to your baking repertoire:
- Unmatched Freshness and Flavor: The taste of warm, freshly baked bread, slathered with extra butter, is a culinary experience that cannot be replicated. The subtle sweetness and rich butteriness are simply irresistible.
- Incredible Aroma: The smell of yeast dough baking is one of life’s simple pleasures, instantly making your home feel warm and inviting.
- Customization Options: From adding garlic and herbs for a savory twist to a sprinkle of cinnamon sugar for a slightly sweet treat, homemade rolls allow for endless customization.
- Cost-Effective: Making rolls from scratch is significantly more economical than buying artisanal bread, allowing you to feed a crowd without breaking the bank.
- Therapeutic Process: For many, the act of baking, particularly working with yeast dough, is a wonderfully relaxing and rewarding experience.
The Secret to Perfectly Soft and Fluffy Rolls
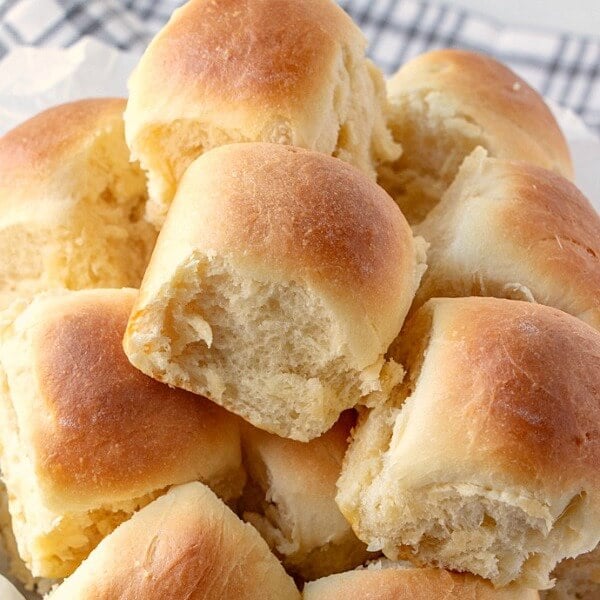
Achieving that coveted soft and fluffy texture in your homemade rolls is easier than you might think, and it largely comes down to a few key ingredients and techniques:
- Warm Milk: The liquid base for these rolls needs to be warm, not hot, to properly activate the yeast. Too hot, and you’ll kill it; too cold, and it won’t activate. Aim for bathwater temperature (105-115°F or 40-46°C).
- Quality Butter: As the name suggests, butter is a star ingredient here. Using good quality, softened butter contributes significantly to the rolls’ richness and tender crumb. Softened butter incorporates more evenly into the dough.
- Bread Flour: While all-purpose flour can work, bread flour has a higher protein content, which develops more gluten. This extra gluten provides the structure needed for those airy, chewy, and wonderfully soft rolls.
- Proper Kneading: Whether by machine or hand, adequate kneading is crucial. It develops the gluten, making the dough elastic and strong enough to trap the gases produced by the yeast, resulting in a light and airy texture.
- Two Rises (Proofing): Giving the dough two distinct rises allows the yeast ample time to work, producing maximum flavor and a superior texture. The first rise develops flavor, and the second rise ensures the rolls are light and puffy.
Choosing Your Baking Method: Bread Machine, Stand Mixer, or Hand-Kneading
One of the best features of this recipe is its adaptability. You can choose the method that best suits your time, equipment, and personal preference:
- Bread Machine: The Ultimate Convenience
For those busy days, your bread machine is a lifesaver. Simply add the ingredients in the order recommended by your machine’s manufacturer, select the “dough” cycle, and let it do all the work. It takes care of mixing, kneading, and the first rise, freeing you up for other tasks. This method consistently yields a perfectly risen dough, ready for shaping and baking. - Stand Mixer: Hands-Off, Professional Results
A stand mixer with a dough hook attachment makes quick work of kneading. It’s less hands-on than traditional kneading and provides consistent results. The mixer ensures thorough mixing and develops the gluten efficiently, leading to wonderfully textured rolls. It’s a great middle-ground option that saves effort while still giving you control over the process. - Hand-Kneading: The Traditional Art
For bakers who enjoy the tactile experience of dough, hand-kneading is incredibly rewarding. While it requires more physical effort, it allows you to truly connect with your dough and feel its transformation from a shaggy mixture to a smooth, elastic ball. Don’t be afraid if the dough feels a bit sticky at first – resist the urge to add too much extra flour, as this can make your rolls tough. The warmth of your hands helps activate the yeast and develop the gluten, resulting in rolls with a rustic charm and incredible flavor.
Other Bread Recipes You’ll Love
If you enjoy baking bread, here are some other fantastic recipes from our collection that you might like to try next:
- Soft and Buttery Crescent Rolls
- Egg Roll in a Bowl (Not a bread recipe, but a popular dish!)
- Classic Cinnamon Rolls
- Quick Dinner Rolls
- Lemon Sweet Rolls
Rated 4.45 out of 5 stars by 79 bakers
24
rolls
Buttery Rolls
Jamie Sherman
30
mins
1
hr
30
mins
2
hrs
Pin Recipe
Rate Recipe
Print Recipe
Equipment
-
Sunbeam Programmable Bread Maker
-
Stand Mixer (with dough hook)
-
9×13 inch Baking Pan
Ingredients
-
1 cup warm milk (105-115°F) -
½ cup unsalted butter, softened, (1 stick) -
¼ cup granulated sugar -
2 large eggs -
1 ½ teaspoons salt -
4 cups bread flour (plus more for dusting) -
2 ¼ teaspoons active dry yeast (one standard packet)
Instructions
Bread Machine Instructions:
-
In your bread machine pan, add all ingredients following the order suggested by your manufacturer (typically liquids first, then dry ingredients, and yeast last). Select the “dough” setting. Allow the machine to mix for about 5 minutes, then check the dough. If it’s too sticky, add 1-2 tablespoons of flour; if too dry, add 1-2 tablespoons of warm water. Let the cycle complete.
-
Once the bread machine cycle is complete, carefully remove the dough onto a lightly floured surface. Gently punch down the dough to release the air. Divide the dough into 24 equal pieces. Shape each piece into a smooth ball. Arrange the dough balls in a greased 13x9x2-inch baking pan. Cover the pan loosely with plastic wrap or a clean kitchen towel and let the rolls rise in a warm place for 15-20 minutes, or until they have visibly doubled in size.
-
Preheat your oven to 375°F (190°C). Bake the risen rolls for 13-16 minutes, or until they are beautifully golden brown on top. For an extra buttery finish, you can brush them with melted butter immediately after removing them from the oven. Serve warm and enjoy!
Stand Mixer Instructions:
-
In the bowl of a stand mixer, combine the warm milk and softened butter. Sprinkle the active dry yeast over the milk. If you are not using instant yeast, allow it to sit for about 5-10 minutes until foamy, indicating it’s active.
-
Add the sugar, eggs, salt, and bread flour to the bowl. Attach the paddle attachment to your mixer and mix on low speed until all ingredients are just combined and a shaggy dough forms. Scrape down the sides of the bowl, then cover it and let the dough rest for 5-10 minutes. This allows the flour to fully hydrate.
-
Switch to the dough hook attachment. Knead the dough on medium speed for 10 minutes. The dough should become smooth, elastic, and pull away from the sides of the bowl. It will still be somewhat sticky to the touch.
-
Lightly grease a large bowl. Transfer the kneaded dough to the greased bowl, turning it once to coat. Cover the bowl tightly with plastic wrap or a damp kitchen towel. Let the dough rise in a warm, draft-free place for 30-45 minutes, or until it has doubled in size.
-
Gently turn the risen dough out onto a lightly floured surface. Punch down the dough to deflate it. Divide the dough into 24 equal pieces. Shape each piece into a neat, smooth ball. Place the shaped rolls into a greased 13x9x2-inch baking pan. Cover the pan again and let the rolls rise for a second time in a warm place for 15-20 minutes, or until they have doubled in size and look puffy.
-
While the rolls are on their second rise, preheat your oven to 375°F (190°C). Bake the rolls for 13-16 minutes, or until they achieve a beautiful golden-brown color. For an irresistible finish, brush the warm rolls with a little extra melted butter immediately after they come out of the oven. Serve hot!
-
*No stand mixer or bread machine? No problem! You can easily make this bread by hand. Simply follow the mixing and kneading steps outlined for the stand mixer, but use your hands instead. Be mindful not to incorporate too much extra flour during hand-kneading; the dough should remain somewhat sticky for the softest results. Continue kneading until the dough is smooth and elastic.
Notes
- Hand-Kneading Tip: When kneading by hand, embrace the stickiness! A slightly sticky dough leads to softer, more tender rolls. Avoid adding excessive amounts of flour, as this can make your rolls dense and tough. A bench scraper can be very helpful for managing sticky dough.
- For Best Results: Ensure your milk is truly warm (like a baby’s bath) but not hot, as too-hot liquid will kill the yeast. Use softened butter for easier incorporation and a smoother dough.
- Storage: Leftover rolls can be stored in an airtight container at room temperature for 2-3 days, or in the refrigerator for up to a week.
- Freezing Instructions: To freeze, allow rolls to cool completely, then place them in a freezer-safe bag or container for up to 3 months. Thaw at room temperature and reheat gently in the microwave or oven until warm and soft.
- Make Ahead: You can prepare the dough through the first rise, then punch it down, shape the rolls, and refrigerate them overnight (up to 12-18 hours). The next day, remove them from the fridge about an hour before baking, let them come to room temperature and complete their second rise, then bake as directed.
Nutrition
Serving:
1 roll
,
Calories:
129kcal
,
Carbohydrates:
18g
,
Protein:
3g
,
Fat:
5g
,
Saturated Fat:
3g
,
Polyunsaturated Fat:
0.4g
,
Monounsaturated Fat:
1g
,
Trans Fat:
0.2g
,
Cholesterol:
25mg
,
Sodium:
185mg
,
Potassium:
45mg
,
Fiber:
1g
,
Sugar:
3g
,
Vitamin A:
155IU
,
Vitamin C:
0.001mg
,
Calcium:
19mg
,
Iron:
0.3mg
Nutrition information is automatically calculated and should only be used as an approximation. Values may vary based on ingredients and preparation methods.
We hope you love these soft and easy buttery rolls as much as we do! They truly are a delightful addition to any meal, bringing comfort and warmth to your table. Don’t forget to leave a comment below and share your thoughts once you’ve tried the recipe. Happy baking!
Originally published on June 27, 2012. Updated on April 21, 2021, and further enhanced for clarity and SEO on [Current Date].